Many homeowners would like a turf grass lawn, but might feel
irresponsible watering a lawn in the arid Southwest. The key to choosing a turf
grass is to determine the one most suited to the specific needs of your
landscape.
There are two different categories of turf grasses: cool season and warm season. Cool season grasses are Kentucky bluegrass, perennial ryegrass and tall fescue. These are cold tolerant, green most of the year, and hold up to extensive amounts of foot traffic. But they use a lot of water. Warm season grasses are Bermuda grass, blue grama, and buffalo grass. Warm season grasses have a shorter growing season. This means they green up in mid Spring, are low maintenance, and require less water than cool season grasses. But blue grama and buffalo grass can’t take extensive foot traffic.
Grasses should not be selected solely on perceived water use. Depending on the purpose and function of the turf area, traffic tolerance, recuperative ability, maintenance and aesthetic appearance should also be considered.
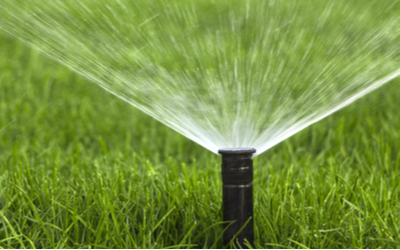
Four Turf Grasses for Albuquerque
Park Blend grass, a combination of Kentucky bluegrass, perennial ryegrass, and tall fescue
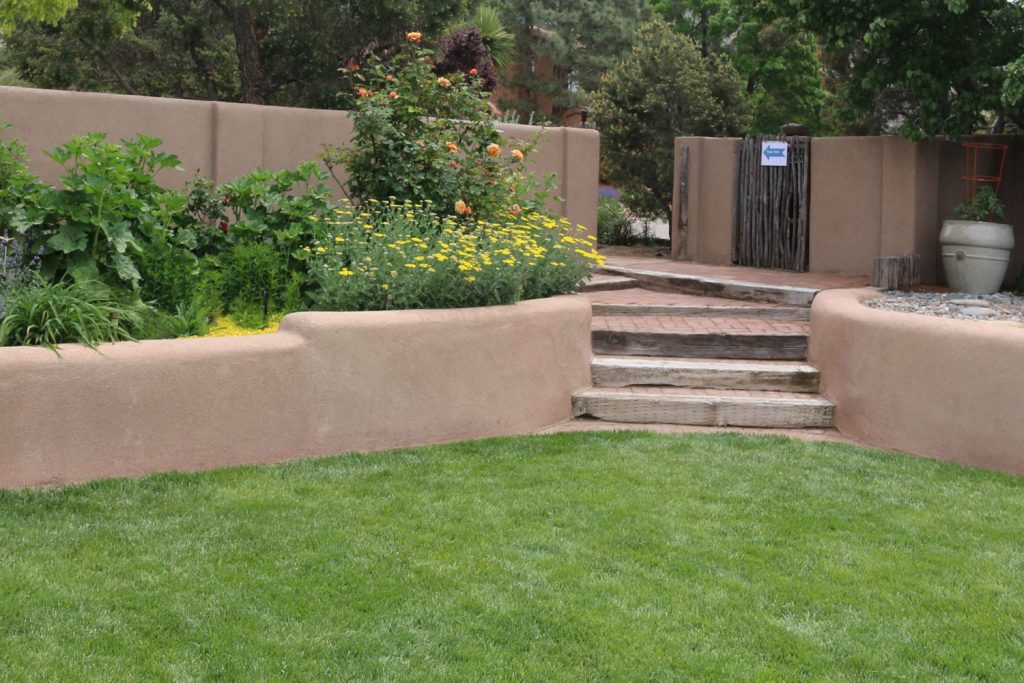
PARK BLEND: The most popular turf grass lawn here, used by the City of Albuquerque and homeowners alike, is Park Blend. Park Blend combines all the cool season grasses into a blend of Kentucky bluegrass, ryegrass and tall fescue, taking advantage of the positive attributes of all three grasses in one turf. Park Blend performs beautifully through warm summers and is especially well-suited to New Mexico's growing conditions. While it does need about 37"- 41" inches of water a year, this is a great choice for a lawn that will receive a lot of traffic. It does require regular mowing and weed control.
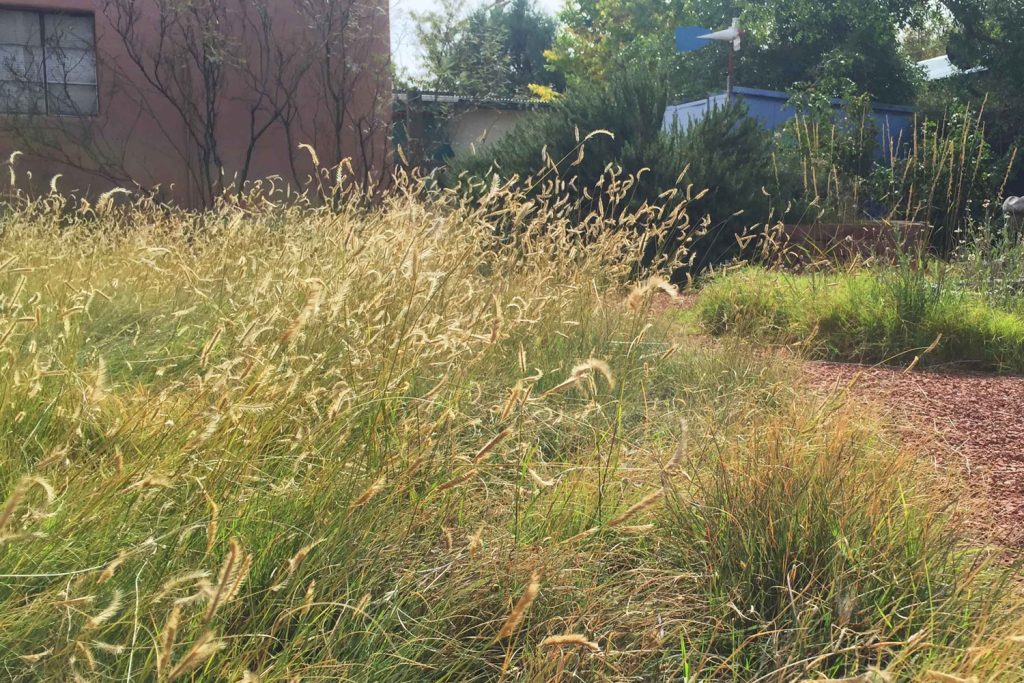
Buffalo grass, Bouteloua dactyloides
BUFFALO GRASS: Choose warm season buffalo grass for a beautiful low growing, low water and low maintenance grass. It will handle light traffic, rarely requires mowing and uses around 24" - 28" inches of water a year.
Bermuda grass, Cynodon ‘PWIN04S’ Dog Tuff
BERMUDA GRASS: Bermuda grass is a great choice for a low water, low maintenance grass with medium foot traffic. The downside is that it does spread prolifically via runners. It is best to surround this grass with an 8-inch-wide and deep edger to keep it in check. Bermuda grass uses about 22 - 26 inches of water a year and requires a few mowings a year.
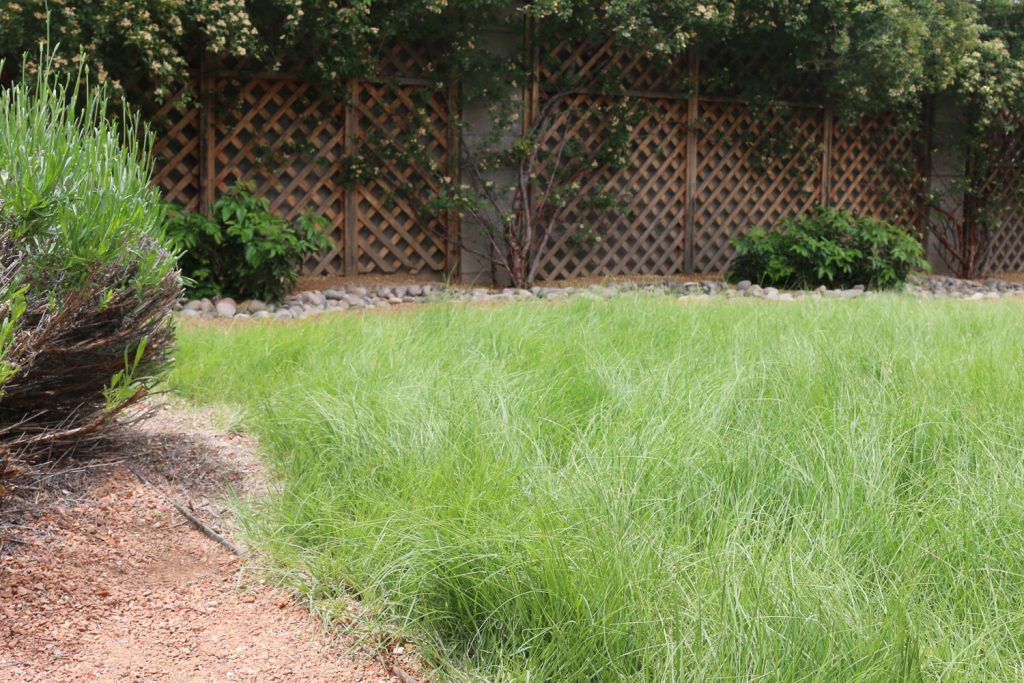
Blue grama grass, Bouteloua gracilis
BLUE GRAMA GRASS: Choose blue grama grass for a stunning native meadow look. It can be seeded with wildflowers for a beautiful spring and summer appearance. Keep the eyelash like seed heads on the grass through the fall and winter for both aesthetics and wildlife appeal. This grass uses about 18 - 20 inches of water a year. Trim and dethatch once in late winter for best appearance.
PRO TIPS: prepare the soil well before planting turf grasses, water early in the morning or late evening, keep grasses to a mow height of 3-4" so the soil stays cooler, service the irrigation system regularly to check for efficiency.
Author: Jill Brown, ASLA Landscape Architect and owner of My Landscape Coach in Albuquerque, NM. Resources: Turfgrass irrigation Circular 660 Bernd Leinauer, Professor and Extension Turfgrass Specialist NM State University, Growing the Southwest Garden by Judith Phillips, High Country Gardens, Plants of the Southwest. Even more resources about turfgrasses can be found over at NMSU.
What should every home owner know about simple irrigation maintenance?
The most important thing is to visually inspect your system periodically. Usually, irrigation runs during the middle of the night and we’re unaware of how well (or how poorly) it’s working. Turn on each zone and observe its operation. Look for leaks in your valve boxes – if there’s water in the box, you probably have a leak.
With sprinklers:
Look for broken or tilted heads and nozzles that should be adjusted to address overspray. If water continues to drain from one of your sprinklers after the zone has shut down, you may have a low head drainage problem. To fix this, install a simple check valve, which typically screws into the lower part of the sprinkler head. Ask your local irrigation supplier for a check valve recommended for your situation.
With drip irrigation:
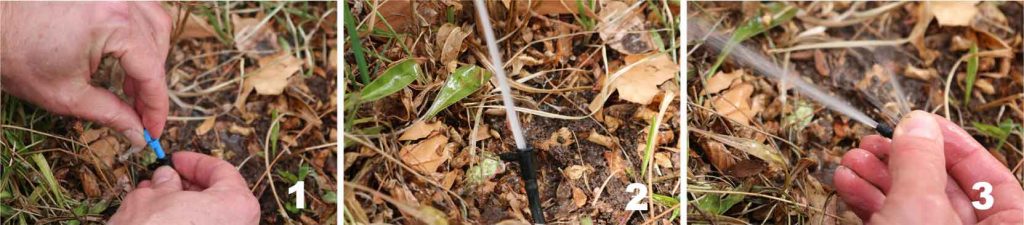
How to unclog your button or flag emitters.
Button emitters are not easy to unclog. Often, it’s easiest to simply remove a clogged button emitter and replace it.
Flag emitters can be unclogged as follows:
While water is flowing through the emitter, twist the colored flag piece located on top of the emitter so that it can be removed.
Allow water to flow out the top of the emitter for 10-15 seconds with the flag piece removed.
Block flow from the top of the emitter to send water through the side orifice for 10-15 seconds.
Twist the flag piece back into place to resume typical irrigation (not pictured).
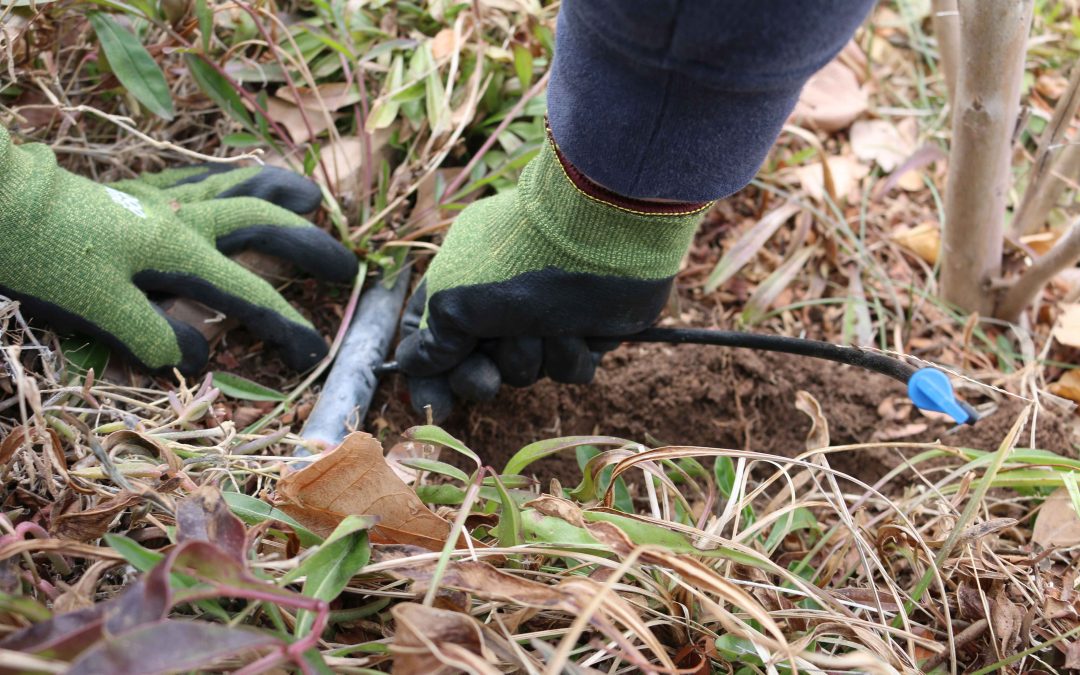
How to add an emitter?
Using a punch tool, make a hole where you will connect the spaghetti tubing
Attach the spaghetti tubing to the lateral line using a barbed connector
Run the spaghetti tubing through a small trench to where you want the emitter to apply water – at the dripline of the plant is usually best
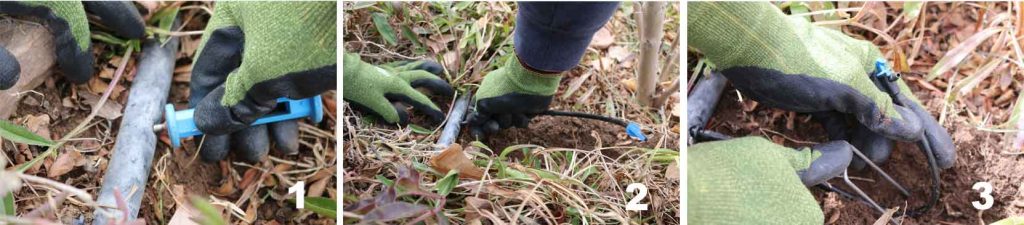
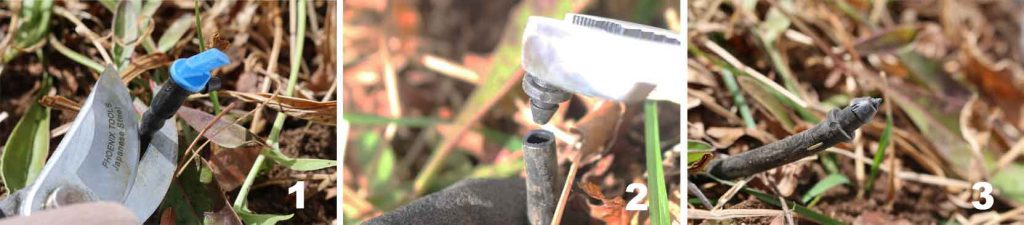
How to repair a poly tube if it's been punctured?
Locate the damaged section of poly
Cut out the damaged section
Use a fitting – there are many types that will work – to join the ends
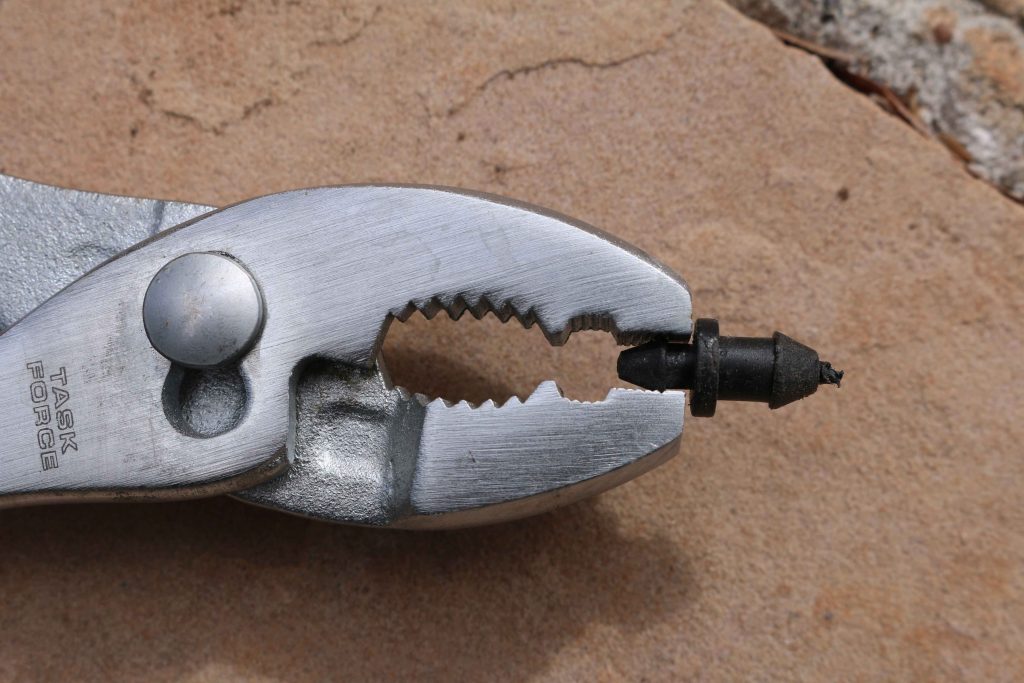
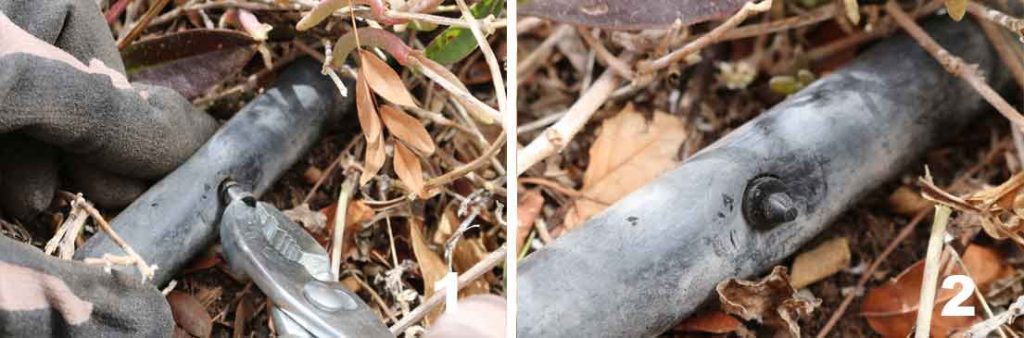
What is a goof plug and how to install it?
It’s a simple, 2-sided plastic piece used to plug a small opening in drip irrigation lines
Goof plugs can be used to stop water flow through spaghetti tubing, as follows:
Locate tubing to plug (cut off emitter if necessary)
Twist small end of goof plug into spaghetti tubing opening
Enjoy your water conservation!
Goof plugs can be used to stop water flow through distribution line, as follows:
Locate tubing to plug
Twist large end of goof plug into distribution line
Using these few simple tricks, you can easily manipulate water flow in your landscape for maximum system efficiency.
Author: Laura Ferenchak, Irrigation Efficiency Specialist with Albuquerque Bernalillo County Water Utility Authority
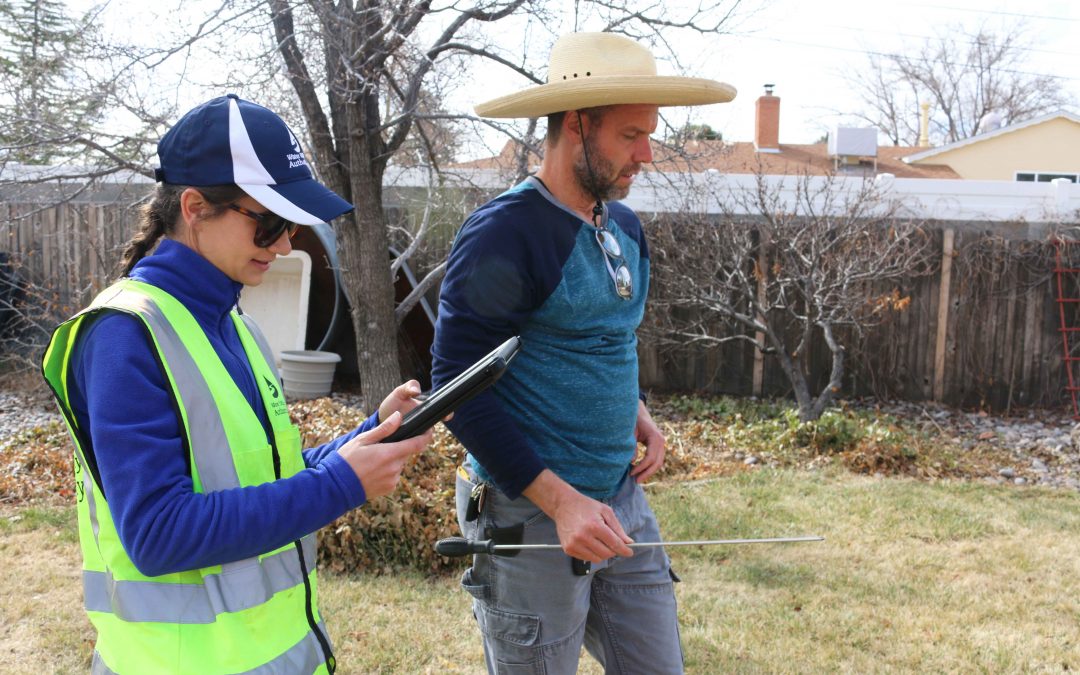
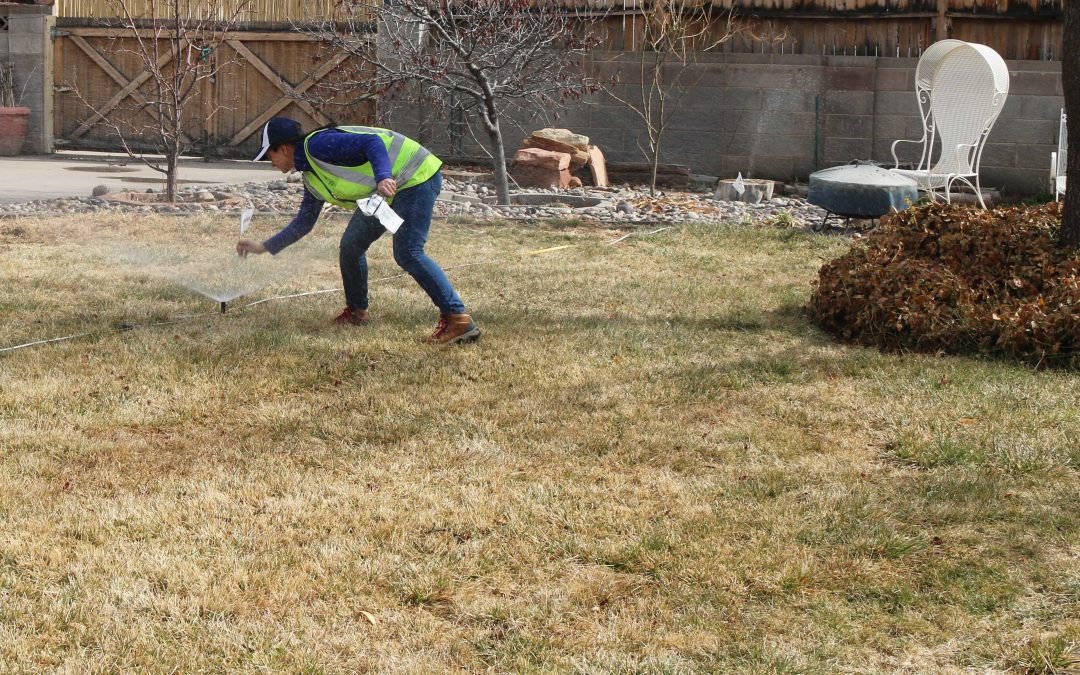
As irrigation season ramps up, we sat down with the Water Authority’s irrigation specialist to ask a few questions about the utility’s new FREE Efficient Irrigation Consultations.
Why is the Water Authority offering this service?
In ABQ, 40% of our drinking water is
used on landscapes.
Improperly maintained irrigation
systems often apply twice the water the
plants need in order to compensate for system inefficiencies.
Often, relatively simple maintenance
or scheduling changes have a big impact on how much water our irrigation
systems use to water plants.
It’s often difficult for someone not
trained in this field to detect irrigation problems, since the systems usually
run at night and most components are hidden.
Empowering you to better understand your landscape and
irrigation systems will help all of us steward our valuable water resources.
How does a typical
consultation go?
A trained specialist will:
Arrive at your home at the scheduled
time to review your landscape goals and plant material.
Check your irrigation system’s
performance and controller settings.
Create customized recommendations for
irrigation settings to help you save money and water.
Review rebates that are available
through the Water Authority that could benefit you and your landscape.
Turn on your irrigation system after the last chance of freezing temperatures has passed (typically late March in the greater Albuquerque area, but possibly as late as mid-April). This will prevent damage to your irrigation system.
1. Turn on your irrigation system. Then observe and listen.
If you turned off the main valve for your irrigation system over the winter to prevent freezing, turn it back on slowly, only part way. Then wait a few minutes until the system is fully pressurized. If it is not leaking, turn it fully on.
Caution: turning it too fast can create a water-hammer which could break pipes.
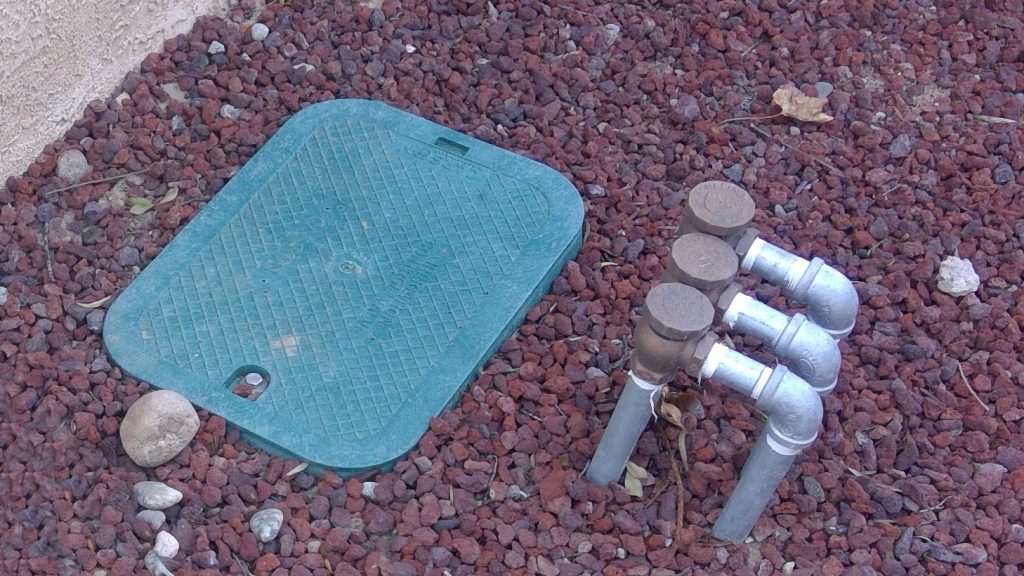
Irrigation valve box with backflow preventers.
Check the backflow preventer for leaks by inspecting it and checking for wetness.
Open the valve box (it usually has a green cover) and make sure there is no water in the box itself. Look for leaks in the valves, connections, filters and pressure reducers.
Run each zone for several minutes (long enough to see every part of it up close). Walk along each irrigation system pipe and inspect all sprinkler, bubbler and/or drip zones.
For sprinklers:
Look for signs of a leak, such as at the risers to the heads, the heads themselves, the emitter lines, or the pipes.
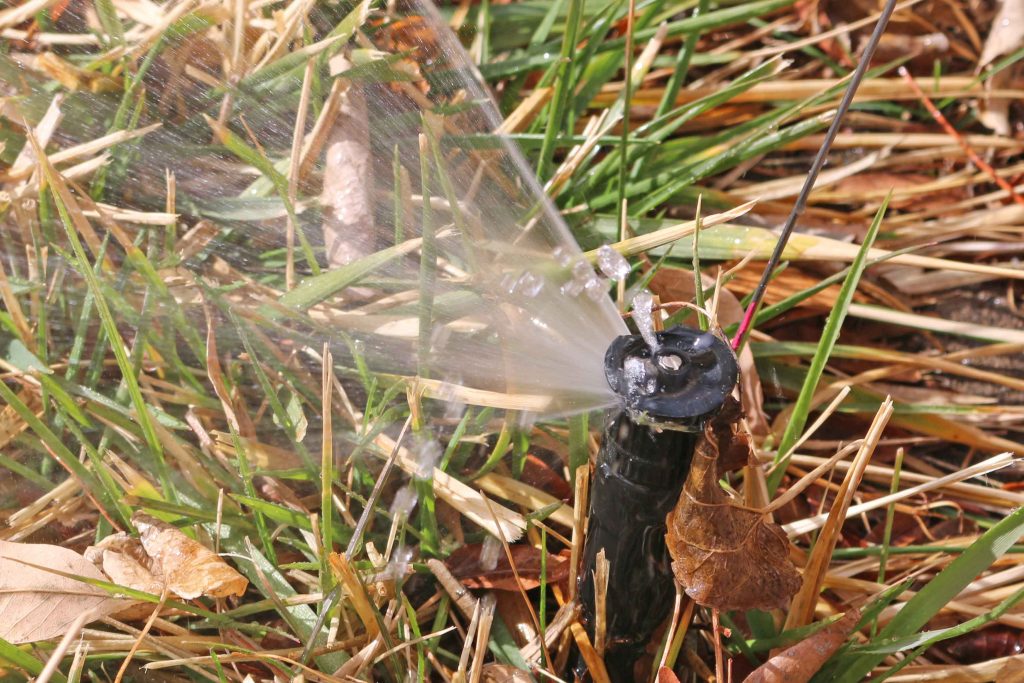
Look for heads not spraying correctly, such as spraying in the wrong direction, spraying too low, or other signs of breakage or misalignment. It is very common for them to go out of alignment when the system was turned off for the winter.
Spray head with minor leak
For drip and bubbler systems:
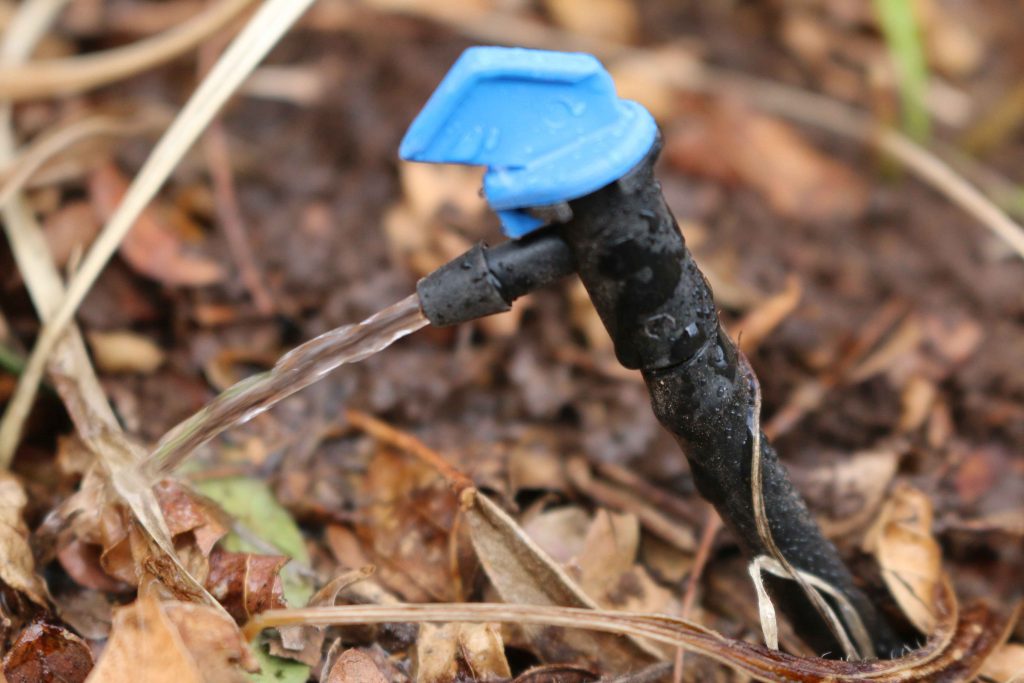
Look for missing emitters and/or bubblers. Emitters or bubblers may be hard to see due to plant coverage so listen carefully. Hearing a whooshing sound means an emitter or emitter line has blown off.
Drip emitter
2. Re-check the valve boxes again for water leaks now that the system has been on for testing.
3. Perform any necessary repairs and re-check for leaks after repairs are complete.
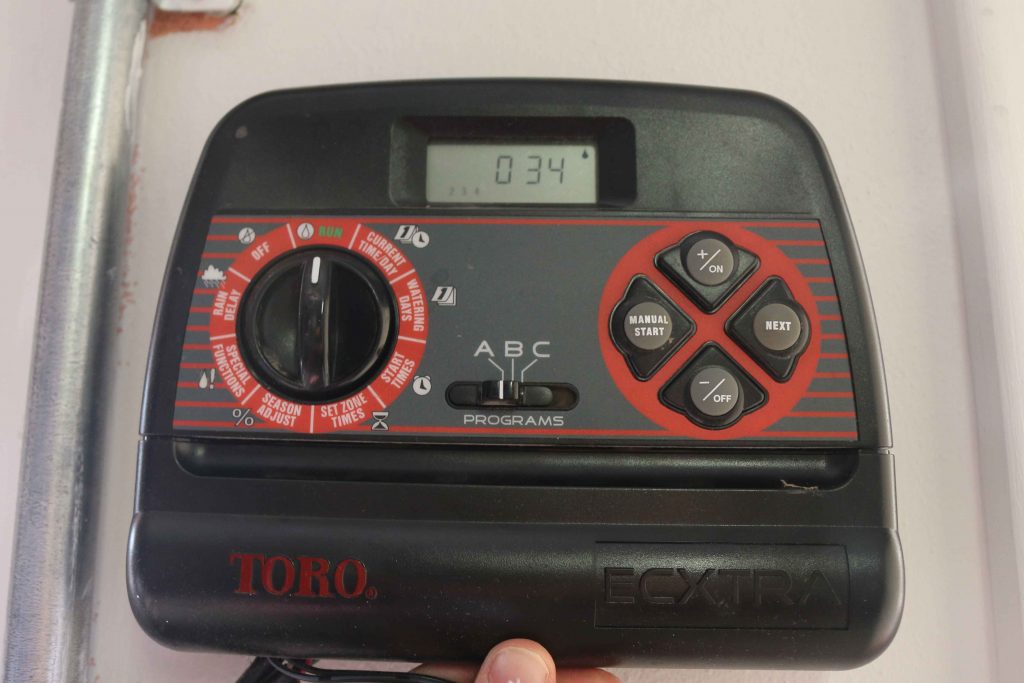
4. Set the timer.
Typical Irrigation Timer
The key to irrigation is to supply enough water to replace evaporative
losses from the ground root areas and from the leaves or stems. Too much or too
little water can harm your plants. It
is important that you set the timer correctly.
Follow the water recommendations guide to help you set your timer. Mixed zones like lawns and desert friendly landscapes are hard to water together. They usually need different run times. Large trees do not do as well being watered as if they were a lawn. Lawns have shallow roots (1” to 6” is typical) so usually need less water per application than trees with their deep roots (up to 24”). They require longer, deeper watering. Sign up for a FREE Efficient Irrigation Consultation at 505-289-3003 for help with your timer settings.
Do not confuse start times with zone numbers. Remember that every start time (4 am, 11 am, 5 pm….) on a program (A, B, C…) will run all your zones in series for the program you are running.
Attach a written copy of your schedule showing programs, zone number and corresponding location to the inside of your controller box.
Sprinkler heads or emitters vary greatly as to how much water comes out per minute. A slow watering head may need 2 to 4 times the watering time of traditional faster water delivery heads. For example, emitters can be as low as ½ gallon per hour but could be as high as 14 gallons per hour. The same watering time will not work for all zones or all emitter types.
Bubblers typically deliver 1 or 2 gallons per minute, compared to emitters that can be 1 or 2 gallons per hour. Many people over water when using bubblers for small plants. If you see pooling, run-off or recognize the flow is too fast, then replace the bubbler with a smaller one.
After watering, test to see if you provided enough, too little, or about right amount of water to the plants. Use a soil probe or a long screwdriver to test soil moisture. Push the screwdriver into the soil about an hour after you’ve watered your plants. It will go easily into moist soil. Mark and measure how far it went into the ground. That will tell you how deep you have watered that plant. Every yard is different, but once you figure out how long it takes your watering system to water to certain depths, you’ll be set.
If your controller is getting old, you would be wise to install an up to date one. There are lots of options. Some are “smart” controllers and can do many irrigation tasks well and can be operated from your phone or home computer, allowing you anywhere, anytime control. Check out the Irrigation Efficiency Rebates here to help you with the cost.
5. Observe your irrigation system the first month of the season.
We suggest the run times for the first few weeks should be during times of day where you can observe the operation of the system. When you are sure everything is running well, then you can have the system run at times you would not normally be observing. However, we suggest manually running the system zones for a few minutes every two months just to stay on top of any problems that may occur.
Many homeowners want to put a lot of water on at the beginning of the year to make sure the dry roots from the winter get thoroughly soaked. This makes some sense for the first watering of the year. Once the roots are soaked, you can go to shorter run times and number of runs per week to adequately irrigate your plants.
If you are uncertain about the any of the start-up tips, or need help, contact us for FREE Irrigation Efficiency Consultations at 505-289-3003. Or consider hiring a landscape contractor to help you get your system up and running correctly.
Author: Richard Chapman of Smart Use in Albuquerque, NM.
Water the lawn only when needed
Step on the grass; if it springs back up when you move your foot, it does not need water. The Water Authority recommends watering just one day per week in March, two days per week in April and May, three days per week in the summer, two days per week in September and October, and one day per week in November.
Accept a less-than-lush lawn
Grass will naturally go dormant during periods of drought but will readily regenerate when water becomes available. Reduce traffic on stressed turf areas if possible.
Mow as infrequently as possible
Mowing puts the grass under additional stress that requires more water.
Mow higher than normal
Longer leaf surfaces promote deeper rooting and shade the root zone. Never remove more than 1/3 of the leaf blade in one mowing. Return mulched clippings to the lawn.
Match fertilizer to the plant requirement
Fertilizer applications require additional water. Excess fertilizer stimulates top growth, often to the detriment of the root system. Learn to accept turf grasses with low water needs.
Keep lawns free of weeds
Weeds are water thieves and will rob your plants of water and nutrients. Spot spray or remove weeds as they appear.
Don’t water the pavement
Move sprinkler heads away from curbs or sidewalks. 12” or more away from a paved service is a good rule of thumb.
Signs of under watering your grass:
Turns bluish-grey
Grass doesn’t spring back after being stepped on
It is difficult to push a screwdriver into the soil
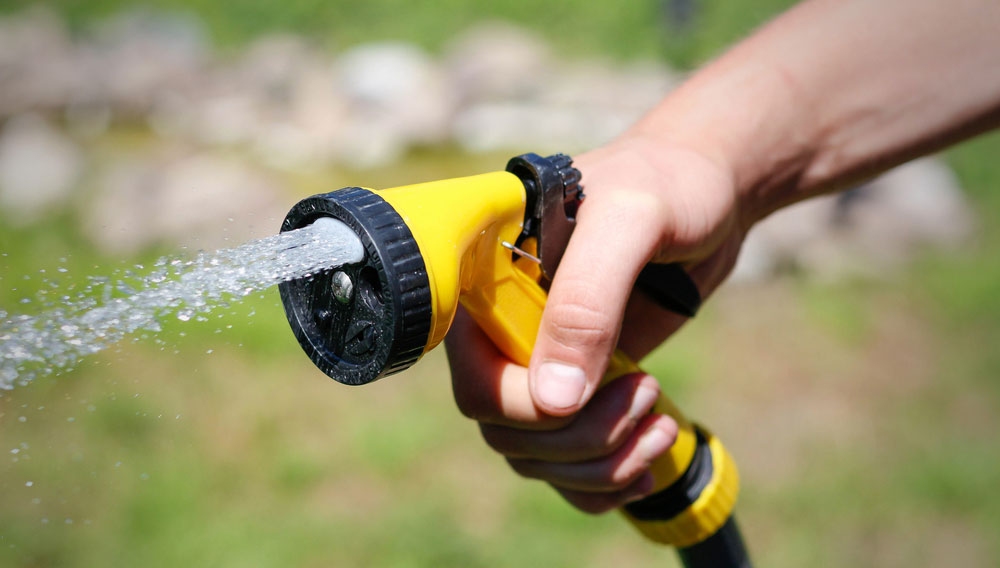
Use shut-off nozzles on hoses
Shut-off nozzles completely turn off the water when you are not using it.
Install a hose watering system
If you are not ready to invest in an inground irrigation system there are automatic hose systems available. Instead of dragging your hose around the yard, this system allows you to set up your hose with appropriate watering system and water your yard at a set time and for a set length of time. Basically, it is a timer attached to your hose. You can even build a hose watering system that has multiple valves. Each valve can be set to water at various times throughout the day. For example, you could set one valve to water your vegetable garden for 10 minutes daily and another valve to water your perennials two times a week for 20 minutes.