Common Mistakes for Drip Irrigation Installations

Common Mistakes for Drip Irrigation Installations

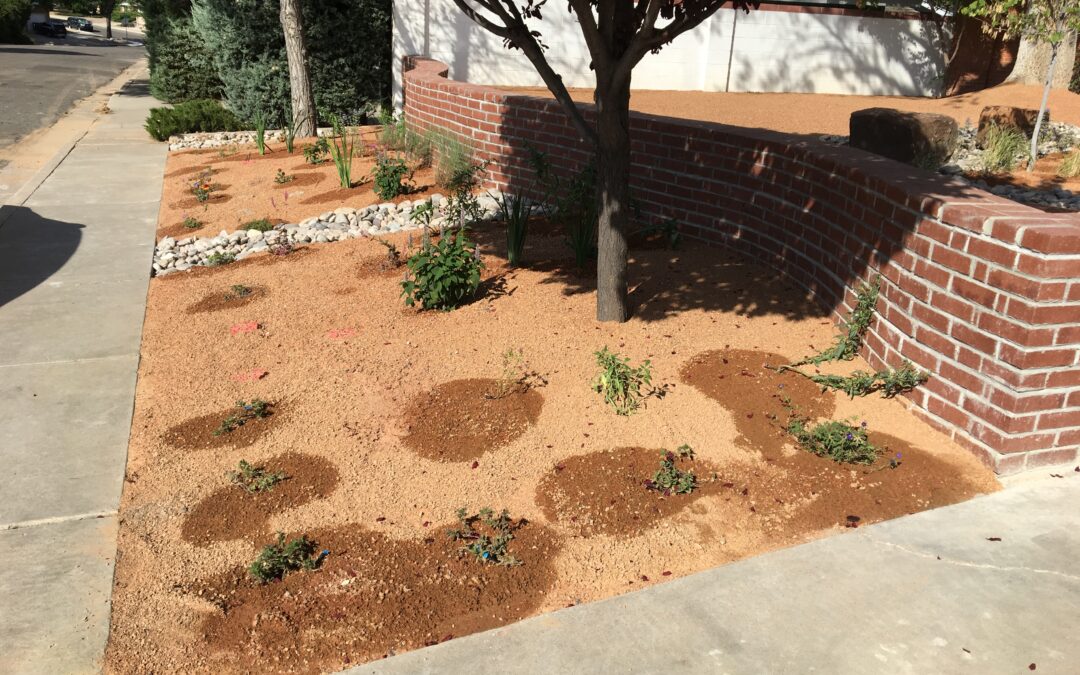
In our hot, arid climate, drip irrigation efficiently waters trees, shrubs and other landscape plants by delivering the right amount directly to roots, promoting healthier plants and reducing waste. The drip systems greatest advantage is flexibility. It’s easy to install and modify a drip system as a landscape grows and changes. However, they can be incredibly wasteful if not installed and maintained correctly. Like many things, it’s easiest to learn from mistakes. We compiled the most common drip irrigation mistakes we see in our Albuquerque landscapes.

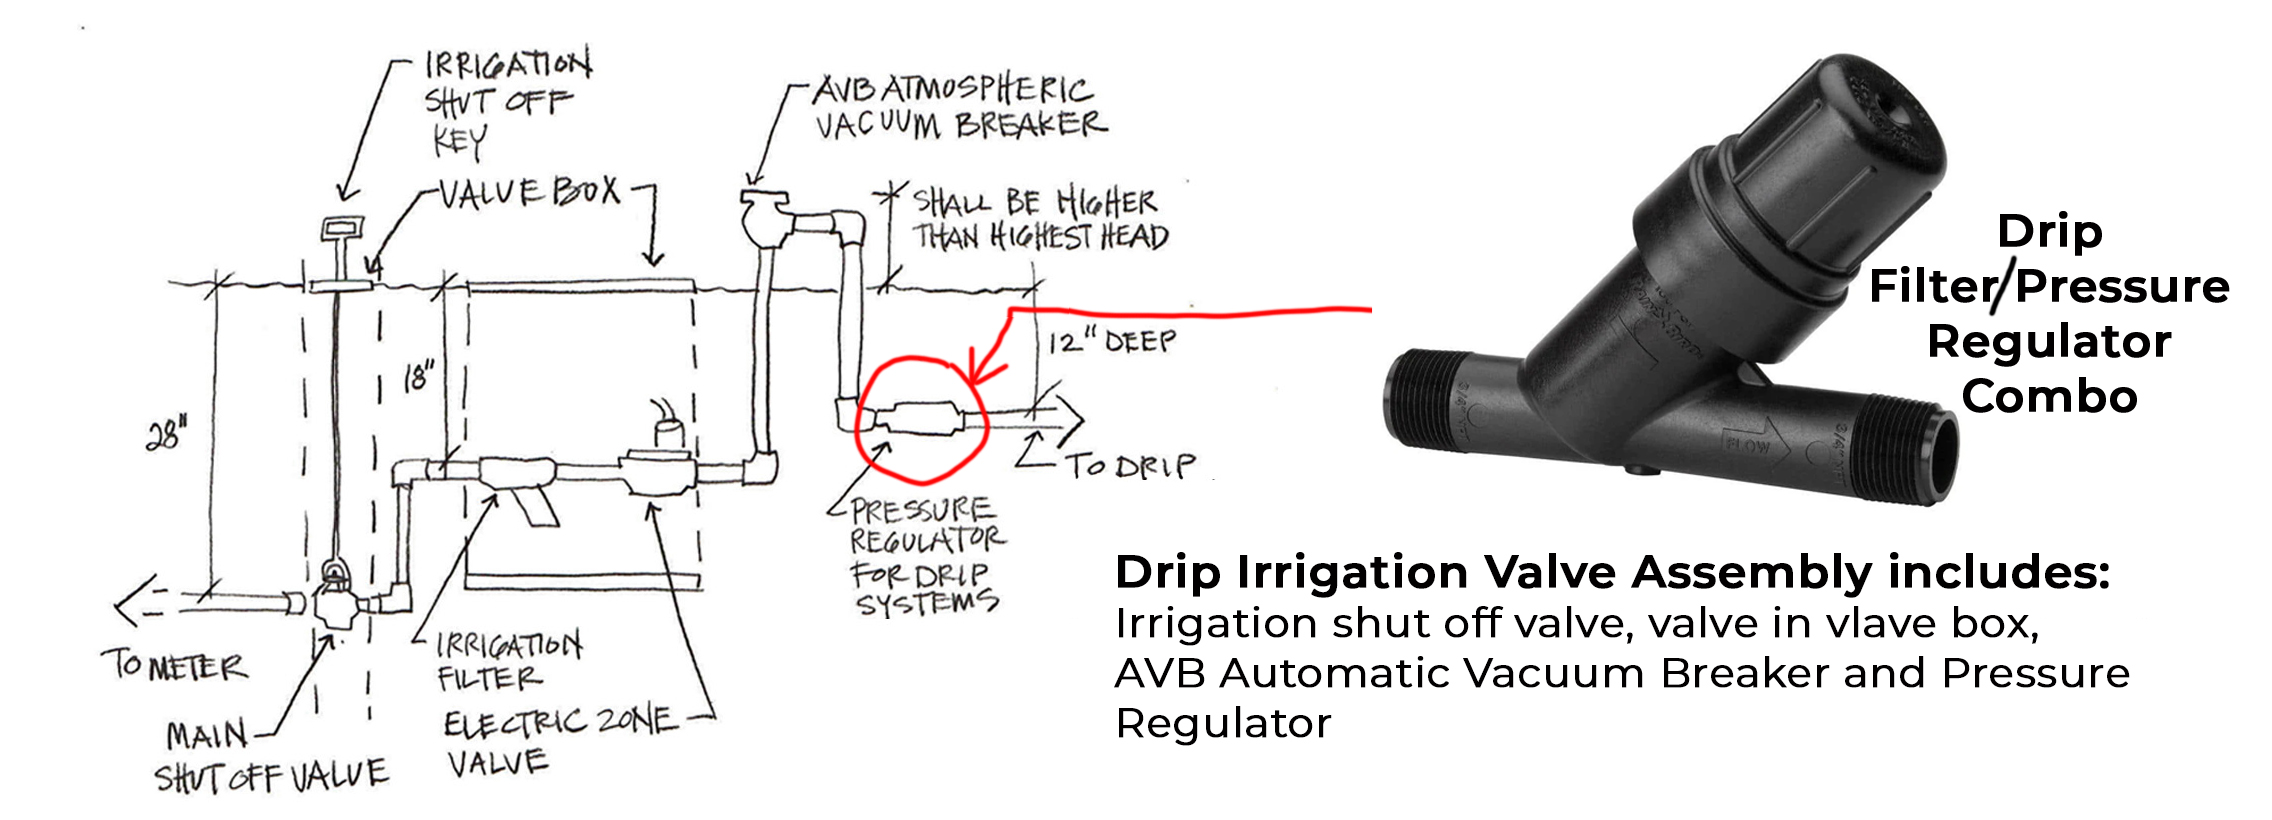
Mistake 1: Not installing a drip filter/pressure regulator combination.

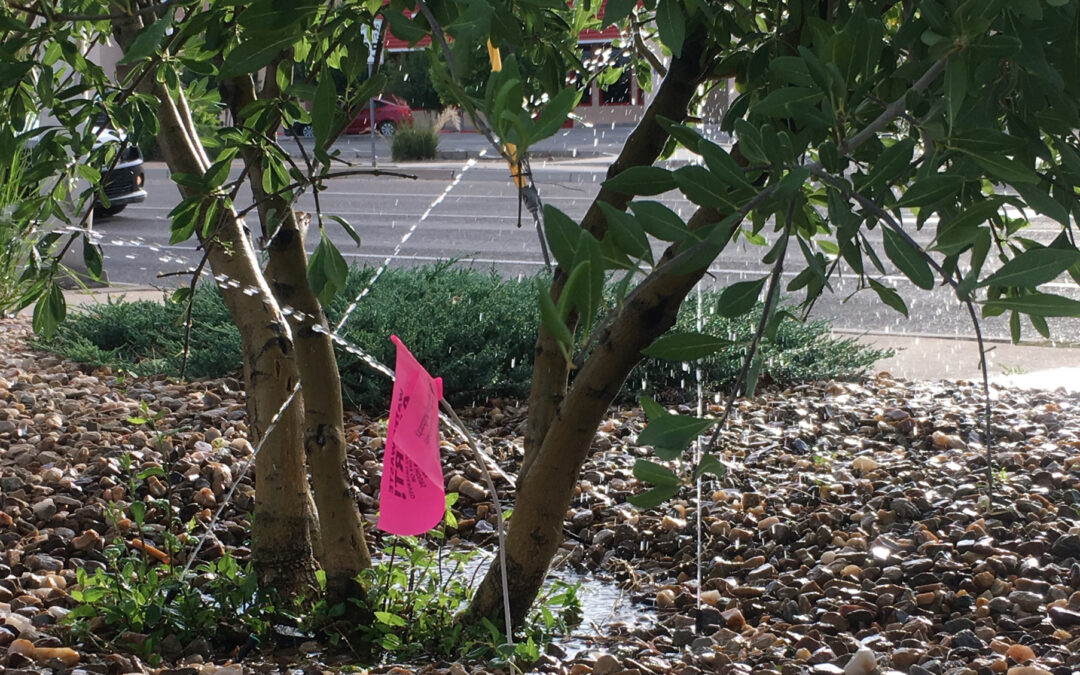
Average water pressure in Albuquerque ranges from 45-80 PSI, but drip irrigation systems have been designed to operate best at 25 PSI. All drip systems should have a pressure regulator to reduce the pressure and a filter to screen dirt and debris from water. If you notice drip emitters are popping off or leaking, then the water pressure is too high. Install a drip filter/pressure regulator combination downstream of the valve, immediately after the backflow preventer or vacuum breaker. If your system has a pressure reducer but emitters keep popping out of the ¼-inch distribution tubing then the end of the tubing may have become stretched. If so, cut off a small section of the tubing and reinstall the emitter into the fresh tubing to create a more secure fit.


Mistake 2: Relying on the existing sprinkler heads and sprinkler lines for drip irrigation.

Don’t rely on the old piping when converting sprinklers to drip. Abandon all old PVC and galvanized lateral lines and install sprinkler irrigation directly downstream of the valve assembly and backflow preventer. You may have seen the spray-to-drip retrofit kits locally available and wonder if this is a good approach. We don’t recommend this approach because studies show that nearly half of the water saved from converting a lawn to a xeriscape comes from abandoning leaky underground piping and fittings. Install your drip directly downstream of the valve assembly. Click here to learn how..

Mistake 3: Not burying or covering drip irrigation tubing.

One of the best ways to extend the life of your drip system is to keep it out of direct sunlight and hidden from rodents. Although drip tubing is UV-resistant, prolonged exposure to the sun gradually breaks down the plastic, making it brittle causing it to weaken and leak over time. To protect from the elements, ½” and ¾” distribution tubing should be installed with landscape staples and buried in a 4-6” depth trench and cover with 3-4″ of mulch.
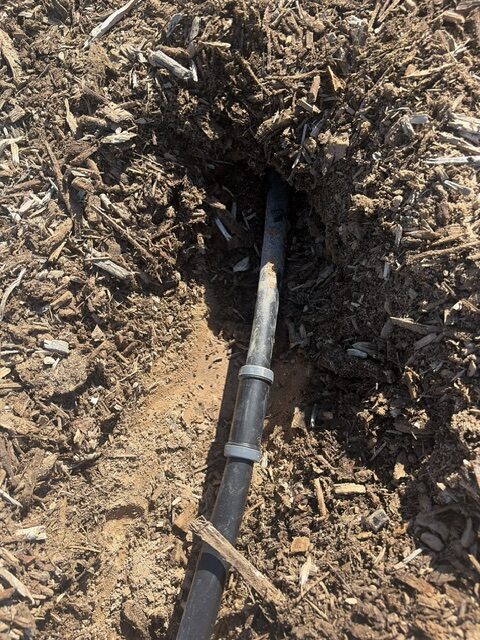
Polyline drip tubing buried underground.

Mistake 4: Going over instead of under retaining wall.

Avoid running drip tubing over the top of retaining walls (or landscape edging) whenever possible. A better option is to install a PVC sleeve beneath the wall before construction. Be sure to cover both ends of the sleeve with tape to prevent soil and debris from entering during construction. When you’re ready to install the irrigation system, simply feed the drip tubing through the sleeve. The sleeve protects the tubing from damage while also providing a convenient pathway for future repairs, replacements or system modifications.
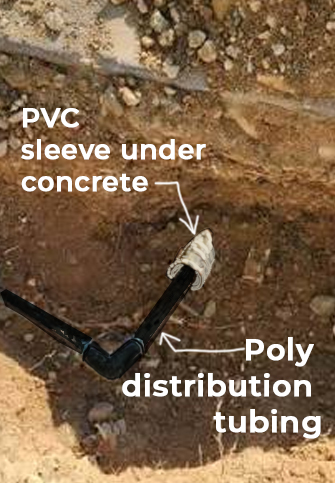
Irrigation PVC sleeve under concrete.

Mistake 5: Runs of ¼-inch distribution line (often called spaghetti tubing) that are too long.

In a perfect world, these smaller tubing lengths wouldn’t exceed 2 or 3 feet between the larger lateral tubing (½-inch or ¾-inch size) and the base of the plant. Keeping ¼-inch distribution tubing short, pinned down with landscape staples, and covered effectively with mulch helps prevent pressure loss from long runs plus reduces the opportunity for physical damage from UV sunlight, rodents or dogs.

Mistake 6: Having unnecessary fittings.

Every fitting creates an opportunity for leaks, compared to a continuous run of tubing. Whenever possible, use a single uninterrupted length of tubing. For example, if the tubing can be gently bent around a corner without kinking, there is no need to install a 90-degree elbow fitting,
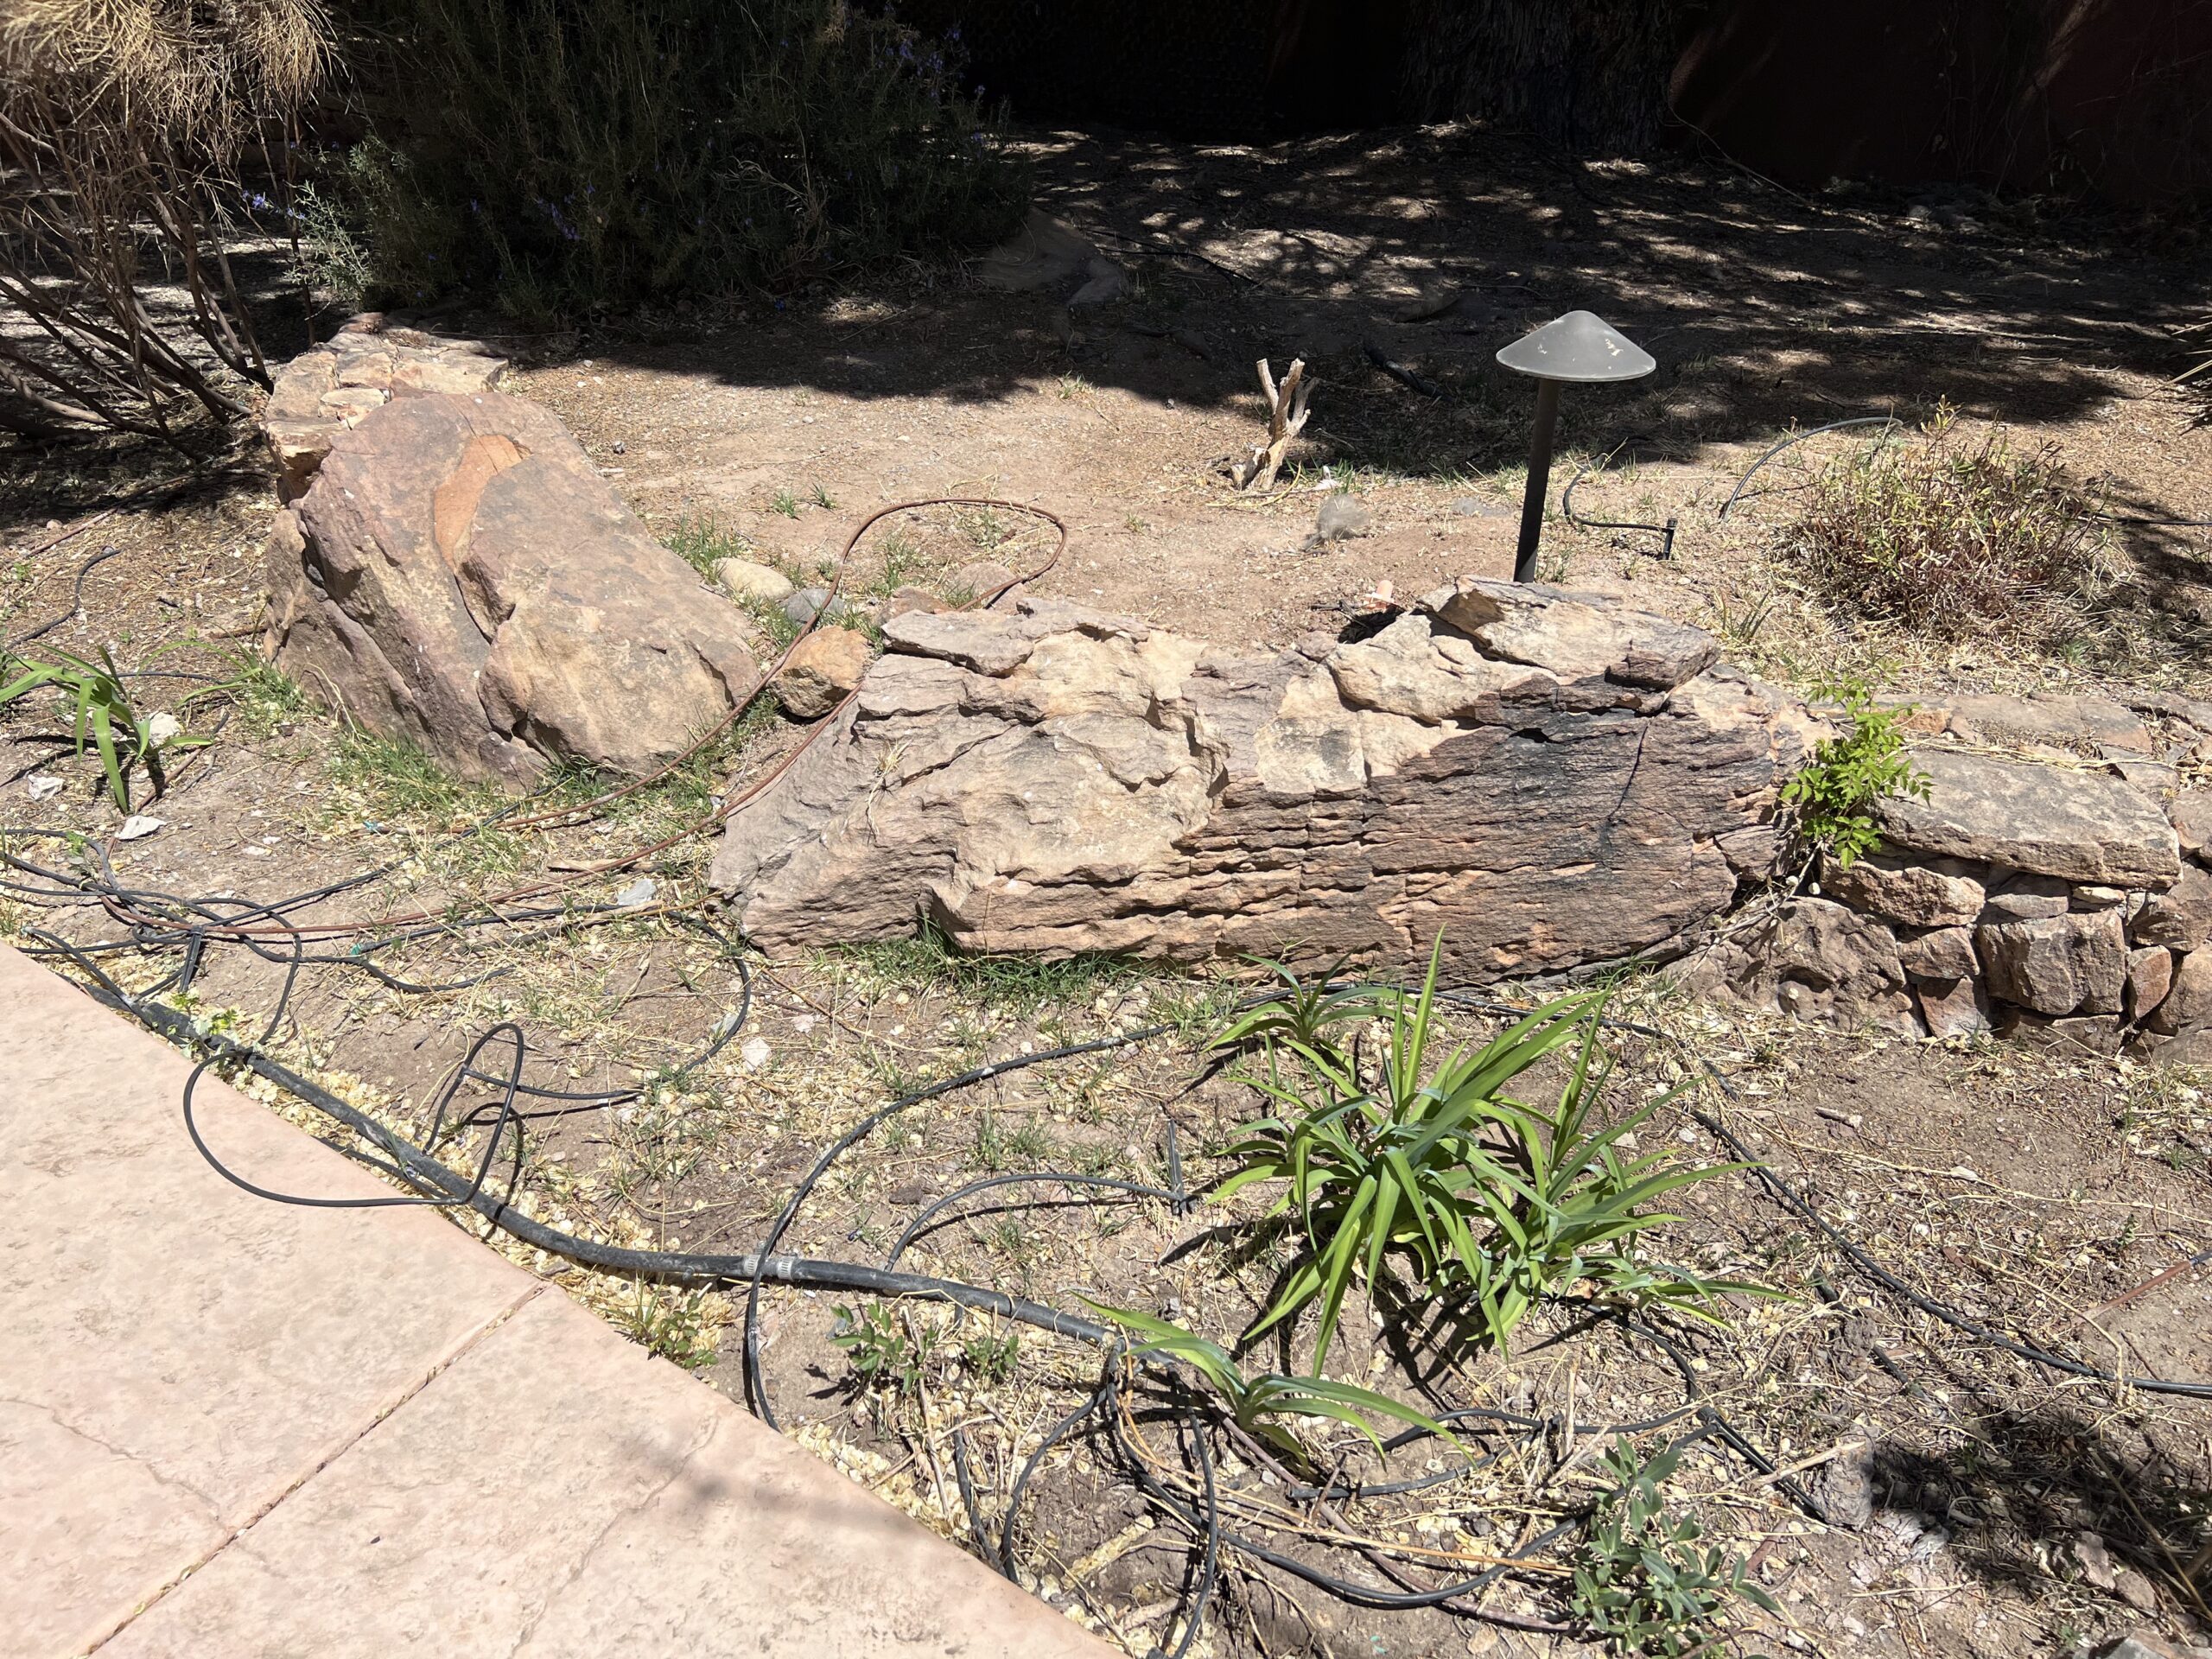
Lots of dripline connectors and long runs of ¼” distribution tubing – likely leading to damage and leaks.

Mistake 7: Not using enough landscape pins or staples.

Properly securing irrigation tubing with staples keeps it in place. Temperature fluctuations can cause the lines to expand and contract, which, over time, can allow the tubing to migrate to the surface, exposing it to sunlight and physical damage. Pin down the larger lateral supply line tubing and use at least one landscape pin on each ¼-inch tubing line to prevent the emitter from moving away from the plant’s root zone.

Mistake 8: Insufficient emitters for existing trees and plants.

This problem is most common when a lawn is converted to a xeriscape landscape with drip irrigation. Existing trees may have relied on sprinkler irrigation for many years, allowing their roots to spread throughout the lawn and often well beyond the edge of the canopy. When sprinklers are removed, homeowners or contractors sometimes replace the irrigation with just two or three emitters near the base of a mature tree. This does not provide enough water, and the water is not being applied where the majority of the feeder roots are located. This issue also occurs in newly installed landscapes when plants receive too few emitters; if the emitters are not repositioned, the problem continues as the plants mature. For newly installed landscapes use our Irrigation Guide page 28 to learn how many emitters should be installed per plant.
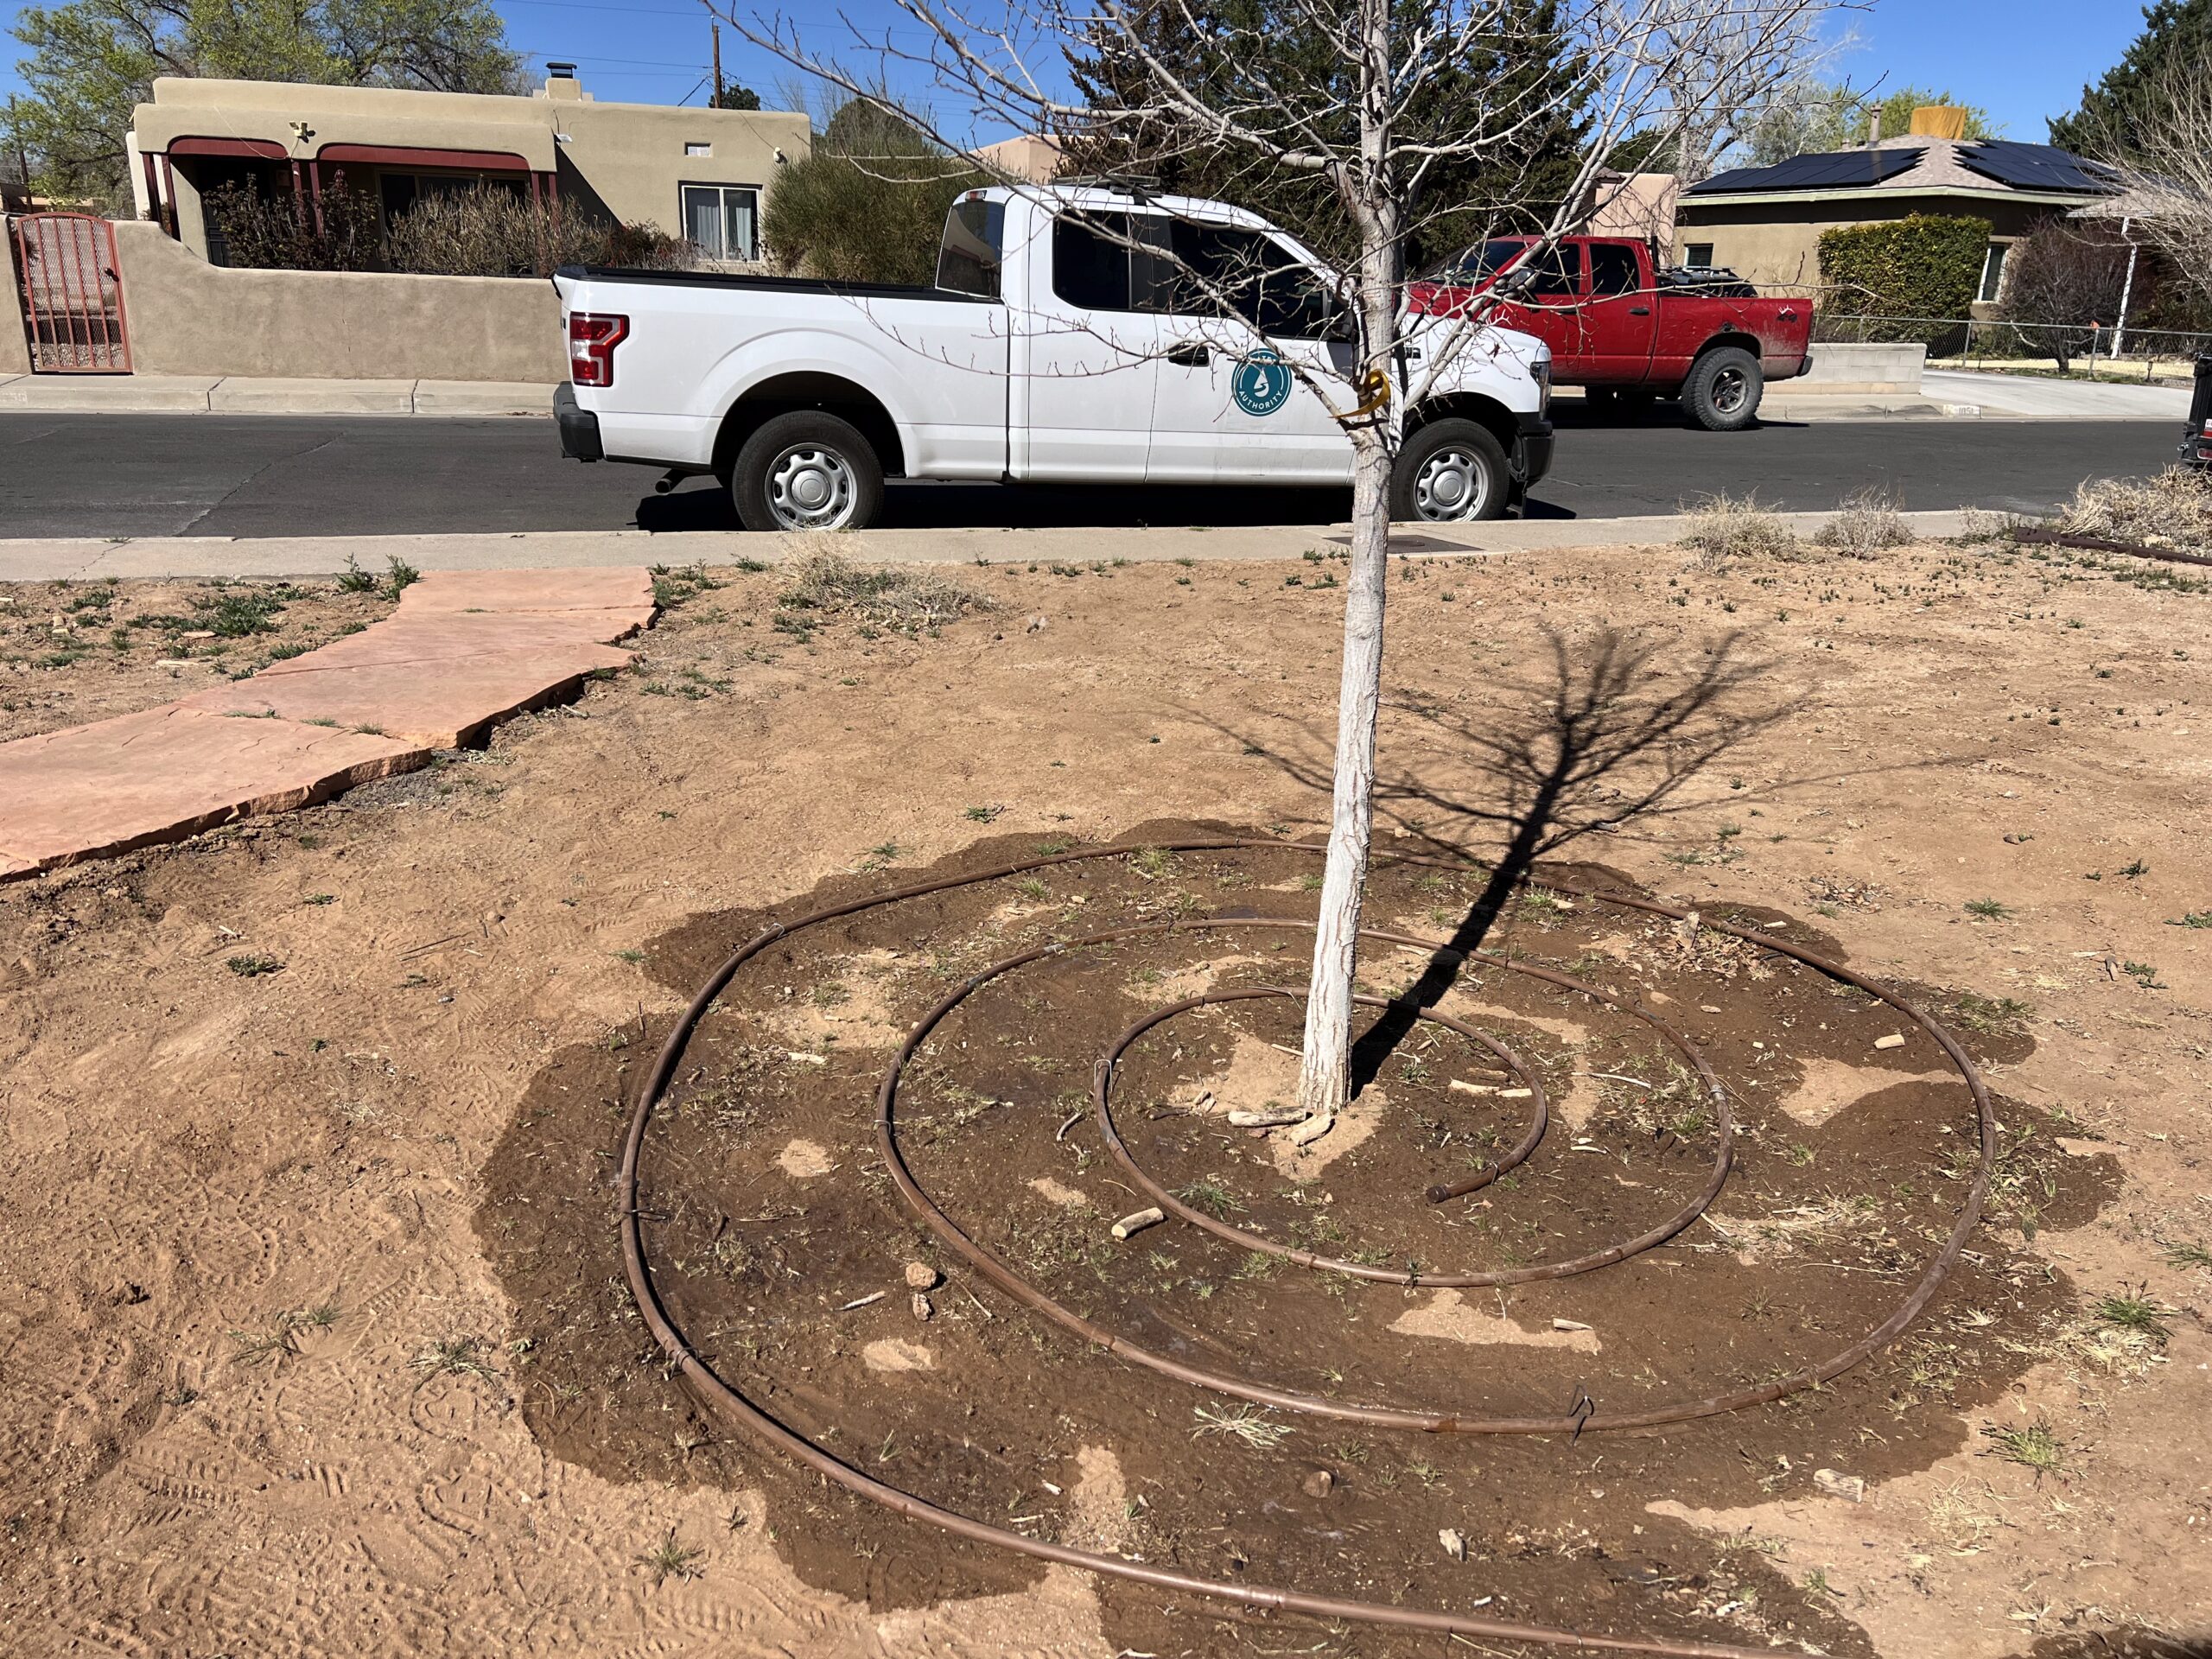
Newly installed tree watering system around a newly planted tree
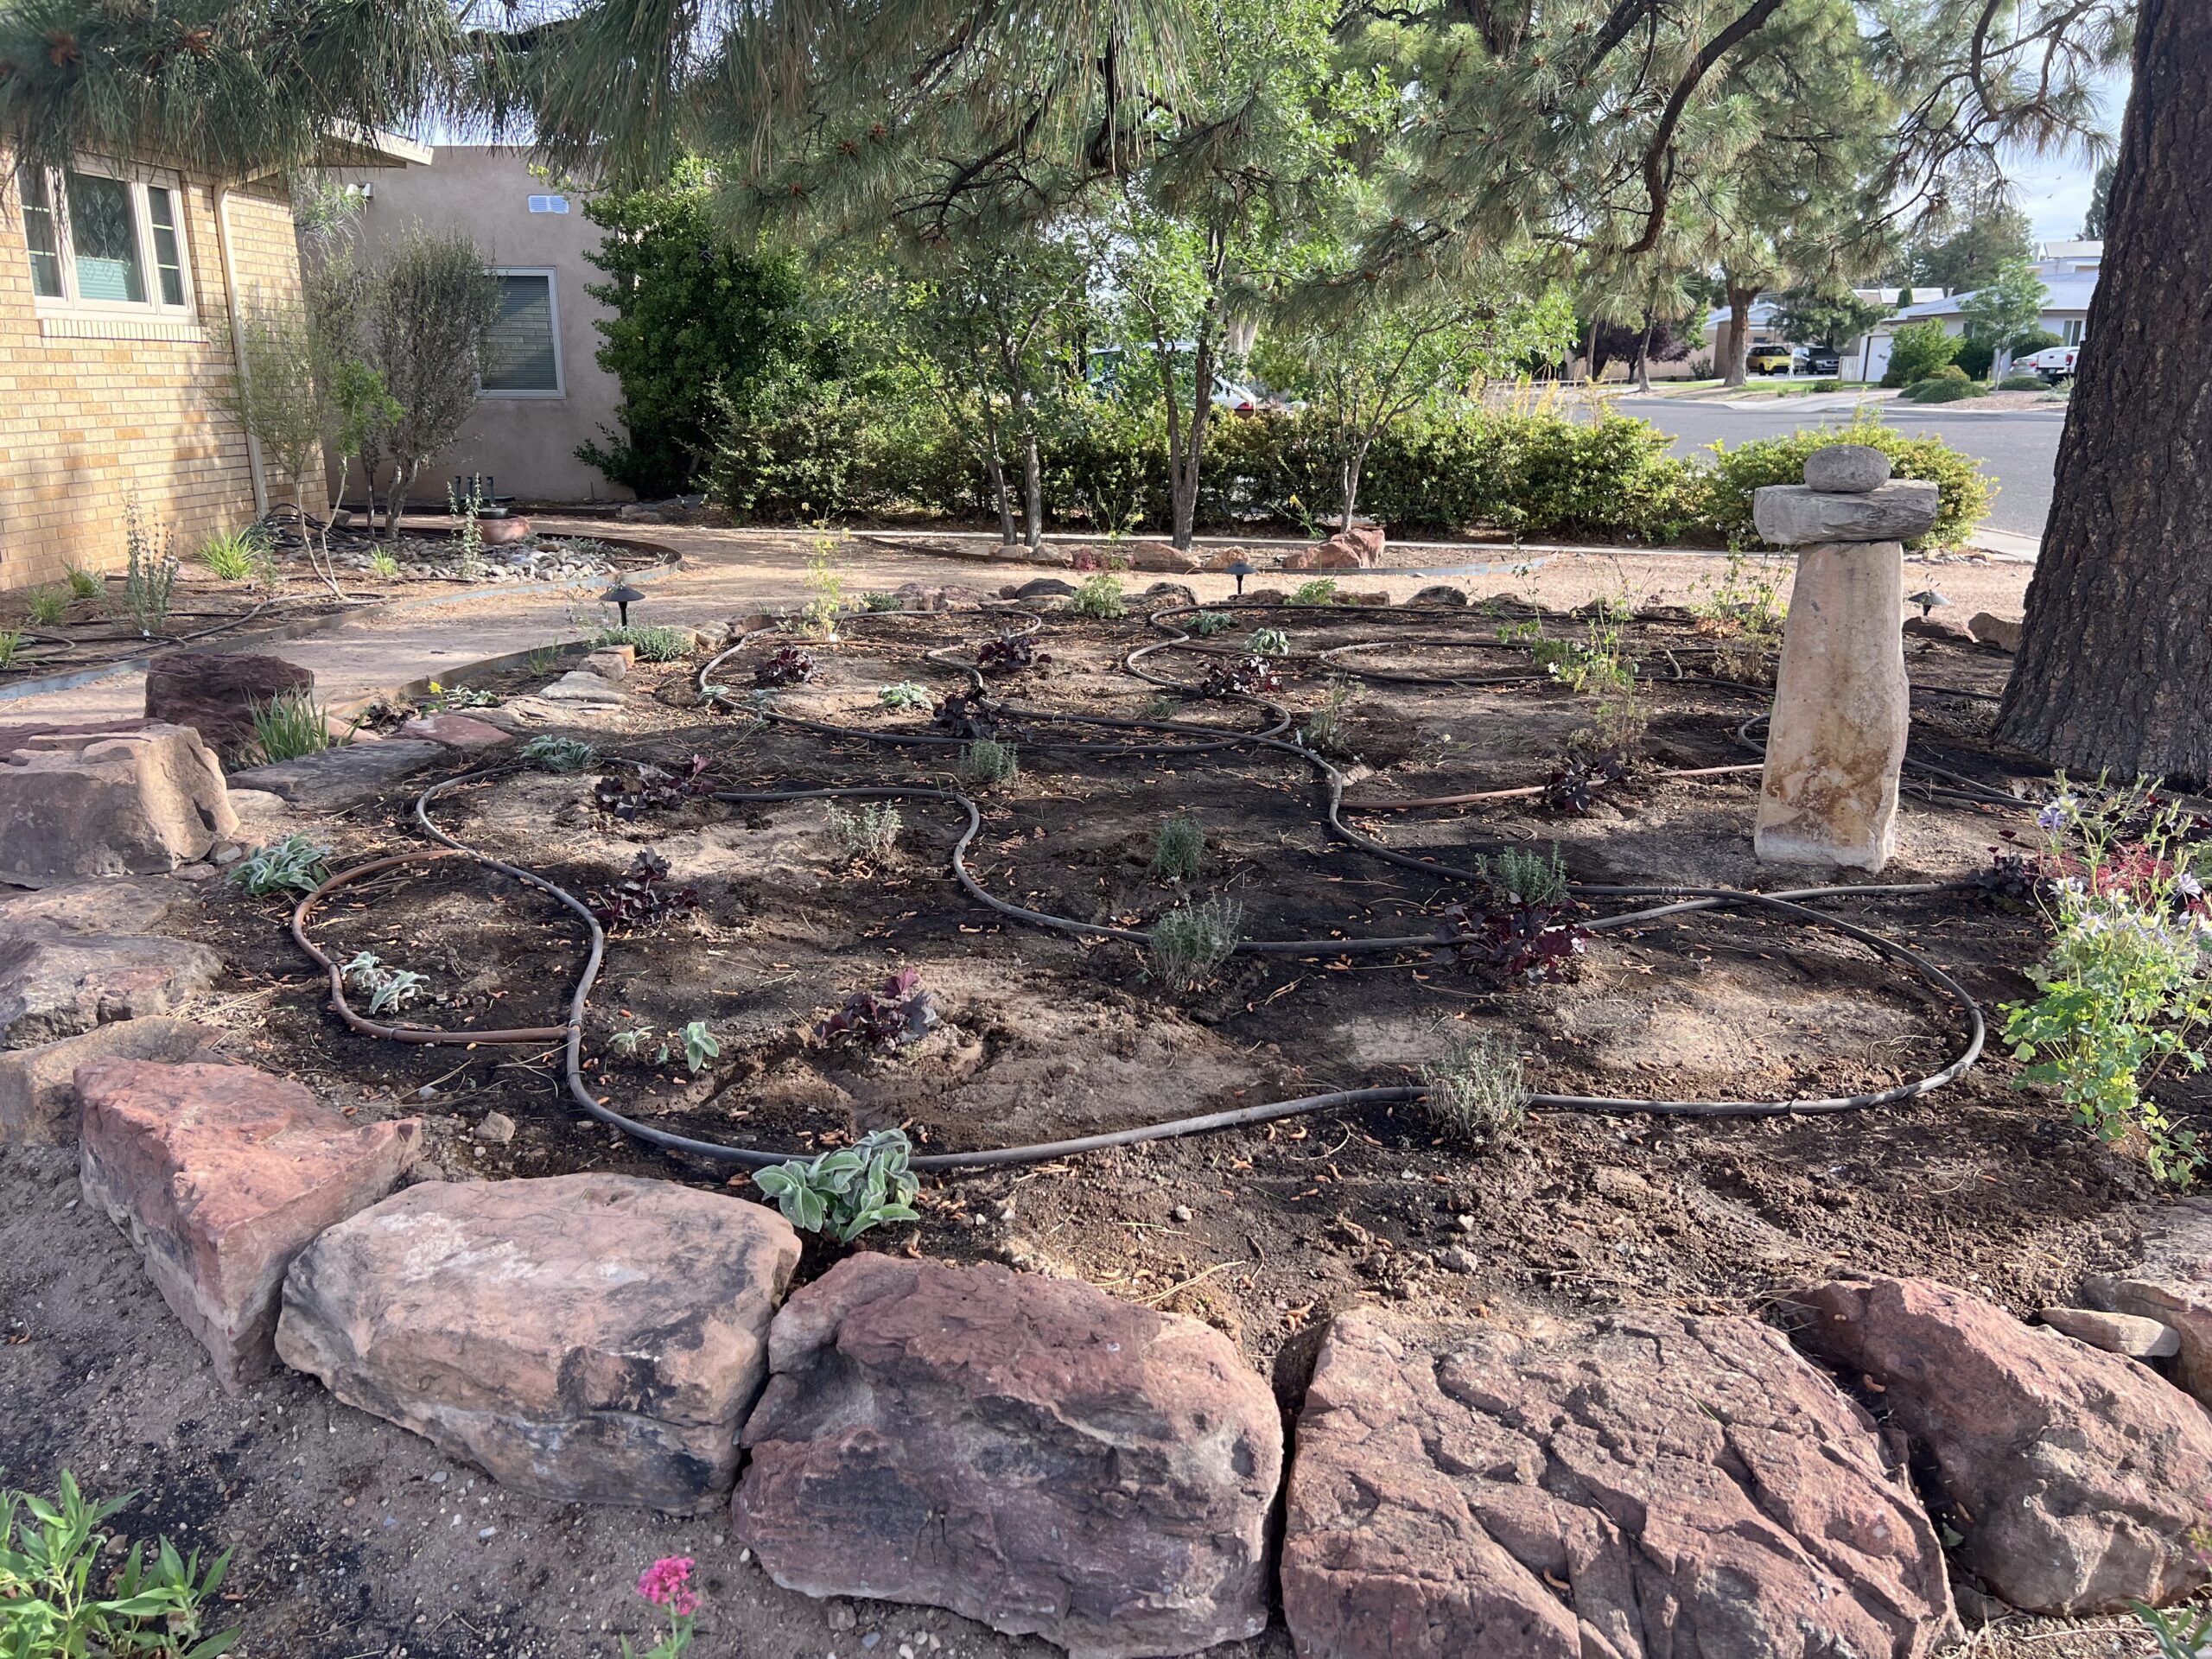
Tree watering system around existing tree to accommodate watering of the root zone around the large existing tree.

Mistake 9: Not separating trees and perennials into different irrigation zones.

We often find that customers have their low water use plants and medium water use trees on a single drip irrigation zone. One of the best irrigation practices – called ‘hydrozoning’ is to place trees and desert-friendly plants on separate watering zones. This allows each plant grouped by water need type to receive water according to its specific needs. Established trees typically benefit from deep, infrequent watering once or twice per month, while smaller plants generally require more frequent watering, often two to three times per week during the growing season. Separating these plants into different zones improves water efficiency, promotes healthier root systems and helps prevent both overwatering and underwatering. Occasionally, we come across a single irrigation zone or valve that contains both sprinklers for grass and drip irrigation for plants — this should always be avoided because it results in overwatered plants or underwatered grass.

Mistake 10: Not keeping emitters visible.

When walking through your newly installed landscape, you should be able to see the drip emitters positioned 2 to 3 inches above the mulch or gravel. (Emitters should also be placed on the uphill side of the plant.) Keeping emitters visible during the establishment period makes it much easier to verify that they are working properly and delivering water where it is needed. While they may not be the most attractive feature at first, the emitters will become less noticeable as plants grow and fill in. In a mature landscape, however, they can become hidden by plant growth and groundcover. In this case, the overall appearance and health of the plants provides clues if an irrigation problem exists. When you do need to locate an emitter, try listening when the drip zone first turns on. The sound of water flowing through the emitter can often help you pinpoint its location.
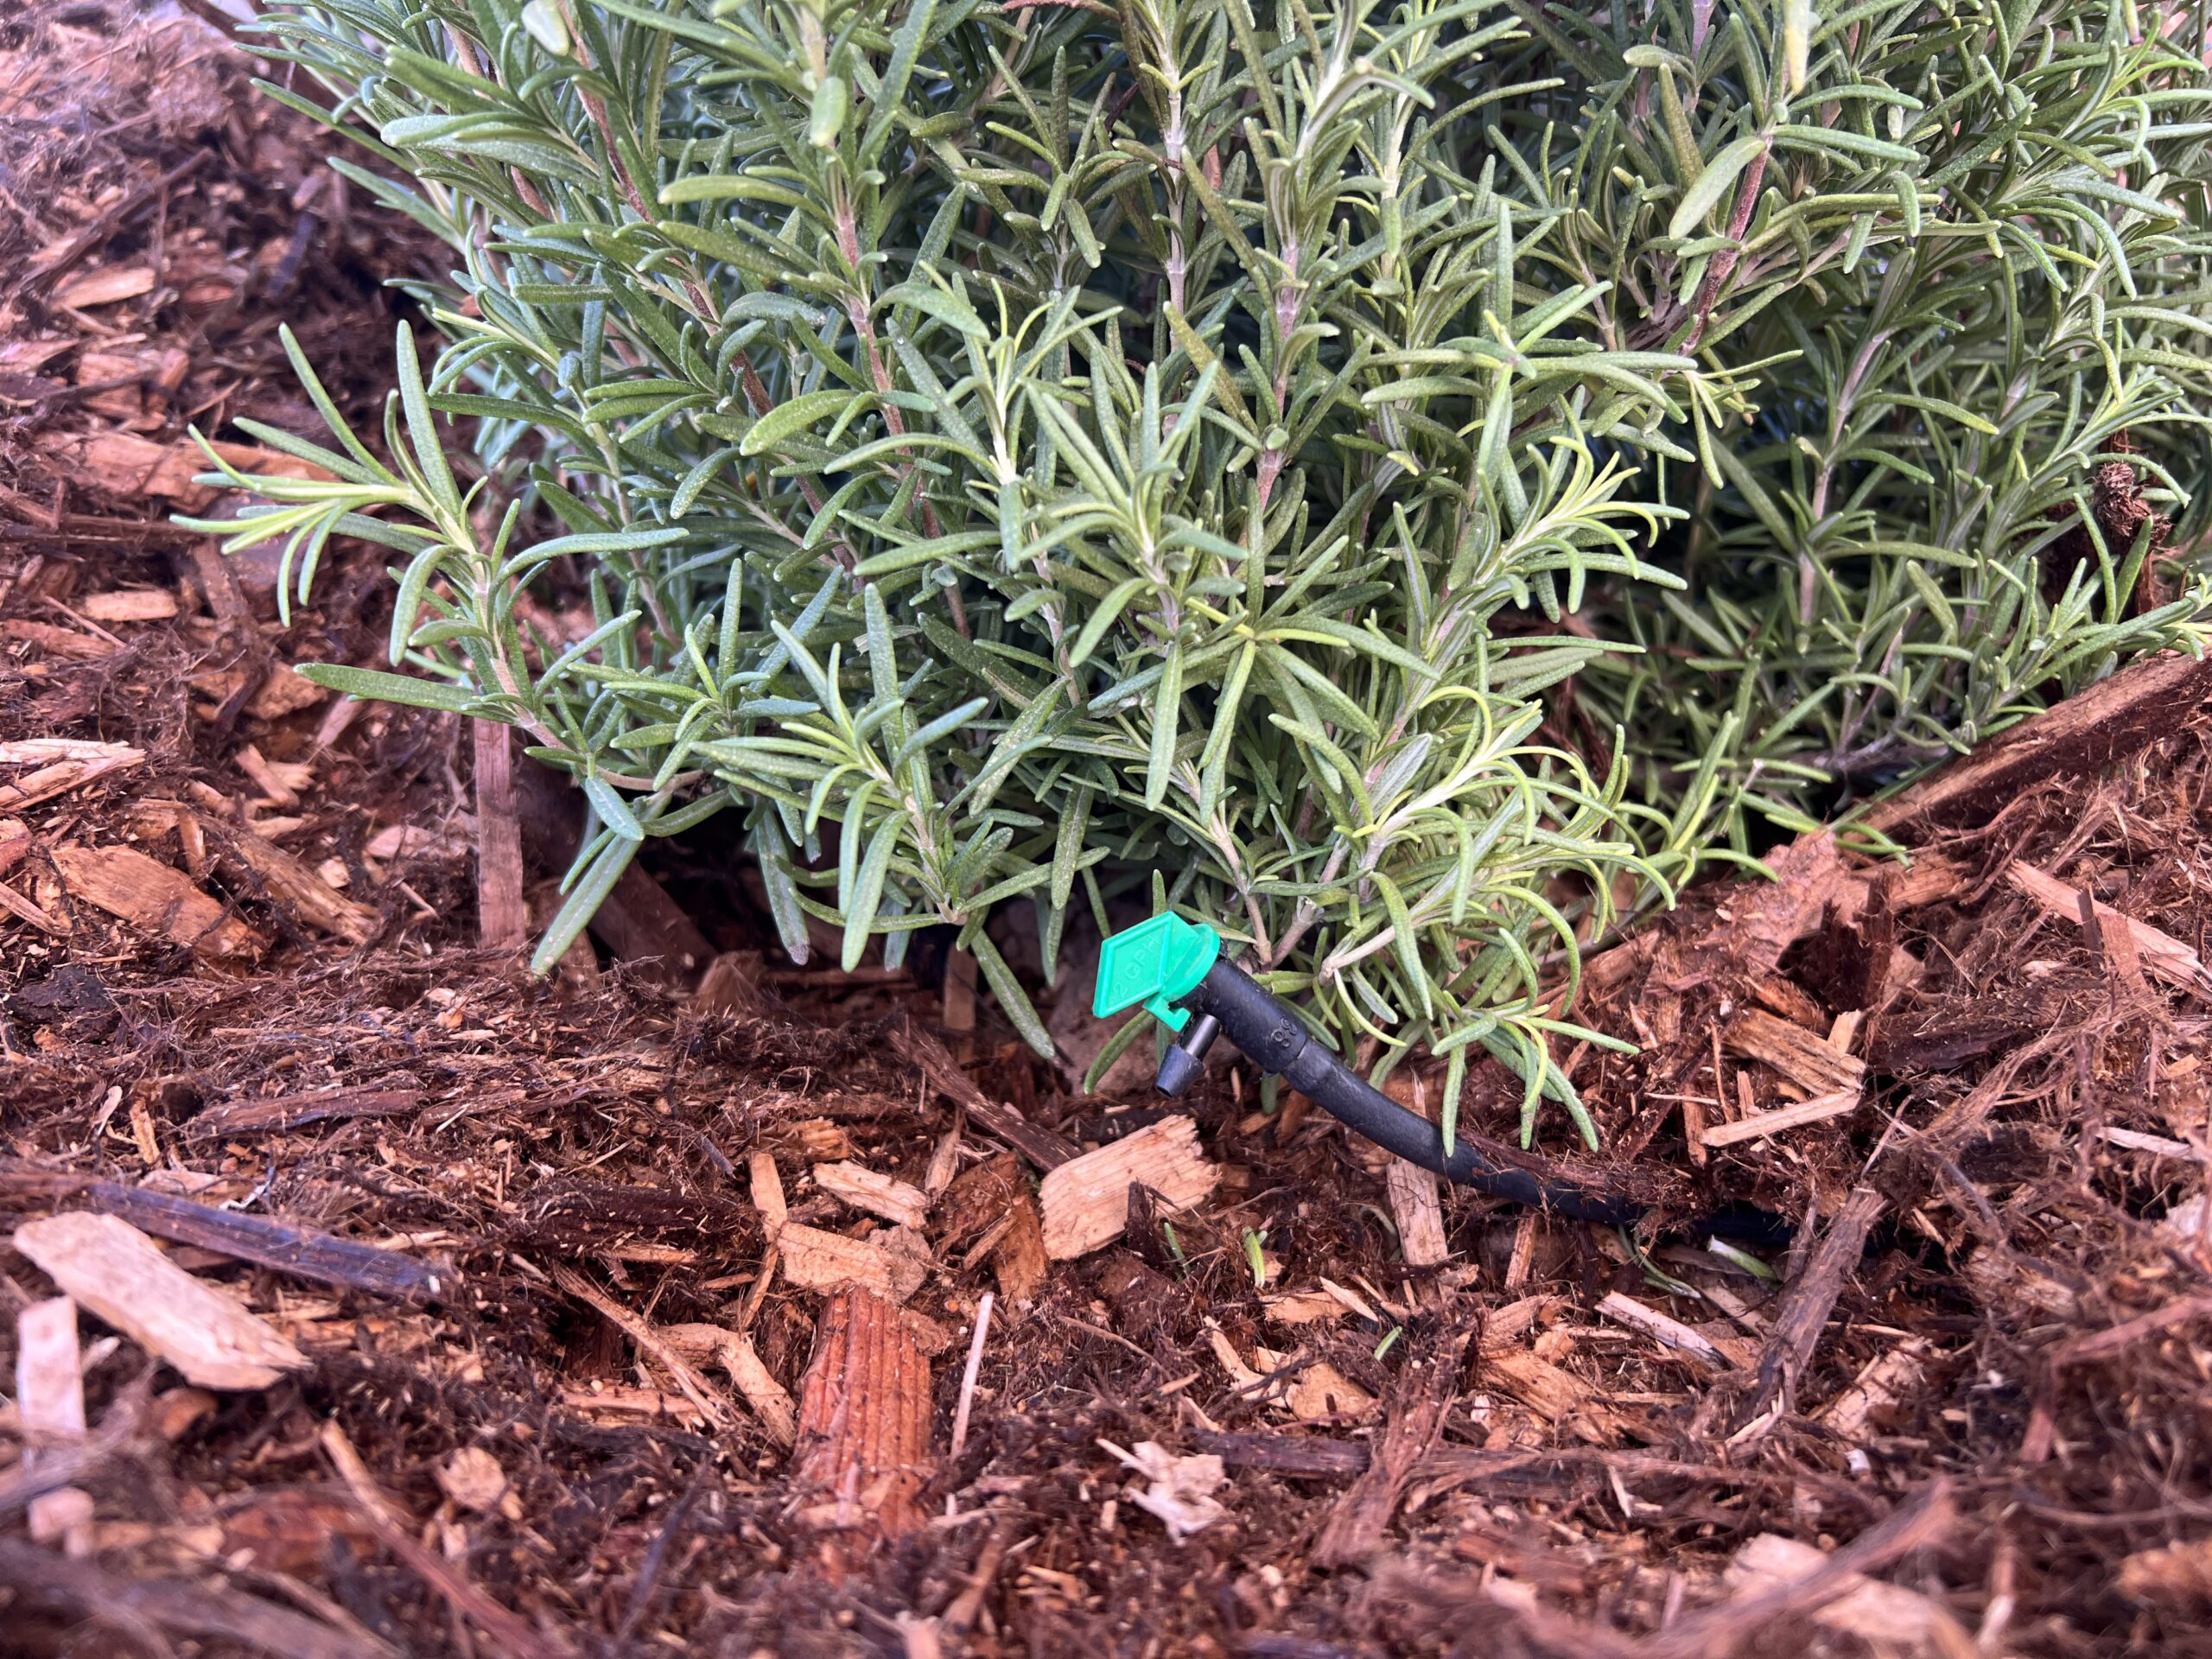
Emitter next to shrub.

Mistake 11: Using specialty parts that aren’t readily available at most irrigation or hardware stores.

When designing and installing your drip irrigation system, it’s best to use common, readily available parts. Choosing specialized components that are difficult to find or incompatible with standard fittings can lead to frustration, delays in repairs and resulting plant stress when repairs or replacements are needed in the future. We recommend purchasing supplies from irrigation specialty stores, as they offer higher-quality products, stock the same parts from the same manufacturers, and have experts available that can answer your questions. Be selective in the parts you purchase and keep a stash of extra parts in your toolbox so you can make a quick repair and avoid wasted water or stressed plants.


Learn More Here:

Irrigation Efficiency Guide

Irrigation 101 Video Tutorials

Take the Guesswork Out of Programming an Irrigation Controller

Yes You Can Afford and Irrigation System

Tree Watering System


Author: Carl Christensen, Xeriscape Inspector. Have a question about the article or anything else? [email protected]
The Dos and Don’ts of Autumn Landscape Maintenance

The Dos and Don’ts of Autumn Landscape Maintenance

Autumn brings many changes to our landscapes and gardens. Certainly, we are enjoying the cooler temperatures and changing light. It is more inviting to spend time outside, and we may find ourselves more inclined to do some of that yardwork that was unbearable in the heat of the summer.

But what is necessary work in the fall garden? Some of us have a tidy streak and find ourselves compelled to rake up the leaves as soon as they begin to fall or cut back the flowers and grasses that mere weeks ago swayed in the breeze and lured in the pollinators. Hold your horses. Your sense of neatness, or perhaps the need to control or tame the wildness going dormant before you, may not be what is best for the garden.

You may have heard the phrase “Leave the leaves.” Increasingly, we are understanding the benefits of letting the fallen autumn leaves lie and, along with that, holding back on some of the pruning, deadheading and raking that may have been your fall garden ritual. There are good reasons to let your landscape and garden remain a bit messy, and science can help you understand why.

Leaves store nutrients for the plant they are attached to throughout the growing season, releasing them into the vascular system as the plant requires. When autumn arrives and leaves fall to the ground, these stored nutrients are slowly released back into the soil, even as the decaying foliage enriches the ground beneath it, adding to the organic profile of the earth and creating systems for all the beneficial microorganisms to flourish. Healthy bacteria, fungi and mycorrhizae thrive in the soil beneath a mulch of decaying organic matter, and the blanketed soil also holds moisture, insulates the soil and reduces the need for supplemental irrigation.

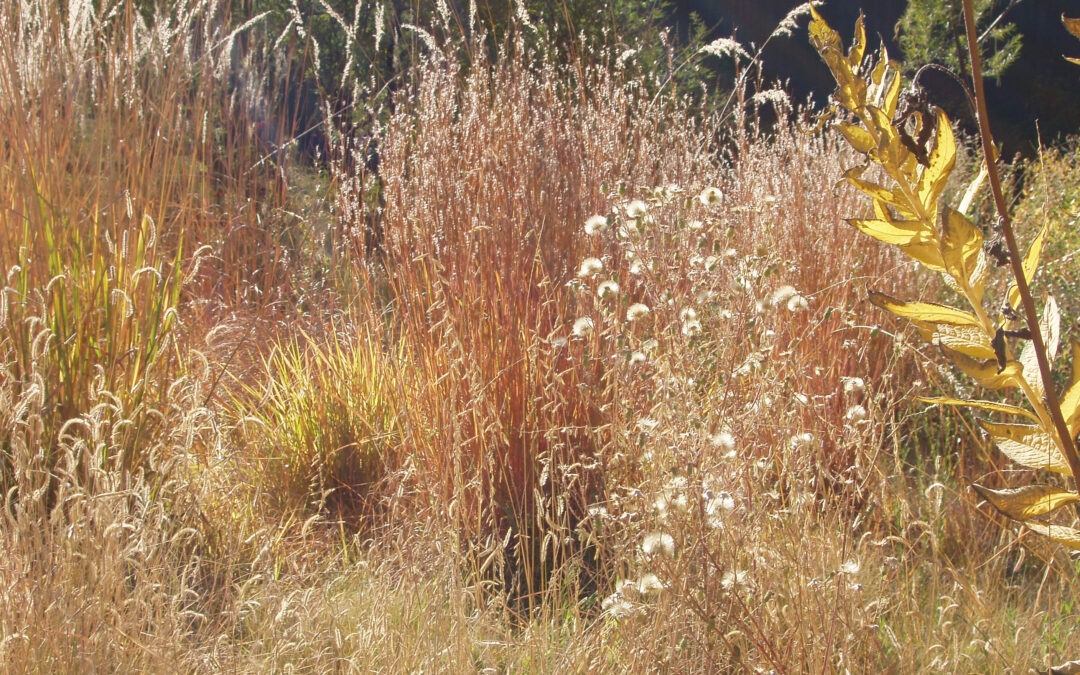
There are also many wildlife benefits to leaving a bit of messiness in the garden over the winter, especially for creatures that may be searching for natural food or nice hiding places to overwinter in, protected from the elements. In addition, there are ornamental benefits. For example, a native grass meadow can take on subtle color shifts, from greys to golds to russet tones, especially if graced with winter precipitation.

If we are fortunate enough to have precipitation in any form, the organic material left in the garden can act as a sort of sponge, soaking up moisture and slowly releasing it into the soil.

For a maintained appearance, rake the leaves and pine needles from patios and walkways if you wish, but let them accumulate and remain as free mulch in your flower beds, under trees and shrubs, on top of organic mulch such as bark or shredded wood, and on the soil surface between grasses in your meadows. You can add any excess to your compost pile if you have it. The exception would be if you had an issue with a fungus, such as powdery mildew. You should dispose of those leaves. If you have gravel or crusher fine mulch, you may want to rake the debris from those surfaces and recycle in appropriate areas of the garden or landscape.

If you have native and ornamental grasses, wait until spring to cut them back. Aesthetically, our plants go through a fall transition fading from red into russet browns and greys. This change signals the changing of the seasons, helping us align with Mother Nature. Erect stems and plump leaves will fade and crumble, setting up a beautiful contrast to the bright green growth of early spring and the tidy appearance after your spring clean-up and cut-back. The faded growth adds visual winter interest to the landscape, seeds for birds and protection for overwintering insects (even butterflies) as well as helping to hold soil moisture. The same goes for perennial flowers, like coneflower, penstemon, gayfeather and bee balm. These plants provide natural winter sustenance for birds and other wildlife and protect the sensitive crown of the plant from potential damage from freezing winter temperatures.

Ornamental Grasses in Fall, Photo by Wes Brittenham


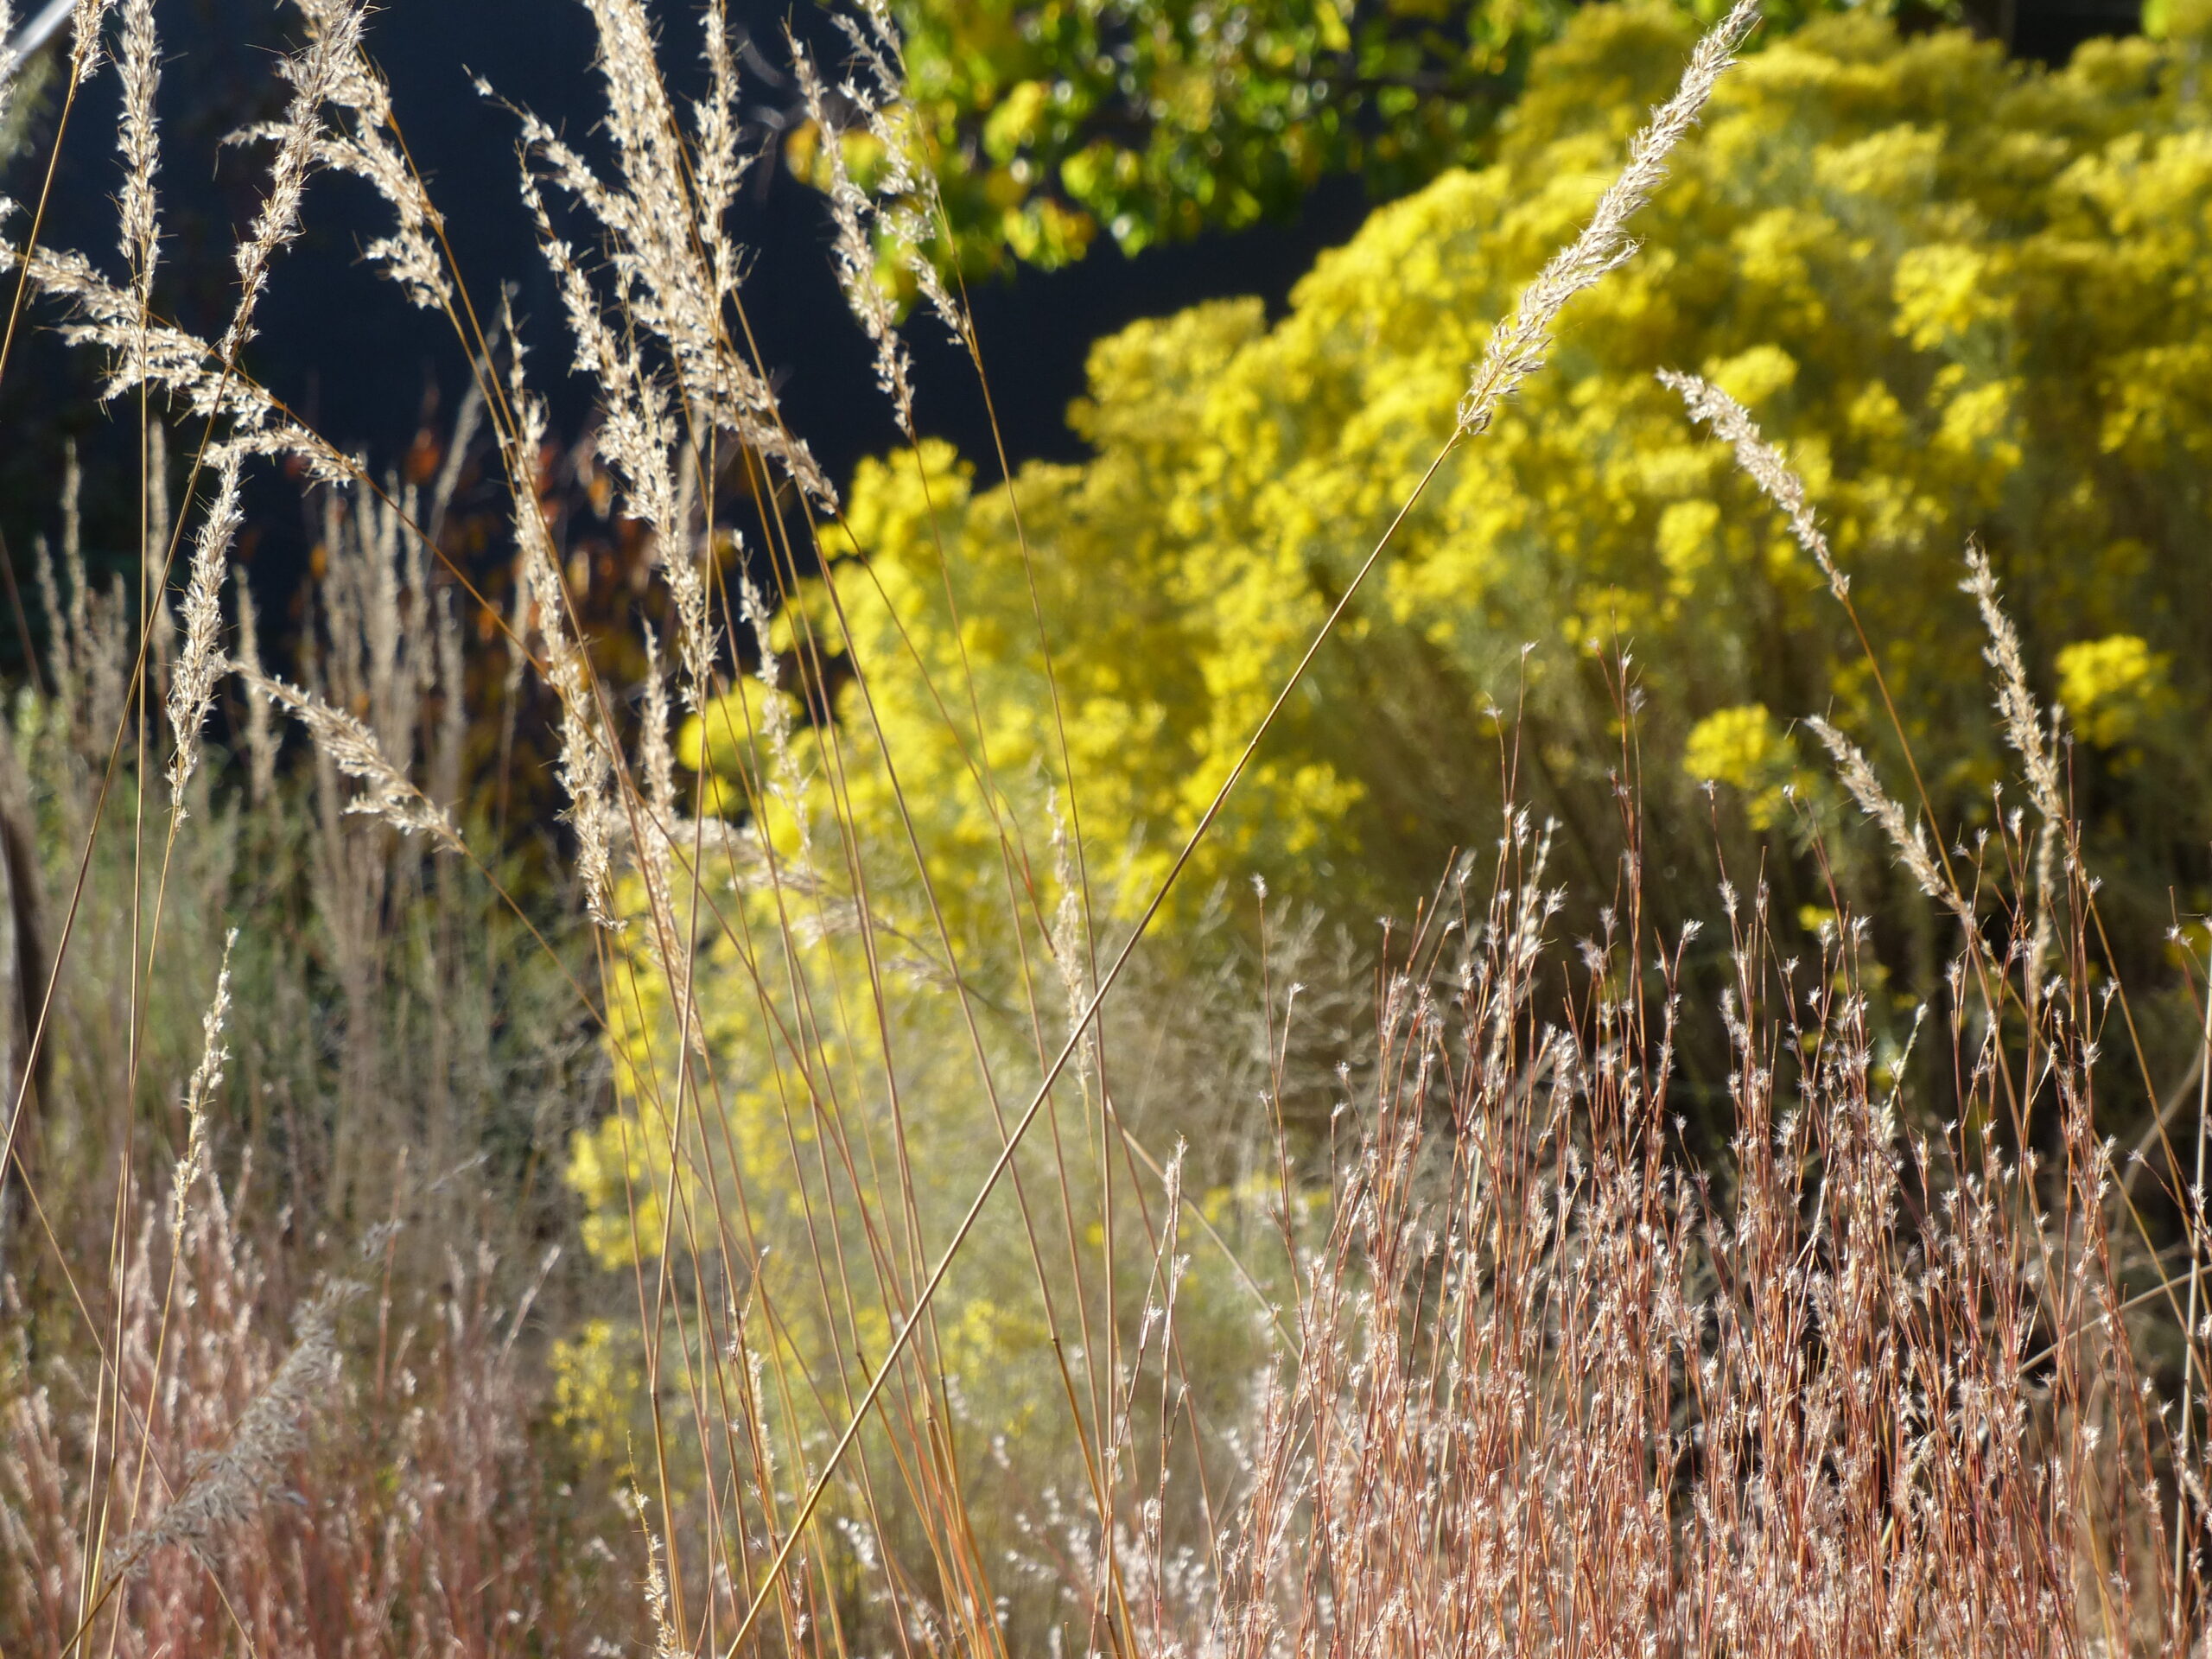
As for fall pruning of shrubs, there are several reasons to hold off on using your hedge trimmers and hand pruners there, too. One reason is that the spent flowers and seed heads on some shrubs such as blue mist spirea or chamisa also provide visual winter interest and food for birds. Some common landscape plants — like autumn sage, Texas sage and lavender as well as herbs like garden sage, rosemary, thyme and oregano — benefit from being left alone in the fall. The older outside growth acts as insulation to the more tender interior of the plant, protecting it from freezing temperatures. If you cut these back in the fall, you may find that winter damage has killed back much of the plant come spring.

There is something peaceful and restorative when looking at a winter landscape. You feel the earth resting after a season of heat and growth, the stored energy in slumber and silence, waiting for the shift in seasons to spring forth in renewal.

Rest with your garden. Let the quiet, meditative nature of the dormant period reset your own seasonal clock. Enjoy the cooler autumn days and the changing of the color, texture and mood of the landscape. Feel the gentle ebb of the need to do something and allow yourself to just sit with the slow season. You deserve a rest, too.


Photo by Wes Brittenham


Learn More Here:

Ornamental Grasses and How and When to Use Them

Plants for Fall Color

Great Natural Areas to Visit this Fall for Respite and Inspiration


Author: Wes Brittenham, artist, gardener and writer. Have a question about the article or anything else? [email protected]


Walk the Line: A mid-summer check of your irrigation system

Walk the Line: A mid-summer check of your irrigation system

Up to 50% of outdoor water use is wasted due to lack of service. In just 15 minutes, a broken sprinkler could waste about 225 gallons of water.  To put that in perspective, that’s more than the daily water needs for 3 Albuquerque homes.

If that broken sprinkler is set to run in the middle of the night, it could easily go a full week unnoticed, which would end up wasting 1575 gallons of water. That’s as much water as most Albuquerque residents use over an entire month during the winter. What if your leak goes unnoticed until you receive your next water bill? There goes 6300 gallons. If you’re like many of our customers and don’t pay much attention to your water bill due to auto payments, that broken sprinkler could run for an entire irrigation season unnoticed, wasting over 50,000 gallons of water. This one broken sprinkler can waste more water than what it takes to supply a home for a year. Consider the amount of water wasted citywide by that broken sprinkler along with all the other broken sprinklers, leaky pipes, and poorly programmed systems, and you can understand why it’s important for all of us to promptly address water waste issues in our landscapes.

Make the time to “walk the line”. While your system is running, walk the perimeter of your property and check your system. Do this a minimum of once a month for sprinkler systems. If you have a drip system, check it more often as they’re more susceptible to damage.  If your system is over 20 years keep an eye on it as components are going to fail more frequently on older systems.

When you walk the line, it’s important to use all your senses, not just your eyes.  Pay attention to the feel of the surface you’re walking on. If you feel a squishy spot below your feet, you probably have a subsurface leak.  Also, listen, your brain is remarkably good at picking out sounds that are out of place, and can lead you to a leak.


Monthly Walk the Line Checks:

Leaks:

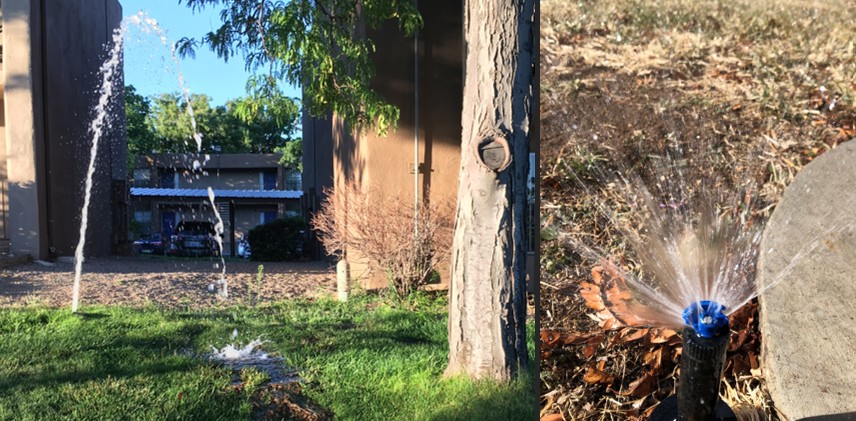
Sprinkler System Leaks: Quickly catching leaks will save plants and money. A broken sprinkler head is easy to identify.  Less easy to see and often overlooked is a cracked pop-up spray nozzle (see photo). It’s important to know how your sprinklers look when they’re distributing water as intended, so if one starts spraying water differently from the rest, notice it and inspect it more.

Leaks from sprinkler head and cracked nozzle.


The good news is that replacing sprinkler heads and nozzles is easy. All you have to do is unscrew the old one to remove it and then screw in the new one. Just remember to replace them with the exact same brand part and model. Putting in the wrong part can result in distributing the wrong amount of water on your turf. This will cause brown spots either from your grass dying because it’s not getting enough water or from fungus because it’s getting too much. Unfortunately, most homeowners’ responses to brown spots is to apply more water. But remember, symptoms of over and under watering can look similar.

Make your life easy and keep the correct spare parts for your system on hand.  If you’re uncertain, consider taking what you have to your local irrigation supply store for help with finding the right match.

When you purchase your new sprinkler parts, ask about high efficiency nozzles and pressure regulating spray bodies to upgrade your system.  We offer Irrigation Efficiency Rebates for this equipment. However, do not mix and match traditional spray sprinklers with newer high efficiency options, they do not deliver water at the same rate. So, if you replace one sprinkler with an upgrade, you need to also upgrade at least the rest of the sprinklers in that zone and then make sure you adjust your sprinkler run time for the new rate at which water is applied with efficient nozzles.

Drip System Leaks:

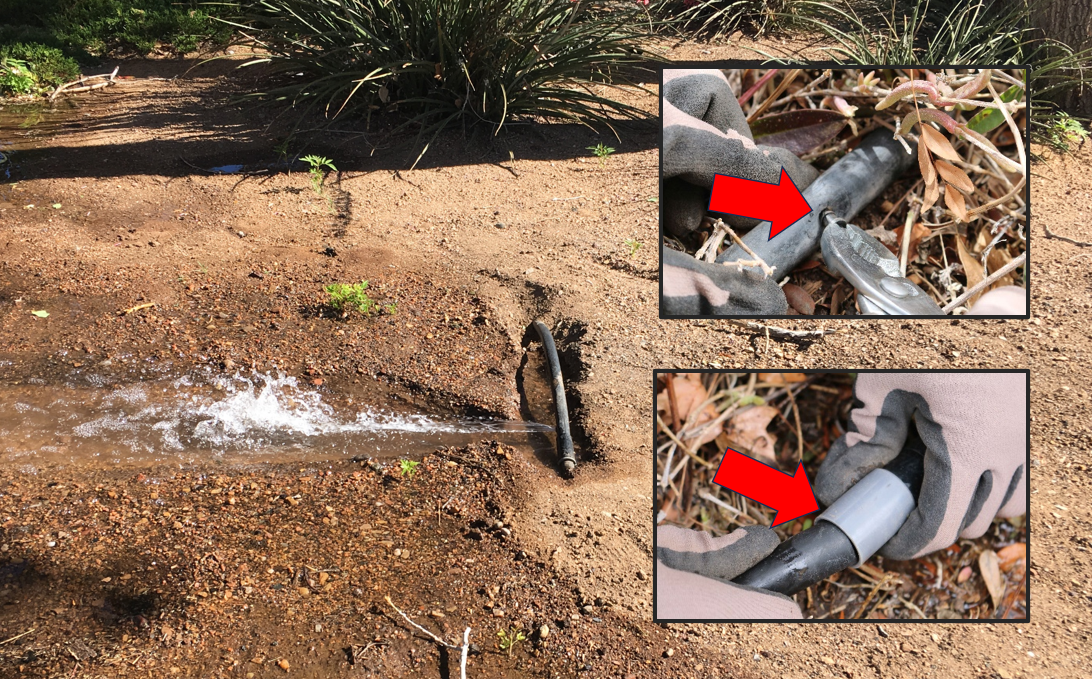
If you have a drip system we recommend that you walk the line more often. Drip systems are easy to install and maintain, but they’re also easily damaged. One of the more common problems we see is cracked or punctured polyline tubing.

This is an inexpensive and easy fix. A small hole can be patched by inserting a “goof plug”. And a larger hole or crack can be repaired with a repair coupling, just make a clean cut and connect the two pieces with the correct size coupling. It’s a good idea to always keep goof plugs and the right sized couplings on hand if you have a drip system. A tackle box can be useful for all the parts. After the repair, run the system and observe the zone running to make sure the repair was successful and that you don't have other leaks.


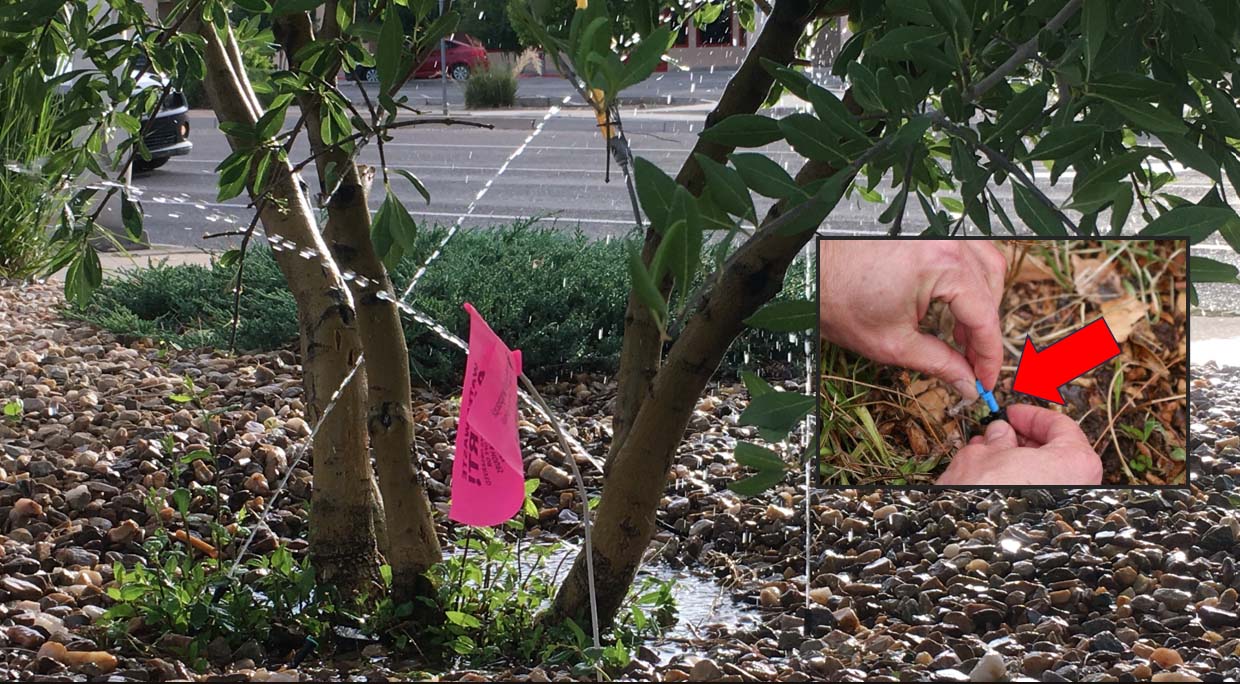
Another common issue with drip systems is missing emitters. This is also an easy and inexpensive fix. You just need to pop on a new emitter with a replacement that delivers water at the same rate as the old one.

If you are frequently loosing emitters it's highly likely that the pressure in your drip zone needs to be reduced.  Each drip valve should have a pressure reducer installed to match the pressure the parts were designed for (15-30psi). If yours doesn’t, consider installing one ASAP. Hold on to your receipt so you can apply for our irrigation efficiency rebate for pressure reduction within 90 days of the purchase or service.


Valve Assembly Leaks:

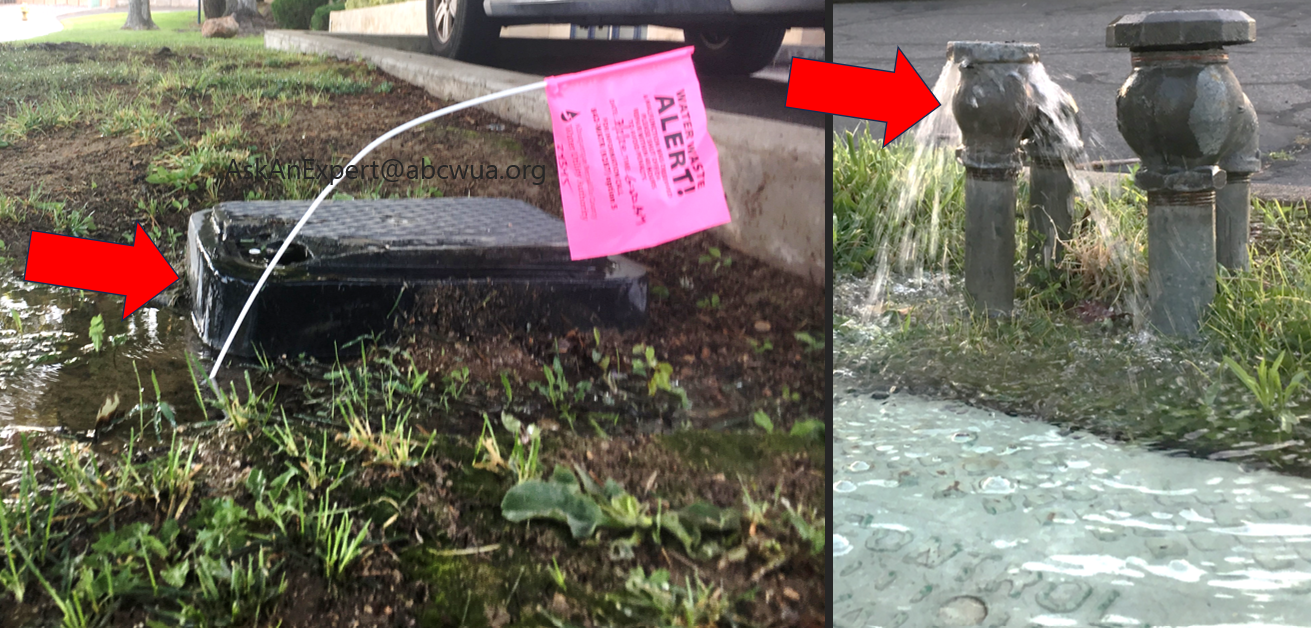
The picture of the left shows a valve box filled with water due to valve assembly leaks and the picture on the right shows a backflow preventer leaking due to an old or broken washer.

When you’re walking the line turn on the system then start at the valve assembly. This is where the whole irrigation system begins. It includes a valve (which is usually inside a valve box under a green or brown plastic cover) and a backflow preventer. The valve opens to turn on the water supply to the irrigation system and you should not see water in the valve box. Leaks often start gradually and they may not be immediately obvious so it’s a good idea to open the lid and look for water in the valve box when you’re doing your monthly system inspection. The valve assembly needs to include a backflow preventor. The backflow preventer is what prevents contaminated water from your landscape from siphoning back into your home’s water supply.

Valve box and backflow preventers.


If you are uncertain of whether or not you have a backflow preventer or you can’t locate your valves, you can always reach out to us through our “Ask an Expert” email us at [email protected]


Other Water Leak Clues:

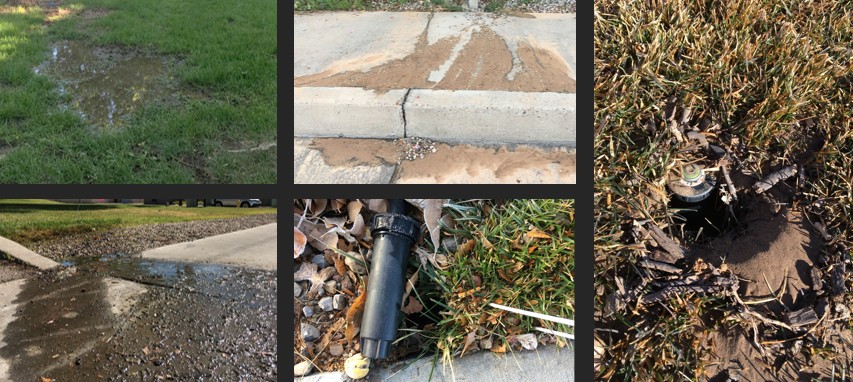
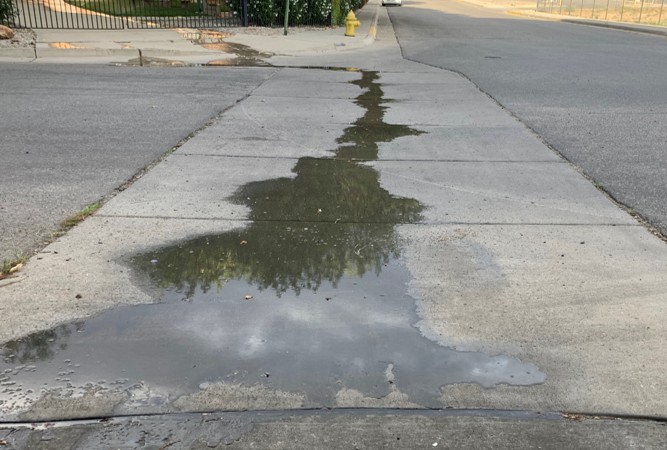
Even when your system isn’t running, there are clues you can look out for that can alert you to leaks and broken sprinklers. If you see ponds in your turf or in the street in front of your house, you might have leak.  Other clues to look out for are things like algae growing on the sidewalk, or popped off sprinkler heads lying in the grass.

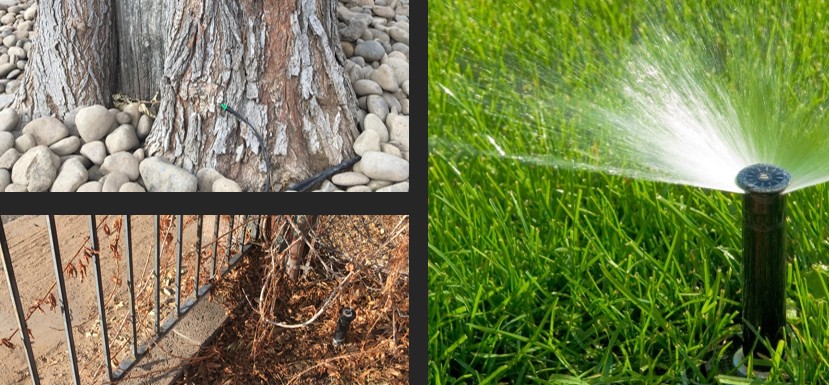
Another great visible leak clue is sediment flow.  When water flows, it moves soil with it. So, if you see sediment around a sprinkler head like in the picture at right, or flowing across the sidewalk like in the top center, it’s a good sign that there is a leak below the surface.


Finally, one of the best clues you have is your water bill.  If you notice an unusual jump in your bill, it’s a good idea to check your irrigation system for leaks. There is also a free online water use tracking tool we offer called HomeConnect, which allows users to view nearly real time data on their water use. With HomeConnect, you can view your water use down to the hour which allows you to familiarize yourself with your daily water use patterns so you can catch abnormal usage before it drives up your water bill. Set your water use thresholds so you can get alerts via email or text if your use goes above a set limit, this can also help avoid property damage at a rental or if you’re out of town.


Sprinkler Aim: Check for Efficient Alignment, Proper Throw, Consistency


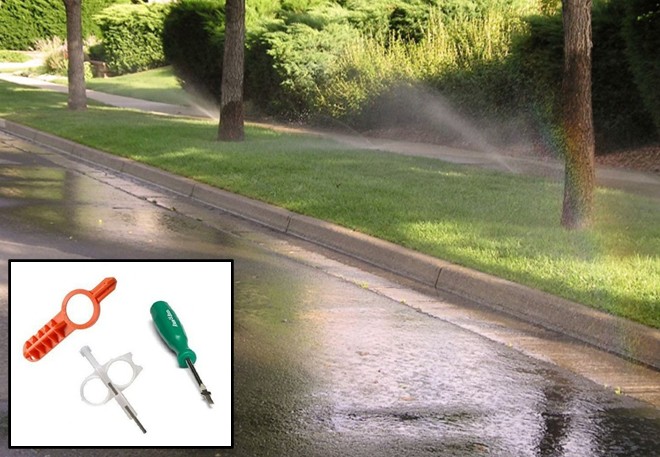
When you’re walking the line on your sprinkler system, check that your heads are spraying water onto the grass not pavement or other areas that don't need water.  If you see overspray, you can usually fix it pretty easily by adjusting the throw radius.  How you do this will depend on the type and brand of sprinkler you have. Some sprinkler nozzles require a special adjustment tool, so if you need one, make sure you have it handy when you walk the line.


Now with some grass it’s impossible to avoid overspray, like narrow strips next to pavement like you see here. These are fantastic opportunities for a Desert Friendly Xeriscape Conversion. This rebate gives customers $3 per square foot for transforming their unwanted or inefficient grass to a healthier xeriscape that contains plants, trees, mulch and drip irrigation.

Another important aspect of checking your aim is looking for overflow. If you see water seeping off the grass, that tells you that the water isn’t soaking into the soil anymore, and no more water should be applied. This can usually be fixed by cutting back the time on your irrigation controller. Now if your grass needs more water than what can be applied before it starts running off, you can program your controller to a “cycle and soak” pattern. To determine the run times run your sprinklers until you see water is about to overflow. Then turn the sprinklers off, let it soak in for about half an hour, and run it again to meet your turf irrigation requirements. This is an excellent practice to help your grass develop a healthy and more drought tolerant root system, and it ensures that all of the water you’re paying for is benefiting your grass instead of being wasted in the street (which can result in a fine). Report Water Waste

Another solution for overflow is to replace all your spray nozzles with high efficiency rotating sprinkler nozzles, which we offer a rebate for. These nozzles apply water at a slower rate than traditional nozzles, giving water time to infiltrate to the root zone.


You should also make sure your sprinklers haven’t sunk or tilted.  Take a close look and make sure that the outer radius of your sprinkler is throwing to the head of its neighbor what we call head to head coverage.  And make sure that all the sprinkler throw patterns look consistent. The even distribution of water on your turf will help you avoid brown spots and uneven growth.


It’s very difficult to grow turf on a hill, the top can receive 2x as much water as the bottom. High efficiency nozzles and cycle and soak can help but, you’ve got another excellent candidate for a Desert Friendly Xeriscape Conversion rebate.


Clogs:

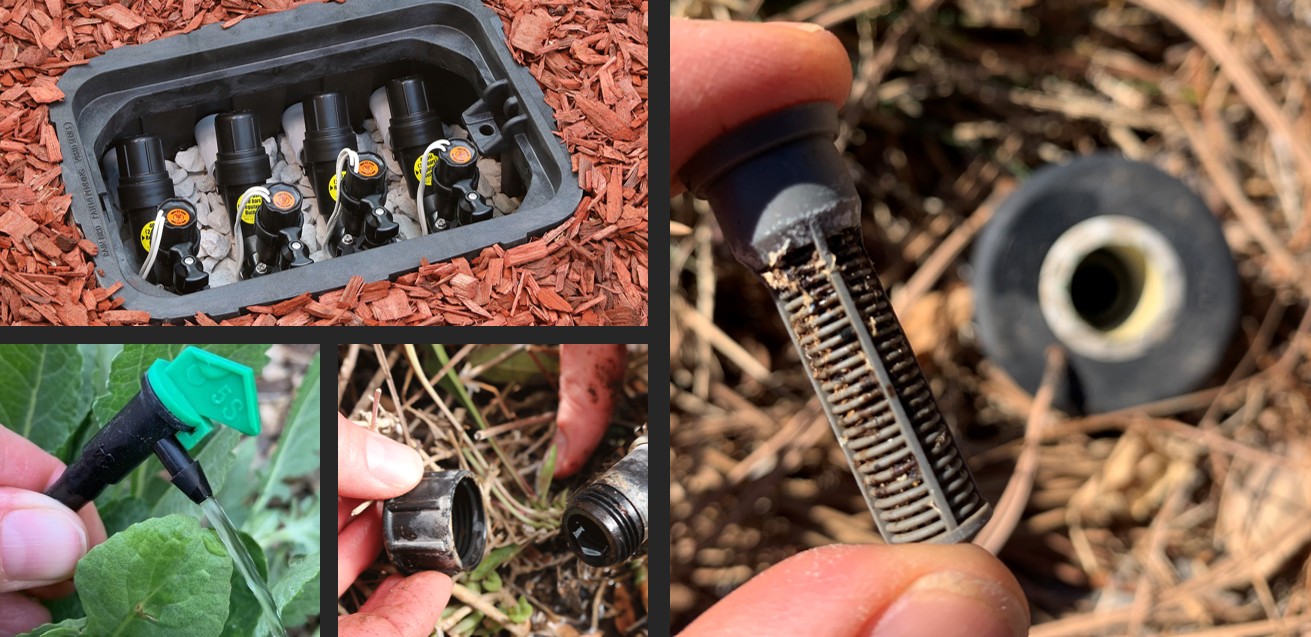
Automatic valves, drip emitter, end cap, basket filter.


Clogs in the system can be another cause of water waste. When sediment and debris collect in your system, water doesn’t get to the plants. And what do we tend to do when we see the plants struggle? Turn up the run times. That’s not going to help your plants.


If you have a drip system, before you turn it on for your monthly check, take one minute and open the valve box cover, unscrew the filter, which you can see in the picture up top, and clear out any debris you find. If you don’t see a filter, it's a good idea to get one installed. Once you turn the system on, inspect your emitters to make sure water is flowing as it should and clear any clogs that you identify. On the green-topped emitter pictured on the bottom left, this is easily done by rotating the flag and removing it from the main body of the emitter, place your finger over the hole to flush it (if the system is running) and replace the flag. Other types of emitters need to be replaced if clogged. It’s also a good idea to flush your line during your monthly check, which is done by removing the end cap while the system is running. If you don’t have an end cap, they are super easy to install and we recommend installing one to make maintenance easier.


To identify clogs in a sprinkler system, look for sputtering sprinklers.  If you look closer and don’t see a cracked nozzle, you probably have a clogged filter basket. To fix this, simply turn off the system, unscrew the nozzle, pull out the basket filter and wash out the debris.


Controller:

Controller

Our monthly service tip is to click through your controller settings on your timer. With this you’re looking out for a couple of things.


First, make sure that your settings haven’t unexpectedly changed as power surges and weather events can disrupt your controller's programming. If you’ve installed a fresh backup battery at the start of the season, which we recommend, you shouldn’t have to worry about a power failure wiping out your programming.


Another issue we come across is mystery programming. Controller programming is often not intuitive and sometimes well-intentioned people accidentally program a system to run the same zone multiple times, which ends up wasting water. If you have questions about programming your controller, email [email protected].


Most importantly, check that your controller is set appropriately for the season. You should not be watering the same in October as you were in June. If you need guidance on watering schedules, check out our Water by the Season charts.

Now if making regular adjustments isn’t something you’d realistically do, you can purchase a Smart Controller which will figure it all out for you. These are wifi enabled devices that will calculate how much water your landscape needs based on local weather conditions and make the necessary adjustments for you. We've calculated that if everybody in our service area adjusted their sprinklers for the seasons we would easily meet our water conservation goals. We’ll give you 25% off up to $100 rebate back on your water bill for installing one.

Check out our Irrigation Efficiency Guide.


Best Practices and Common Mistakes:

A quick note about your mid-summer check. Make sure you’re adjusting for plant growth. If you have a drip system, move your emitters to the edge of the plant’s root ball, or drip line. You want to avoid the situation where the emitter is placing water directly onto the trunk of established trees and plants.


With sprinkler systems, maintain the vegetation so it doesn’t interfere with the streams of water. Trim back plants for sprinkler clearance. And when it comes to grass height if the grass is too tall it will block the sprinkler. If it’s too low, your grass doesn't shade its roots and can dry out quickly making it susceptible to drought stress. Aim for grass height between 3-4” Check vegetation around irrigation.

If you suspect you’ve got a problem with your irrigation system and you’d like help troubleshooting it, you can always contact us through “AskanExpert” and we can walk you through it or even come out to your property for an irrigation consultation. We want to help you save water and have a healthy landscape, so please don’t hesitate to reach out!


Learn More Here:


Irrigation 101 Tutorials

Improving Irrigation Efficiency Can Be Affordable

Drip Irrigation Maintenance Checklist

3 Steps to Landscape Success Webinar

 Irrigation Efficiency Guide

Residential Irrigation Rebates Page

Have a question about the article? Email us at [email protected]

Living with Mosquitos

Living with Mosquitos

Mosquitoes have been so very prominent here in the Albuquerque area over the last five years, and we’ve been learning a lot about how to live with them in our yards. Fortunately, Bernalillo County and the City of Albuquerque have been studying mosquito lifecycles, treatment and abatement for years.

There are three types of mosquitoes found in our area, including the Aedes vexans (floodwater mosquito) and the Culex quinquefasciatus (southern house mosquito). Additionally, the Aedes aegypti (yellow fever mosquito) has become firmly established in the Albuquerque area in recent years.

All these species are well adapted to the local environment, but they differ significantly in behavior, feeding habits and the types of risks they pose. Southern house mosquitoes primarily feed on birds but will bite humans and domestic animals. They are active at night and during dawn and dusk.

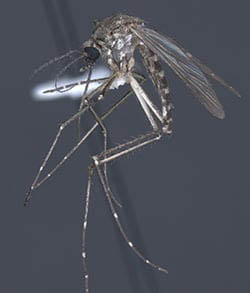
Floodwater mosquitoes prefer to host on humans, livestock and pets. They are highly aggressive and notorious for biting during the evening and nighttime hours. Floodwater mosquitoes are a nuisance because of their painful and frequent bites but not commonly associated with disease.

Floodwater Mosquito

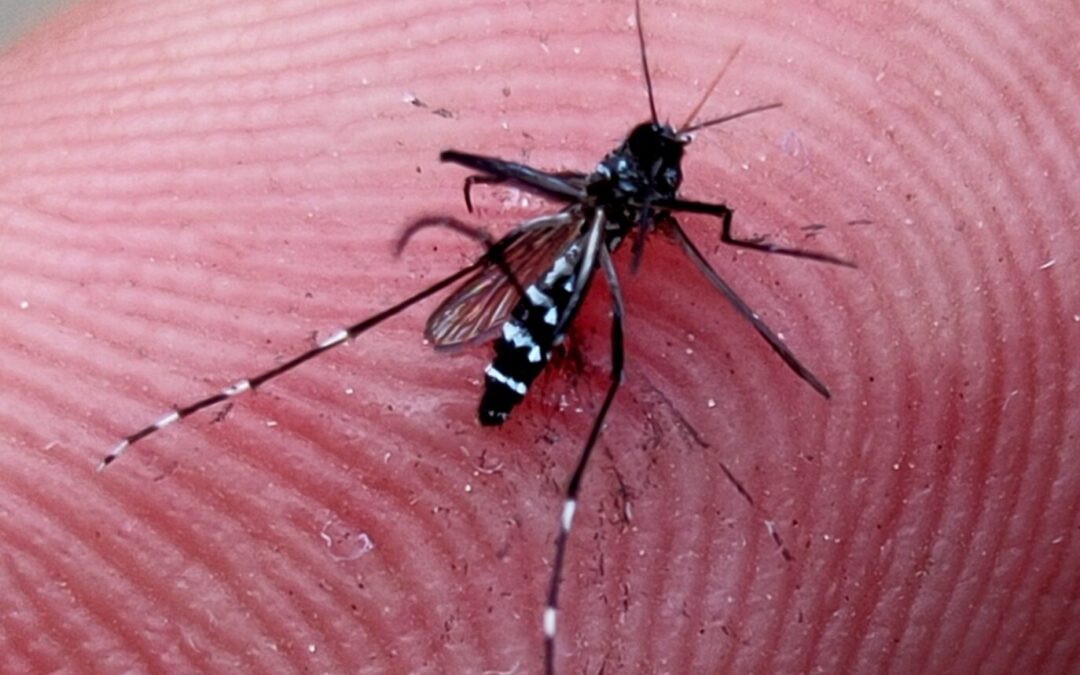
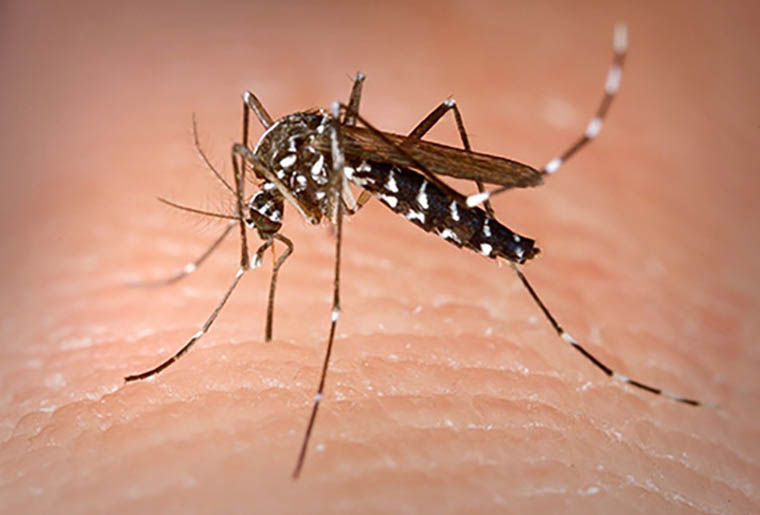
Yellow fever mosquitoes are specifically human-focused biters that actively hunt during the daytime. They are easily recognized by the distinct white, violin-shaped markings on their back and striped bands on their legs. They are the primary transmitters of critical mosquito-borne diseases, such as Zika, dengue fever and yellow fever. These diseases have not been found in the greater Albuquerque area and City-County prevention is underway to keep it that way. To learn more about the yellow fever mosquito, check out this useful flyer.

Yellow Fever Mosquito

Local mosquito control is conducted as a combined city-county effort. Mosquitoes are controlled at all life stages through a variety of methods, following the principles of integrated pest management. The goal is effective and efficient control designed to minimize the amount of pesticide released in the environment and to prevent pesticide resistance. Protecting public health and ensuring that outdoor activities can be enjoyed safely and comfortably is the City-County partnerships underlying mission.

Albuquerque and Bernalillo County residents can report mosquito issues by calling 311.

Residents who don't wish to have their property sprayed can register on the No-Spray List by calling 311.

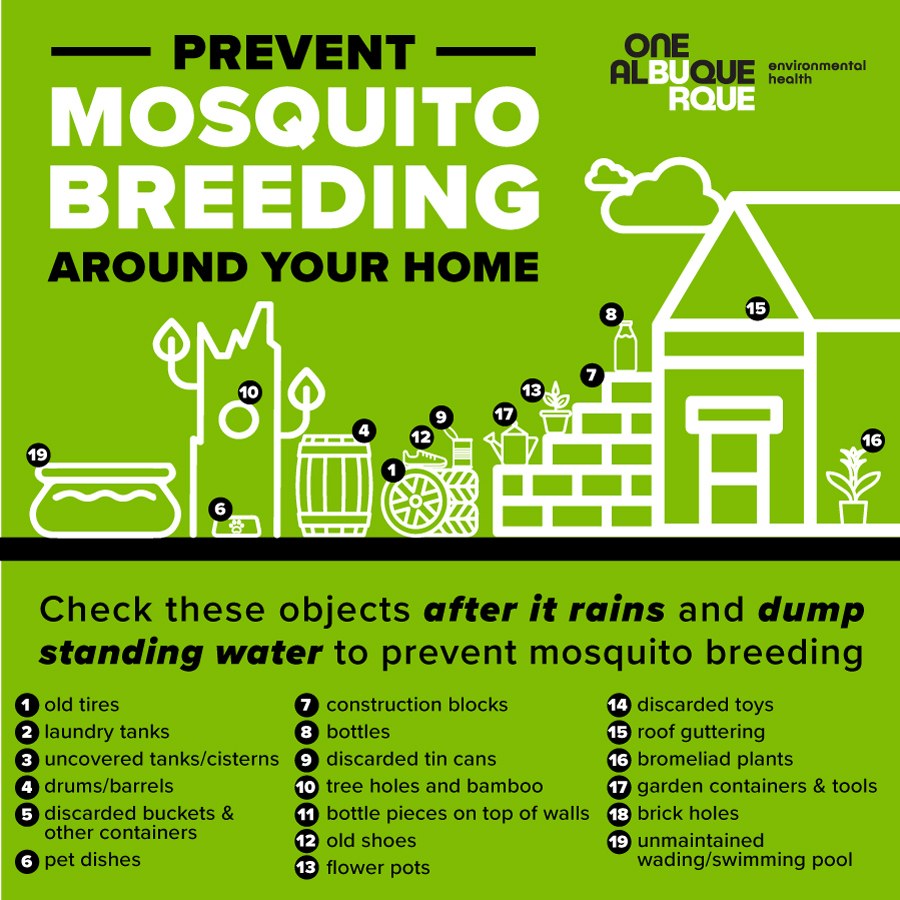
The most important things you can do are reducing mosquito breeding habitat and preventing mosquito bites as per City of Albuquerque Environmental Health Department.


What you can do

Prevent mosquito breeding on your property

  • Dump standing water found in trays beneath potted plants; used tires; trash, discarded buckets and other containers; children’s toys; and other places.
  • Store containers that could hold water upside down.
  • Keep your property uncluttered ­— mosquitoes can breed in the smallest pools of water even as small as a bottle cap.
  • Clean pet water dishes regularly by emptying, scrubbing and replacing the water.
  • Replace bird bath water regularly.
  • Cover rain barrels with a fine mesh and treat with mosquito dunks. Mosquito dunks contain bacteria called Bacillus thuringiensis israelensis (Bti). Bti is a naturally occurring bacterium found in soils. It contains spores that produce toxins that specifically target the larvae of the mosquito. Bti has no toxicity to people and is approved for pest control in organic farming operations. It has been well tested and based on the studies EPA has concluded that Bti does not pose a risk to humans. The Bti mosquito dunks are sold at hardware, home improvement, and feed supply stores. They can be placed in standing water, and the bacteria will kill mosquito larvae.
  • Treat pools with chlorine. If not in use, keep empty or treat with mosquito dunks
  • Reduce moist collection areas in your grass lawn as mosquitos like to bread in these small moist spaces. Aim to space your sprinkler watering out so the wet areas dry up between irrigation days.
  • Add mosquitofish, Gambusia affinis, to ponds and small water features (available free from the City of Albuquerque by calling 311).
  • Check flat roofs for pockets of water in shaded areas and clogged rain gutters.


Prevent mosquitoes from entering your home

  • Keep door and window screens in good condition.
  • Check window screens and doors for holes and repair any holes with sticky screen tape.


Protect yourself when outdoors


Report standing water and high adult populations to 311


Other home strategies

  • Set out mosquito traps to reduce the number of mosquitoes in your yard or home. BG-sentinel traps use dry ice (which can be bought at a grocery store) and/or a scent bait to attract mosquitoes and are very effective. The City uses BG-Sentinel traps when conducting mosquito surveillance. Ovitraps can be used to attract females that are ready to lay their eggs. It is important to maintain ovitraps by adding a mosquito dunk or they will become breeding habitat.
  • Repel mosquitoes with smell: Mosquitoes rely heavily on their sense of smell to locate their next meal. They are attracted to certain odors, such as carbon dioxide from our breath and lactic acid from our skin. Mosquitoes hate strong, pungent and herbaceous scents that mask the carbon dioxide and lactic acid humans emit. These can be distributed as sprays, diffused as essential oils or the plants can be crushed and rubbed onto your skin for a natural repellent. The smells they don’t like include:
    • Lemon eucalyptus: Approved by CDC and World Health Organization, it is recognized as one of the most effective natural deterrents. It contains PMD(p-menthane-3,8-diol) which is extracted from the leaves of a lemon eucalyptus tree. This scent is known to block mosquitoes from detecting you.
    • Citronella: The classic lemon-grass scent disrupts a mosquito's ability to find hosts.
    • Peppermint and menthol: The intense smell of mint can overpower their sensory receptors.
    • Lavender: Contains compounds like linalool that deter pests.
    • Citrus: Citrus smells, such as those from lemons, oranges and grapefruits, are highly effective at repelling mosquitoes. You could place citrus peels in strategic locations to deter mosquitoes from coming too close.
    • Rosemary: Rosemary is another herb that mosquitoes dislike. Plant rosemary bushes near outdoor seating areas then crush the leaves to release the smells and oils.
    • Basil: Crush fresh basil leaves to release their scent.
    • Garlic: Create a garlic spray by mixing crushed garlic cloves with water.
    • Lemon balm: Rub crushed lemon balm leaves on your skin for added protection.
    • Catnip: Catnip contains a compound called nepetalactone, which is highly effective at repelling mosquitoes. Plant catnip in pots or in your garden or crush the leaves and rub them on your skin for a natural repellent.
  • Create DIY sprays: One of the easiest ways to use essential oils for mosquito control is by creating a DIY spray.
    • Combine:
    • 2 ounces of distilled water
    • 1.5 ounces of witch hazel
    • 30-40 drops of essential oils (Mix and match based on your preferences; effective options include citronella, lavender, peppermint, eucalyptus, lemongrass and tea tree.)
    • Repel mosquitos with smoke: Incense sticks and smudge sticks have been used around town by local restaurants and in yards with some success.
    • Repel mosquitos with a fan. The breeze of an outdoor fan can make it harder to trace the scents and harder for them to fly near the fan.
    • Schedule a yard audit: According to a recent KRQE interview with City of Albuquerque Urban Biology Division Manager Nick Pederson, the city can help residents reduce mosquitoes on private property by performing an inspection. “We like to offer what we call a yard audit or a yard inspection where we’ll come out and actually look at a person’s yard with them and see if we can identify possible sources of mosquito issues,” Pederson said, explaining that these inspections can be requested by contacting 311.


    Resources and Photography for this article:


    https://www.krqe.com/news/community/dealing-with-mosquitoes-the-city-of-albuquerque-will-give-you-free-fish-to-help/

    https://kentuckypest.com/blog/smells-mosquitoes-hate

    https://www.cabq.gov/environmentalhealth/urban-biology/mosquitoes/what-you-can-do

    https://www.cabq.gov/environmentalhealth/urban-biology/pest-management/integrated-pest-management

    https://www.bernco.gov/planning/consumer-health-protection/mosquito-control/

    https://www.epa.gov/mosquitocontrol/bti-mosquito-control##1


    Learn More Here:


    How to DIY a Mosquito bucket trap

    Yellow Mosquito Flyer

    City Of Albuquerque Mosquito Tips


    Have a question about the article or anything else? [email protected]
    Set up a hose irrigation system for great benefits at a reduced cost

    Set up a hose irrigation system for great benefits at a reduced cost

    Set up a hose irrigation system for great benefits at a reduced cost

    The most efficient way to water your yard is by using an automatic irrigation system with underground valves. Hand watering can be problematic because it can lead to inconsistent watering, causing you to overwater, underwater or forget to water altogether.

    However, these systems can be expensive to install, with costs sometimes ranging from $800 to $2,000, depending on the number of valves. If you are ready to install a more efficient irrigation system but aren’t ready for the cost of an inground system, consider starting with a hose timer system that can be easily converted to an inground system later on.

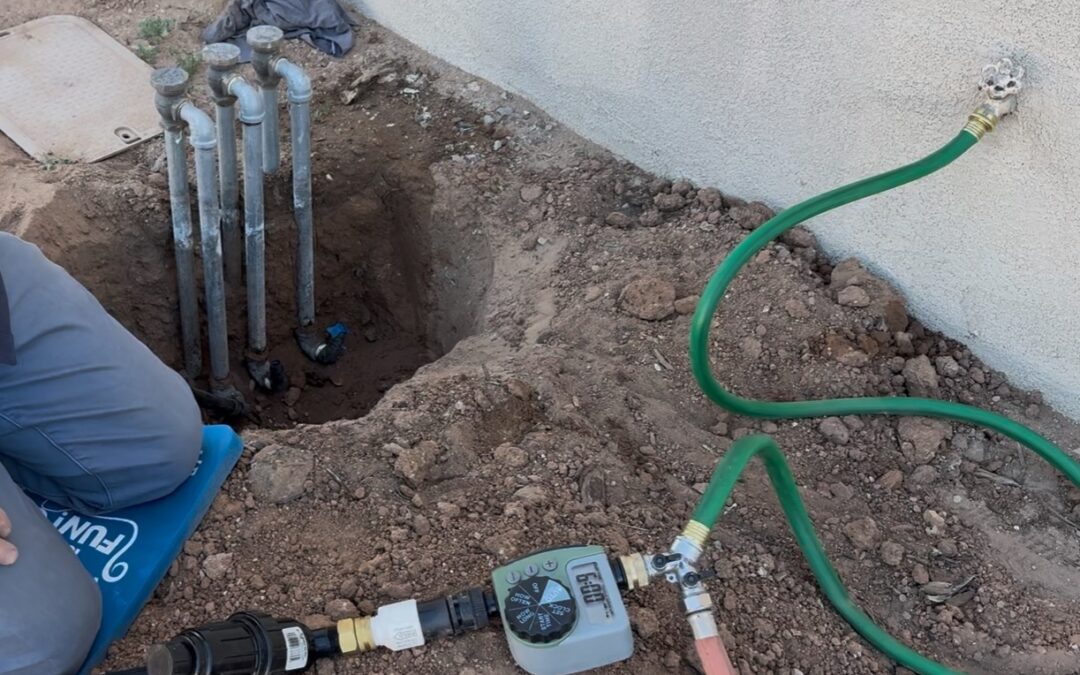
    A hose timer system is an inexpensive way to get your plants on automatic irrigation, allowing you to water your yard on a specific day of the week, time of the day and for a set number of minutes. You can put it together yourself for under $100.

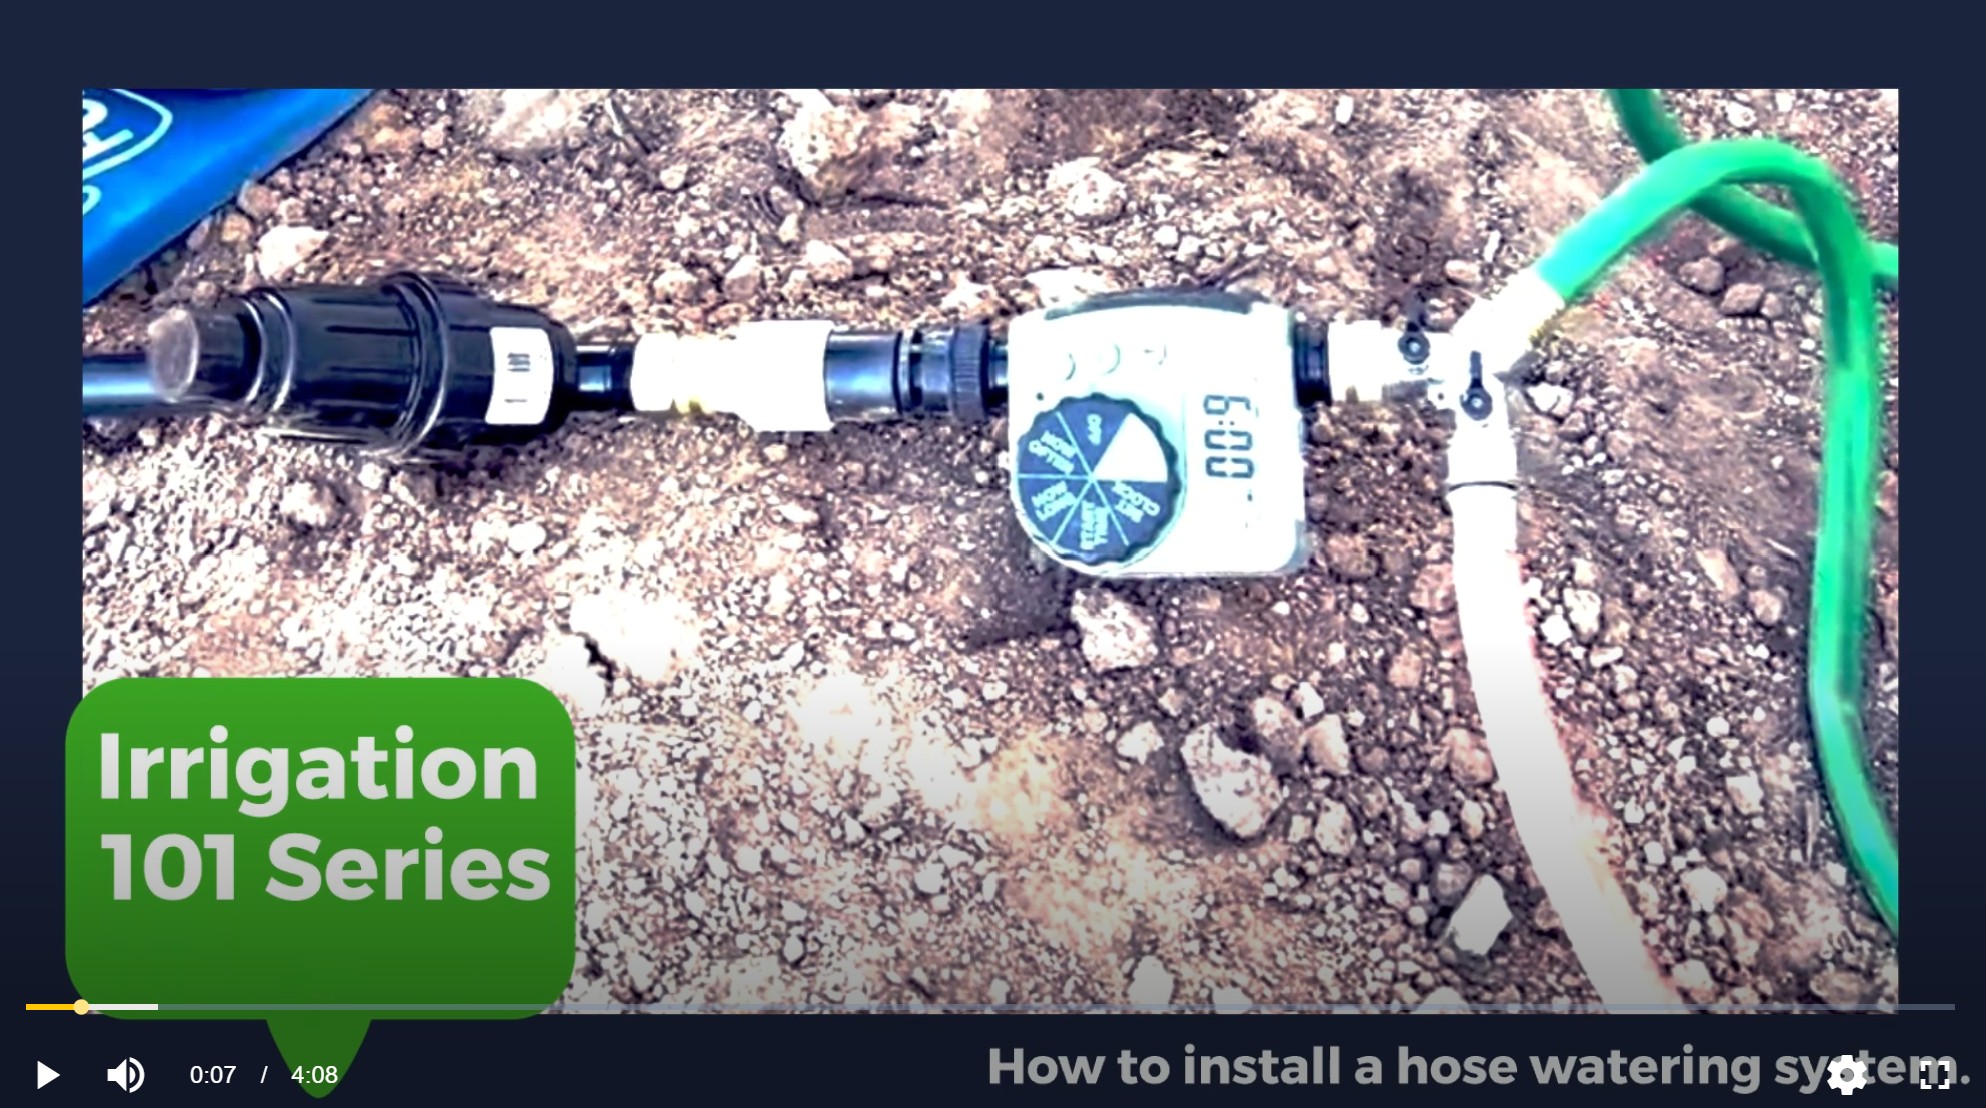
    The hose timer attaches to high-quality irrigation ¾” Polyline with drip emitters or professional landscape dripline. The dripline can stay in the ground year-round and be later connected to future valves of an automatic in-ground irrigation system.

    There are a variety of products you can use, including smart controllers, easy twist-and-turn controllers, multi-valve controllers, and more. We offer a rebate on ones that adjust to our weather and your plants’ water needs (referred to as ‘smart controllers’).

    Check out our how-to installation video to learn how to get started.

    Learn more by checking out these other useful irrigation articles:

    Yes, You Can Afford an Irrigation System

    Best Practices for Watering Your Plants With a Hose or Drip System.

    Use Drip Irrigation for Your Trees and Shrubs

    How to Build a Hose Irrigation System for Trees

    Author: Have a question about the article or anything else? [email protected]