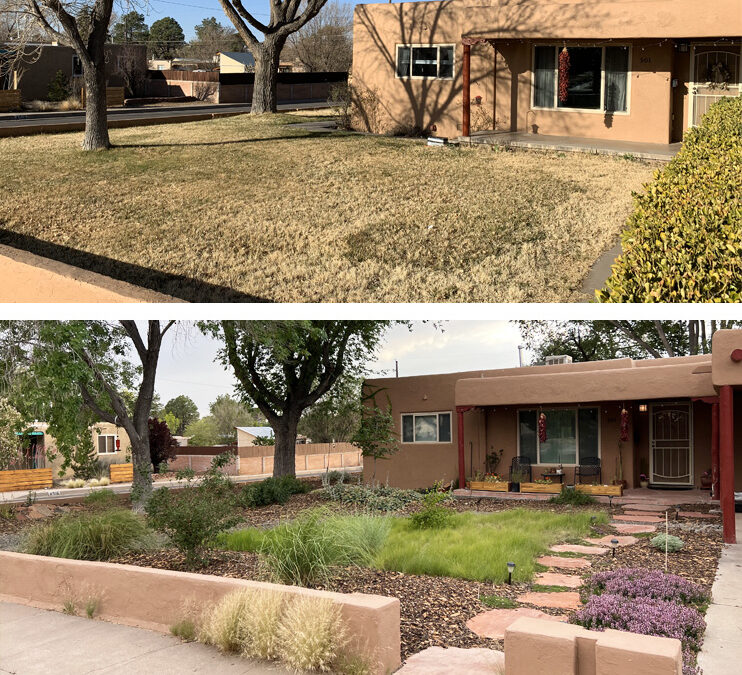
You undoubtedly have seen your neighbors and friends around town removing their grass lawns and replacing them with water efficient desert friendly xeriscapes. You may yourself be interested in doing the same with your yard but perhaps are overwhelmed by the tasks or concerned about how much it would cost. Don’t fret, it’s much simpler than you think. We’re walking you through the six steps to transform your lawn into a beautiful desert friendly xeriscape.
STEP 1
COME UP WITH A DESIGN, then apply for the $3-a-square-foot rebate.
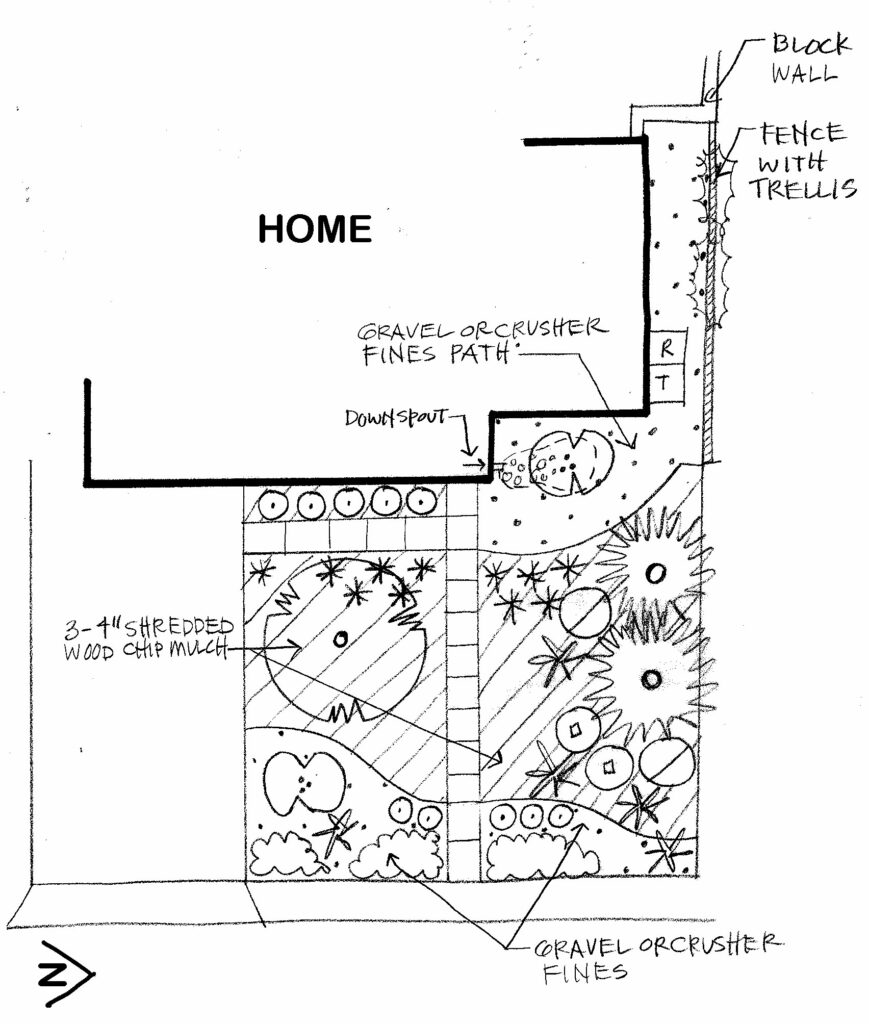
No need to get overwhelmed by this step. You know your yard best, so observe and understand how you want to use your space. Brainstorm elements you want to include. Take into account existing plants and trees, views you want to preserve or hide, shady or very sunny spots, and downspouts/canales or other places where water collects.
Dig Deeper with these design articles:
Simple Steps to Get Started Designing Your Yard
Desert Friendly Design Templates
Favorite Mediterranean Plants for the Albuquerque Area
Apply for the rebate.
STEP 2
DEMOLITION, GRADING AND DRAINAGE
Once you have your design, use spray paint or old hoses to lay it out on the ground. Walk around the space and make changes as needed.
Before demolition and removal of the lawn, call 811 to mark underground utilities. Also note existing tree roots that you need to protect during your work.
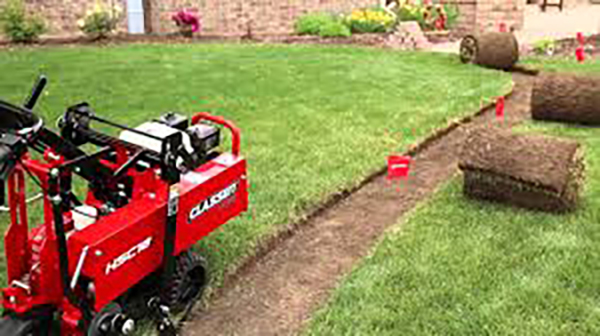
Lawn removal techniques: A sod cutter works best for most lawns unless there are large roots or the grass is Bermuda. Hand dig grass out around large roots so as not to cut any that are more than 2” thick. Use an herbicide to kill Bermuda due to its invasive and prolific roots. Along sidewalks you’ll want to dig down 4” by 12” wide to make room for 3” of mulch and slope the soil back up to the surrounding grade gently. Avoid using a skid steer to remove the grass, this can unnecessarily remove useful existing topsoil.
Drainage Considerations: Always grade water away from your house, masonry walls or walking paths and towards planting areas.
Dig Deeper with these articles:
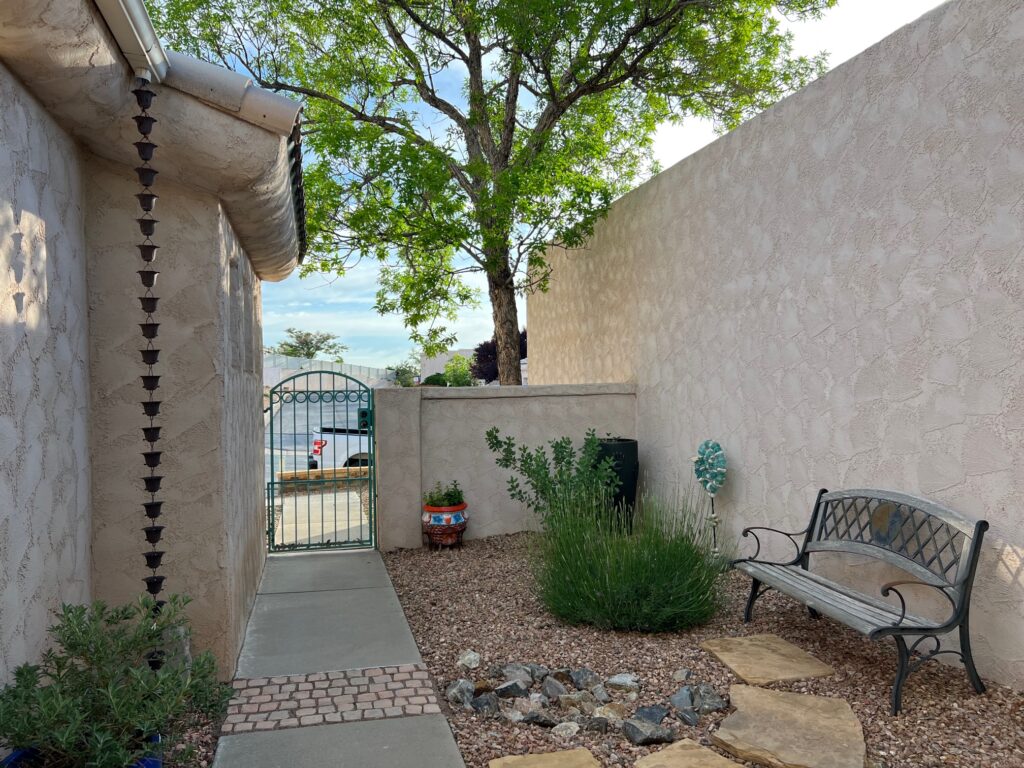
Passive Rainwater Harvesting for Homeowners
Plants for Passive Rainwater Harvesting Gardens
Residential Rainwater Harvesting Information
STEP 3
HARDSCAPE

Install any hardscape elements such as walls, pergolas, sidewalks, pavers and boulders.
STEP 4
IRRIGATION
You’ll use a drip system to irrigate your new beautiful desert friendly xeriscape. Check that your existing spray valves are in good working condition. If so, you can reuse these valves. Simply have a licensed irrigator or plumber add a pressure reducer after the valve, then you can add your ½” drip polyline.
Irrigation Components: If your existing valves are damaged or non-functional you’ll need to install new ones. Typically, an irrigation specialist or licensed plumber would install your new manual shut-off valve, automatic valves, box, backflow preventers and pressure reducers. But if you want to do it yourself, do your research and reach out to local landscape irrigation suppliers for advice.
Drip Tubing: The drip tubing is everything downstream of the pressure reducers, and it’s relatively easy for homeowners to install. Uncoil the ½” or ¾” poly tubing in the sun until it’s flexible enough to manage (making sure there are no kinks in the process). Then, dig shallow 6” trenches, lay out the ½” poly in the trench, staking it with 6” weed fabric staples along the way, and snake the poly within a few feet of the plant locations. Wait until the plants are installed to cover the poly unless you have long lengths of it without plants.
Dig Deeper with these articles:
Use Drip Irrigation for your Trees and Shrubs
How to Convert your Existing Spray System to Drip
Drip Irrigation Maintenance Checklist
STEP 5
PLANTING
Install the plants (link to article). Water your new plants with a hose right after they’re installed. You might need to create temporary basins around each plant to keep the water from running off.
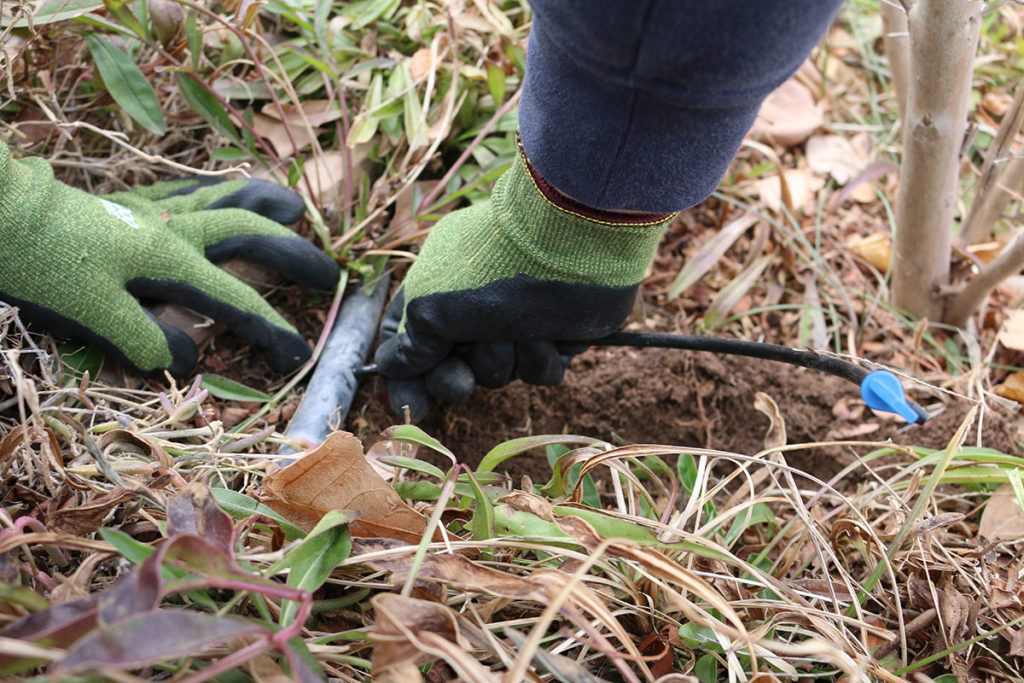
At this point, you’ll want to set up the permanent irrigation. Use your drip tubing punch tool to create a hole for the ¼” coupler and ¼” tubing. Always punch the hole in the side of the ½” poly, not the top, so a footstep doesn’t damage the connection. Carve a small trench in the dirt and run the ¼” tubing to the base of the plant and attach the emitter (use a weed fabric staple to hold it in place if necessary). Avoid running ¼” tubing farther than 3 feet in order to keep things orderly. After the ¼” tubing is installed, cover it with dirt to protect it and keep it from being tripped over.
Dig Deeper with these articles:
STEP 6
INSTALLING MULCH
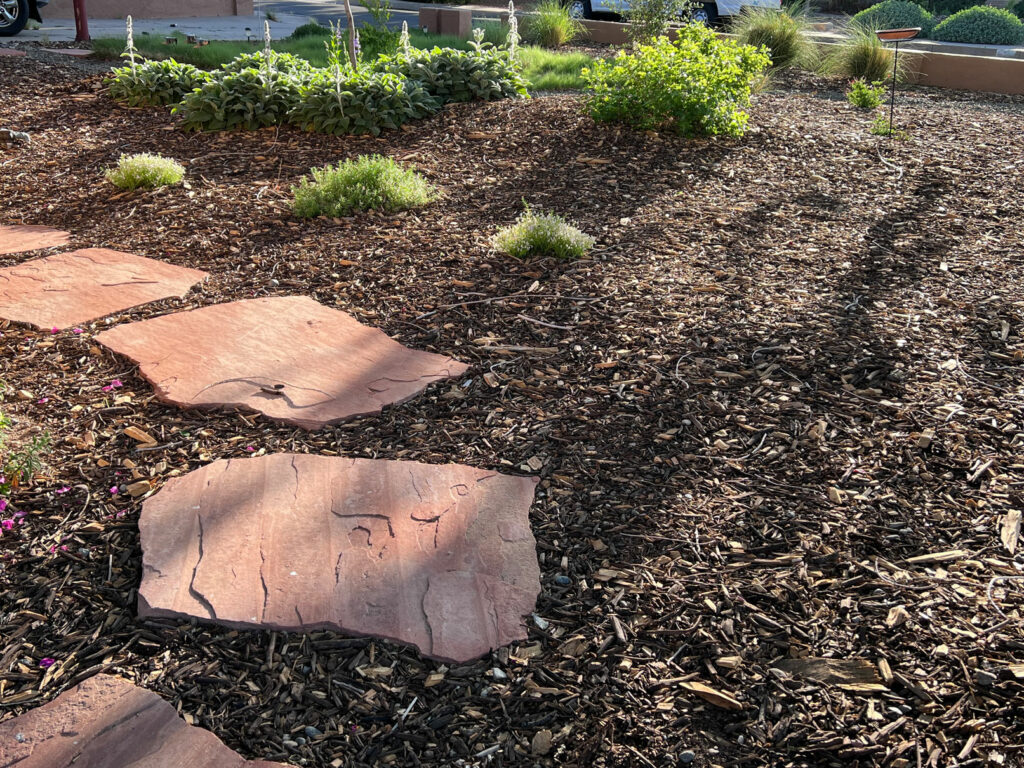
If you’re using gravel, the complexity and layout of your yard will determine whether you install weed barrier fabric before or after planting, but you do want the drip tubing under the weed fabric. For shredded wood chip mulch, lay the irrigation line down over the bare dirt then top with 3-4” of wood mulch.
If the mulch has been delivered in the street or on a concrete driveway, use a square shovel to scoop it up. From there, just load each wheelbarrow full and dump it throughout the yard. Spread it out with a rake and you’re done!
Dig Deeper with these articles:
Xeriscape Conversions that use Wood Chip Mulch
4 Common Myths about Organic Mulch
