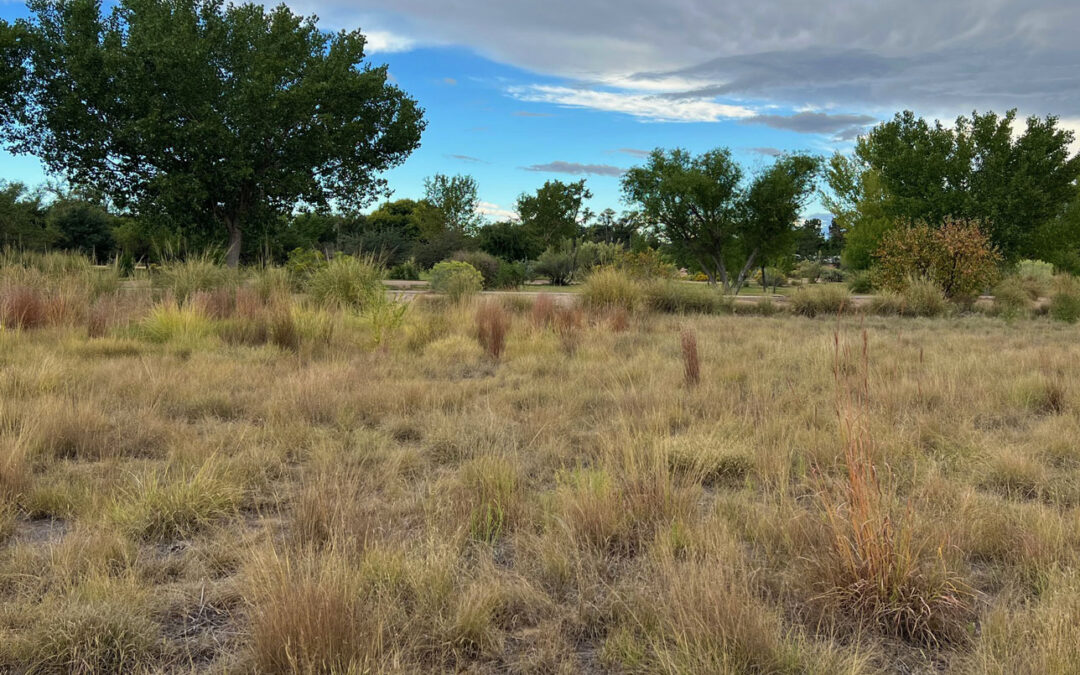
In the heart of Albuquerque, the Rio Grande Bosque includes 4,300 acres of protected cottonwood gallery forest. It’s a great natural space to find inspiration for your own landscape. The bosque is just one of many beautiful open space areas in the greater Albuquerque area that provide recreation, conservation, education, heritage and design inspiration. The plants you see in these natural areas are likely to do well in yards in that same part of town. Plants that are growing near each other will make good combinations in yards as well.
Today, we are highlighting a couple of beautiful natural areas to visit along the Rio Grande, all offering educational opportunities and recreational trails.
Paseo del Bosque Trail
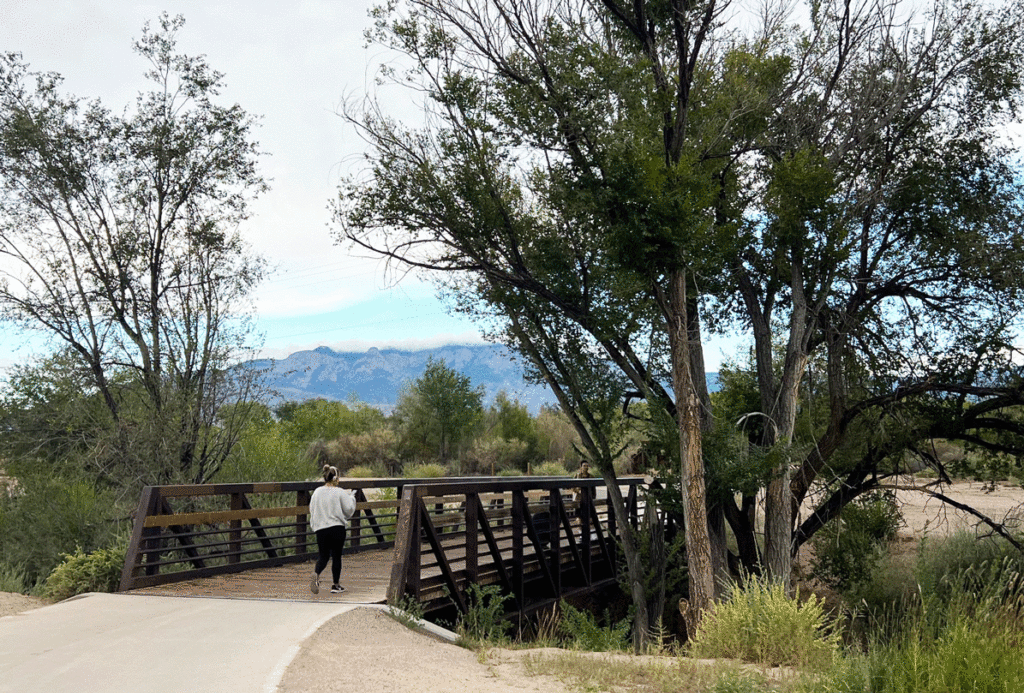
This 16-mile long uninterrupted trail connects Albuquerque’s North and South valleys, starting at Alameda NW next to the Bachechi Open Space. Heading south, the paved trail passes the Rio Grande Nature Center State Park and the Albuquerque BioPark near Central Avenue before ending south of the National Hispanic Cultural Center. Because this is a multiuse trail, you are likely to encounter more than bicyclists, walkers and runners. The trail also is used by people with wheelchairs, in-line skaters, equestrians, families with strollers and others. The City Parks and Recreation Department reminds users to remember that “courtesy and caution are a part of having an enjoyable and safe experience on Open Space trails.”
Paseo del Bosque multi-use trail
Bachechi Open Space
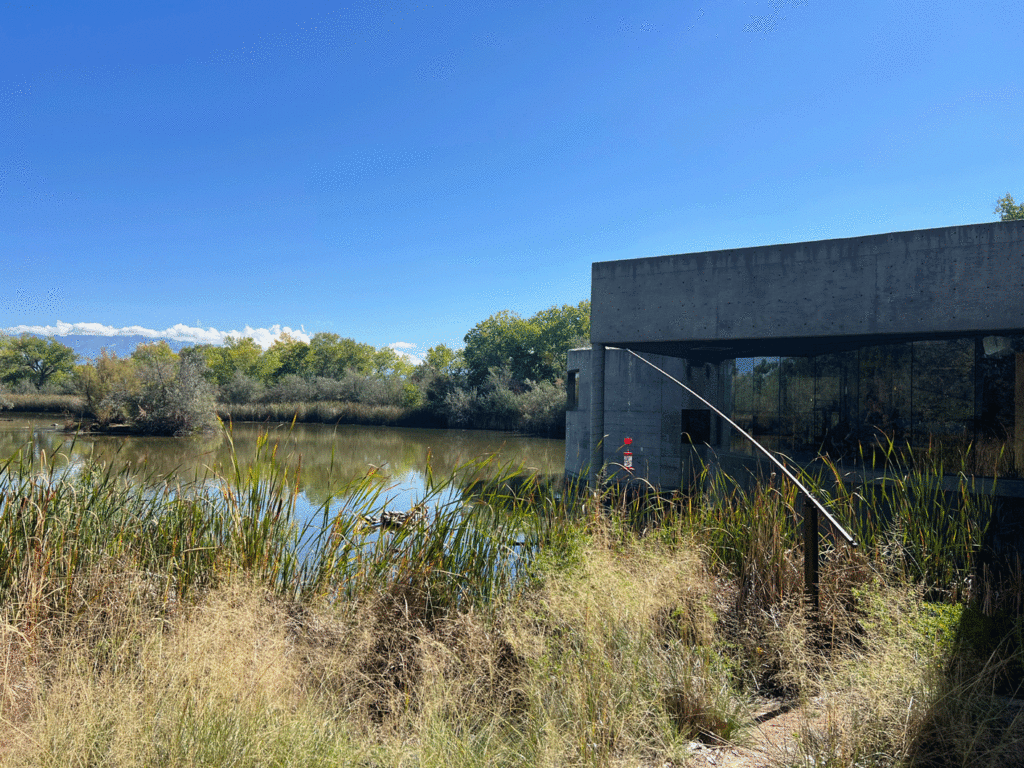
Brought to you by Bernalillo County and located along the Paseo del Bosque Trail south of Alameda NW, Bachechi is a 28-acre open space area with an Environmental Education Building that includes an indoor interpretive area and an outdoor classroom. Here, kids can grab Nature Packs, kid-sized backpacks filled with guides, hands-on supplies and activity sheets to teach kids how to explore the open space area. There are a variety of interpretive trails through native landscaping and migratory waterfowl habitat, which includes blinds for viewing the birds and other wildlife. An arboretum on the northern 8 acres of the property shows off many specimens of trees.
Environmental Education Building at Bachechi Open Space
Rio Grande Nature Center State Park
A New Mexico state park located in the middle of the city, the nature center focuses on bird watching with many wildlife viewing areas overlooking native gardens and ponds. The park also offers many trails, including loop hiking and interpretive trails plus access to the Paseo del Bosque multiuse trail.
Rio Grande Nature Center State Park
Open Space Visitor Center
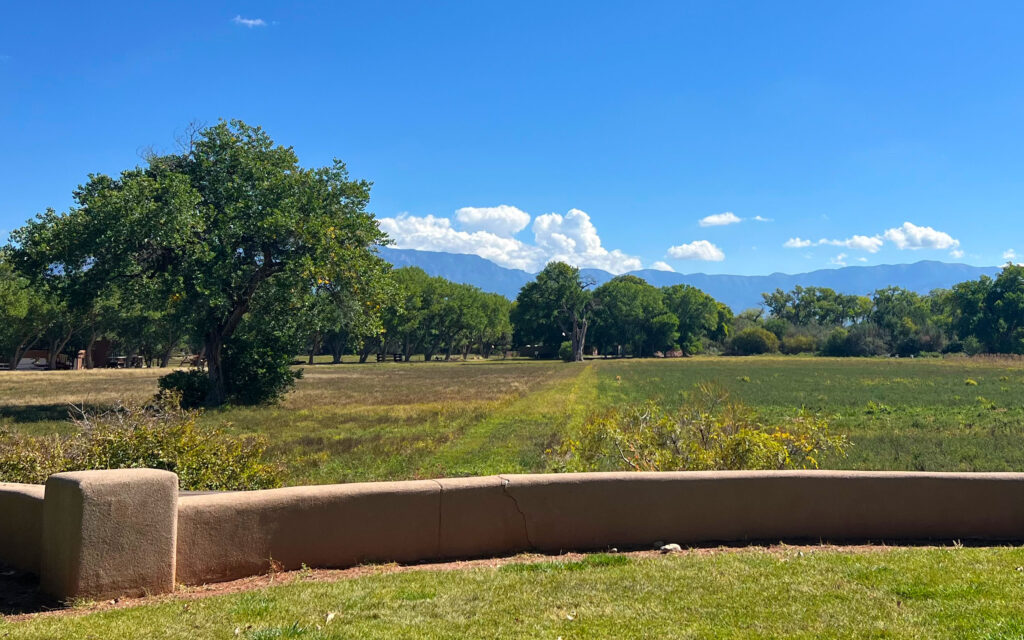
The City of Albuquerque visitor center has exhibits interpreting the natural and cultural resources the Open Space Division protects. Rotating exhibits feature local artists highlighting New Mexico landscapes. Spacious indoor and outdoor bird viewing areas allow visitors to watch sandhill cranes, Canada geese and other migratory birds during the fall and winter.
A short walk leads to an agricultural demonstration garden that shows off different farming methods and the foods that were collected and cultivated in New Mexico. A longer walk goes to the LAND/ART exhibition pieces in place since 2009.
Open Space Visitor Center Bird Viewing Across the Farm Fields.
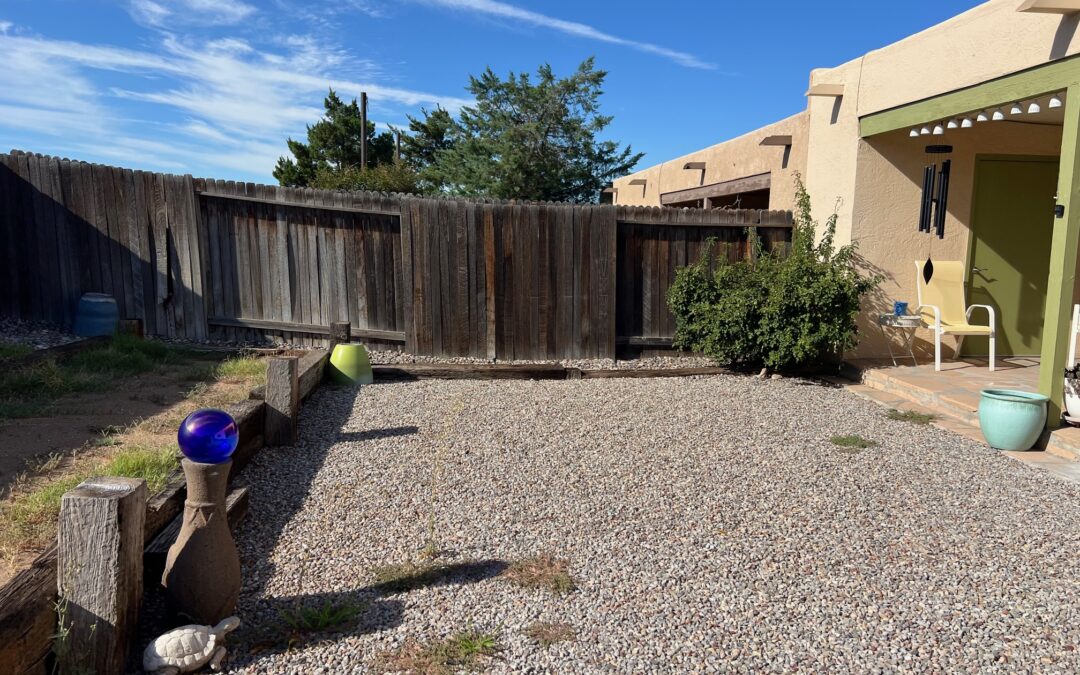
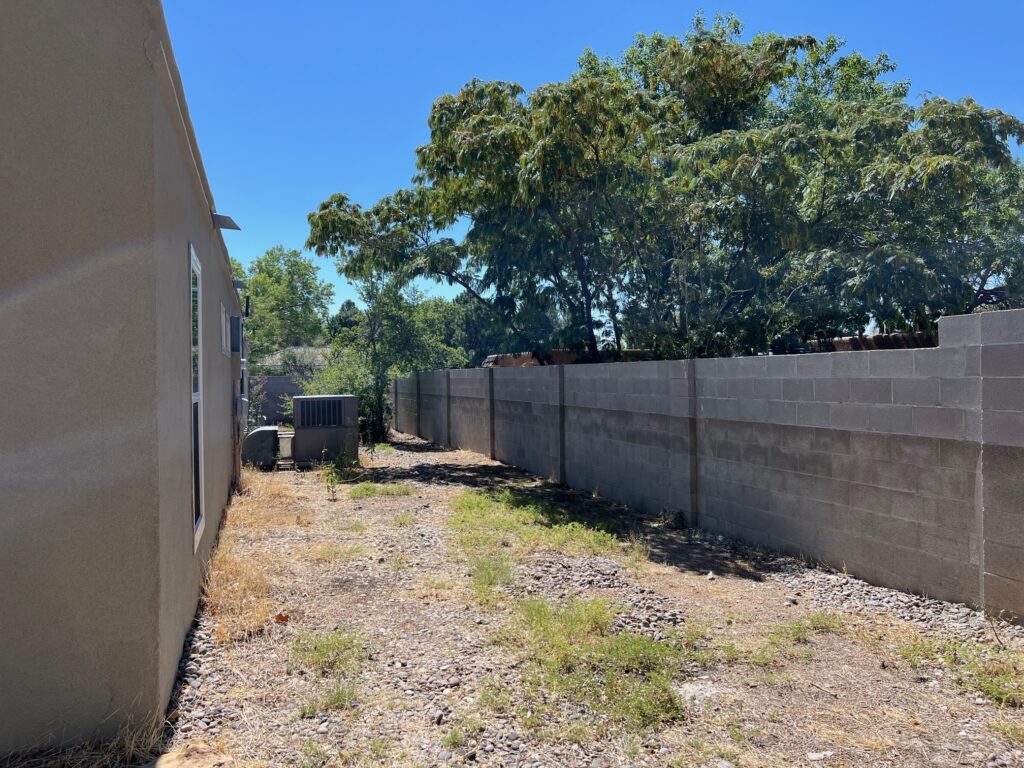
Maybe you recently moved into a house that has never been updated — think avocado tile in the bathroom and shag carpet in the sunken living room. You look outside and the theme continues — a sea of gravel and railroad ties. As with interiors, home exterior fashions and landscaping styles change over time. We once thought of gravel as low maintenance and tidy, but now are finding out isn’t the best choice as far as sustainability and community health. Thankfully, through the efforts of local designers, tree experts and Water Authority resources, there is a sea change in understanding the problems that gravel, weed fabric and plastic sheeting can cause in our neighborhoods.
Gravel soaks up heat and radiates it back into the neighborhood, warming up the city. We’ve also found out that gravel and weed fabric don’t discourage weeds, instead their seeds and dust settle on top, sprouting in no time. This leaves few options other than using herbicides, because pulling them can be difficult once they’re rooted in the weed fabric, and using a hoe is difficult in gravel larger than crusher fines. Additionally, tree and plant roots need two things: water and oxygen, neither of which permeate through old weed fabric clogged with silt. Wanting to install some flowering xeric plants near your new front door? That’s going to be a challenge — moving the rock out of the way, cutting the weed fabric and finding a way to install drip irrigation under the existing weed fabric and rock. Perhaps you’d like to invite pollinators to your new yard? Well, our native (and solitary) ground nesting bees won’t find a home in your yard because they can’t burrow through the weed fabric or rock to nest in the soil.
But all hope is not lost. Whether you’re aiming to remove all the gravel, just take out some around existing trees to improve their health or make your outdoor living space cooler and be sure water is soaking though the old weed fabric (or worse, plastic), there is help.
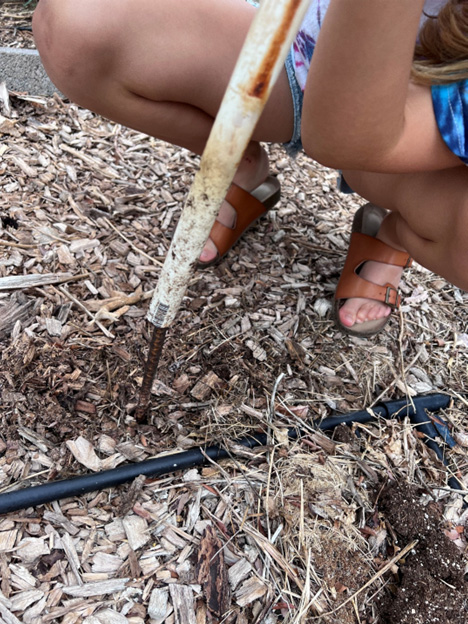
If you have a limited budget and time but want to do some good, use a piece of rebar to poke holes in the weed fabric around your existing plants. This will ensure they can use some of our precious rainfall and allow for oxygen exchange.
Have an existing tree that’s suffocating in heat absorbing rock? Time to grab the wheelbarrow and a shovel. If you’re removing small sections at a time, start with areas with the dripline of the tree. Here is where weed fabric is actually useful: In good condition it can make the gravel removal easier. Lift up the fabric carefully, using it to form the rock into piles that can be scooped up more easily. A square end shovel can be useful here because it’s less likely to rip the fabric underneath as you work. If you need to remove large rock like cobble, I recommend sitting on a protective pad and doing it by hand. Have a 5-gallon bucket or wheelbarrow right next to you to put it in. Some homeowners construct a basic wooden frame out of two-by-fours and wire mesh to make a screen to separate the gravel from dirt. Size it to fit over your wheelbarrow so you can transport the dirt more easily.
Albuquerque’s three convenience centers accept about two wheelbarrows full of rock (or dirt and concrete). Be sure not to take too much because you may be turned away. For larger amounts, you can try the Sandoval County Landfill in Rio Rancho or Southwest Landfill on Albuquerque’s southwest mesa; be sure to call first to confirm they will accept it. Alternatively, many homeowners are looking for gravel for erosion control under downspouts so try placing a FREE add on Craigslist, Facebook Marketplace or Nextdoor. It will most likely get picked up in no time.
Now if your whole yard is full of gravel, you’ll probably need to call in someone who is better equipped, someone with a skid steer (Bobcat). Front yards are easier, but backyards can usually be done with a smaller machine if access is limited.
The obvious question to follow is, what’s next? We recommend wood chips spread to a depth of 4 inches. This mulch (without weed fabric) helps improve the soil over time and allows the tree and plant roots to breath. It also cools the environment a few degrees compared to rock. Several suppliers in the Albuquerque area sell mulch, and they all deliver. They’ll be happy to tell you how much you need if you know the dimensions. Additionally, several places offer free or discounted mulch. Call up large tree removal companies and see if they have any or head to the East Mountain Transfer Station in Tijeras and pick up a cubic yard for $5. There is also a great website called ChipDrop that connects tree service companies with homeowners who want mulch — you may have to wait a while for the stars to align but it’s totally free.
If you’d like to speak with our experts for more tips on removing gravel and having a healthy desert-friendly yard, reach out to us at AskanExpert@abcwua.org
As in most fields, change is slow. Older ways of thinking permeate the landscape industry, but some steps in the right direction (like wood chips instead of gravel) can make a difference over time.
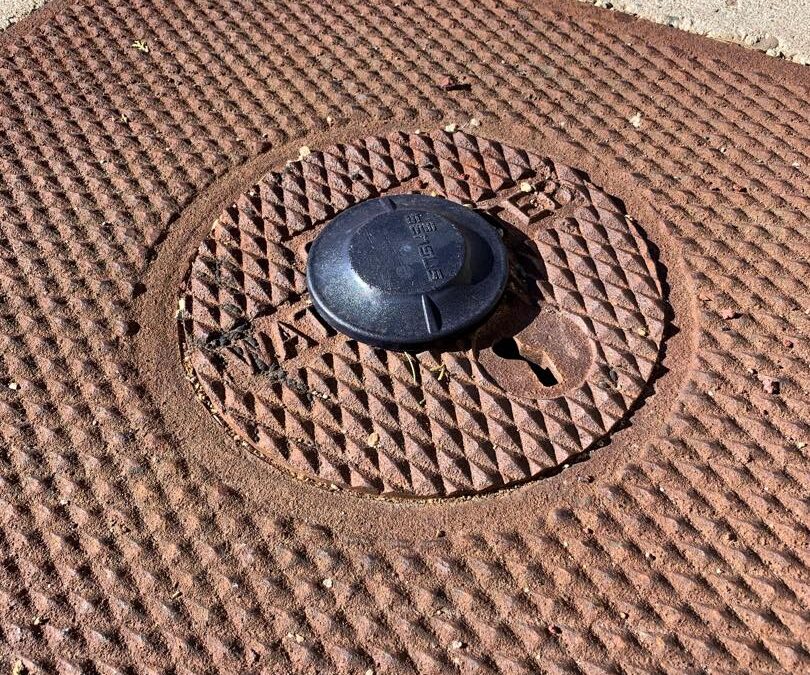
If you have a meter equipped with AMI (Advanced Metering Infrastructure) as shown in the photo above, you can log into your Water Authority account and see your hour-by-hour usage. This may help you locate any issues in your house or yard, such as a continuous water leak in toilets or irrigation systems. It can help you understand how much water you use throughout your day and serve as a guide to better decision-making in how you use your water. If you don’t have an AMI meter installed yet, it will produce an average use graph for your home.
Start by going to www.abcwua.org. Click on “My Account” in the top menu bar (shown below with a red arrow) to create an account if you haven’t done so already. You’ll need your billing information. Once you’ve created an account, you can view and pay your bills, as well as see your daily water usage.
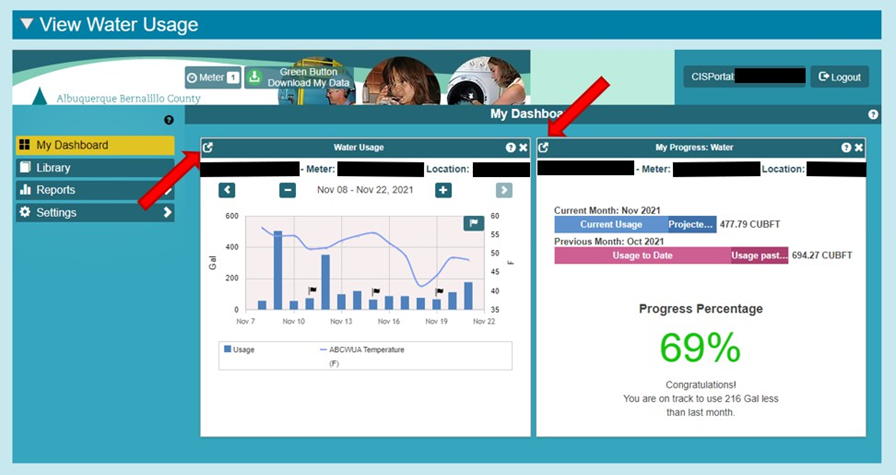
Here is an example of the account page. We are going to focus on the “View Water Usage” section. It can take a few moments to add the dashboard information.
Initially, you will have two screens in your dashboard: “Water Usage” and “My Progress.” You can expand each one by clicking on the icon in the top left corner (red arrows). This will make the information easier to read and provide access to some additional features.
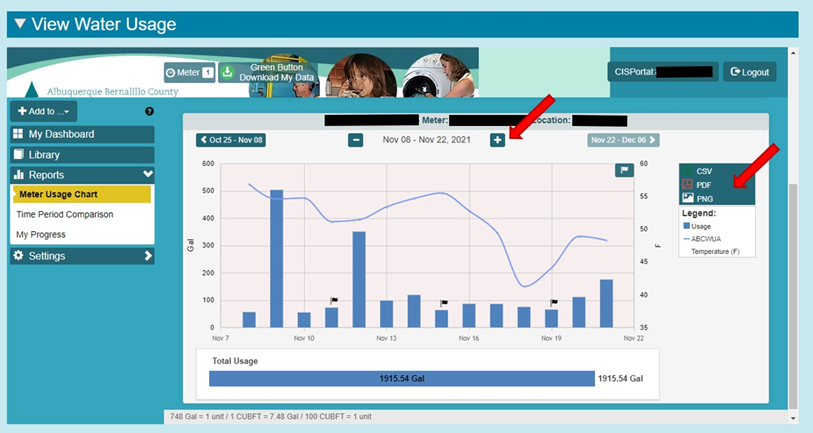
Below is a graph that provides you with a glance of your daily usage, along with the average temperature for that day. Two features highlighted in this photo are: 1) the “+” sign will change the date parameter and provide hourly usage and 2) the “PNG” feature will export your usage chart if you want to save it as a picture.
On the right-hand side, where the red arrow is, the “PDF” feature allows you to download the current month’s hourly data. An example of this is shown in the following image.
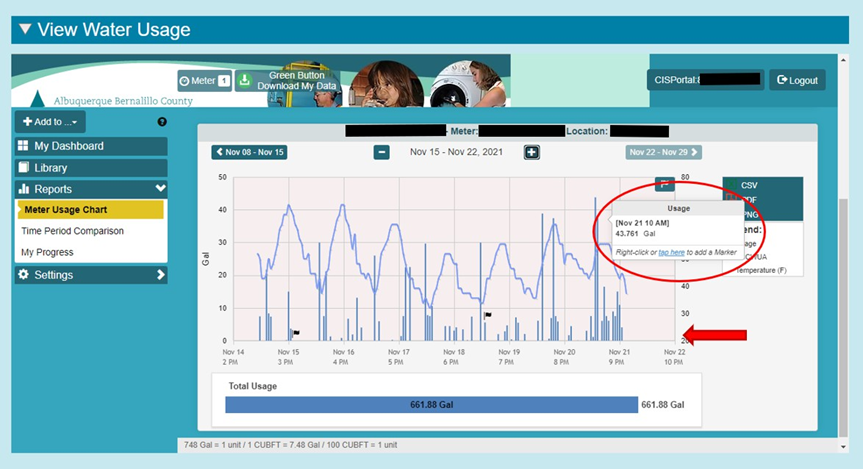
Below is an example of an hourly chart of your water usage, with the hourly temperature shown as well. Note: You can view your actual usage on each line of the graph by hovering your pointer over it. This is where you may see a possible leak if you have vertical lines (hourly usage) each hour, daily. A red arrow highlights where you would see that.
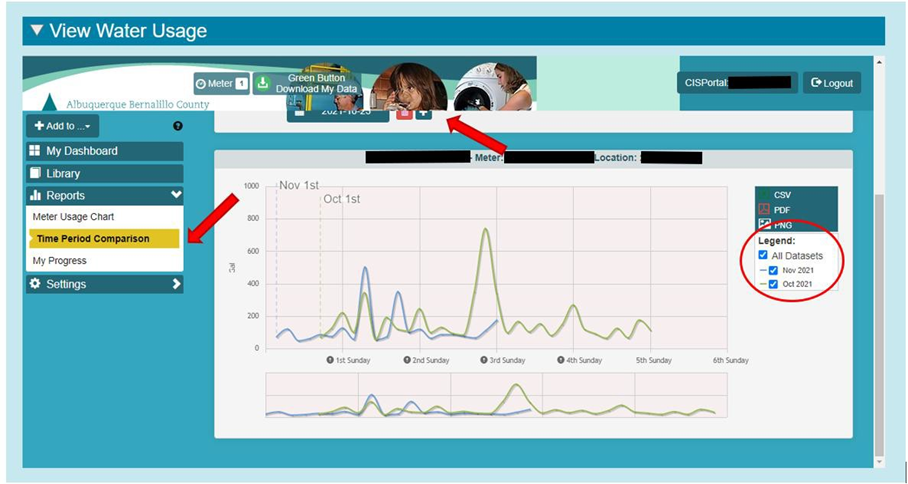
Next, we’ll look at a monthly comparison. To do this, choose “Time Period Comparison” on the left (highlighted by the red arrow). This example shows consecutive months, but you can adjust the view using the “slider” above the graph to click on the months. You can compare your usage for the same month from one year to the next. This is great if you are trying to track savings from changes in your household or irrigation.
You can add a threshold notification that will inform you when your water use passes a set amount. The threshold should start at your “normal” daily usage. So, if your normal usage in the winter is 100 gallons a day, you can add that as your threshold, and our system will notify you if you’ve gone above the threshold. This picture shows you how to add a threshold. You can add an email address or phone number to receive the notifications.
If you have more than one account that you watch over, you can go to the user profile tab and add additional account numbers to your profile.
Watch our How To Video below!
https://www.youtube.com/watch?v=EsZ1C65MQMc
Author: Amos Arber, Water Conservation Program manager. Have a question about the article on AMI reader and Home Connect? AskAnExpert@abcwua.org
Growing winter veggies is a fun and valuable effort more people should experiment with in our area. In many ways, winter gardening is a lot easier than trying to garden in the summer — there are fewer pests, cooler temperatures require less watering and common winter veggie’s seeds are super easy to germinate and then cultivate. Two things are important to ensure success: the timing of starting seeds and modifying the climate to extend the season.
If you're hoping to enjoy sweet, delicious, and healthy salads and other dishes all winter long, it's important to start your seeds by the middle to late August. Unfortunately, by then, we're usually very tired of the heat and of taking care of the plants in our yards. It’s not a time we often think about starting new seeds. However, it's important to start seeds early so the plants can reach a good size before it gets cold. This is where being able to modify the climate in your garden is important on both sides of the spectrum. When starting seeds at the end of the summer and it's still hot, having some sort of shade fabric to keep things a little bit cooler makes all the difference. Later, when it starts to get cool, being able to cover your garden bed with a row cover material, sometimes called Reemay (white polyester nonwoven fabric), modifies the climate in the other direction by making it a few degrees warmer and more protected — crucial for having productive beds of kale, Swiss chard, beets, lettuce, spinach, radishes and other yummy veggies. Most of those veggies are super easy to germinate, usually popping up within a couple of days — another reason why this kind of gardening is especially fun for beginners or people feeling frustrated with starting seeds.
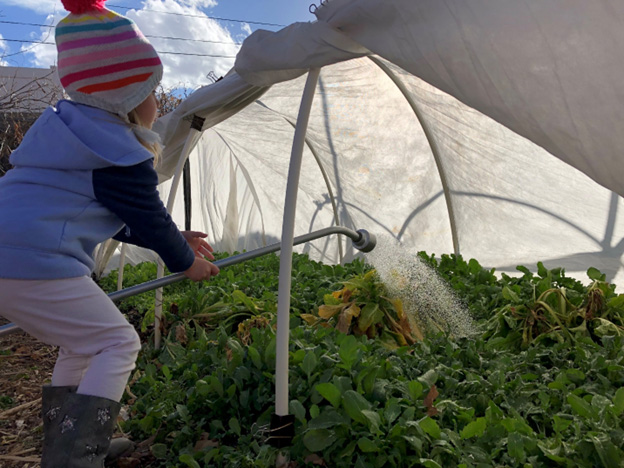
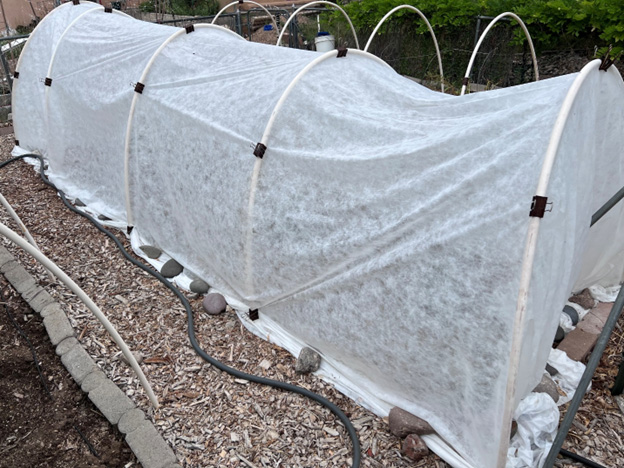
Winter Gardening with Hoops
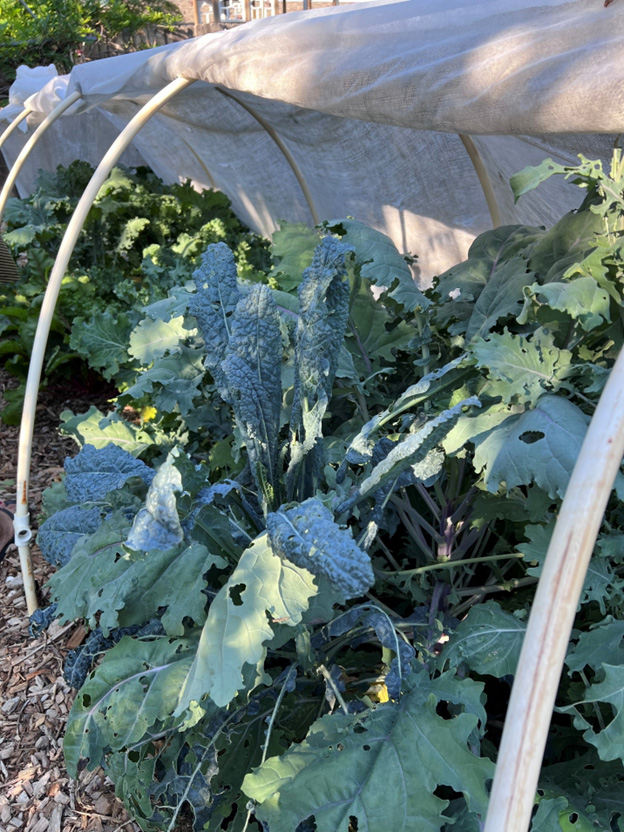
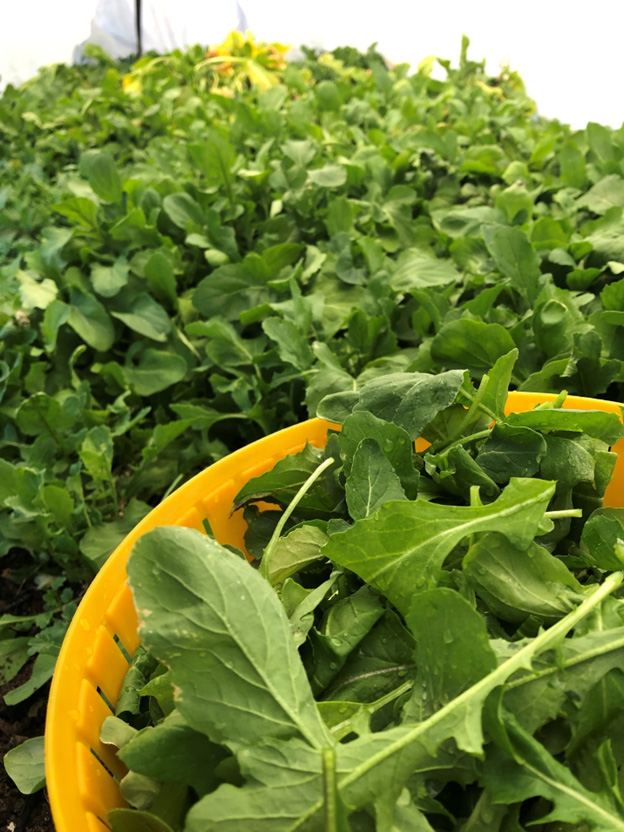
Being able to walk out to your garden and harvest a colander full of fresh kale and Swiss chard is a true delight and can save a lot of money if it's something that you purchase at the store regularly. Winter gardening is easier because the temperatures are cooler and you have to water only once about every two or three weeks, December-February. Also, the cold temperatures don't allow for many pests. Some of my favorite veggies to grow in the winter are kale — I really enjoy red Russian and Dino — beets and collard greens, all of which increase in sweetness substantially once the temperatures begin to drop.
Winter bounty of Arugala
There are substantially less pests in the fall, winter, and early spring compared to the summer. Two pests that you might encounter are aphids and cabbage worms which are relatively easy to manage. Cabbage worms can be avoided by covering your plants with the row cover material to exclude the cabbage moth from laying eggs on your tender greens.
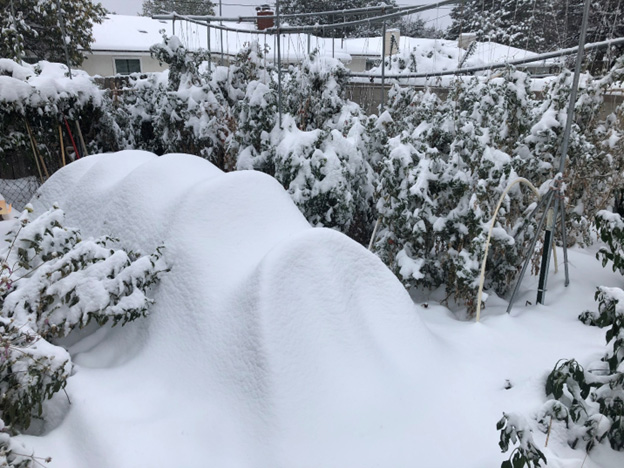
Another advantage of having hoops and shade or frost fabric is that it can protect plants from hail damage. Similarly, some people like to start their tomatoes under row covers to exclude leaf hoppers which can transfer the curly top tomato virus (Learn More in this article by NMSU.)
Creating hoops for your garden to help modify the climate and extend the season is easy to do using common materials — ½” by 10-foot lengths of PVC, 2-foot lengths of 3/8” rebar (both items can be purchased pre-cut at home improvement centers), extra-large binder clips (available at office supply stores), row cover material or shade fabric (available at some local nurseries and greenhouse supply stores), and some stones or bricks to help hold down the fabric at the edges and ends. You may also consider having loose-weave burlap to lay on the soil to facilitate seed germination and keep foraging birds at bay.
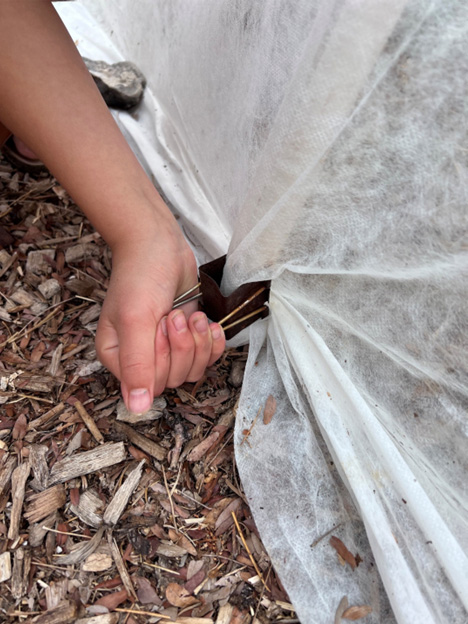
Installing hoops on rebar stakes.Clipping fabric to hoops.Hoop garden.
Other Tips:
Use burlap to help retain soil moisture between waterings and keep birds away when germinating seeds.
A thick, 3-4” layer of mulch such as straw or leaves (once seeds have germinated) is incredibly helpful for keeping moisture in the soil and regulating soil temperature.
If you have room, allow winter veggies such as arugula to flower and go to seed. Arugula flowers are beautiful and beneficial for pollinators. If left to go to seed, they also benefit birds and often result in new “volunteer” plants the following year.
You don’t need much space for a winter garden — a thriving 4’ x 8’ bed of leafy greens is plenty for a small family.
Installing hoops is simple: Pound the 3/8” rebar about 12”-14” deep, slip the ½” PVC over the rebar, clip the fabric to the PVC with extra-large binder clips and weigh down the edges and ends with stones.
A 10’ length of PVC on a 4’ wide bed makes a hoop about 4’ tall. Having a 12’ wide piece of row cover fabric allows for 1’ on each side to secure it with stones.
If you have heard of Bermuda grass or live in one of the older areas of Albuquerque, just the name might make you flinch or grimace. The reason it gets a bad rap is because it is dormant in winter, it spreads like crazy into garden beds and can magically appear out of a dirt mess after monsoon season.
You may be surprised to hear that some of us actually like Bermuda grass lawns. In fact, I’ve even planted the grass in my backyard. I’ll take you through the pros and cons and why I’ve come to love the Bermuda grass lawn. It can be the right plant for the right space to fill the right need.
Many homeowners would like turfgrass but feel irresponsible watering a lawn in the arid Southwest. The key to choosing a turfgrass is to determine the one most suited to the specific needs of your landscape The Water Authority is not anti-lawn that is efficiently irrigated and physically used and enjoyed. Bermuda grass cultivars are one means of having a traffic/play/dog tolerant surface that uses half the amount of water of a traditional cool season lawn
According to the “turf research lab” at New Mexico State University (NMSU), “Certain turf characteristics, such as climate adaptation, water use, traffic tolerance, color, quality, maintenance requirements, and available resources, are all factors that need to be considered when selecting a turf species. Climatic adaptation and traffic tolerance, which largely determine the future use of the turf area, are the two most important factors. Many problems encountered in maintaining turfs can be attributed directly to selecting the wrong turfgrasses for Albuquerque’s difficult growing conditions and to the lack of resources, especially water, that homeowners and professional turf growers face in the state.” This means that understanding how much traffic (kids and dogs playing) and our very dry local climate are how we should be selecting turf grass species not what the big box store happens to have in stock.
There are two different categories of turfgrasses: cool season and warm season. Common Cool season grasses are Kentucky Bluegrass, Perennial Ryegrass and Tall Fescue. These are cold tolerant, green most of the year and hold up to extensive foot traffic. But they use a lot of water, up to 50” a year If efficiently irrigated. The water authority frequently has many customers (especially commercial customers) that water grass 80-100” per year! in a town that only gets an average 8” of precipitation. Common warm season grasses are Bermuda grass, Blue Grama and Buffalo Grass. Warm season grasses have a shorter growing season. This means they green up in mid spring, are low maintenance and require less water than cool season grasses. But blue grama and buffalo grass can’t take extensive foot and paw traffic plus they go dormant in the winter.
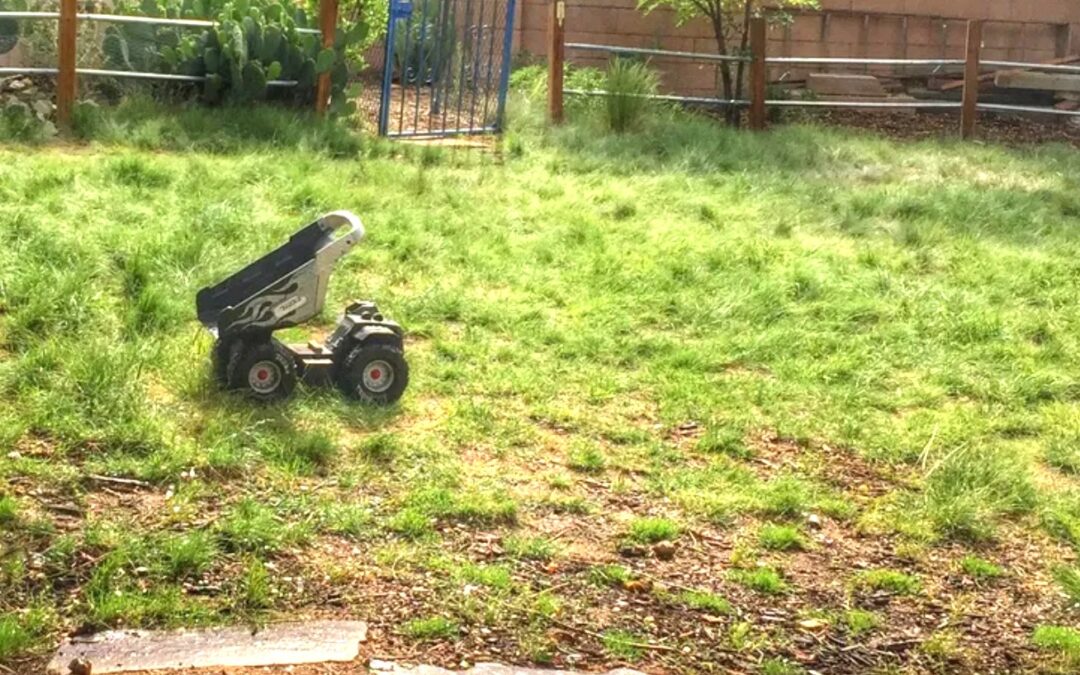
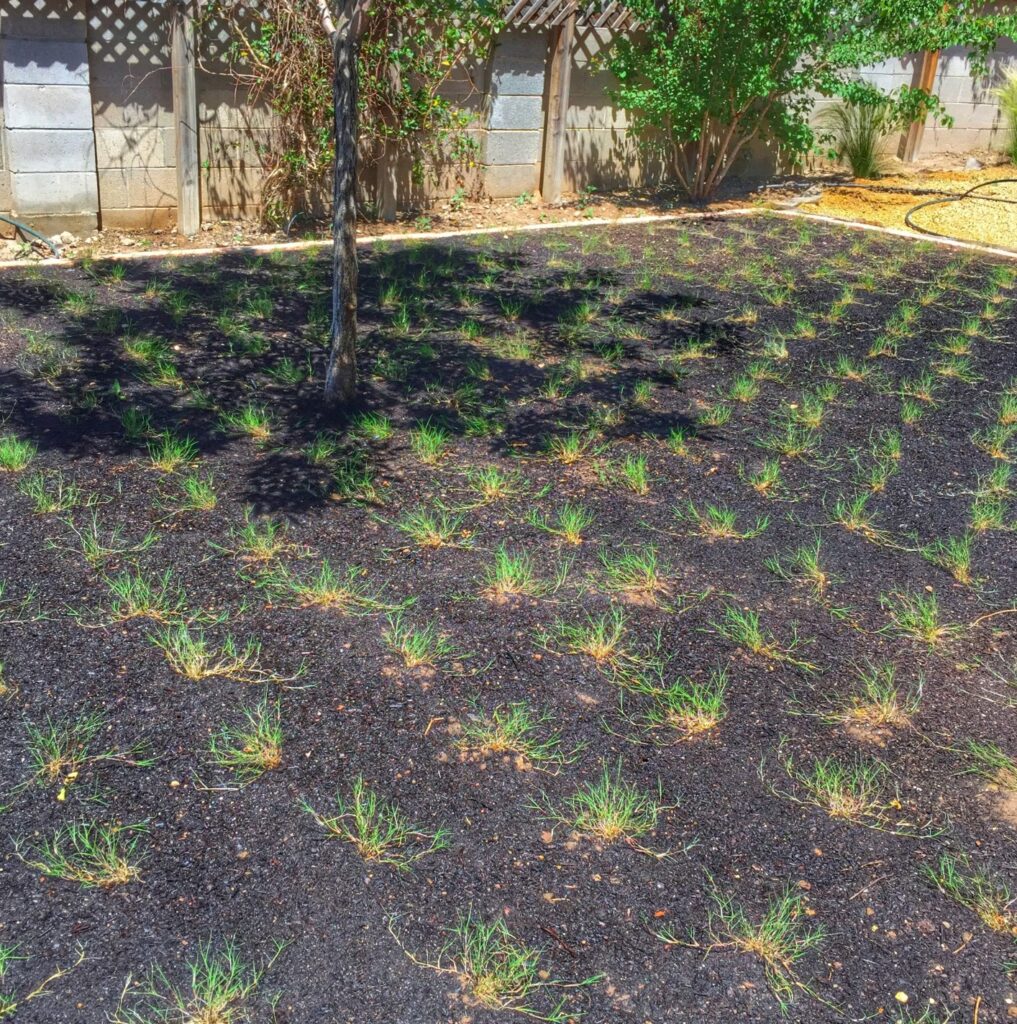
In my case, I had an existing native buffalo and blue grama grass lawn. It had always been perfect for our home. It’s native, low water use, easy to maintain and beautiful to look at. Fast forward to three kids and two dogs later. I was noticing wear and tear in certain areas of my lawn from two large dogs leaving run paths and kids playing soccer. I’m a professional landscape architect and knew Bermuda grass is a prolific spreader but in this case, I was actually looking for a grass to take over and fill in around the heavily accessed places in my yard. I found a species that could meet both my needs called Cynodon hybrida Dog Tuff ™ Grass Plugs, originally from High Country Gardens. There are many cultivars available check out the many options researched by NMSU. It is a Bermuda grass hybrid perfect for high traffic and play areas. It has excellent durability in yards with dogs. Once established, it is highly weed resistant, deep rooted and provides a soft, cushioned feel for bare feet.
The grass itself “produces an extensive system of creeping rhizomes and stolons commonly called runner roots that often have a scaly appearance. It also produces fibrous roots at the stem nodes. Bermuda grass reproduces through seed and vegetatively through rhizomes and stolons,” according to NMSU, allowing it to spread with just a little bit of water, around 20” a year. I find that it rarely needs mowing because of the traffic we give it. I mow it about twice a summer to the highest setting my mower goes around 4”.
Bermuda grass plugs.
The data on this grass comes from NMSU, which has turf study sites in Las Cruces and Farmington. A few key points from their study sites mentions that “Bermudagrass (Cynodon dactylon) is similar to Kentucky bluegrass in its tolerance to traffic and turfgrass recuperative capabilities after stress or damage, but it appeared to be more aggressive than Kentucky bluegrass during hot weather in mid-summer.” NMSU evaluated five different varieties of bermudagrass, Guymon, Riviera, Wrangler, and Yukon, at both their northern NM and southern NM sites. “Riviera was given higher quality ratings than the other varieties due to finer leaf blades. Being a warm-season grass, the bermudagrasses required less irrigation to exhibit a quality comparable to the cool-season grasses.”
The shocking reason homeowners don’t like Bermuda grass is that it can become a troublesome weed, especially in southern NM, so it is wise to separate this grass from garden areas with a dry, unirrigated buffer strip, concrete mow strip at least 8”x 8” or other barrier. I like to design a concrete walk, patio or edger around these grass areas.
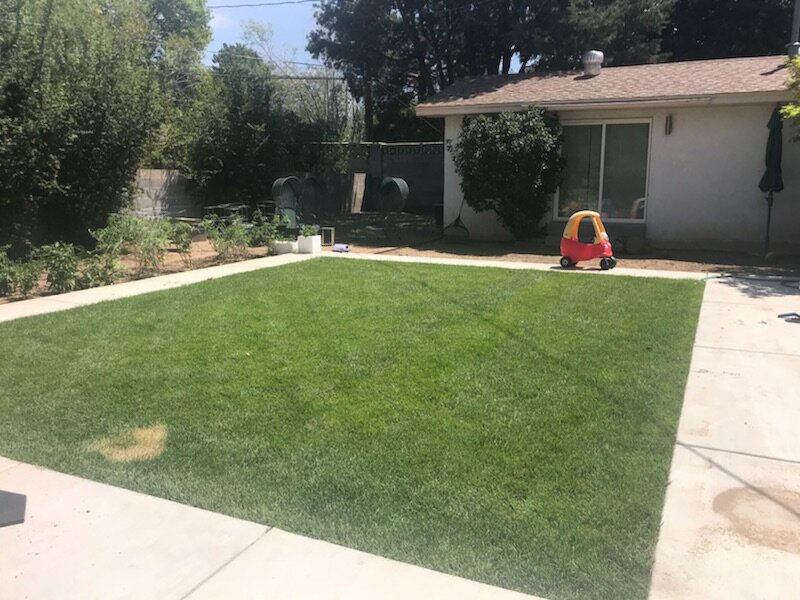
Grass lawn framed by concrete walk.
When placed strategically in a landscape this water friendly, high traffic, low mow grass is a winner in my book.
Author: Jill Brown, ASLA Landscape Architect and owner of My Landscape Coach in Albuquerque. Even more resources about turfgrasses can be found over at NMSU, one of our nations top university turfgrass science programs. Have a question about the article? AskAnExpert@abcwua.org
Your new xeric plants are in, and everything is looking good. What do you need to do to keep it that way? Start by looking at your irrigation controller. It may be programmed to apply water too frequently and/or for too long in order to get the plants started. If you hired a contractor, they may have set the controller to water every day because it’s easier than getting a call about a plant that doesn’t look great.
Many desert-friendly plants and trees evolved to survive on very little precipitation but also to make the most of abundant rainfall when it does happen. They’ll store the water in their roots or grow larger (and produce more seed for dry years) than they would with only adequate water. A xeriscaped yard doesn’t automatically “save” water — it is up to the homeowner to do the actual water saving by adjusting their irrigation controller. My dog would be “happier” if I fed her as much as she wanted, but it’s wasteful (among other things) to do so. Watering your desert-friendly plants too much may cause them to outgrow the space they were designed for, which might mean pruning them more than they need so they don’t grow against the house or over a path or outcompete other plants. Overwatering also creates lush, tender growth that is more attractive to pests and susceptible to frost damage.
A recent study in Arizona found that xeriscaped yards didn’t have reduced water usage because the homeowners applied the same amount of water as they would for a traditional yard with a lawn and non-natives.
Here are steps you can take to make sure you’re watering correctly for your new landscape and keeping your plants healthy:
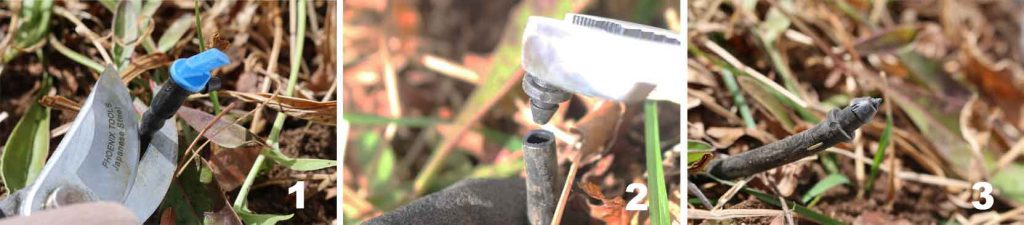
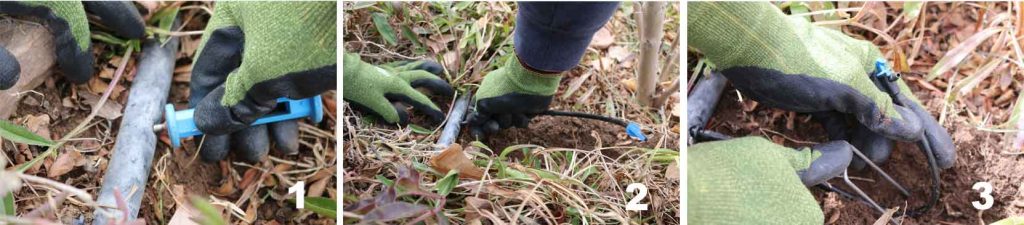
Reduce the number of emitters if needed: The best way to do this is by cutting off the drip emitter and installing a “goof” plug in the end of the ¼ inch tubing. This is preferable to trying to pull the ¼” coupler out from the larger line, which creates a larger hole that can’t be easily plugged.
Check your irrigation controller: You’ll want to keep the soil moist around the newly installed perennials, shrubs and trees for the first week, and that might mean watering every day if it’s above 90 degrees. After the first week, switch to watering every other day. Then on week three, switch to twice a week. Exceptions would be for cacti, which I would soak once when planting and then water once a week for the first month before tapering off to once or twice a month until established. (Perennials / grasses - 8-10 weeks, Shrubs - 1 year, Trees - 1-3 years.)
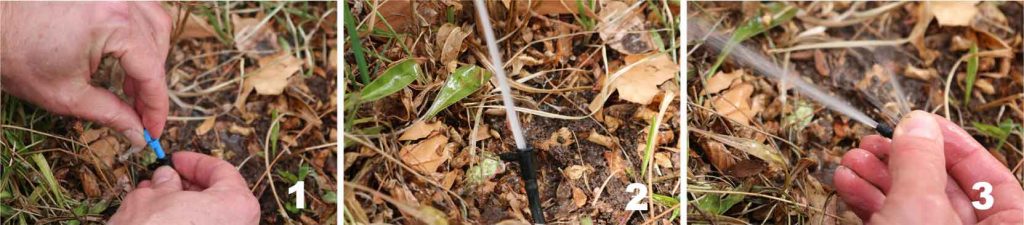
Check that drip emitters are working properly, especially if a plant looks wilted: Drip emitters often get clogged after a repair is made in the larger ½” or ¾” poly tubing. If you’re using “flag”-shaped emitters and one is not flowing, you’ll want to grasp the body of the emitter while you turn the top “flag” shape counterclockwise 90 degrees to allow the top to separate from the rest. You should do this while the zone is running so that you can see if any emitters aren’t working and so that the water pressure can clear the clog. Once you’ve twisted off the top, you should have a strong flowing stream of water coming out. Hold your finger over the water stream, forcing it into the drip outlet, which clears the clog.
If you’re using “button”-shaped emitters and one is clogged, you’ll need to cut it off and replace it. Don’t try to pull it off the ¼” tubing, just cut it off and plug in a new one so that the barbed insert has fresh (not stretched out) tubing to fit into.
Keep up with plant growth: As your desert-friendly plants grow larger, you can move the emitters farther away from the base of the plant and add new ones if needed; larger plants require more water. There are several ways to do this. You can poke a new hole in the nearby larger poly tubing, insert a ¼” coupler, run an additional ¼” line to the plant and add an emitter. However, if the main poly line is more than a couple of feet away, install a ¼” “T” in the spaghetti tubing and go from there. It saves time and means fewer holes in the main poly line. Remember, when installing ¼” couplers into the main poly, always poke the hole in the side, not the top; that way if you step on them by accident, they won’t break off. Also, if your plants are on a slope, the emitter should be on the uphill side, so water flowing downhill will cover more of the root zone. Check that water wells are still in place and holding water around the plant.
Inspect your trees: Check the leaves for any insect damage and the underside of leaves for insect infestations. Also make sure the mulch or gravel isn’t covering up any of the tree trunk above the root flare, which traps moisture that can cause decay or rot. Particularly in fruit trees, this can also allow detrimental insects access to the trunk where they could bore into it.
Check the soil around the base of your plants: Often during initial watering, the soil will settle into the planting hole and can expose the root ball, which causes it to dry out quickly. If you observe or suspect this, kneel in front of the plants, move the mulch out of the way and scrape the surrounding soil back around the plant to cover up the root ball. Then replace the mulch and reposition the drip emitter as necessary.
Learn the common or scientific names of your plants: If you don’t have a list, plant tags or a detailed landscape plan, some newer smart phones have a plant identifier built into the camera app (no need to remember the app store password and download another app). The closer you can get to the plant — showing leaves, branch shapes and flowers (if any) — the better the app will work. The phone (as we all know) can be wrong, but it will give you a place to start. Alternatively, send an email with photos to askanexpert@abcwua.org and we can help you identify
Once you know the plant names you can look them up in our xeriscape guide to reacquaint yourself with their water needs and mature sizes. Need help remembering the plant names? Often the plants themselves can tell you. Is it a catmint? Rub the leaves and smell the minty aroma. Turpentine bush? Lemony pine smell, for sure. Maybe it’s the shape of the leaves. Fernbush? Examine the leaves closely and see how they resemble an actual fern from a rainier climate.