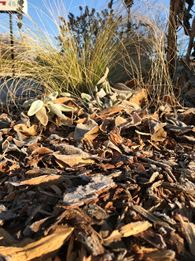
Shredded woodchip mulch helps soil hold moisture and insulates plant roots on a frosty November morning. Photo credit M. Thompson.
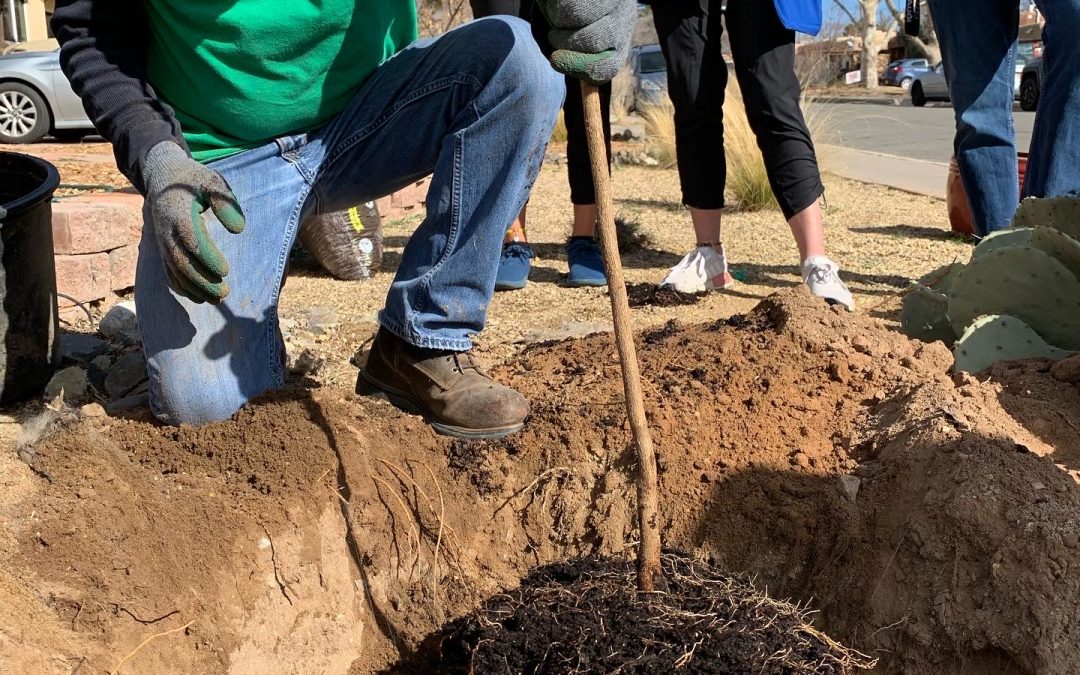
One of the most frequent questions we get at NMSU Extension is, “Should I add fertilizer or amendments to the soil when planting?” The short answer is no. And the long-term answer is an even stronger no.
Soil amendments are materials that are
worked into the soil with the intention of improving soil physical qualities. But
it’s just not that simple. As City of Las Cruces Community Forester Jimmy
Zabriskie said when I asked if he ever recommends using soil amendments when
planting a tree, “Save your money for mulch.” Organic
mulch is
material that sits on top of the soil, providing an insulation layer that helps
control soil temperature, retain moisture, and suppress weeds.
When planting ornamental plants, the
recommended species are the ones with roots that are well adapted to our native
soils. They’re more likely to live long, sustainable lives in our native soils
without amendments. The bottom line: Always put the same soil you dug up right
back into the hole with the new plant, and top dress with a thick layer of
mulch.
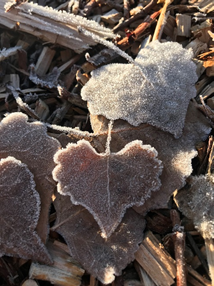
Frosty cottonwood leaves add a nice layer on top of several inches of shredded woodchip mulch. Photo credit M. Thompson
As for fertilizers, slow and steady wins this race. As Albuquerque City Forester Joran Viers said recently at a tree planting demo put on by Tree New Mexico and The Nature Conservancy, it helps to think of our trees (and other plants) as marathoners, not sprinters. When fertilizer is applied to trees, they can grow too fast for their own good and are more likely to develop structural problems and other issues. Fertilizers are not recommended at the time of planting perennial plants, either, because we want the plant’s energy to go into root establishment at a healthy rate to support the aboveground growth. The growth hormones necessary for healthy root development are found in the root tips and are made by the plant itself, so adding root stimulator to living roots is not necessary or even helpful. (Side note: Rooting hormone is potentially useful when you’re trying to get roots to grow quickly from cuttings where the roots have been removed completely.) So hold off on fertilizing for at least a few years while your plants are setting down roots.
Research on all sorts of landscape plants has shown that by adding amendments (like organic matter or perlite) to your soil backfill, the initial, short-term results are good. But the interface between the amended soil and the native soil is bad news. Water doesn’t move well across the interface, and neither do roots. With time, the roots may be inclined to stay in the original planting hole and spiral around, so you end up with essentially a potted tree or plant with reduced growth rate, constant water and nutrient stress (because lateral roots never fully developed), heightened vulnerability to pests and diseases, and even an increased falling hazard (think root ball in socket).
Author: Marisa Thompson, PhD, is the Extension Horticulture Specialist for New Mexico State University and is based at the Agricultural Science Center at Los Lunas. For more gardening information, including decades of archived Southwest Yard & Garden weekly columns, visit the NMSU Extension Horticulture page (https://desertblooms.nmsu.edu/), , follow us on social media (@NMDesertBlooms), or contact your County Cooperative Extension office (https://aces.nmsu.edu/county).
To avoid damage to your irrigation system from
freezing temperatures, it is important to “winterize” it by protecting exposed outdoor
fixtures. If your hose bib is left exposed or standing water is left in pipes, valves
or sprinkler heads during freezing temperatures, that water may expand and damage your
system fixtures. That
could result in costly but avoidable repairs. Each irrigation system may be different,
but the general idea is the same: protect your irrigation system now to save
time and expense later. Here are a few tips you should take to prepare your irrigation
system for winter.
1. Disconnect the water supply to your irrigation system
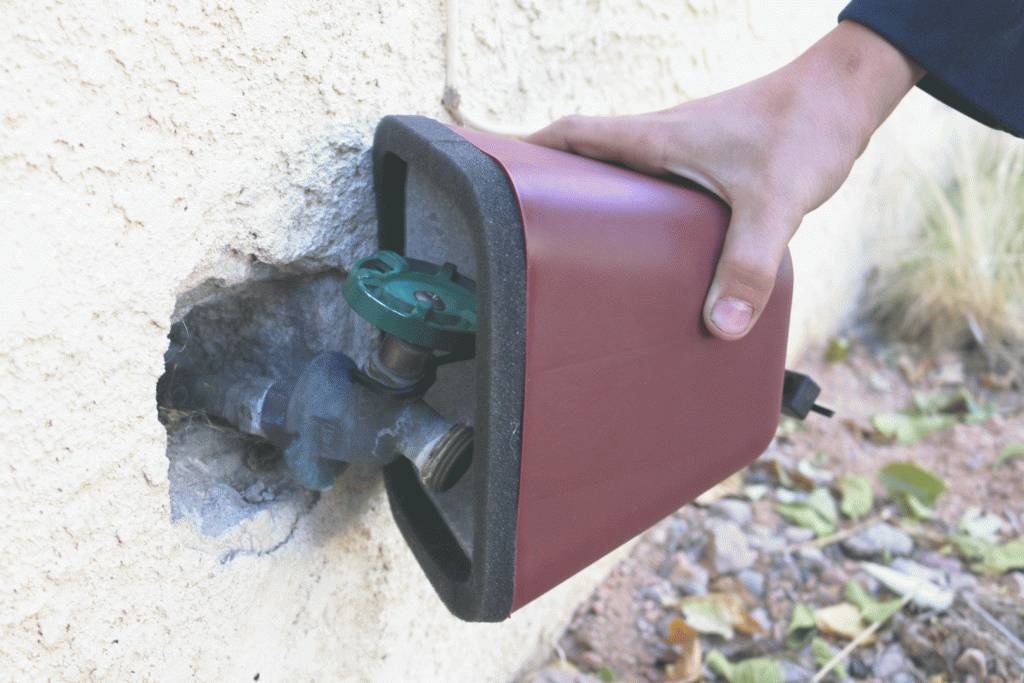
a. If you manually water using a hose or if the irrigation system is attached to an outdoor spigot, you should disconnect it and cover your hose bib using a faucet cover. A faucet cover is easy to install and is usually made from durable hard plastic. It protects your outdoor faucet from freezing temperatures. This in an easy, inexpensive fix that will provide you peace of mind when the temperatures drop.
Pro Tip #1
Faucet cover to protect hose bib from frost.
Disconnecting your hose and covering your hose bib is very important in winter. If you leave the hose connected, water can freeze in the hose all the way into the hose bib and the pipe that goes inside your home. If the house pipe breaks, you will have water flooding inside, and potential major water damage inside your home. It’s definitely worth the $10-$15 on these insulated covers to prevent potentially thousands of dollars in plumbing repairs and water damage to your home. Don’t assume that if the hose bib freezes it will drip and freeze only outside your home. Sometimes the damage is a whole lot worse.
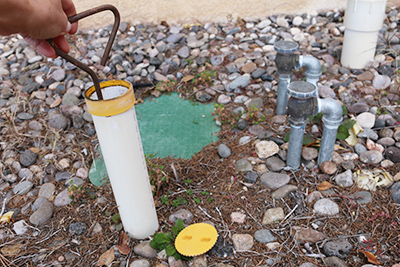
b. If you have a below ground irrigation system, locate your shut-off valve (often hidden in a 3” PVC pipe; often with a white or yellow cap, as shown in the photo). Turn it to the right to shut it off. Be careful when turning so you don’t break the valve. Your shut off valve may look like this:
Irrigation shut-off valve.
Pro
Tip #2
Sometimes the water shutoff for your sprinkler
system is in the green box shown in the picture. If so, we recommend adding some
heat tape and/or insulation in the box because it will be exposed to freezing temperatures.
If you can insulate it and protect it you can avoid potential frozen pipes at the
shut off and potential repairs in spring. Watch out for spiders, though,
because the shutoff box is a warm wet place.
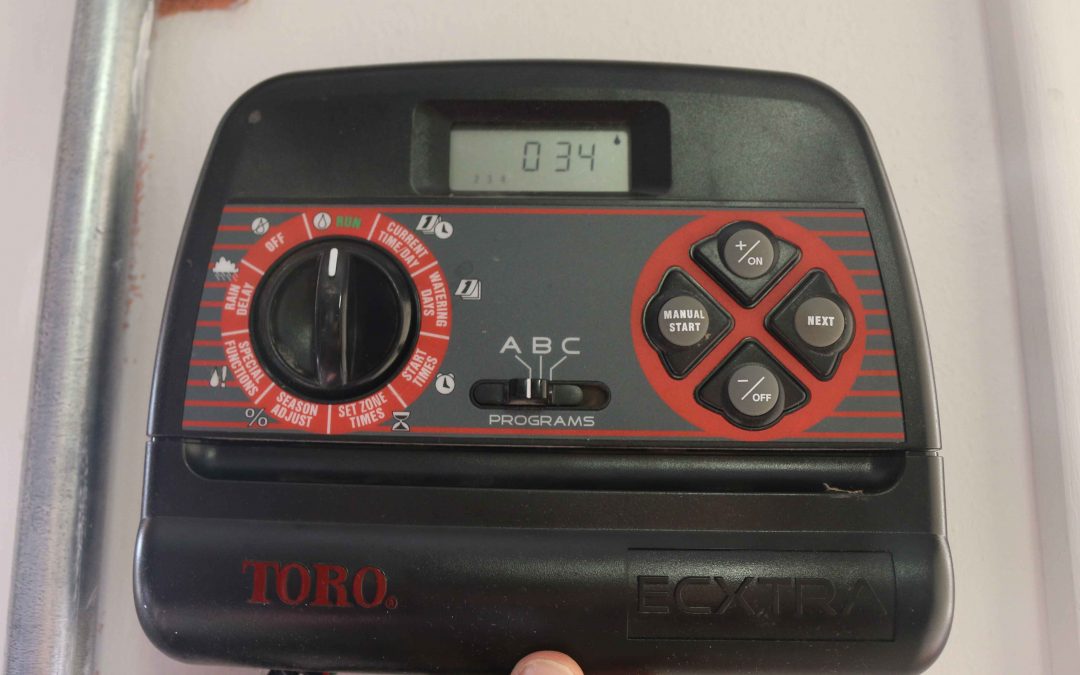
2. Turn off the irrigation system controller (if you have one)
Irrigation controller set to off.
Pro Tip #3
If you forget to shut off your irrigation system during winter you can potentially have your automated sprinklers running in freezing temperatures. That can freeze and damage your sprinkler heads. Make sure you turn off all automatic cycles for your system. If you have a drip system for trees and other plants that need to be watered periodically throughout winter run the system manually when you are home, and only in above freezing temperatures. Don’t just assume that setting it to run during the day will be okay, either. There are days in winter when the temperature doesn’t get above freezing. It’s best to just turn it on when you’re home and then watch it. If your sprinkler heads do crack or break and you don’t notice, you will likely flood your yard in spring when you turn your system back to automatic settings.
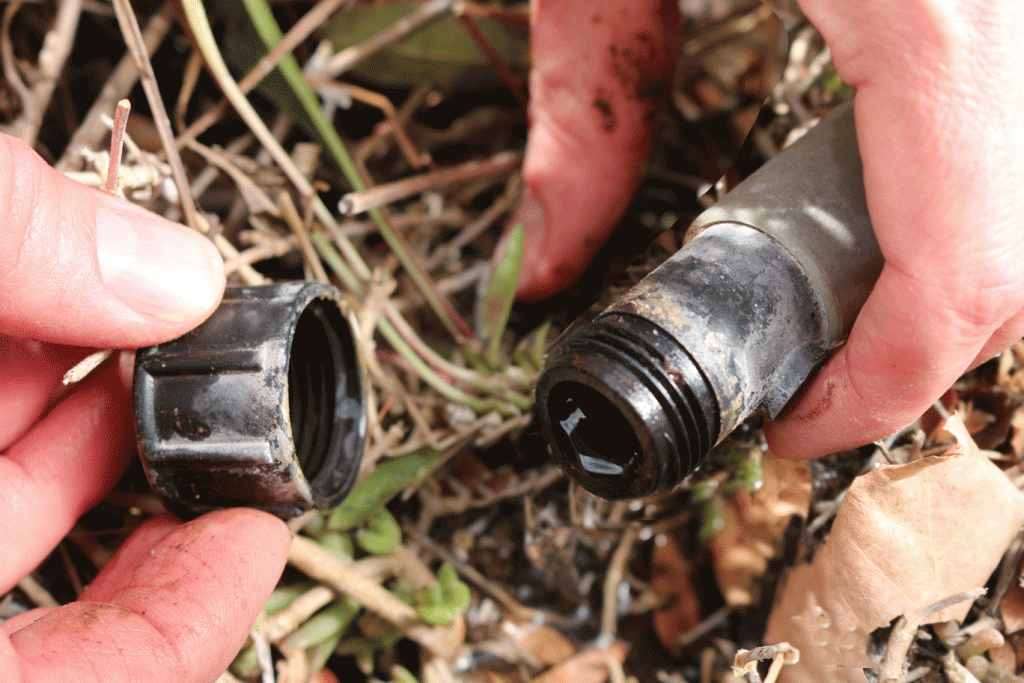
3. Drain the water from all pipes, valves, and sprinkler heads.
Drain cap at the end of a drip system.
There
are several ways to drain your system.
Manual
drain valves and automatic drain valves can be blown out with compressed air. Local
irrigation specialists can help.
If you
have an irrigation system with drip hoses, we recommend you locate the end cap (drain
cap) of the drip hose and drain out the water.
Pro Tip #4
Sometimes irrigation systems don’t have drain
valves. If you don’t have these, simply make sure you’ve turned off your sprinkler
system prior to winter and freezing temps. Then you can have a professional inspect
the system in spring before you turn it back on. A professional will inspect your
system for leaks and make any repairs so you don’t flood your yard. So avoid the
headache and have an inspection. If you consistently have problems year after year,
drain valves can be installed to help clear the lines each winter.
Reminder: If you need to water in the winter season use your hose and remember to cover it when finished.
How to shut off your irrigation system for winter.
Some of our best landscaping practices can be learned from Mother
Nature. Every autumn, leaves fall to the ground, sheltering the soil and beneficial
organisms, returning organic matter back to the ground, and perpetuating the nutrient
cycling essential for good plant health. This year we want you to think about leaving
those leaves in your garden. When we allow leaves to follow their natural life cycle,
we can enjoy a colorful tapestry on our landscape as well as all the benefits provided
by an organic mulch.
With these tips, you can spend less time raking leaves into plastic
bags and enjoy more fall fun:
When designing your landscape, make your pathways
and hardscapes above the level of your planting areas. The wind will naturally blow
leaves into the low spots where they will support soil and plant health. This also
happens to be a great water harvesting strategy.
Use organic mulches instead of gravel. Organic mulches
such as wood mulch are visually accommodating to leaf litter (meaning you won’t
notice them as much), allow for the leaves to decompose into the porous spaces and
build soil. Leaves break down to virtually nothing in this environment. If you prefer
a tidy look, follow up with a light topdressing of mulch for a finished appearance.
If the leaf load is too much to manage directly under
your trees, rake the leaves a little off the top and distribute them throughout
your yard – ideally to a compost heap where the leaf litter will become an excellent
soil amendment for your spring garden. Note: if you have chickens, they will turn
your leaves into next to nothing in a matter of days.
If you have a lawn, run your lawn mower over the
leaves and let the crumbled litter work its way back into the soil. The addition
of organic material to your lawn in the fall will give a boost to your lawn when
it wakes up in the spring.
There are a few instances when you should remove fall
leaf litter. Leaves from diseased plants – particularly fruit trees and roses -
should be taken to a compost facility to be recycled. While you can try to compost
them yourself, be advised that most backyard compost piles do not reach a high enough
temperature to kill pathogens. Also, xeric plants that grow naturally in rocky terrain
will be susceptible to crown rot if organic material is piled up around their bases.
Leaving fall leaves has another great benefit – it is carbon neutral. Carbon is sequestered in the soil, leaf blowers and plastic bags are removed from the equation, leaves don’t end up in a landfill or produce methane gas, and no transport to the landfill is required. It’s a win-win when we let Mother Nature be our guide.
Author: Paulina Aguilera-Eaton, Water Conservation Specialist with Albuquerque Bernalillo Water Utility Authority
Your landscape needs a lot less water in September than it did in the summertime. About 35 percent less on average. The days may still be warm, but shorter days and cooler nights in the months of September, October and November means less evaporation, which means less irrigation is required. Adjust your irrigation controller following the Fall Season Watering Recommendations to save water and money this Fall.
Ramping down your landscape irrigation does not mean you
need to stop watering all together. If you have a lawn, cut back to two days
per week. Cut back to two to four days a month for trees. Fall is when trees,
shrubs and other perennial plants get busy growing their roots, and proper watering
supports this activity. After spending the summer putting energy into growing
leaves, flowers and fruit producing plants take advantage of the fall season by
anchoring their root system to the earth. It’s important to fortify root systems
during the Fall so they have a stronger trunk and stem during the winter
season.
Fall season is also a great time to put in new plants, for the
same reason – they spend their time growing their root system instead of leaves
and flowers. But new plants need more frequent watering to help them get established.
Keep in mind that new plants need at least a month to anchor in the ground before
the first freeze, so don’t plant too late in the season to avoid damage.
And remember it is not necessary to irrigate when it rains, or on days following a good rain event (or about a 1/2" of rain). Using nature as your source of water encourages a desert friendly landscape.
Want to know how much your landscape really needs? Call 505-289-3003 to schedule a free, efficient irrigation consultation with a Water Authority expert.
The Water Authority encourages efficient outdoor water use for beautiful landscapes. With some 40 percent of our drinking water going to landscaping, improving outdoor water use efficiency is now the main focus of the Water Authority’s conservation efforts. But irrigation efficiency doesn't mean you can't have a beautiful, desert friendly yard. Below is your three-step plan for a beautiful, desert friendly yard.
1. Service your irrigation system by checking for leaks and malfunctions.
Low-maintenance landscapes are great, but there’s no such thing as a “no-maintenance” irrigation system. A single broken sprinkler head flowing at 15 gallons per minute will waste 900 gallons in one hour of use. Service your system regularly, and check it often for leaks and malfunctions.
2. Set your turf irrigation timer to water by the numbers.
Adjust your irrigation timer according to the season. For turf, water by the numbers: One day per week in March, two days per week in April and May, three days per week in the summer, and ramp down in the Fall. For other landscapes, follow the Seasonal watering recommendations. Call today for a free irrigation consultation.
3. Select desert friendly plants that thrive in our dry climate.
There are literally hundreds of plant options to choose
from that will thrive in our desert climate. And there are rebates available for
replacing turf with a desert friendly landscape.
If you follow this three-step plan, you’re sure to have
landscape success.
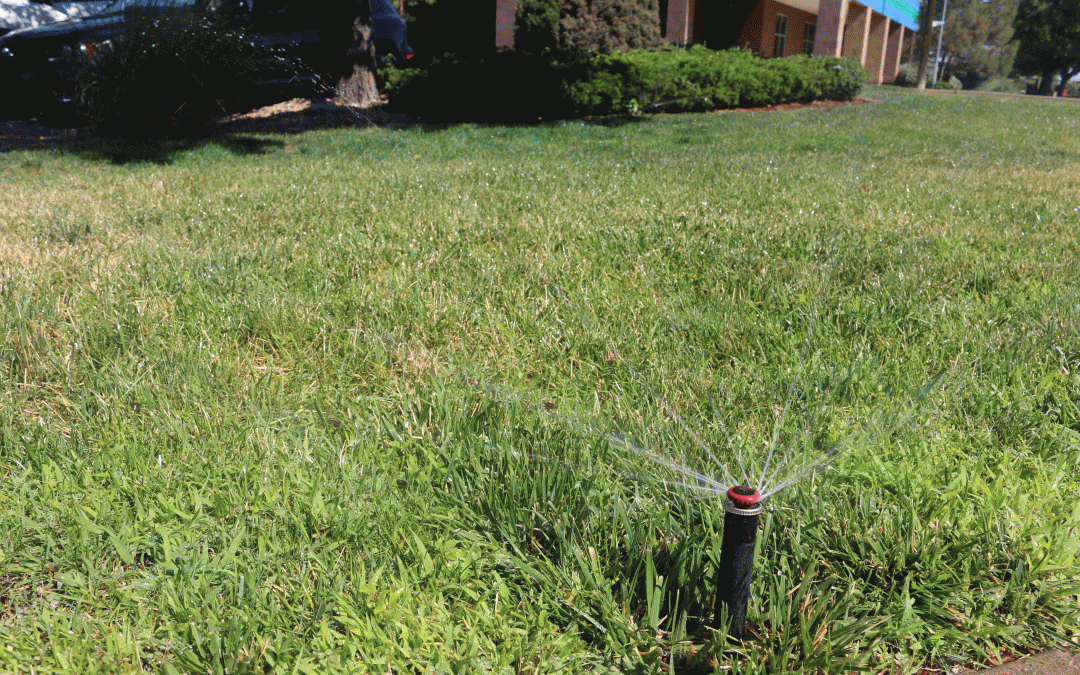
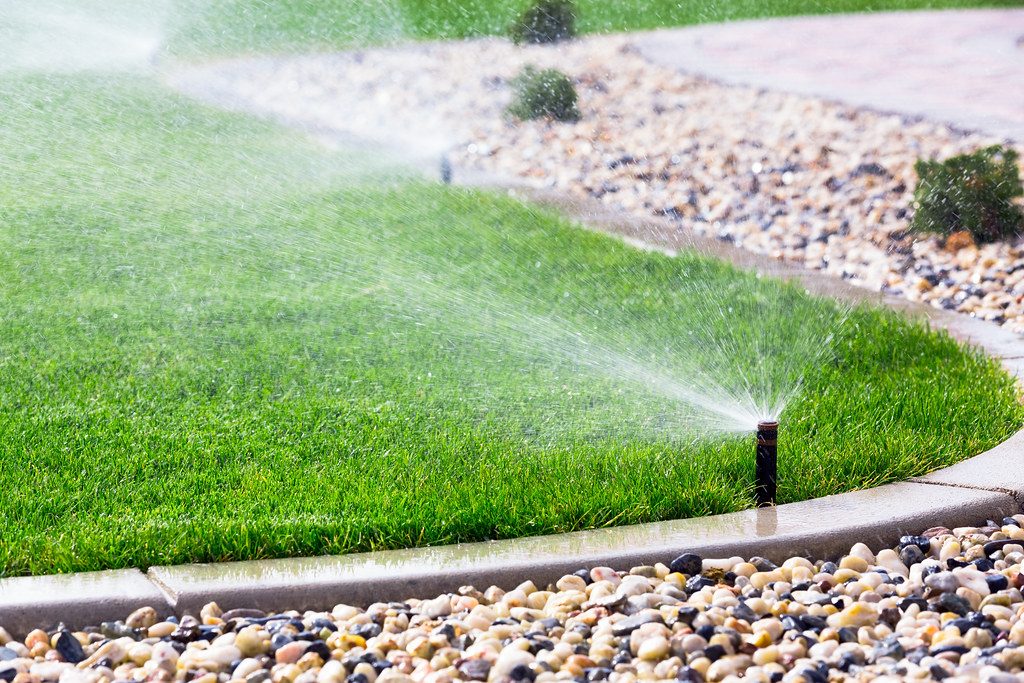
Grass lawns in the greater Albuquerque area require supplemental irrigation in order to survive our high desert climate. Most residential landscapes are watered by pop up spray heads with conventional nozzles, as pictured below.
Pop up spray head
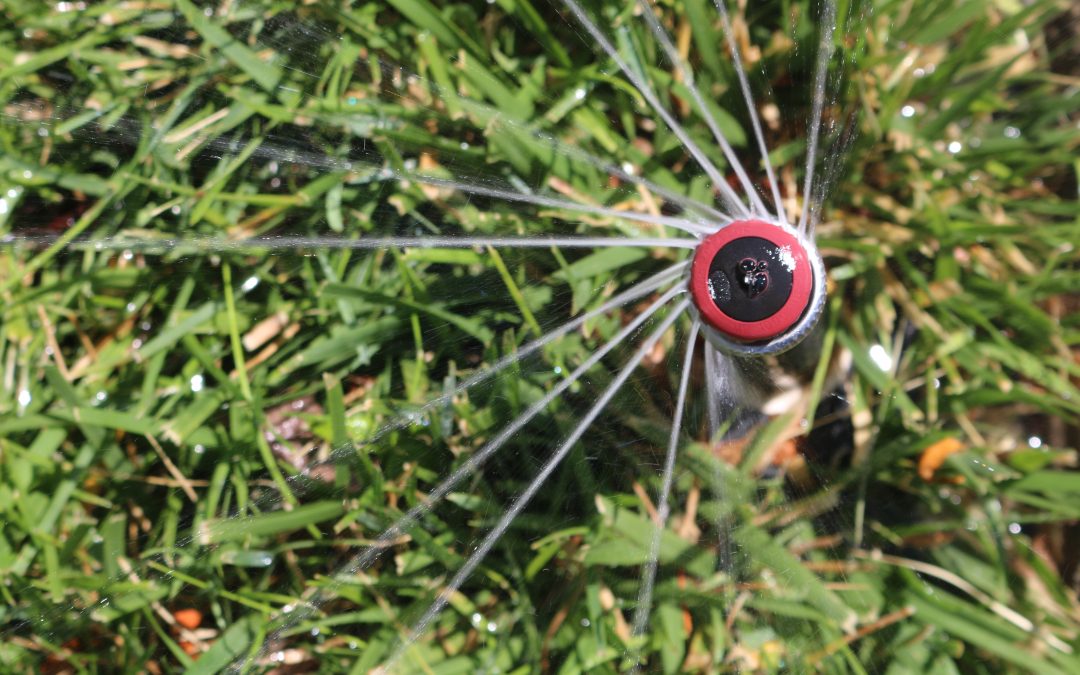
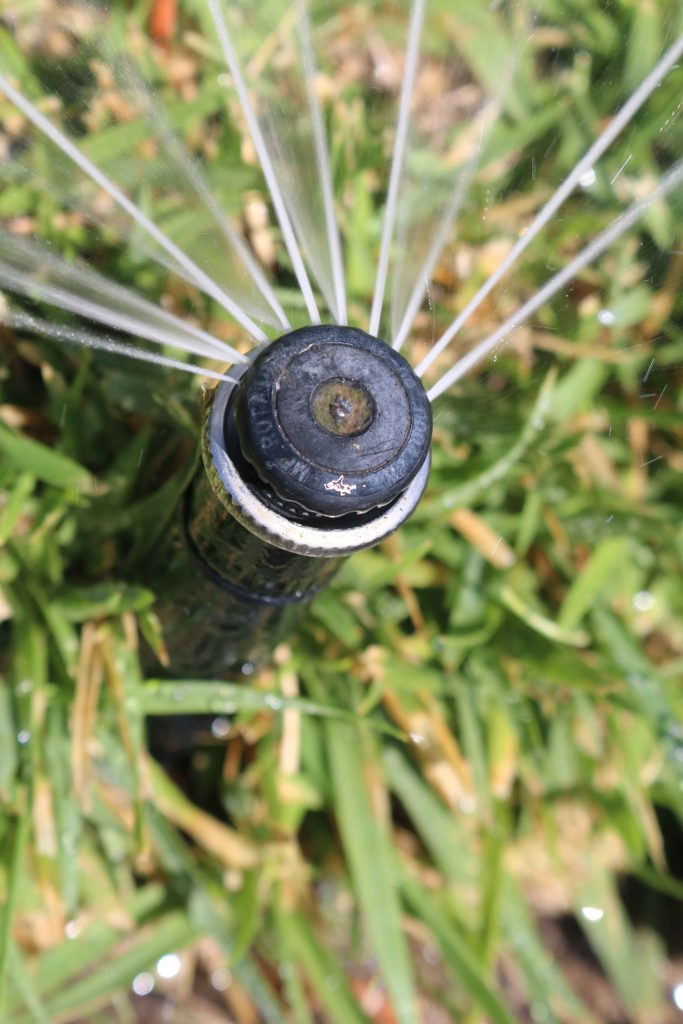
But did you know that water waste from these conventional spray nozzles can be reduced by simply swapping the nozzle out for high efficiency rotary nozzles? And for just a few dollars per head. Rotary nozzles improve irrigation efficiency by delivering water more slowly. That prevents runoff by giving soil time to absorb the water and allows the water to reach the root zone of the plant. These nozzles also deliver water in a larger droplet size, making the spray less susceptible to being carried off by the wind. This is all accomplished via their distinctive multiple rotating streams of water, pictured below.
High efficiency rotary nozzle
505Outside visited local irrigation supply stores to find out their most
frequently asked questions about these nozzles.
Can I replace my existing spray nozzles with these high efficiency rotary nozzles?
Yes. In most cases it’s as simple as unscrewing the existing nozzle and
dropping in the rotary nozzle and filter basket. These are available at any
local irrigation supply store. If you bring in your existing spray head, the
staff can recommend the best solution for you. Water Authority has rebates
available for the purchase of rotary nozzles, too. Visit the link here.
Sounds too good to be true. Are there any negatives?
They tend to clog with the hard water typically found in Albuquerque.
Make sure the brand you select comes with an inline filter basket, so you can
easily flush out and unclog your spray head.
What else should I know about high efficiency rotary nozzles?
They require longer run times. This is where most homeowners get confused. Wouldn’t
a longer run time mean I’m using more water? The answer is no, because rotary
nozzles deliver water at a slower rate than typical spray nozzles. Therein lies
the efficiency: water saturates deep into the root zone rather than running off
and evaporating. This can also help reduce the frequency of runs, thereby
saving water.
They work best at 30-40 psi. If the pressure running through your irrigation
system is too high, the rotary nozzle will spin out of control and break. The
average pounds per inch (psi) in Albuquerque ranges between 40 and 70 psi, so
you may need a pressure regulator on your system to avoid damage. Check with
your local supplier to figure out if you need to regulate the pressure on your
system, and how.
They are adjustable. Most rotary nozzle brands provide matched precipitation rates across radius, arcs, and pattern types, making it easy to install a system with even distribution. Nozzles can be easily adjusted by tool or by hand while the heads are running, to avoid water waste through overspray.
Stop by your local irrigation supplier and learn all about these high efficiency rotary nozzles.
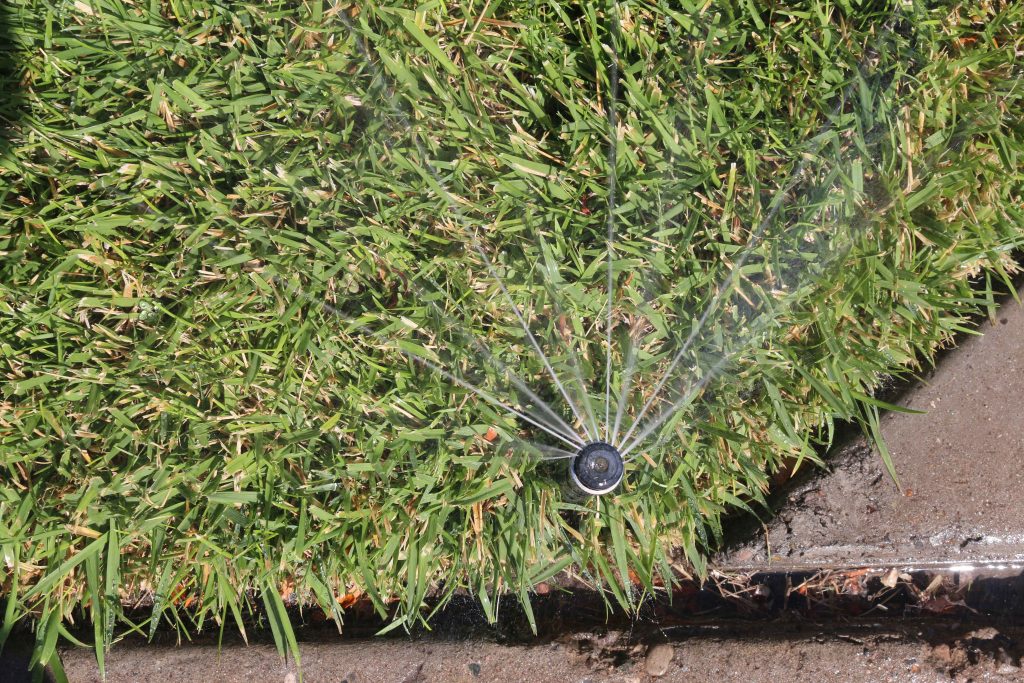
High efficiency rotary nozzle watering a 135 degree angle.