While it is fantastic living in the Southwest
where the sun shines over 310 days a year, sometimes landscapes and homeowners
alike crave shade. Large trees provide great shade but may take a long time to
grow. So to create fast shade for patios and windows, choose vines. Luckily
many vines grow well in Albuquerque, including evergreen vines, flowering
vines, fruiting vines and many more. Below are four favorites of 505Outside for
the Albuquerque area.
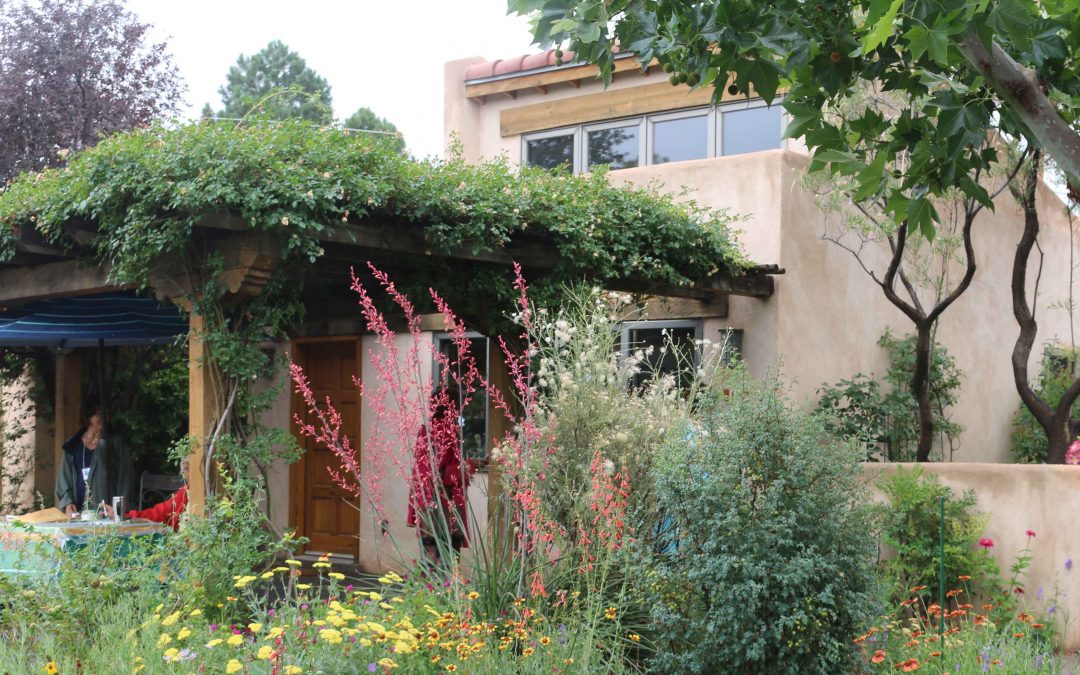
1. Wisteria, Wisteria sinensis: The pendulous lavender flowers of this vine are some of the first to bloom in the spring. Bright green leaves follow shortly thereafter, filling up the plant and creating lots of dappled shade below. Once the flowers fade, the leaves fill in to provide dense shade in the summer. Prepare for wisteria vines to get woody over time. Strategic training of the stems is also recommended. Wisteria grows well in sun, shade and part shade. Mature height and spread are 25’ to 30’ x 25’ to 40’.
Wisteria growing over a front door trellis.
2. Lady Banks Rose, Rosa banksiae: Rarely do you find a plant that is fast growing, evergreen and long-lived. Lady Banks Rose is all those things, and it produces a beautiful if brief show of flowers in spring. And it uses surprisingly little water. This plant grows large and, unlike most roses, blooms on old wood.
3. Trumpet Vine, Campsis radicans: Orange and yellow trumpet-like flowers grace this beautiful deciduous vine. Train it to grow onto a shade structure. It is a fast grower but you must provide a strong enough support and enough space for this vigorous rambler.
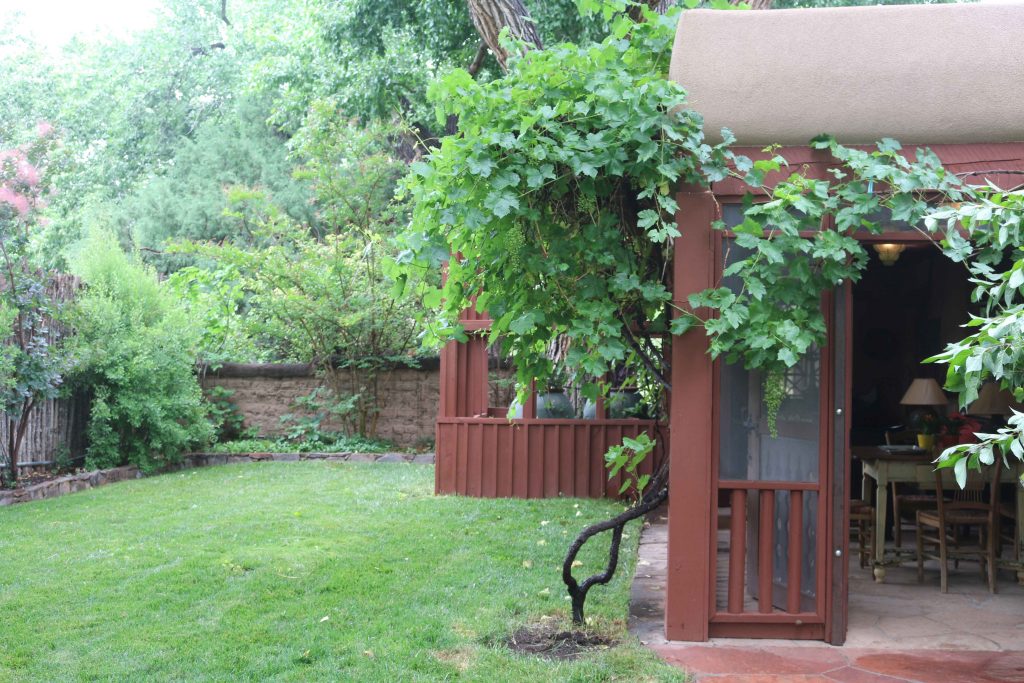
4. Grape vines, multiple varieties: New Mexico is one of the oldest grape growing regions in North America. For covering a trellis or arbor look for vigorous growers. Grape vines like to have moist feet during the first year of establishment. Grapes will grow wild and crazy if not trained and strategically pruned during the winter months. They also need constant redirecting, so tie the vines to the trellis with twine, checking on it every other week during the growing season. These are deciduous so be prepared for a sculptural woody vista throughout the winter months.
Grape vines growing next to an outdoor patio.
Try growing any of these vines on open lattice ramadas, arbors and pergolas. While wood is the most often used material for these structures because it is simple and easy to build, in the Albuquerque climate steel is an ideal choice. Steel structures are strong, long lasting and maintenance free. No matter what material you choose, creating living shade with vines can be rewarding.
Author: Jill Brown, ASLA Landscape Architect and owner of My Landscape Coach in Albuquerque, NM. Resources: Down to Earth, A Gardener's Guide to the Albuquerque Area by Albuquerque Area Extension Master Gardeners. Growing the Southwest Garden and New Mexico's Gardener's Guide by Judith Phillips.
Everything in nature is
connected. Fostering the connections keeps ecosystems and gardens vital. And weaving
pollinator essentials together into a beautiful garden is a fun process. Start
by thinking about where you will view the garden from as well as how you’ll
move through the space to view pollinator activity without disrupting your
winged guests. Organize the largest and thirstiest plants around rainwater
harvesting opportunities such as gutters or canales, and use pathways to divide
larger spaces into smaller planting areas like herb gardens, wildflower beds
and native shrub borders. Include the essentials of food, shelter and water in
your garden and your pollinators will thrive.
Among the insects and
birds that pollinate plants, bees are the primary work force. There are 1000+ kinds
of native bees in New Mexico, as well as honey bees that assist plants in
producing seeds. Butterflies and moths are less efficient pollinators than
bees, and many have key relationships with specific plants: Monarchs
butterflies with milkweeds and hawkmoths with evening primroses. Beetles, bats
and hummingbirds are also nectar drinkers and pollinators.
Plants expend energy to
produce showy flowers to attract pollinators. In exchange for distributing the
pollen needed to fertilize the flowers so the plants can reproduce, the
pollinator feeds on the energy-rich nectar. The shapes and colors of flowers
determine who will pollinate them. Butterflies can’t hover to feed, so they
need open-faced flowers with places to land, like daisies and roses.
Hummingbirds and hawkmoths are able to hover while they probe tubular flowers
for their nectar and pollen. Plants with inconspicuous flowers are often
wind-pollinated, like native grasses, but are still part of the pollinator
support system. Their leaves feed many larval stage insects.
If you are new to the
neighborhood, survey plants nearby for pollinator activity and plant some of
the busiest ones. If you already have plants in your garden that are abuzz with
pollinators, think about replacing any plants that are shirking their habitat
role with ones that are better hosts. Choose plants that are rich in nectar and
well-adapted and watch your garden become a surprise party buzzing with energy.
Food sources include flower nectar for sugar and essential amino
acids, pollen for protein, and leaves as larval food. Native grasses are
especially valuable as caterpillar food. Plan to include food sources
throughout the seasons that pollinators are active.
Shelter includes layers of canopy from taller
trees, mid-height shrubs and groundcovers (knee high and shorter). Leave some
dead snags as hummingbird roosts and for bee nesting. Leave leaf litter in some
places and keep some open soil in out of the way areas for ground nesting
insect habitat. Cluster plants in masses of varied heights and densities as cover.
Plans for bee hotels and ready-made bee and bat nesting boxes are easy to find and
build. Check nature center gift shops and online for ready-made nesting boxes.
A
small, trickling water feature as a
source of drinking and bathing water for insects and birds should have shallow
edges to avoid drowning bees. An extra drip emitter in fine stone mulch or bare
ground is a good water source for bees and puddling place for butterflies.
Eliminate
pesticides and herbicides. You don’t wan to attract pollinators just to poison
them! Your health will benefit, too.
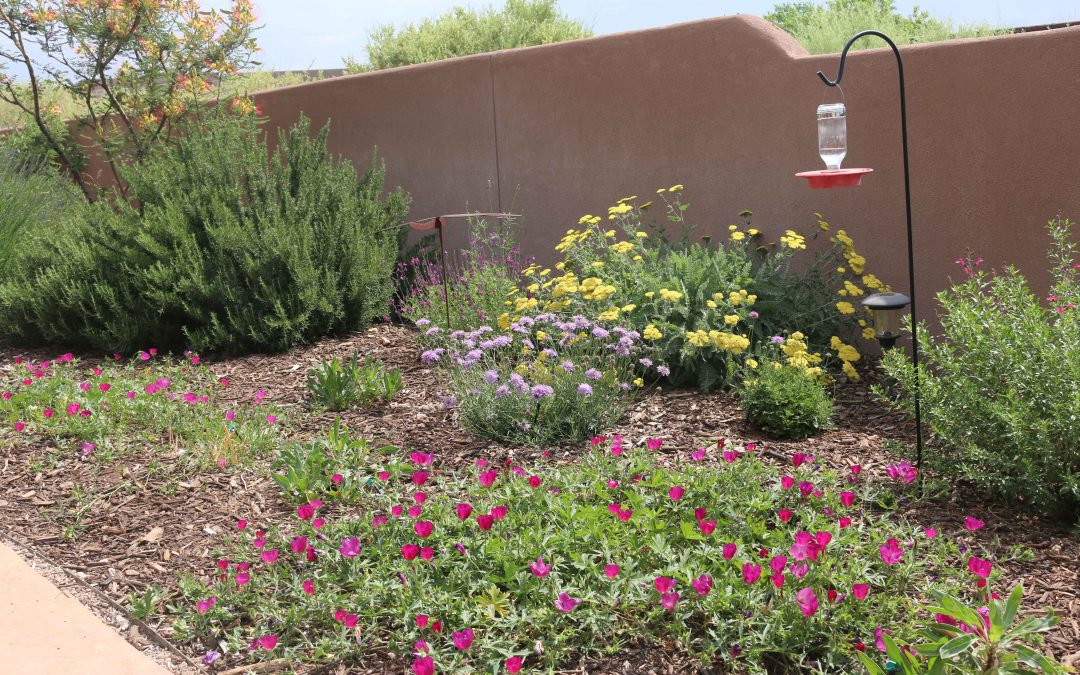
The greater the variety of plants, the greater diversity of pollinators will visit. Plant for a seasonal progression of blooms. It takes at least 100 sq. ft. of the same flower to consistently attract pollinators (think a 5-foot-tall and wide fernbush or butterfly bush or a 10-foot x 10-foot wildflower or herb bed space). So if your neighbor has a swath of red valerian, plant a few but use more of your space for sunflowers, mistflower, yarrow, beebalm, salvias, penstemon, oregano, fennel, whorled butterfly weed or native buckwheats. Pollinators don’t recognize property lines so the more neighbors who garden for pollinators, the richer your neighborhood will become in pollinators. Avoid hybrid flowers, especially varieties with double flowers since those plants may produce little or no nectar or pollen.
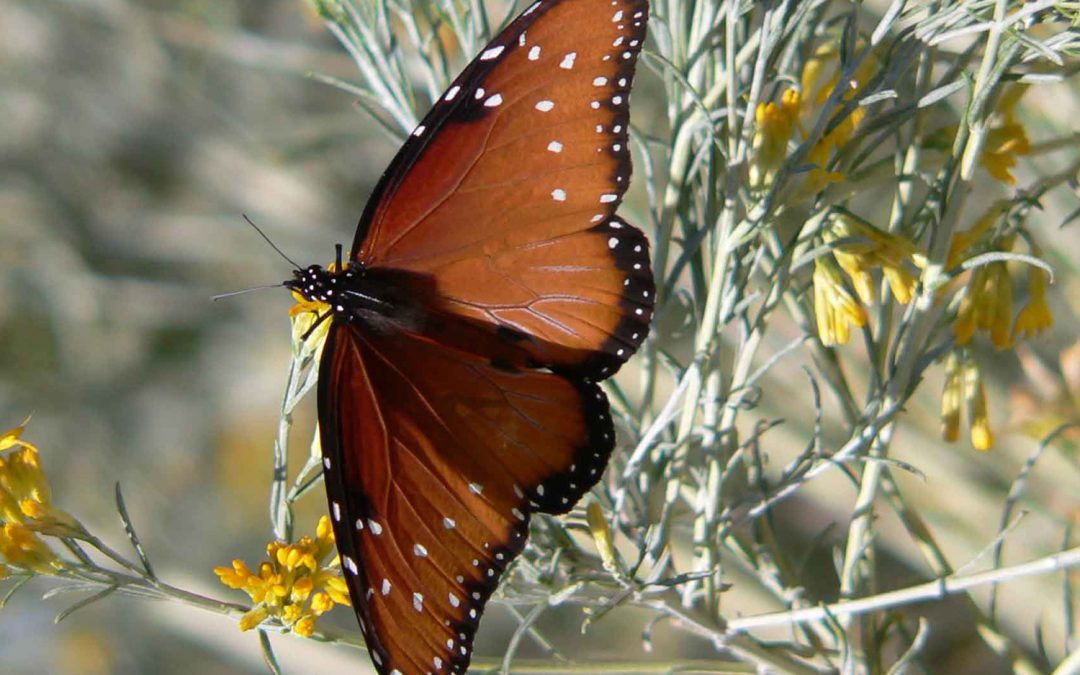
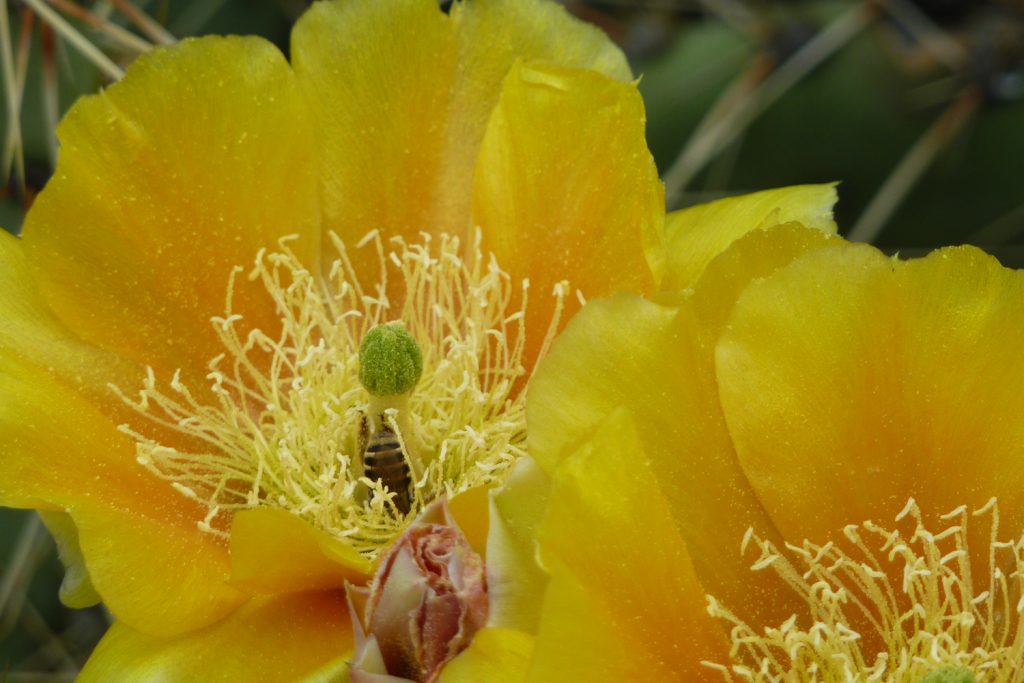
Opuntia englemannii with bee. Photo by Judith Phillips
There are
public pollinator gardens in Albuquerque:
Rio Grande Botanic Gardens on Central Ave at New York NW
El Oso Grande Pollinator Habitat at the east end of El Oso Grande Park on Osuna Road @ Morris NE
Albuquerque Garden Clubs Garden Center in Los Altos Park on Lomas just west of Eubank
Author: Judith Phillips, owner of Design Oasis, landscape designer and garden writer with 30 years experience designing arid-adapted and native gardens in the high desert.
Testing the soil moisture with a long screwdriver.
Use a soil probe or a long screwdriver to test soil moisture. Push the screwdriver into the soil 24 hours after you’ve watered your plants. It will go easily into moist soil. Mark and measure how far it went into the ground. That will tell you how deep you have watered that plant. Every yard is different, but once you figure out how long it takes your watering system to water to certain depths, you’ll be set.
Many homeowners would like a turf grass lawn, but might feel
irresponsible watering a lawn in the arid Southwest. The key to choosing a turf
grass is to determine the one most suited to the specific needs of your
landscape.
There are two different categories of turf grasses: cool season and warm season. Cool season grasses are Kentucky bluegrass, perennial ryegrass and tall fescue. These are cold tolerant, green most of the year, and hold up to extensive amounts of foot traffic. But they use a lot of water. Warm season grasses are Bermuda grass, blue grama, and buffalo grass. Warm season grasses have a shorter growing season. This means they green up in mid Spring, are low maintenance, and require less water than cool season grasses. But blue grama and buffalo grass can’t take extensive foot traffic.
Grasses should not be selected solely on perceived water use. Depending on the purpose and function of the turf area, traffic tolerance, recuperative ability, maintenance and aesthetic appearance should also be considered.
Four Turf Grasses for Albuquerque
Park Blend grass, a combination of Kentucky bluegrass, perennial ryegrass, and tall fescue
PARK BLEND: The most popular turf grass lawn here, used by the City of Albuquerque and homeowners alike, is Park Blend. Park Blend combines all the cool season grasses into a blend of Kentucky bluegrass, ryegrass and tall fescue, taking advantage of the positive attributes of all three grasses in one turf. Park Blend performs beautifully through warm summers and is especially well-suited to New Mexico's growing conditions. While it does need about 37"- 41" inches of water a year, this is a great choice for a lawn that will receive a lot of traffic. It does require regular mowing and weed control.
Buffalo grass, Bouteloua dactyloides
BUFFALO GRASS: Choose warm season buffalo grass for a beautiful low growing, low water and low maintenance grass. It will handle light traffic, rarely requires mowing and uses around 24" - 28" inches of water a year.
Bermuda grass, Cynodon ‘PWIN04S’ Dog Tuff
BERMUDA GRASS: Bermuda grass is a great choice for a low water, low maintenance grass with medium foot traffic. The downside is that it does spread prolifically via runners. It is best to surround this grass with an 8-inch-wide and deep edger to keep it in check. Bermuda grass uses about 22 - 26 inches of water a year and requires a few mowings a year.
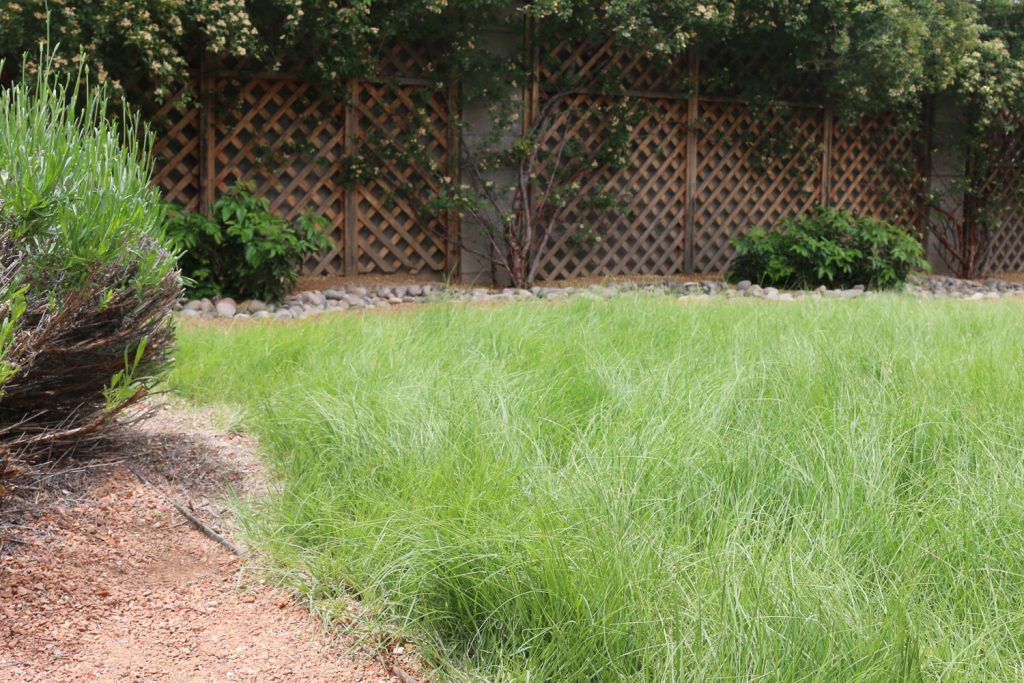
Blue grama grass, Bouteloua gracilis
BLUE GRAMA GRASS: Choose blue grama grass for a stunning native meadow look. It can be seeded with wildflowers for a beautiful spring and summer appearance. Keep the eyelash like seed heads on the grass through the fall and winter for both aesthetics and wildlife appeal. This grass uses about 18 - 20 inches of water a year. Trim and dethatch once in late winter for best appearance.
PRO TIPS: prepare the soil well before planting turf grasses, water early in the morning or late evening, keep grasses to a mow height of 3-4" so the soil stays cooler, service the irrigation system regularly to check for efficiency.
Author: Jill Brown, ASLA Landscape Architect and owner of My Landscape Coach in Albuquerque, NM. Resources: Turfgrass irrigation Circular 660 Bernd Leinauer, Professor and Extension Turfgrass Specialist NM State University, Growing the Southwest Garden by Judith Phillips, High Country Gardens, Plants of the Southwest. Even more resources about turfgrasses can be found over at NMSU.
Experienced gardeners in New Mexico know that the key to
success is in the soil. Soils in our climate are highly erosive and without
care will blow away with spring winds or wash out during summer monsoons.
Covering bare soil with mulch is an essential gardening practice with benefits like
reducing moisture loss through evaporation, suppressing weeds, and giving
landscapes a finished appearance. When you use organic mulches (as opposed to a
gravel type mulch), there are even more benefits. Like keeping the soil cool, improving
soil structure, and feeding the soil microbiology that supports plant health.
Despite the benefits, organic mulches continue to be passed
over for gravel in our area. This is due in part to our tendency to mimic the
practices we see around us. But those are not always best practices! This is
also a consequence of several myths that we’d like to dispel.
Before digging into these myths, let’s take a moment to
define the term “organic mulch.” A mulch is a layer of material placed on top
of the soil. An organic mulch is
one that is derived from living matter. The term “organic” in this context has
no relationship to the standards followed to generate the material. Examples of
locally available organic mulches are wood mulch, bark mulch, pecan shell
mulch, and straw. Because organic mulches were once alive, they contain
essential nutrients, minerals, and energy that nourish the soil ecosystem as
they decompose. An important consideration when using organic mulches is to
skip the landscape fabric, which prevents the rich organic matter created by
decomposition from working its way back into the soil.
Myth #1: Organic
mulches rob your soil of nitrogen
This is a common misconception that is easily dispelled.
Organics decompose via microorganisms that use nitrogen as they undergo
explosive reproduction in response to a new food source. This is why we say
that nitrogen gets “tied up” in the soil when unaged composts are integrated.
But therein lies the key. Mulches are not integrated into the soil - they lie
on top of it! By definition, decomposition only occurs on the surface area of
the material being decomposed. Therefore, plant roots do not compete for
nutrients with the microorganisms that are slowly breaking down the organic
mulch to feed the soil below.
Myth #2: You’re going
to attract all kinds of insects and vermin
The cool, moist environment created by organic mulches is
ideal for promoting plant health. Gravel mulches increase the reflective heat
in a landscape and compact the soil, contributing to plant stress. Heat also creates
higher water demand. The cool, moist layer that is so good for plant health
also provides a hospitable environment for insects. But mulch itself is not a
beacon for the insects in the neighborhood to colonize your yard. It simply
provides a more favorable habitat for
what is already there. But this environment also benefits insects and
vertebrates that predate on the undesirable ones. This creates a healthier
ecosystem that supports your plantings. If you have concerns about termites,
rest assured that a mulch layer does not provide the necessary habitat for a
termite colony. A one-foot bare space between organic mulches and your house
will discourage insects from finding their way into your home.
Myth #3: It will all
wash or blow away
If you use the wrong kind of organic mulch in the wrong
place it can migrate. But with a little understanding of different mulch types, this can be avoided. Most wood mulches
available on the market are chipped flat and consistent in shape in size. These
are great in areas that will receive some foot traffic as they compact down to
a firm surface. However, in areas of higher wind exposure or periodic
inundation with water, use a mulch that is more irregularly shaped and sized as
the pieces will hold together better. Mulches made from recycled yard waste and
tree trimmings typically fit this description. Mulches made from bark tend to
be lighter and can have a tendency to migrate more readily. Above all, pay
attention to grades when using organic mulch. Design landscapes so that the finished
grade of mulched areas is below hard surfaces like sidewalks and patios. If you
use organic mulch on a slope make a small berm on top of the slope and dig in
contour swales to prevent the mulch from washing down.
Myth #4: Organic
mulches are more difficult to maintain
Anyone who has wheelbarrowed out a graveled landscape,
sifted it to remove dirt and weeds, and shoveled it back in can tell you that
gravel is not inherently easier to maintain. Gravel landscapes with filter
fabric are designed to be maintained with a regime of consistent weed
management and treatment. If spraying chemicals in your landscape is not your thing, then invest in the right
tools to make weed
management simple. A 3-4” layer of organic mulch is effective in preventing
sunlight from reaching annual weed seeds, thereby preventing weed germination.
The beauty of organic mulches is that they can visually
accommodate a little bit of leaf litter, reducing the need for constant raking
and blowing. A thin top coat of mulch added every other year will keep your
landscape looking fresh and replace the material that has broken down to
sustain the soil. Organic mulches are light weight, too, making them easy to
wheelbarrow and rake around.
Organic mulches are available in bags from most local garden centers, and are available in bulk from several retailers in the Albuquerque area. When you buy from local bulk retailers, you are supporting the recycling of local organic materials that may otherwise end up wasting away in a landfill and contributing to greenhouse gas emissions. Buying bulk also means less plastic! Organic mulches are a renewable resource that will improve your landscape health and help you conserve water.
What should every home owner know about simple irrigation maintenance?
The most important thing is to visually inspect your system periodically. Usually, irrigation runs during the middle of the night and we’re unaware of how well (or how poorly) it’s working. Turn on each zone and observe its operation. Look for leaks in your valve boxes – if there’s water in the box, you probably have a leak.
With sprinklers:
Look for broken or tilted heads and nozzles that should be adjusted to address overspray. If water continues to drain from one of your sprinklers after the zone has shut down, you may have a low head drainage problem. To fix this, install a simple check valve, which typically screws into the lower part of the sprinkler head. Ask your local irrigation supplier for a check valve recommended for your situation.
With drip irrigation:
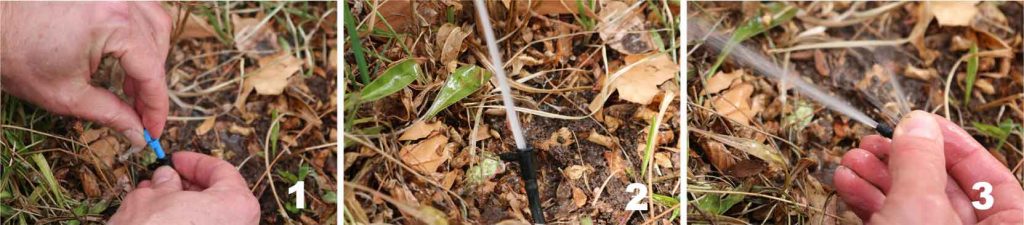
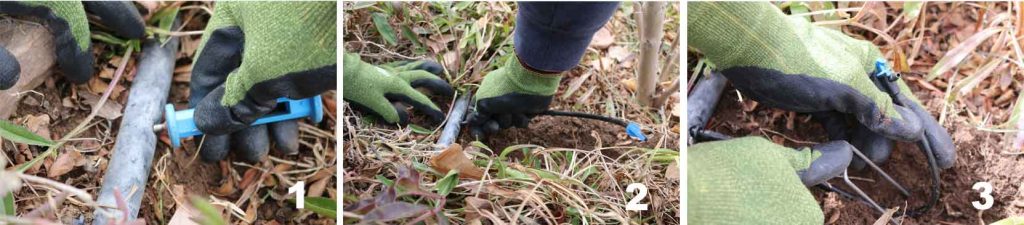
How to unclog your button or flag emitters.
Button emitters are not easy to unclog. Often, it’s easiest to simply remove a clogged button emitter and replace it.
Flag emitters can be unclogged as follows:
While water is flowing through the emitter, twist the colored flag piece located on top of the emitter so that it can be removed.
Allow water to flow out the top of the emitter for 10-15 seconds with the flag piece removed.
Block flow from the top of the emitter to send water through the side orifice for 10-15 seconds.
Twist the flag piece back into place to resume typical irrigation (not pictured).
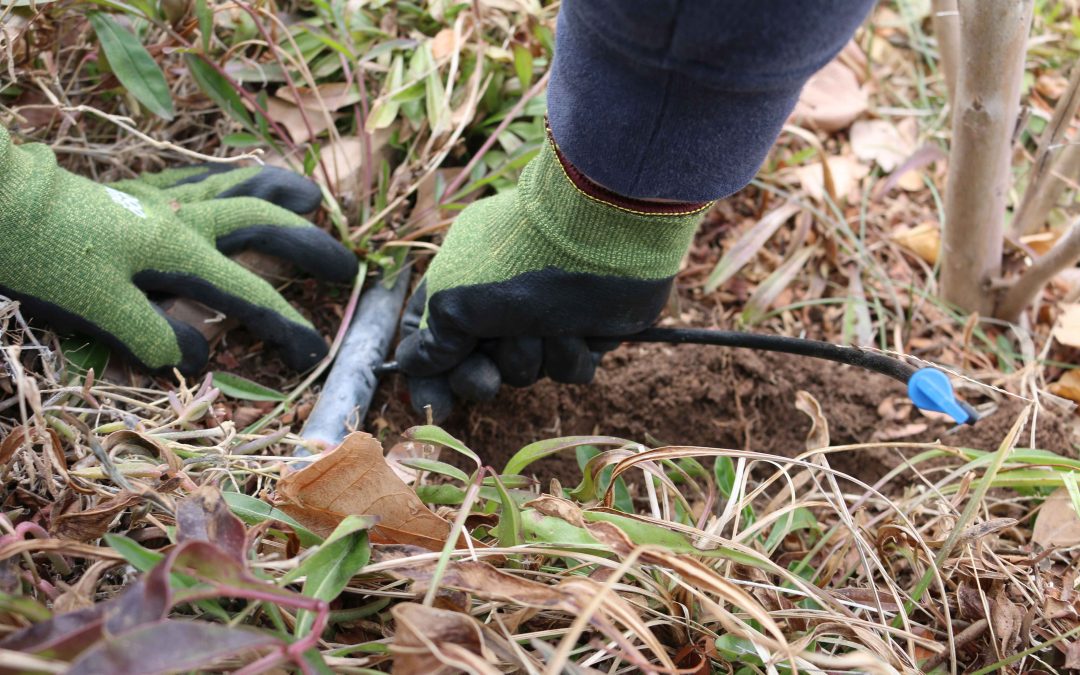
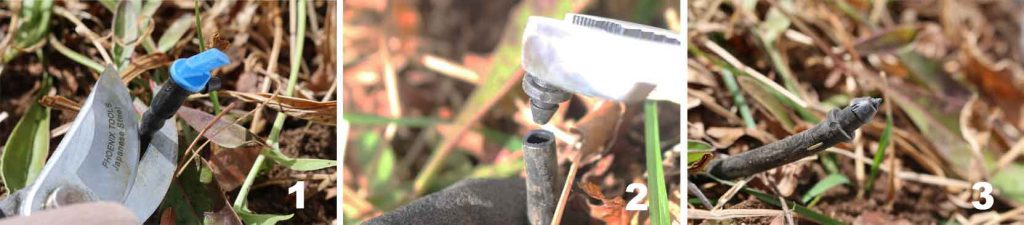
How to add an emitter?
Using a punch tool, make a hole where you will connect the spaghetti tubing
Attach the spaghetti tubing to the lateral line using a barbed connector
Run the spaghetti tubing through a small trench to where you want the emitter to apply water – at the dripline of the plant is usually best
How to repair a poly tube if it's been punctured?
Locate the damaged section of poly
Cut out the damaged section
Use a fitting – there are many types that will work – to join the ends
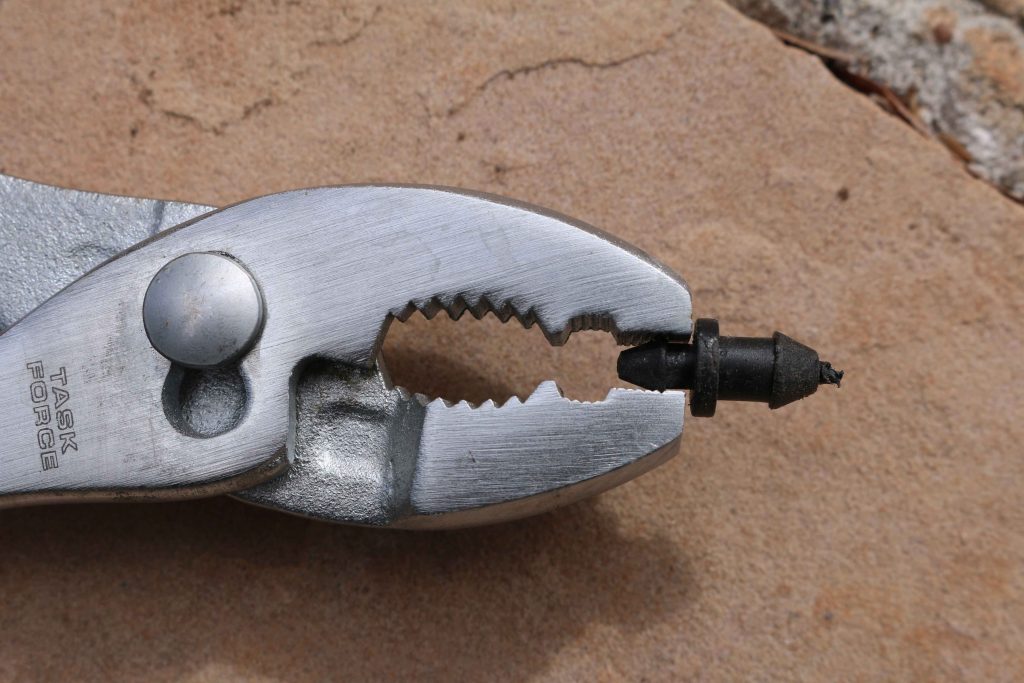
What is a goof plug and how to install it?
It’s a simple, 2-sided plastic piece used to plug a small opening in drip irrigation lines
Goof plugs can be used to stop water flow through spaghetti tubing, as follows:
Locate tubing to plug (cut off emitter if necessary)
Twist small end of goof plug into spaghetti tubing opening
Enjoy your water conservation!
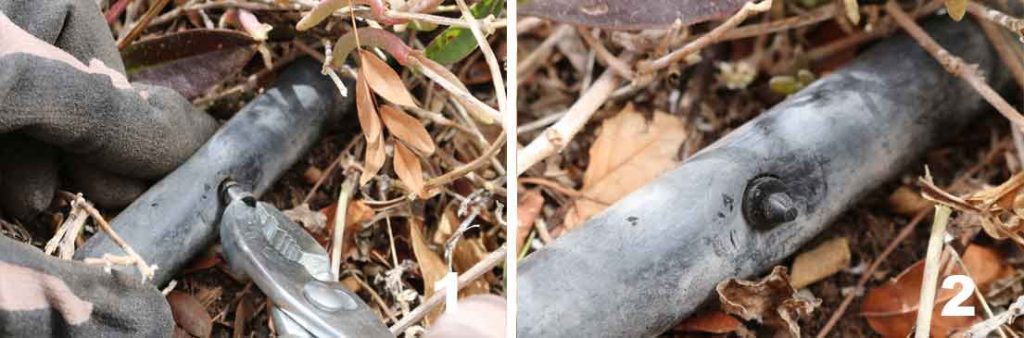
Goof plugs can be used to stop water flow through distribution line, as follows:
Locate tubing to plug
Twist large end of goof plug into distribution line
Using these few simple tricks, you can easily manipulate water flow in your landscape for maximum system efficiency.
Author: Laura Ferenchak, Irrigation Efficiency Specialist with Albuquerque Bernalillo County Water Utility Authority