How do I know how deeply I’m watering my plants?


Testing the soil moisture with a long screwdriver.

Use a soil probe or a long screwdriver to test soil moisture. Push the screwdriver into the soil 24 hours after you’ve watered your plants. It will go easily into moist soil. Mark and measure how far it went into the ground. That will tell you how deep you have watered that plant. Every yard is different, but once you figure out how long it takes your watering system to water to certain depths, you’ll be set.

Simple Irrigation Maintenance Techniques

Simple Irrigation Maintenance Techniques

What should every home owner know about simple irrigation maintenance?

The most important thing is to visually inspect your system periodically. Usually, irrigation runs during the middle of the night and we’re unaware of how well (or how poorly) it’s working. Turn on each zone and observe its operation. Look for leaks in your valve boxes – if there’s water in the box, you probably have a leak.

With sprinklers:

Look for broken or tilted heads and nozzles that should be adjusted to address overspray. If water continues to drain from one of your sprinklers after the zone has shut down, you may have a low head drainage problem. To fix this, install a simple check valve, which typically screws into the lower part of the sprinkler head. Ask your local irrigation supplier for a check valve recommended for your situation.

With drip irrigation:

How to unclog your button or flag emitters.

Button emitters are not easy to unclog. Often, it’s easiest to simply remove a clogged button emitter and replace it.

Flag emitters can be unclogged as follows:

  1. While water is flowing through the emitter, twist the colored flag piece located on top of the emitter so that it can be removed.
  2. Allow water to flow out the top of the emitter for 10-15 seconds with the flag piece removed.
  3. Block flow from the top of the emitter to send water through the side orifice for 10-15 seconds.
  4. Twist the flag piece back into place to resume typical irrigation (not pictured).

How to add an emitter?

  1. Using a punch tool, make a hole where you will connect the spaghetti tubing
  2. Attach the spaghetti tubing to the lateral line using a barbed connector
  3. Run the spaghetti tubing through a small trench to where you want the emitter to apply water – at the dripline of the plant is usually best

How to repair a poly tube if it's been punctured?

  1. Locate the damaged section of poly
  2. Cut out the damaged section
  3. Use a fitting – there are many types that will work – to join the ends

What is a goof plug and how to install it?

  1. It’s a simple, 2-sided plastic piece used to plug a small opening in drip irrigation lines

Goof plugs can be used to stop water flow through spaghetti tubing, as follows:

  1. Locate tubing to plug (cut off emitter if necessary)
  2. Twist small end of goof plug into spaghetti tubing opening
  3. Enjoy your water conservation!

Goof plugs can be used to stop water flow through distribution line, as follows:

  1. Locate tubing to plug
  2. Twist large end of goof plug into distribution line

Using these few simple tricks, you can easily manipulate water flow in your landscape for maximum system efficiency.

Author: Laura Ferenchak, Irrigation Efficiency Specialist with Albuquerque Bernalillo County Water Utility Authority 

Irrigation: Getting it Right!

Irrigation: Getting it Right!

As irrigation season ramps up, we sat down with the Water Authority’s irrigation specialist to ask a few questions about the utility’s new FREE Efficient Irrigation Consultations.

Why is the Water Authority offering this service?

  • In ABQ, 40% of our drinking water is used on landscapes.
    • Improperly maintained irrigation systems often apply twice the water the plants need in order to compensate for system inefficiencies.
    • Often, relatively simple maintenance or scheduling changes have a big impact on how much water our irrigation systems use to water plants.
    • It’s often difficult for someone not trained in this field to detect irrigation problems, since the systems usually run at night and most components are hidden.
    • Empowering you to better understand your landscape and irrigation systems will help all of us steward our valuable water resources.

How does a typical consultation go?

  • A trained specialist will:
    • Arrive at your home at the scheduled time to review your landscape goals and plant material.
    • Check your irrigation system’s performance and controller settings.
    • Create customized recommendations for irrigation settings to help you save money and water.
    • Review rebates that are available through the Water Authority that could benefit you and your landscape.

Why should I sign up for a FREE Efficient Irrigation Consultation?

  • You’ll be supporting water efficiency goals in Albuquerque. Be a steward of water conservation.
    • Save money and water.
    • It’s free.
    • Learn something about your landscape and your watering systems.

How do I request this service?

  • Call 505-289-3003

Visit our Irrigation Efficiency Rebate page to see all our rebates.

Changes to the Water Waste Reduction Ordinance

Changes to the Water Waste Reduction Ordinance

In order to tackle inefficient irrigation practices that result in wasted water, and help customers identify malfunctions in their irrigation systems, The Water Authority (WA) recently updated the Water Waste Reduction Ordinance and will be implementing it during the 2019 irrigation season.

The goal of the Ordinance is to eliminate water waste in our service area by providing education and incentives to our customers. Of course, this goal is much like the goal of eliminating all speeding cars from local roads, so the ordinance cannot ensure total elimination of water waste. Instead, water use compliance activities serve as an effective educational tool to change customer behavior by reducing water waste.

Over the course of the 20-year history of the Ordinance, the Water Authority has identified that 90% of water waste violations issued came as a result of runoff due to overspray, leaks, malfunctions and inefficient timer scheduling practices.

In order to address these the WA is offering Free Efficient Irrigation Consultations to customers who receive a water waste notice. The WA will come to the customers property, evaluate their irrigation system and teach them how to avoid future water waste. Customers have 15 days to schedule a free consultation after receiving the notice

The amended Water Waste Reduction Ordinance provides the following benefits:

  • Less emphasis on enforcement and more on education
  • Create opportunities for more positive interaction with the public
  • Increase participation in Efficient Irrigation Consultations
  • Increase staff response effectiveness

The changes to the Water Waste Reduction Ordinance include the following:

  1. All customer classes will utilize the following system:
  • Reported Warning Notice for first complaint
    • Observed Warning Notice for documented water waste
    • Certified Notice of Violation with an opportunity for an Irrigation Efficiency Consultation
    • Fee assessed if consultation is not scheduled or the problem is not fixed
  • The fee schedule was also modified. The previous fee schedule had eight sequential violations issued over a period of five years. The proposed new fee schedule will have three escalating fines for each consecutive violation issued within one calendar year. The schedule has also been modified to base the fee on meter size (representative of water usage).
Meter size 1st Fee 2nd Fee 3rd Fee
< 1.5” $20 $50 $100
< 4” $100 $250 $500
< 8” $250 $500 $1,000

Effective April 1, 2019, Water Conservation Specialists from the Water Authority will be identifying properties that may benefit from the free services that the WA offers. Property owners will be notified of any potential water waste issues that have been reported by the community or staff. As a result, the customer will receive a warning notice and an opportunity to request a Free Efficient Irrigation Consultation. Failure to correct any issues may result in a violation. If a customer receives a violation, they have 15 days to schedule a FREE Consultation.

Spring Irrigation Startup

Spring Irrigation Startup

When do I start my irrigation system back up?

Turn on your irrigation system after the last chance of freezing temperatures has passed (typically late March in the greater Albuquerque area, but possibly as late as mid-April). This will prevent damage to your irrigation system.

1. Turn on your irrigation system. Then observe and listen.

If you turned off the main valve for your irrigation system over the winter to prevent freezing, turn it back on slowly, only part way. Then wait a few minutes until the system is fully pressurized. If it is not leaking, turn it fully on.

Caution: turning it too fast can create a water-hammer which could break pipes.

Irrigation valve box with backflow preventers.
  • Check the backflow preventer for leaks by inspecting it and checking for wetness.
  • Open the valve box (it usually has a green cover) and make sure there is no water in the box itself. Look for leaks in the valves, connections, filters and pressure reducers.
  • Run each zone for several minutes (long enough to see every part of it up close). Walk along each irrigation system pipe and inspect all sprinkler, bubbler and/or drip zones.

  • For sprinklers:
    • Look for signs of a leak, such as at the risers to the heads, the heads themselves, the emitter lines, or the pipes.
    • Look for heads not spraying correctly, such as spraying in the wrong direction, spraying too low, or other signs of breakage or misalignment. It is very common for them to go out of alignment when the system was turned off for the winter.
Spray head with minor leak
  • For drip and bubbler systems:
    • Look for missing emitters and/or bubblers. Emitters or bubblers may be hard to see due to plant coverage so listen carefully. Hearing a whooshing sound means an emitter or emitter line has blown off.
Drip emitter

2. Re-check the valve boxes again for water leaks now that the system has been on for testing.

3. Perform any necessary repairs and re-check for leaks after repairs are complete.

4. Set the timer.

Typical Irrigation Timer

The key to irrigation is to supply enough water to replace evaporative losses from the ground root areas and from the leaves or stems. Too much or too little water can harm your plants. It is important that you set the timer correctly.

  • Follow the water recommendations guide to help you set your timer. Mixed zones like lawns and desert friendly landscapes are hard to water together. They usually need different run times. Large trees do not do as well being watered as if they were a lawn. Lawns have shallow roots (1” to 6” is typical) so usually need less water per application than trees with their deep roots (up to 24”). They require longer, deeper watering. Sign up for a FREE Efficient Irrigation Consultation at 505-289-3003 for help with your timer settings.
    • Do not confuse start times with zone numbers. Remember that every start time (4 am, 11 am, 5 pm….) on a program (A, B, C…) will run all your zones in series for the program you are running.
    • Attach a written copy of your schedule showing programs, zone number and corresponding location to the inside of your controller box.
    • Sprinkler heads or emitters vary greatly as to how much water comes out per minute. A slow watering head may need 2 to 4 times the watering time of traditional faster water delivery heads. For example, emitters can be as low as ½ gallon per hour but could be as high as 14 gallons per hour. The same watering time will not work for all zones or all emitter types.
    • Bubblers typically deliver 1 or 2 gallons per minute, compared to emitters that can be 1 or 2 gallons per hour. Many people over water when using bubblers for small plants. If you see pooling, run-off or recognize the flow is too fast, then replace the bubbler with a smaller one.
    • After watering, test to see if you provided enough, too little, or about right amount of water to the plants. Use a soil probe or a long screwdriver to test soil moisture. Push the screwdriver into the soil about an hour after you’ve watered your plants. It will go easily into moist soil. Mark and measure how far it went into the ground. That will tell you how deep you have watered that plant. Every yard is different, but once you figure out how long it takes your watering system to water to certain depths, you’ll be set.
    • If your controller is getting old, you would be wise to install an up to date one. There are lots of options. Some are “smart” controllers and can do many irrigation tasks well and can be operated from your phone or home computer, allowing you anywhere, anytime control. Check out the Irrigation Efficiency Rebates here to help you with the cost.

5. Observe your irrigation system the first month of the season.

We suggest the run times for the first few weeks should be during times of day where you can observe the operation of the system. When you are sure everything is running well, then you can have the system run at times you would not normally be observing. However, we suggest manually running the system zones for a few minutes every two months just to stay on top of any problems that may occur.

Many homeowners want to put a lot of water on at the beginning of the year to make sure the dry roots from the winter get thoroughly soaked. This makes some sense for the first watering of the year. Once the roots are soaked, you can go to shorter run times and number of runs per week to adequately irrigate your plants.

If you are uncertain about the any of the start-up tips, or need help, contact us for FREE Irrigation Efficiency Consultations at 505-289-3003. Or consider hiring a landscape contractor to help you get your system up and running correctly.

Author: Richard Chapman of Smart Use in Albuquerque, NM.

Time to winterize – Prepare your landscape for winter

Time to winterize – Prepare your landscape for winter

November is the time to prepare your landscape for winter. By following the simple recommendations outlined below, you can get your yard ready to endure the coming winter months so it can flourish next spring.   How do I prepare my plants for the winter season? Turf grass:
  • Mow your lawn to a height of 1-2 inches. Grass left too long over the winter can develop brown patches.
  • Aerate the ground before it freezes. Aerating involves penetrating the lawn with small holes to allow air, water and nutrients to reach the roots over winter. Power aerators are available to rent at your local home and garden center, or you can try a strap-on shoe aerator.
  • Remove fallen leaves from the lawn. These may cause damage to the grass if left over the winter.
All other plants:
  • Add mulch to existing plants. Mulch helps retain moisture and keeps the soil a more consistent temperature in the winter. When mulching trees, be sure to leave space around the trunk.
  Do I need to water my plants in the winter? Yes! In our area we recommend you continue to water your plants over the winter. But you won’t need to water as often. During the winter, soil retains water for longer periods because of the colder nights and shorter days. You’ll want to pay attention to how much rain and snow you get in your yard each month. If it has rained more than ½ inch (or snowed more than 6 inches) in the last 4 weeks, then no need to water. If we are having a dry winter (less than ½ inch of precipitation in a month), then your yard is thirsty! Give it a drink. When watering during the winter, we recommend you water during the warmest part of the day. Below is a chart with watering recommendations.   How much do I water my plants during the winter?
Plant Type How often? How deep?
Trees 1 time a month 24 inches
Shrubs 1 time a month 18 inches
Flowering plants 1 time a month 12 inches
Desert accents none none
Groundcover 1 time a month 12 inches
Grass: turf 2 times a month 6 inches
Grass: ornamental 1 time a month 12 inches
Vines 1 time a month 18 inches
  How do I know how deeply I’m watering my plants?

Testing soil moisture with a long screwdriver.

Use a soil probe or a long screwdriver to test soil moisture. Push the screwdriver into the soil about an hour after you’ve watered your plants. It will go easily into moist soil. Mark and measure how far it went into the ground. That will tell you how deep you have watered that plant. Every yard is different, but once you figure out how long it takes your watering system to water to certain depths, you’ll be set.       
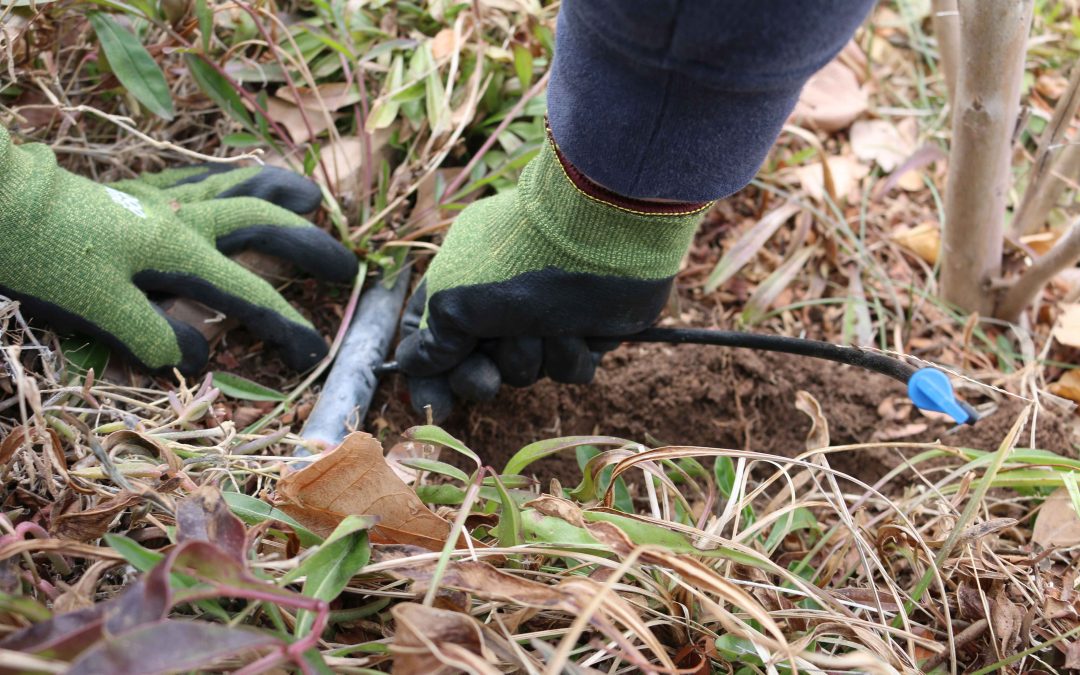
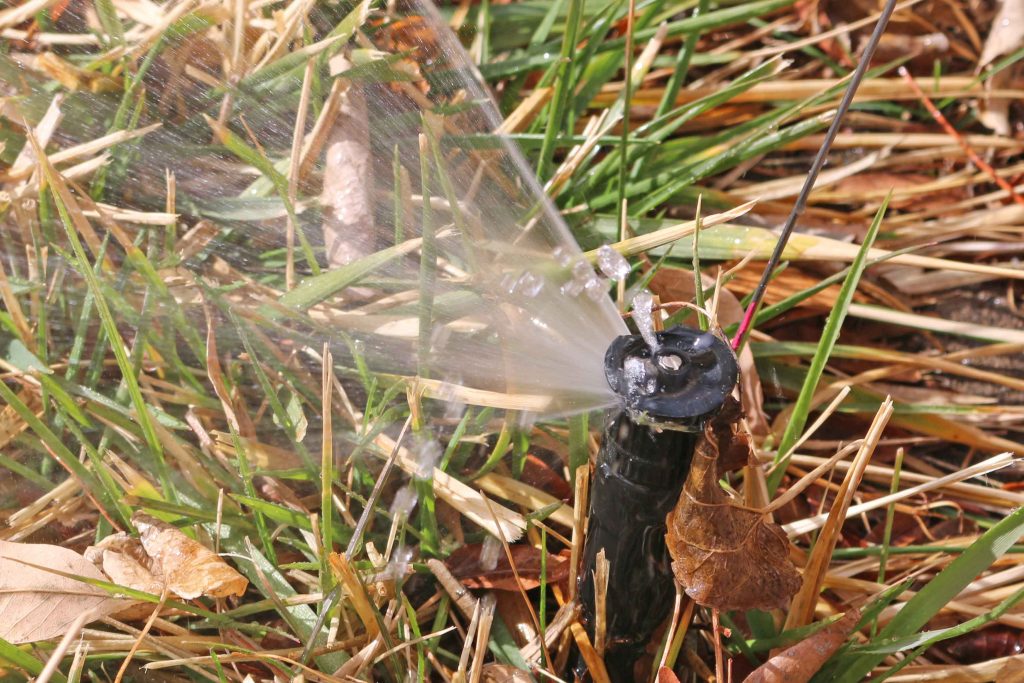
Winterize your irrigation system In a climate where winter temperatures can get below freezing, it may be advisable to “winterize” your irrigation system in order to avoid damage. If water is left in pipes, valves and sprinkler heads during freezing temperatures, that water may expand. You can imagine the results. The steps you should take to prepare your irrigation system for winter depend on a lot of factors, but the overall goals for winterizing are the same for most systems:

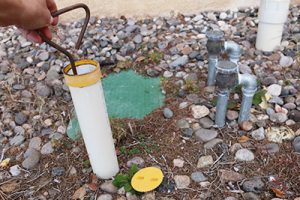
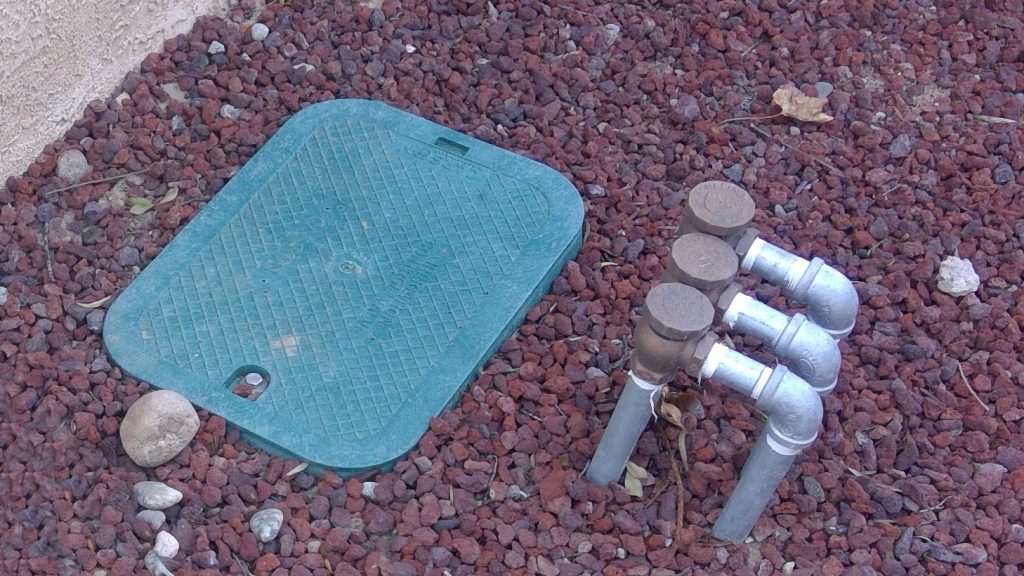
Shut-off valve with sprinkler valve key.

 
  1. Shut off the water supply to your irrigation system
  • Locate your shut-off valve (often hidden in a 3” PVC pipe; sometimes this pipe has a white or yellow cap on it as shown in the photo) and turn it to the right to shut it off
     

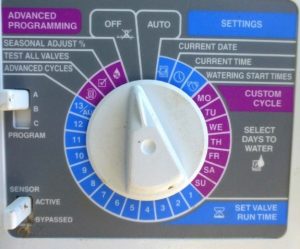
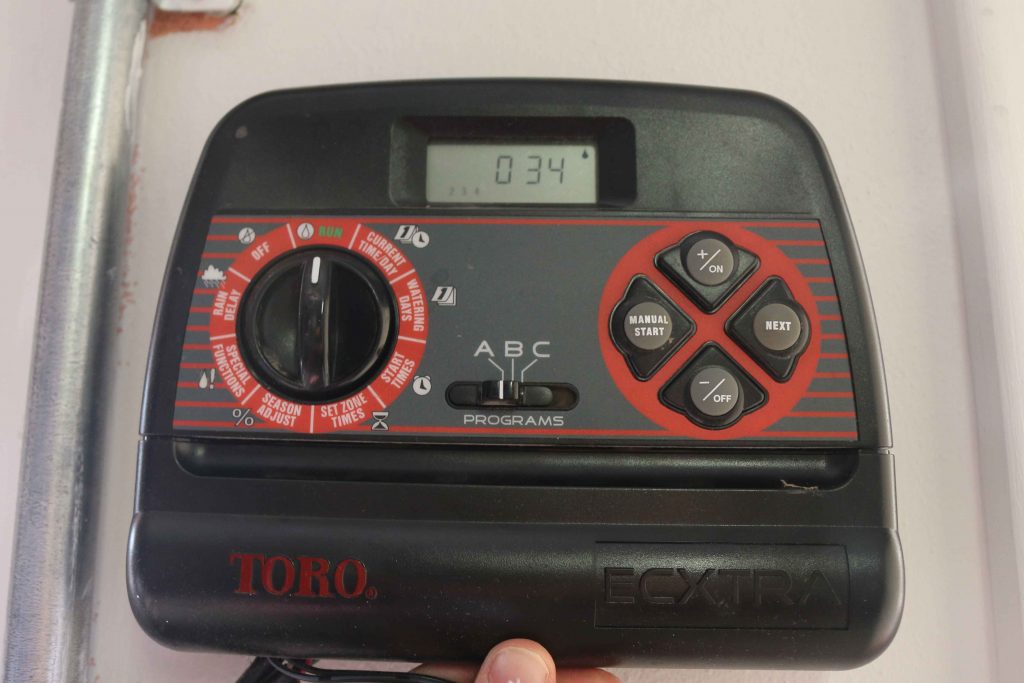
Controller set to the "off"position.

2. Turn off the irrigation system controller (if you have one)
  • Leave your controller plugged in to save programming information for next year
  • Turn the controller dial to OFF.
       

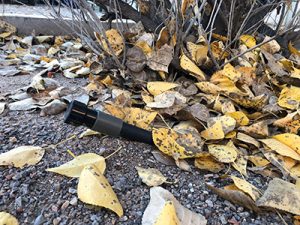
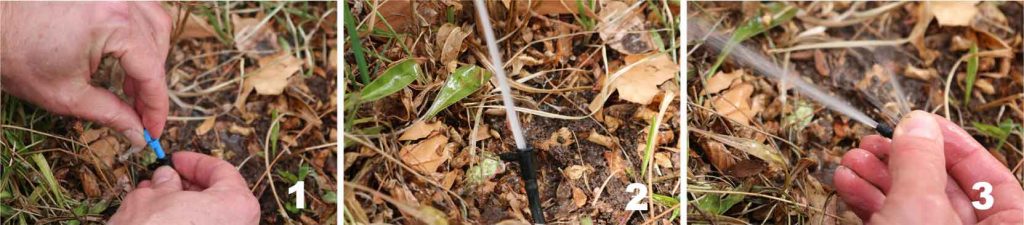
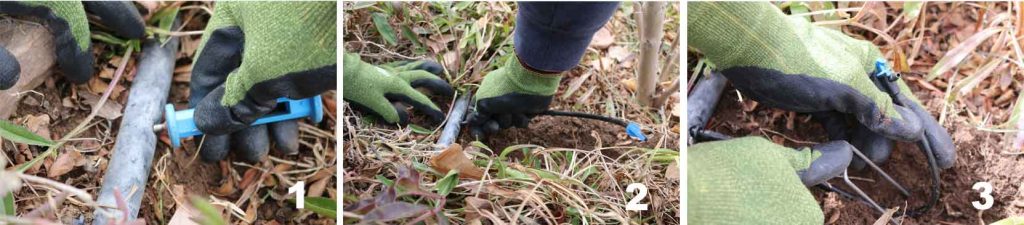
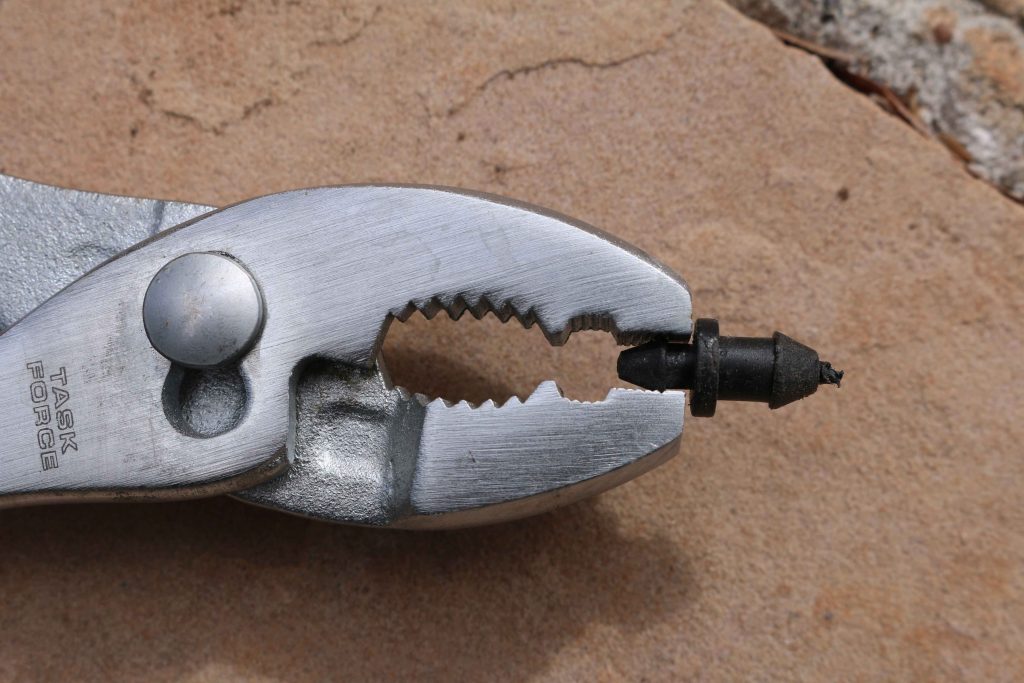
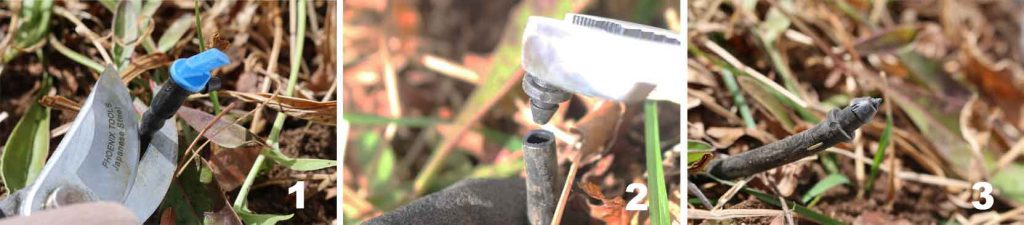
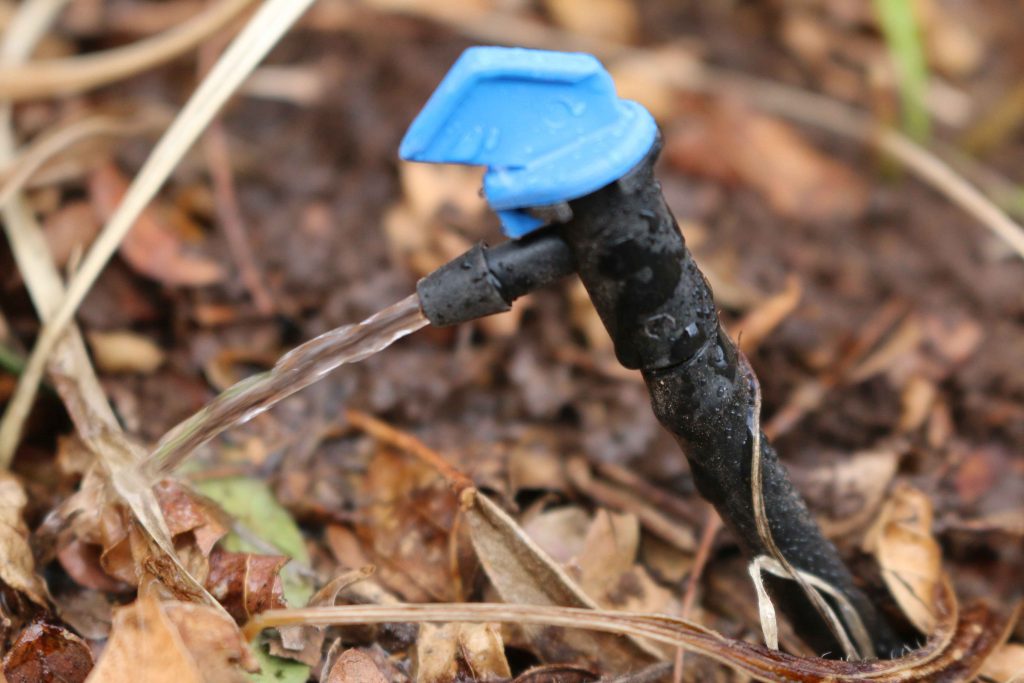
Flush Cap at the end of a drip system.

3. Drain the water from all pipes, valves, and sprinkler heads
  • There are several ways to drain your system. Manual drain valves, automatic drain valves, are blown out with compressed air. This should be left to trained professionals.
  • Local irrigation specialists can be hired to help.
  • If you have an irrigation system with drip hoses, we recommend you locate the end cap (flush cap) of the drip hose and drain out the water.
  Don’t forget – hose bibs (or faucets located on the outside of your house) can also freeze. Make sure that water to your hose bibs is shut off. Remove any hoses that are connected to hose bibs, and turn on the faucet to allow any trapped water to drain out. On warm winter days, you may want to turn the water back ON in order to water with a hose.