As
the seasons begin to change and the signs of Spring appear in the landscape, be
on the lookout for a remarkable shrub with small, fragrant yellow flowers: the Golden
Currant. A native to New Mexico moisture catchments at elevations from 2,500 to
8,000 feet, this plant is suitable for many Albuquerque landscape situations if
sited and cared for properly.
A
standout in terms of multi-season interest, fragrance and wildlife garden value,
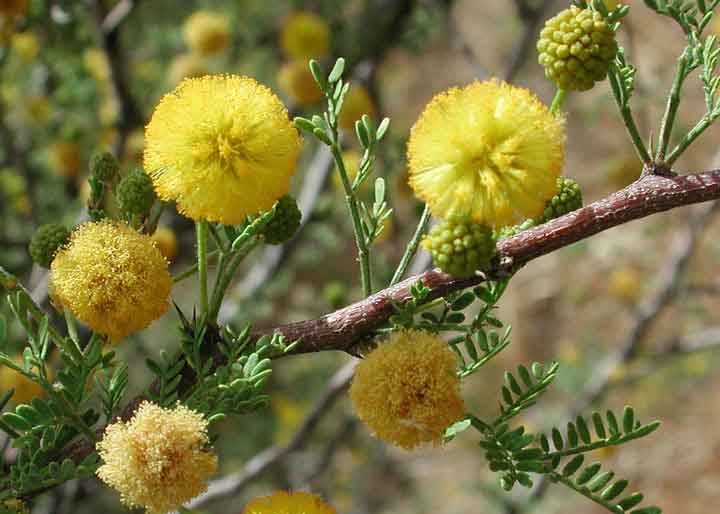
Ribes aureum has few botanical peers. In late
Spring, five-petaled flowers - with a scent said to resemble the aroma of cloves
or vanilla - attracts hummingbirds and monarch butterflies. The flowers develop
into edible currants, a favorite of birds, which by June will mature from a red
color to deep blue. Small green leaves turn a bright red in autumn before falling.
Tips for success: Golden
Current may succeed in sunny or shaded locations, but will require less irrigation
(link to new Efficient Irrigation Consultation tab) in lower elevations if sited
in at least partial shade. However, it is likely to fruit most heavily in sunnier
locations. Golden Current is adaptable to a wide range of soil types, but is not
tolerant of salt. It also benefits from a substantial layer of organic mulch for
moisture retention. Water every few weeks in summer. It may try to spread via suckers
so be careful when choosing a location.
A
useful specimen in any edible or wildlife garden, Ribes
aureum is also suitable for the edge of a rain garden or beneath a shade tree.
Grow it for its ornamental properties or simply for the fruit, which can be eaten
raw or used in juices, jams or pies.
Turn on your irrigation system after the last chance of freezing temperatures has passed (typically late March in the greater Albuquerque area, but possibly as late as mid-April). This will prevent damage to your irrigation system.
1. Turn on your irrigation system. Then observe and listen.
If you turned off the main valve for your irrigation system over the winter to prevent freezing, turn it back on slowly, only part way. Then wait a few minutes until the system is fully pressurized. If it is not leaking, turn it fully on.
Caution: turning it too fast can create a water-hammer which could break pipes.
Irrigation valve box with backflow preventers.
Check the backflow preventer for leaks by inspecting it and checking for wetness.
Open the valve box (it usually has a green cover) and make sure there is no water in the box itself. Look for leaks in the valves, connections, filters and pressure reducers.
Run each zone for several minutes (long enough to see every part of it up close). Walk along each irrigation system pipe and inspect all sprinkler, bubbler and/or drip zones.
For sprinklers:
Look for signs of a leak, such as at the risers to the heads, the heads themselves, the emitter lines, or the pipes.
Look for heads not spraying correctly, such as spraying in the wrong direction, spraying too low, or other signs of breakage or misalignment. It is very common for them to go out of alignment when the system was turned off for the winter.
Spray head with minor leak
For drip and bubbler systems:
Look for missing emitters and/or bubblers. Emitters or bubblers may be hard to see due to plant coverage so listen carefully. Hearing a whooshing sound means an emitter or emitter line has blown off.
Drip emitter
2. Re-check the valve boxes again for water leaks now that the system has been on for testing.
3. Perform any necessary repairs and re-check for leaks after repairs are complete.
4. Set the timer.
Typical Irrigation Timer
The key to irrigation is to supply enough water to replace evaporative
losses from the ground root areas and from the leaves or stems. Too much or too
little water can harm your plants. It
is important that you set the timer correctly.
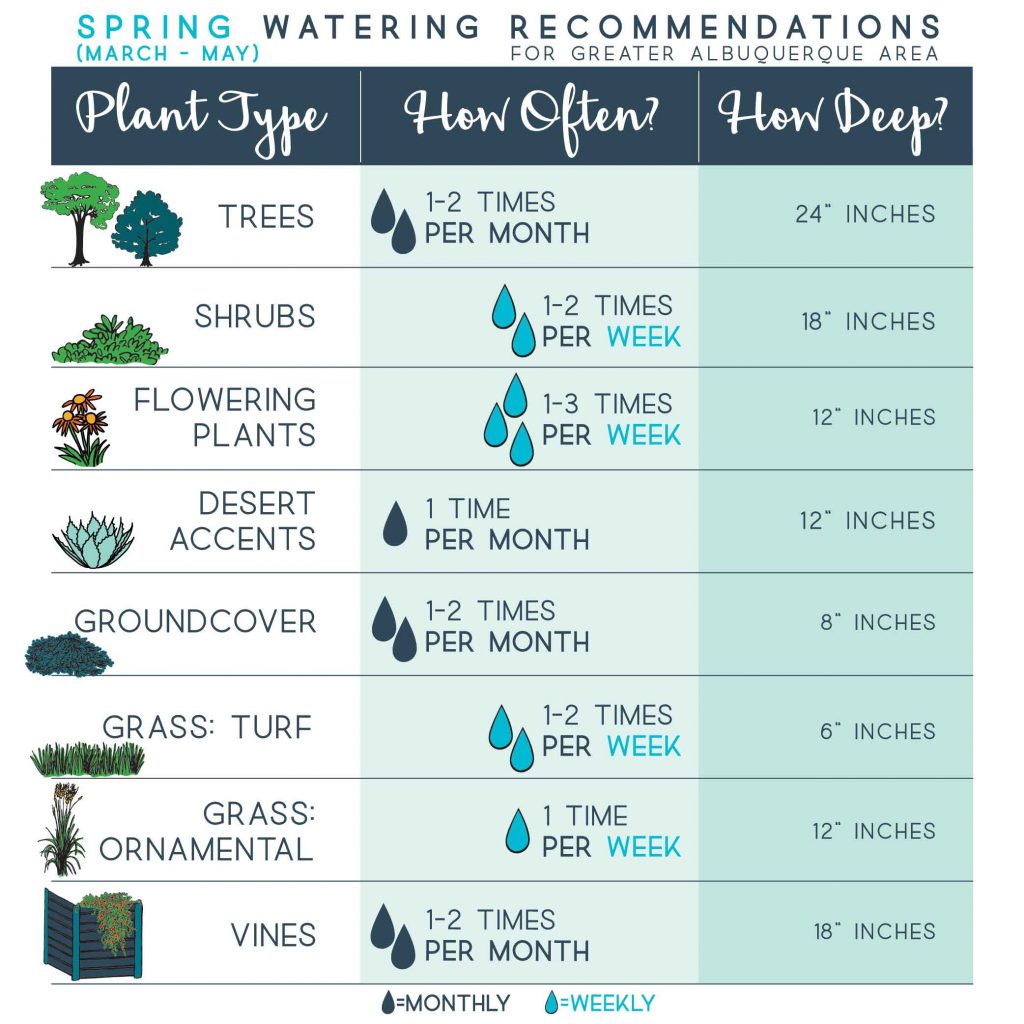
Follow the water recommendations guide to help you set your timer. Mixed zones like lawns and desert friendly landscapes are hard to water together. They usually need different run times. Large trees do not do as well being watered as if they were a lawn. Lawns have shallow roots (1” to 6” is typical) so usually need less water per application than trees with their deep roots (up to 24”). They require longer, deeper watering. Sign up for a FREE Efficient Irrigation Consultation at 505-289-3003 for help with your timer settings.
Do not confuse start times with zone numbers. Remember that every start time (4 am, 11 am, 5 pm….) on a program (A, B, C…) will run all your zones in series for the program you are running.
Attach a written copy of your schedule showing programs, zone number and corresponding location to the inside of your controller box.
Sprinkler heads or emitters vary greatly as to how much water comes out per minute. A slow watering head may need 2 to 4 times the watering time of traditional faster water delivery heads. For example, emitters can be as low as ½ gallon per hour but could be as high as 14 gallons per hour. The same watering time will not work for all zones or all emitter types.
Bubblers typically deliver 1 or 2 gallons per minute, compared to emitters that can be 1 or 2 gallons per hour. Many people over water when using bubblers for small plants. If you see pooling, run-off or recognize the flow is too fast, then replace the bubbler with a smaller one.
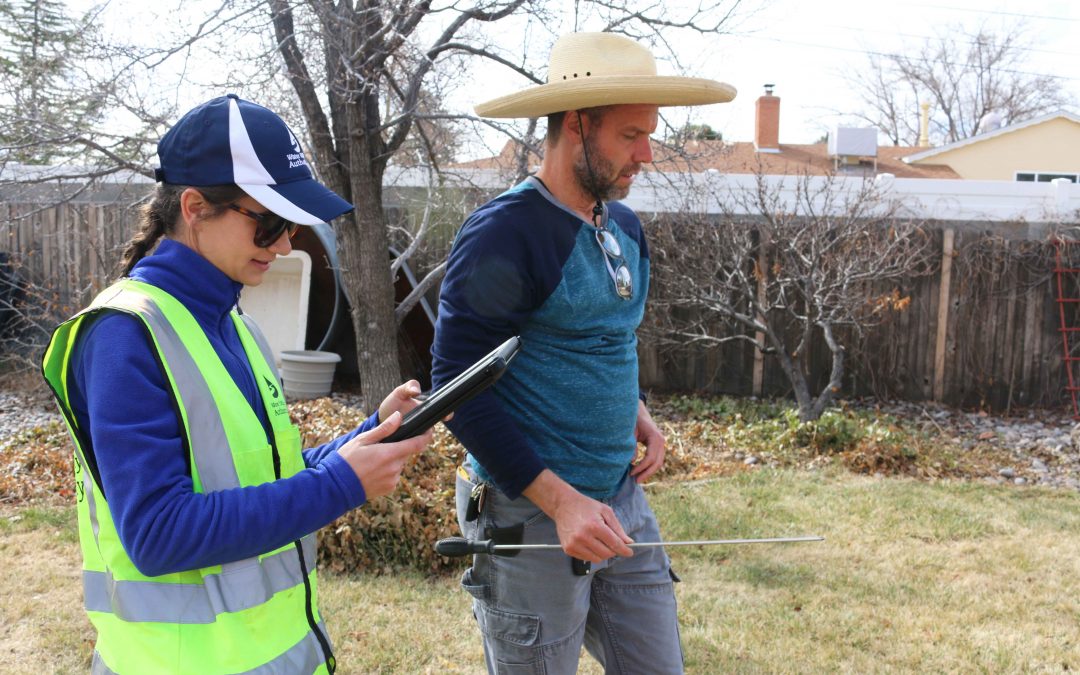
After watering, test to see if you provided enough, too little, or about right amount of water to the plants. Use a soil probe or a long screwdriver to test soil moisture. Push the screwdriver into the soil about an hour after you’ve watered your plants. It will go easily into moist soil. Mark and measure how far it went into the ground. That will tell you how deep you have watered that plant. Every yard is different, but once you figure out how long it takes your watering system to water to certain depths, you’ll be set.
If your controller is getting old, you would be wise to install an up to date one. There are lots of options. Some are “smart” controllers and can do many irrigation tasks well and can be operated from your phone or home computer, allowing you anywhere, anytime control. Check out the Irrigation Efficiency Rebates here to help you with the cost.
5. Observe your irrigation system the first month of the season.
We suggest the run times for the first few weeks should be during times of day where you can observe the operation of the system. When you are sure everything is running well, then you can have the system run at times you would not normally be observing. However, we suggest manually running the system zones for a few minutes every two months just to stay on top of any problems that may occur.
Many homeowners want to put a lot of water on at the beginning of the year to make sure the dry roots from the winter get thoroughly soaked. This makes some sense for the first watering of the year. Once the roots are soaked, you can go to shorter run times and number of runs per week to adequately irrigate your plants.
If you are uncertain about the any of the start-up tips, or need help, contact us for FREE Irrigation Efficiency Consultations at 505-289-3003. Or consider hiring a landscape contractor to help you get your system up and running correctly.
Author: Richard Chapman of Smart Use in Albuquerque, NM.
March is the perfect time to clean up your landscape to prepare for the spring growing season. In fact late March is the best time because new growth hasn’t completely emerged, making it easier to see the structure of the plants.
For the same reason, this is also the best time of year to check the irrigation system. Once freezing temperatures are no longer a threat, get the irrigation system back up and working to support new spring growth. The greater Albuquerque area occasionally gets a freeze as late as the middle of April. So although you may be eager to crank on the irrigation system and begin automatic irrigation, don’t forget that pipes may be susceptible to bursting if there is water in them and we receive a late frost.
One of the first steps to Spring
landscape cleanup is to walk around your yard and observe your plants and how they
grew last year and how they will continue to grow this year. Based on the success
of those plants consider if you’d like to:
Remove: Cut back or
dig out dead or dying plants or plants that have outgrown their space.
Replace: If the plant
has not been successful, think about what factors made it this way. Replace plant
material with an alternative better suited to the location.
Divide: Break up one
plant into multiple plants for distribution in other places in the garden or share
with friends and neighbors. This is a great chance for you and your neighbors to
try new plants.
7 Basic Spring Landscape Tasks
1. Cut Back Perennials and Flowering Plants
It is good practice to leave perennials intact over the winter, leaving stems, dried leaves, and seed heads on the plant. This helps insulate the plant over the winter, can be aesthetically pleasing, and provide forage for wildlife. Come Spring, it is time to cut back the perennials and clean up the debris around and underneath them. Pruning shears, a wire rake and gloves are good tools for this task. An example of a typical perennial is listed below.
Valerian (typical of many flowering plants and perennials): prune dry stalks just above any live growth to allow the new leaves and stems greater access to energy-producing sunlight.
2. Trim Ornamental Grasses and Rake Out Turf Grasses.
Ornamental Grasses – Spring Trimming:
Most ornamental grasses are deciduous and
produce new growth each spring. These grasses should be cut back around this time
of year for best aesthetics and to allow new growth to emerge unencumbered. Most
grasses fall into this category.
Other grasses and grass-like plants will
respond negatively to being cut back in the spring. These include yucca, bear
grass (nolina), and sotol. Selectively
remove tattered or dead leaves from these grass-like plants. Due to the density
of blue avena and regal mist grass, these should not be trimmed down. Instead selectively
remove dead material from these plants.
For
deciduous grasses, follow these steps:
Cut back last year’s growth to the main mass of the grass (typically 3”-6” above the ground) with pruners or scissors, without scalping the top of the new growth.
By hand, remove any of last year’s brown foliage and stems remaining in the middle of the grass.
For turf
grasses, rake out and dethatch with a wire rake. For native lawn grasses such as
buffalo and blue grama grass, line trim them then rake out and dethatch.
Ornamental Grass before pruning (Karl Foerster Grass, Calamagrostis x acutiflora 'Karl Foerster' ) Ornamental Grass being pruned (Karl Foerster Grass, Calamagrostis x acutiflora 'Karl Foerster' ) Ornamental Grass being de-thatched (Karl Foerster Grass, Calamagrostis x acutiflora 'Karl Foerster' ) Ornamental Grass after pruning (Karl Foerster Grass, Calamagrostis x acutiflora 'Karl Foerster' )
3. Prune Shrubs When Necessary
Many native shrubs do not require annual
pruning but some respond well to what is called renewal pruning.
Renewal pruning is not
as drastic as cutting the whole plant back but it does result in a plant with less
old, leggy growth. For renewal pruning,
use the rule of thirds. Cut back to near ground level
about one-third of the oldest stems each year to encourage new healthy growth. This
is recommended for shrubs such as lilac, forsythia,
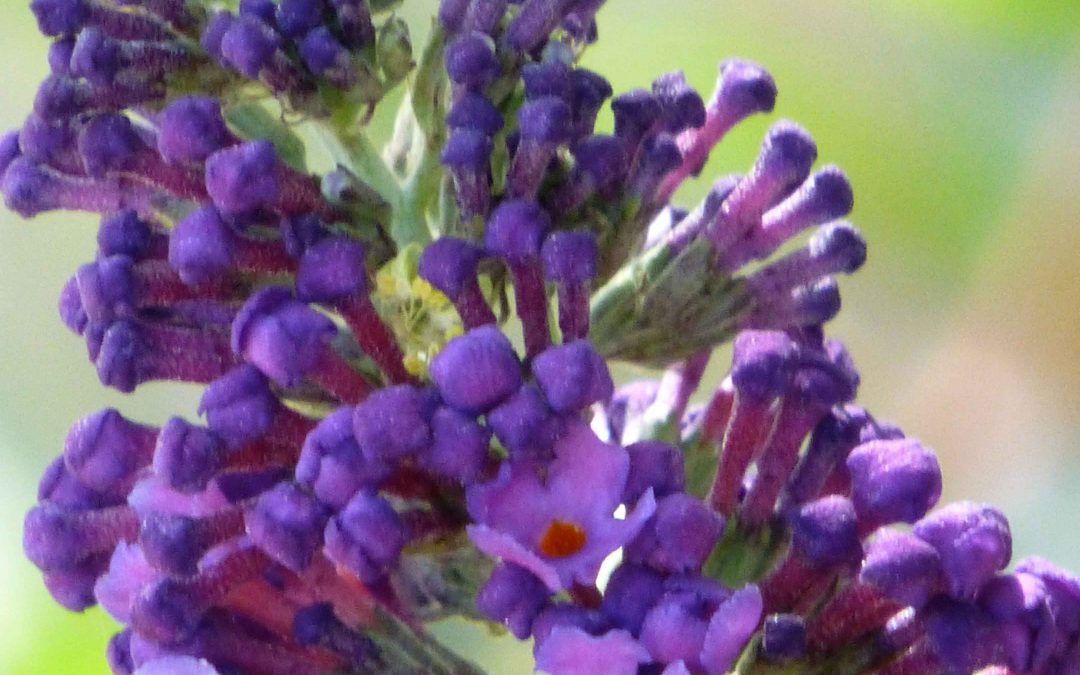
cherry sage and butterfly bush.
Renewal pruning also will
benefit shrubs that become dense with a lot of dead wood on the inside, such as
Spanish broom. Roses however are unique and require special methods for pruning.
Example plant: Cherry sage: look for the
oldest growth and trim off old growth to about 6” above the ground. This will encourage
new growth in the spring.
Example of appropriate pruning of a shrub. (Photo courtesy of natureswayinc.com)
Another method of pruning is to formally shear a shrub. Formally shearing or hedging of plants should only be done if the intent is to create a hedge. Typical plants used as hedges are boxwood, laurel, photinia, etc. Most plants used in the landscapes do not need to be hedged or trimmed formally, unless there is a clear reason to limit their growth. After pruning, the plant should look like it does in nature, not a box, ball or cylinder.
5. Check Irrigation System. See the Spring Irrigation Start Up Post
6. Restore Organic Mulch.
Organic mulch is a natural covering, and includes such material as straw, chipped wood, shredded wood, or pecan shells. (The phrase organic refers to material relating to or derived from living matter. In this context it’s not related to the food or farming method of food production without the use of chemicals.) Organic mulch spread on the ground around plants has the added benefit of retaining moisture in the soil. Certain types of organic mulch will also enrich the soil as it breaks down. A depth of 4 inches of organic mulch will inhibit weed growth by preventing sunlight from reaching weed seeds. The Water Authority offers a rebate for mulch when used around trees – check out our Treebate here or get information on converting lawn to desert friendly landscape.
Organic mulch in a landscape.
7. Recycle Green Yard Waste. There are a few places to take green yard waste.
Local composting facility (commercial, industrial, municipal).
City of Albuquerque free green waste pick up days. This is typically the last week of April and the first week of May.
Compost green waste at home.
Author: Jill Brown, ASLA Landscape Architect and owner of My Landscape Coach in Albuquerque, NM. Resources: Growing the Southwest Garden by Judith Phillips, Down to Earth: A Gardener's Guide to the Albuqueque Area, Fourth Edition by Albuquerque Area Extension Master Gardeners, Curtis Smith formerly of NM Extension Service. Consultations with: Chad Peterson, local native plan maintenance expert.
Mature Size (H x W): 35’ x 40’ Blooming Season: Spring
Region: Thrives in all part of the greater Albuquerque area
Closely
related to the iconic oak tree of the Old South, the Escarpment Live Oak is
surprisingly well-adapted to life in the Albuquerque area. Native from Texas, Oklahoma
and into the mountains of northern Mexico, this long-lived tree is among the
few broad-leafed evergreens we see in our area. Quercus virginiana var. fusiformis
(also known as Quercus fusiformis) is an excellent choice for a focal point
in a small space or as part of a mixed planting for privacy or wind protection.
Rough, dark brown bark and a gnarled form add to the character of this plant.
Tips for success: When drought stressed, this tree is more susceptible to oak wilt and rot – be sure it gets watered deeply according to our watering recommendations. Best in alkaline, well-drained soils, but tolerant of clay. Don’t be alarmed during the 2-4 week period in spring when the leaves turn yellow and drop – this is to be expected. In the wild, the tree is multi-trunked and shrubby, naturally tending to form thickets, but it can be pruned into and grown as a single-stem tree.
Its
sturdy canopy provides cover and nesting sites for birds and mammals, and its
elongated acorns offer a food source for a variety of wildlife. Branches can be
selectively pruned for use in holiday arrangements and wreaths. Check out a
beautiful example of this stunning tree near the copper relief in the Curandera
Garden at the Albuquerque Botanic Garden and in the parking lot of Explora.
Most definitions of a weed call it “a wild plant growing where it is not wanted and in competition of cultivated plants.” What you may call a weed in your yard may be a beloved plant in your neighbor’s yard.
There are two times a year in the greater Albuquerque area when weeds can get out of hand. This happens typically in early spring after a wet winter and after a monsoon season in late summer. The first thing to do is to identify the plant and decide whether it is actually a weed.
There are some common
plants most people in our area think of as weeds. These are broken up into two
categories: annual weeds and perennial weeds.
According to the NMSU blog “Desert Blooms”
Annual weeds (puncture vine/goathead, pig weed, purslane, mustard weeds, spurge, and many others) must grow from seeds each year. Prevent them from forming seeds to reduce potential weed problems for the next year. However, since weed seeds can persist in the soil many years before germinating, they will continue to reappear. Be persistent!
Perennial weeds (silverleaf nightshade, bindweed, and others) grow from seeds as well, but they also are able to regrow from their root systems. Pulling newly germinated perennial weeds before they can establish their perennial root system helps reduce the problem. As they regrow from established root systems, frequent removal of the tops will help diminish the food reserves in the roots and weaken the weeds over time. As they become weaker, they become easier to manage.
WEED REMOVAL
Chemical sprays are typically not recommended due to the
health hazards and environmental pollution they produce if used incorrectly. It
mightsound easier to use the chemical sprays, but once the weeds die
from the chemicals, you still have to pull the dead weeds from your yard.
Instead, most weeds should be removed manually.
There are few
ways to manually remove weeds: hand pulling, using a hand weeder tool, or using
a tool called a hula hoe.
Hand Pulling
When hand
pulling weeds, definitely wear gloves. Rubber coated gloves are good for small
weeds where you need dexterity. Leather gloves are good for larger weeds with
thorns. Weeds are most easily pulled when the ground is wet.
Hand Weeder
Hand Weeder Tool
If the weed
doesn’t easily come out by hand, then use a weed tool known as a hand weeder.
This tool is dug into the base of the weed near the roots and wiggled around to
pop out the weed with the root.
Hula Hoe
Hula Hoe and Scuffle Hoe Skidger® Xtreme Weeder™
If you have a large area of small weeds to remove, a third method is to use a hula hoe tool. This tool allows you to easily pull up the weeds by gently pushing the tool a few inches into the ground. Some hula hoes, also known as scuffle hoes, have a pointed tip to allow the user to pop the weed out at the root. Another benefit to hula hoeing is that it avoids excessive disturbance to the soil, preventing new seeds from being exposed to light and then germinating. This is the best option if you have a large areas of weeds less than 3” high.
What
to do with your pile of weeds after you have removed them?
If you have not used chemicals on your weeds, then you could compost them. But only compost if you know the weeds have not gone to seed and that your compost pile will heat up sufficiently. When in doubt, dispose of them in the trash or take them to a local composting facility.
This plant appears in summer. We all love to
hate the seeds of this plant, especially if you have ever stepped on them with
bare feet. They are also frustrating for cyclists because they cause flat
tires. Each goathead fruit contains 5-7
additional seeds, meaning that each plant can easily produce 200 - 5,000 seeds.
That’s why it is so important to remove this plant before it flowers and goes
to seed.
How to remove: Remove before plant starts to flower. If you notice the bright yellow flowers it’s time to get after it with a hula hoe. Because of this plant’s spreading nature, just a few plants can take up a relatively large area. With a hula hoe, these areas can be cleaned up quickly. A thick layer (3-4 inches) of organic mulch can be effective in controlling this plant from germinating.
Related to the South American ‘ancient grain’ amaranth, pig weed usually appears after summer rains and grows quickly. It can easily reach over 6 feet tall, if allowed. Mowing or line trimming will only encourage this plant to grow low and horizontally, and to go to seed earlier. Like most weeds, pig weed is worth controlling when it is young to reduce the amount of work to remove it later, and to reduce the number of seeds it produces. Remove pig weed when it is less than 8-12 inches tall and when the soil is a little damp with a hula hoe. When larger, this weed is relatively easy to hand pull when soil is damp. If large, chop below ground with a shovel or heavy garden hoe.
This plant appears in mid-summer and should be removed before it flowers. Use a hula hoe for removal when the plant is less than 3 inches wide. Hand pull larger than 3-inch plants. This plant, which is known locally as verdolagas, is also an edible plant that is packed with nutrients, including omega-3 fatty acids. It can sometimes be found in local farmers’ markets.
This plant appears in the winter months in pockets of dampness. It should be removed before yellow flowers appear. Use a hula hoe to remove when the plant is less than 4 inches tall and the soil is damp. Hand pulling is recommended once mustard weed reaches over 6 inches tall. As with all weeds, mustard weed is easiest to pull when the soil is moist. If the soil is dry, use the hand weeder tool to dig out the tap root.
Spurge - Annual Weed (Photo courtesy of New Mexico State University (NMSU) by Leslie Beck)
This plant appears in early spring. Use a hula hoe to remove when the soil is damp. Spurge is most often seen in patchy lawns with sprinklers. Spurge goes to seed very quickly, so removal should happen the moment you first notice it. The milky sap of this plant is toxic, be sure to avoid touching eyes and wash your hands after handling.
Tumbleweed - Annual Weed (young plant) (Photo courtesy of NMSU)Tumbleweed - Annual Weed (Photo courtesy of NMSU)
Infamous around the state, this plant appears in early summer. Seedlings and small plants look very different from the dry tumbleweeds seen blowing across the highway in the fall. Learn how to identify these when they are young as early removal is recommended. Use a hula hoe to remove when the plant is less than 4 inches tall and the soil is damp. Hand pull plants larger than 4 inches. Eradication of tumbleweed seed can take between 2-3 years because of the numerous seeds in the soil. For more extensive recommendations on removal visit this website.
This winter weed has seeds that can get lodged into pets’ paws, coat, nose and ears and cause extreme danger in the animal if not removed promptly. The fox tail has very shallow roots and is easily removed by hand or hula hoe.
Purple flowers appear between April and August. This plant is in the nightshade family and can be toxic if consumed by humans or cattle. Its prickly branches produce purple flowers followed by yellow berries. The deep taproot can be difficult to remove, so deep watering, a hand weeder, and gloves are recommended for removal. This is a native plant, so consider leaving it for pollinators to enjoy the purple flowers. But never let it grow where it may be accidentally consumed by pets or children.
Pink or white trumpet shaped flowers appear on this weed in June. The leaves are shaped like arrowheads and the first sign of this weed appears as thin stems wrapped around existing plants. Bindweed is a tenacious plant, powered by a root system that can reach 20 feet deep, and a dense root system that looks like a bowl of noodles. Repeated hand removal is the key to eliminating this weed because it forces the plant to use up the energy reserves in its root system. You may have to pull the tops every 5 days for several months to get it under control. Never put these in the compost.
Bermudagrass: Cynodon dactylon
Bermuda Grass - Perennial Weed
Bermudagrass was the main grass planted as a lawn in Albuquerque homes 50-60 years ago. This plant can make a great durable low water lawn but can be a nuisance in every other situation. This grass is considered a warm season grass, meaning it is green from the spring to the fall and dormant in the water. Licensed professionals can be hired to eradicate large areas of Bermuda grass with an herbicide. Like bindweed, this aggressive weed grows from persistent underground roots called rhizomes. Rhizomes allow the plant to store energy and continue to resprout many times and allow it to grow up through mulch and even weed fabric. It is important to prevent this plant from becoming established and to continually pull the tops to reduce energy reserves. When removing this plant, the grass lawn can be dug out with digging forks and shovels to loosen the soil then remove and dispose of the rhizomes by hand.
Bermuda Grass re-appearing in a Landscape.
WEED PREVENTION
Have you ever driven across the city and wondered why the
parks and medians are weed free, yet your yard seems to be their breeding
ground? The City has a specific weed management plan for the parks and medians
to prevent weeds from germinating. Homeowners can benefit from a management
plan or strategy, as well.
Even with a good weed management plan, it takes an average
of three years to really control a weed problem. Each
weed requires a different approach, too. One of the best prevention methods is
to avoid the conditions that allow weeds to grow.
The most common conditions that allow weeds to
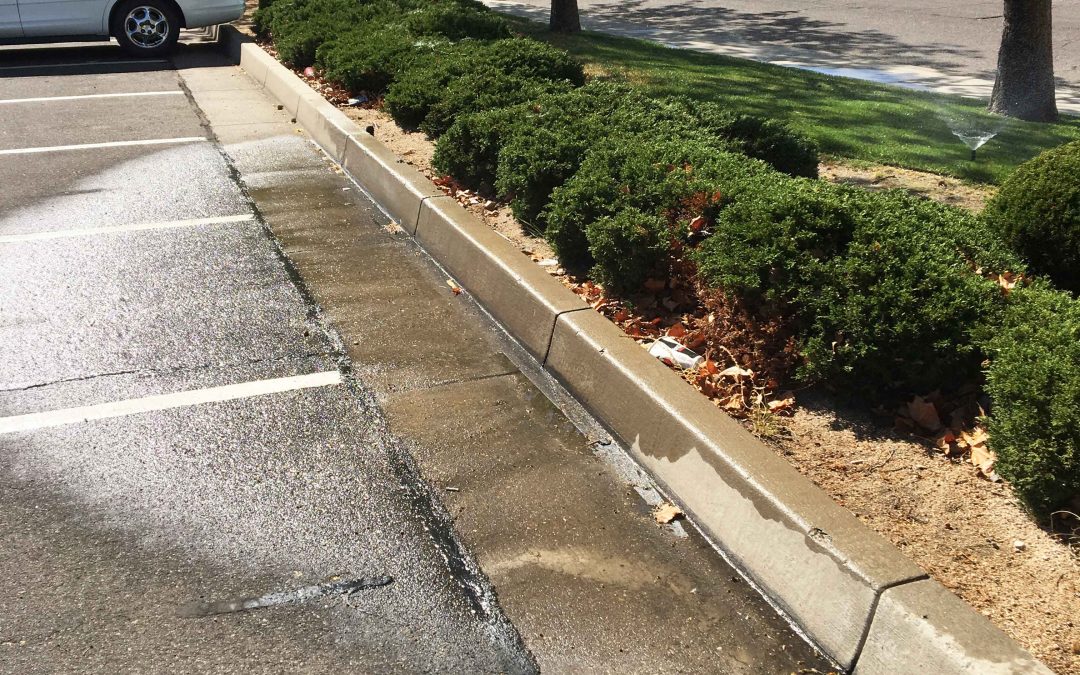
proliferate is sprinklers from a lawn over-spraying into a planting area. This
can be due to mismanaged or
poorly adjusted sprinklers. Check your sprinklers each month and adjust as
necessary to prevent overspray. The Water Authority offers free one-on-one
irrigation consultations for those interested in improving the efficiency of
their irrigation system and improving the health of their landscapes.
For persistent weed problems in a lawn, consider converting the lawn to a desert-friendly landscape
with drip irrigation. This will greatly reduce both weeds and your water bill. The
Water Authority offers generous rebates for lawn to desert-friendly conversions
-- learn more here.
Another common condition that encourages weeds is bare dirt. Weeds
thrive in bare dirt, so cover the dirt with organic mulch or plants. Organic
mulch is a natural covering, and includes such material as straw, chipped wood,
shredded wood, or pecan shells. (The phrase organic
refers to material relating to or derived from living matter. It’s not related
to the food or farming method of food production without the use of chemicals.)
Organic mulch spread on the ground around plants has the added benefit of preventing
excessive evaporation and erosion. Organic mulch will also enrich the soil as
it breaks down. A depth of 4 inches of organic mulch will inhibit weed growth by preventing sunlight from reaching weed
seeds. The Water Authority offers a rebate for mulch
when used around trees – check out our Treebate here or information on converting
lawn to desert-friendly landscape.
Covering your yard with plants is another great way to prevent weeds. Weeds don’t typically grow in the shade of other plants. The more you plant, the fewer weeds and more beautiful yard you’ll have!
Weed Free Landscape With Mulch
You might be wondering about weed fabric (also known as landscape
fabric). There
are a few things to keep in mind regarding this product. Weed seeds can still
germinate and grow on top of weed fabric as the New Mexico winds blow in new
seeds and dust every season. Those new seeds are happy to grow in the dust that
collects over the weed fabric.
Landscape fabric is also not a permanent solution. It has a limited lifespan in the landscape, and many weed roots will grow through the fabric, making their removal even more difficult. Weed fabric can also be expensive, it’s difficult to install, can restrict growth of plants you actually want. Additionally weed fabric can also inhibit the soil fertility by not allowing leaves to decompose back into the soil or allowing oxygen exchange and plant roots to “breathe”.
Author: Jill Brown, ASLA Landscape Architect and owner of My Landscape Coach in Albuquerque, NM.