The Dirt on Albuquerque’s Weeds
WEED IDENTIFICATION
Most definitions of a weed call it “a wild plant growing where it is not wanted and in competition of cultivated plants.” What you may call a weed in your yard may be a beloved plant in your neighbor’s yard.
There are two times a year in the greater Albuquerque area when weeds can get out of hand. This happens typically in early spring after a wet winter and after a monsoon season in late summer. The first thing to do is to identify the plant and decide whether it is actually a weed.
There are some common plants most people in our area think of as weeds. These are broken up into two categories: annual weeds and perennial weeds.
According to the NMSU blog “Desert Blooms”
Annual weeds (puncture vine/goathead, pig weed, purslane, mustard weeds, spurge, and many others) must grow from seeds each year. Prevent them from forming seeds to reduce potential weed problems for the next year. However, since weed seeds can persist in the soil many years before germinating, they will continue to reappear. Be persistent!
Perennial weeds (silverleaf nightshade, bindweed, and others) grow from seeds as well, but they also are able to regrow from their root systems. Pulling newly germinated perennial weeds before they can establish their perennial root system helps reduce the problem. As they regrow from established root systems, frequent removal of the tops will help diminish the food reserves in the roots and weaken the weeds over time. As they become weaker, they become easier to manage.
WEED REMOVAL
Chemical sprays are typically not recommended due to the health hazards and environmental pollution they produce if used incorrectly. It mightsound easier to use the chemical sprays, but once the weeds die from the chemicals, you still have to pull the dead weeds from your yard. Instead, most weeds should be removed manually.
There are few ways to manually remove weeds: hand pulling, using a hand weeder tool, or using a tool called a hula hoe.
Hand Pulling
When hand pulling weeds, definitely wear gloves. Rubber coated gloves are good for small weeds where you need dexterity. Leather gloves are good for larger weeds with thorns. Weeds are most easily pulled when the ground is wet.
Hand Weeder
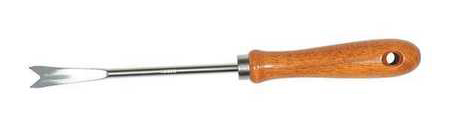
If the weed doesn’t easily come out by hand, then use a weed tool known as a hand weeder. This tool is dug into the base of the weed near the roots and wiggled around to pop out the weed with the root.
Hula Hoe
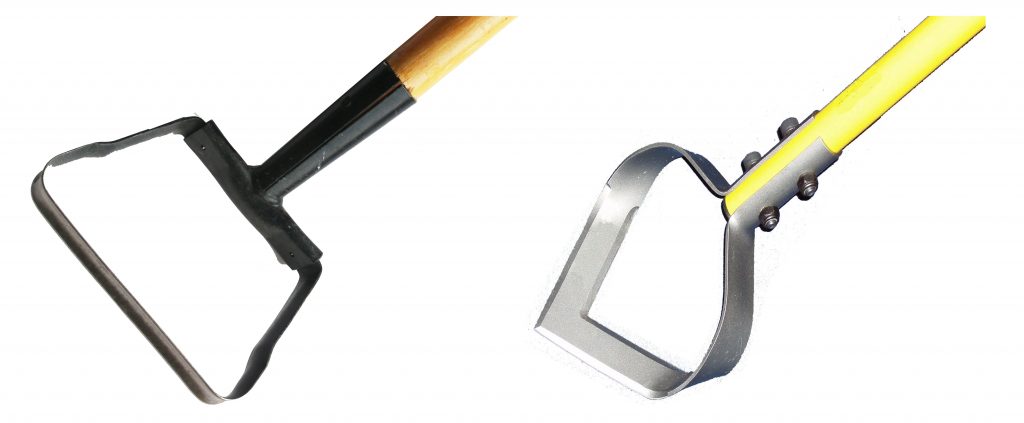
If you have a large area of small weeds to remove, a third method is to use a hula hoe tool. This tool allows you to easily pull up the weeds by gently pushing the tool a few inches into the ground. Some hula hoes, also known as scuffle hoes, have a pointed tip to allow the user to pop the weed out at the root. Another benefit to hula hoeing is that it avoids excessive disturbance to the soil, preventing new seeds from being exposed to light and then germinating. This is the best option if you have a large areas of weeds less than 3” high.
What to do with your pile of weeds after you have removed them?
If you have not used chemicals on your weeds, then you could compost them. But only compost if you know the weeds have not gone to seed and that your compost pile will heat up sufficiently. When in doubt, dispose of them in the trash or take them to a local composting facility.
COMMON WEEDS IN THE GREATER ALBUQUERQUE AREA
Puncture Vine/Goathead, Tribulus terrestris
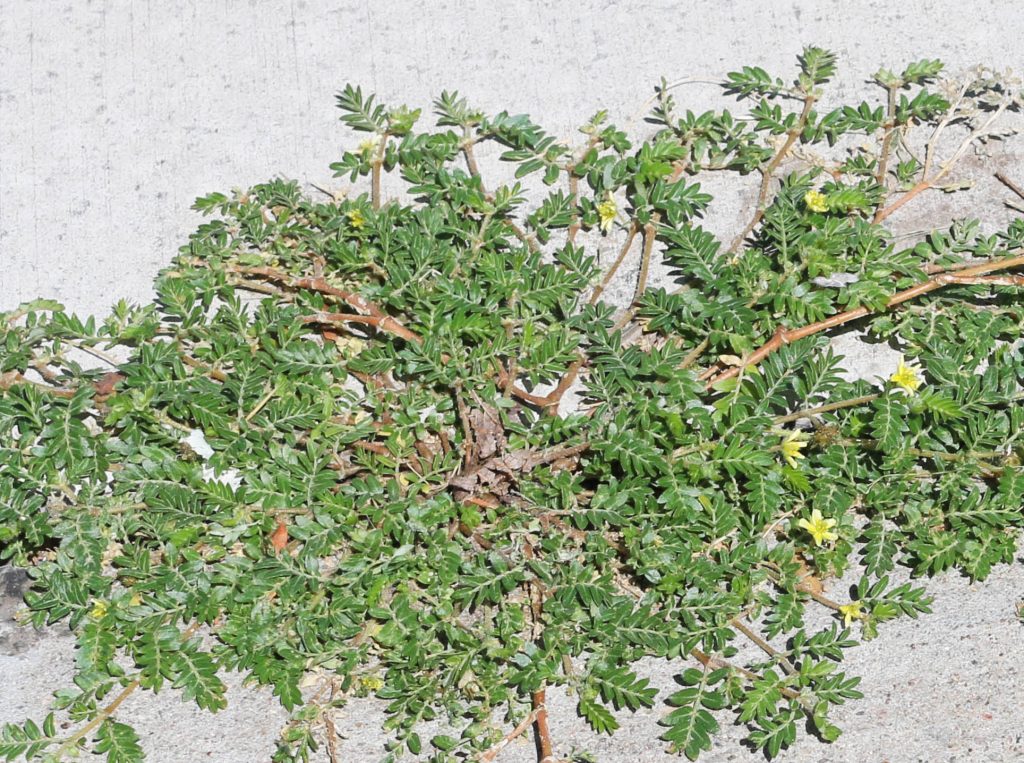
This plant appears in summer. We all love to hate the seeds of this plant, especially if you have ever stepped on them with bare feet. They are also frustrating for cyclists because they cause flat tires. Each goathead fruit contains 5-7 additional seeds, meaning that each plant can easily produce 200 - 5,000 seeds. That’s why it is so important to remove this plant before it flowers and goes to seed.
How to remove: Remove before plant starts to flower. If you notice the bright yellow flowers it’s time to get after it with a hula hoe. Because of this plant’s spreading nature, just a few plants can take up a relatively large area. With a hula hoe, these areas can be cleaned up quickly. A thick layer (3-4 inches) of organic mulch can be effective in controlling this plant from germinating.
Pig weed, Amaranthus alba
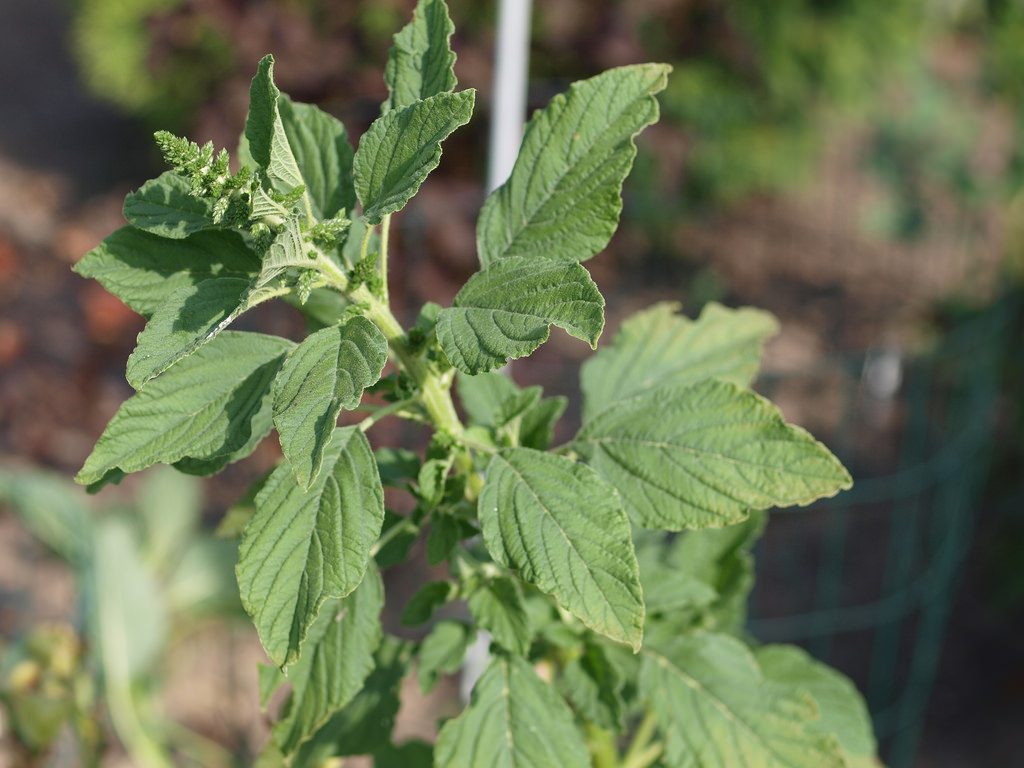
Related to the South American ‘ancient grain’ amaranth, pig weed usually appears after summer rains and grows quickly. It can easily reach over 6 feet tall, if allowed. Mowing or line trimming will only encourage this plant to grow low and horizontally, and to go to seed earlier. Like most weeds, pig weed is worth controlling when it is young to reduce the amount of work to remove it later, and to reduce the number of seeds it produces. Remove pig weed when it is less than 8-12 inches tall and when the soil is a little damp with a hula hoe. When larger, this weed is relatively easy to hand pull when soil is damp. If large, chop below ground with a shovel or heavy garden hoe.
Purslane, Portulaca oleracea
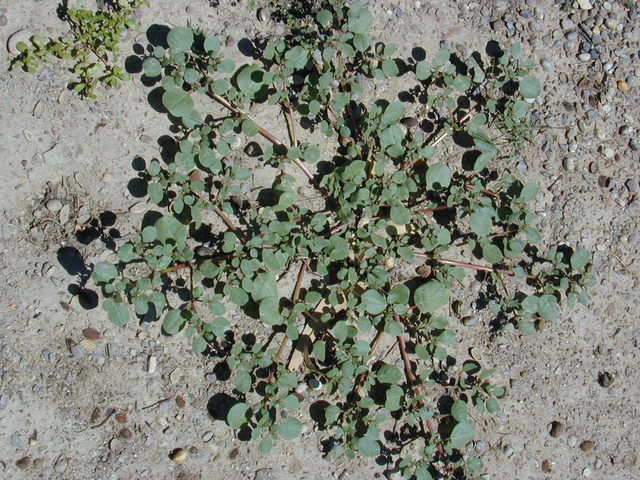
(Photo courtesy of NMSU)
This plant appears in mid-summer and should be removed before it flowers. Use a hula hoe for removal when the plant is less than 3 inches wide. Hand pull larger than 3-inch plants. This plant, which is known locally as verdolagas, is also an edible plant that is packed with nutrients, including omega-3 fatty acids. It can sometimes be found in local farmers’ markets.
Mustard Weed, London Rocket Sisymbrium irio
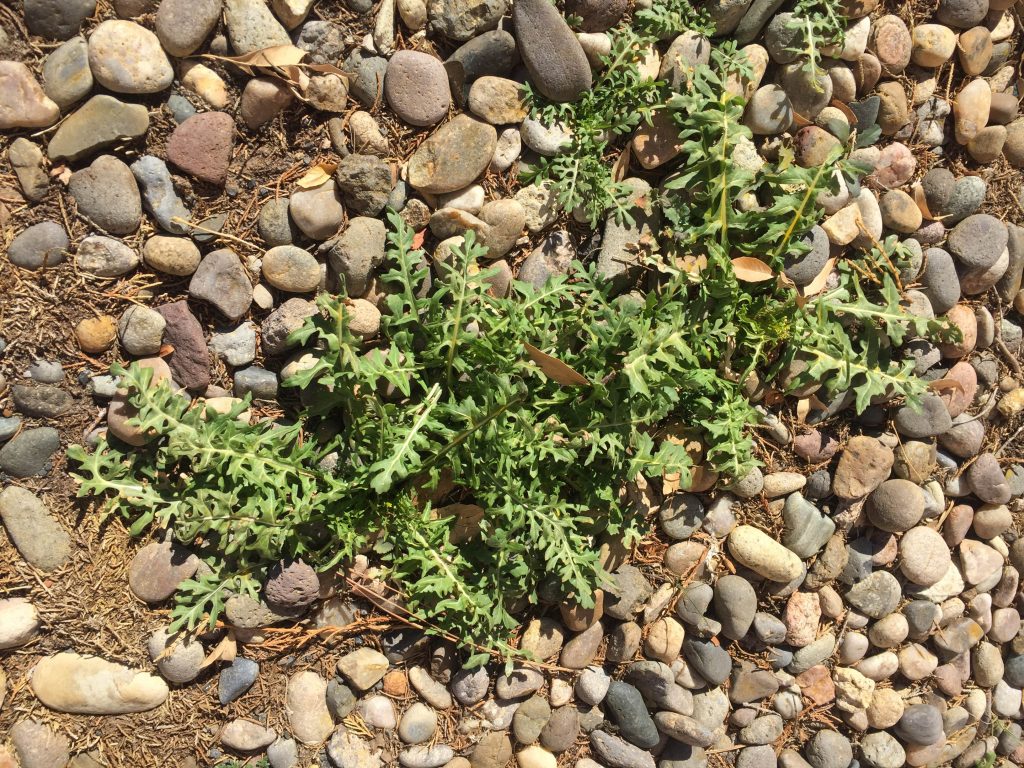
This plant appears in the winter months in pockets of dampness. It should be removed before yellow flowers appear. Use a hula hoe to remove when the plant is less than 4 inches tall and the soil is damp. Hand pulling is recommended once mustard weed reaches over 6 inches tall. As with all weeds, mustard weed is easiest to pull when the soil is moist. If the soil is dry, use the hand weeder tool to dig out the tap root.
Spurge, Euphorbia serpens
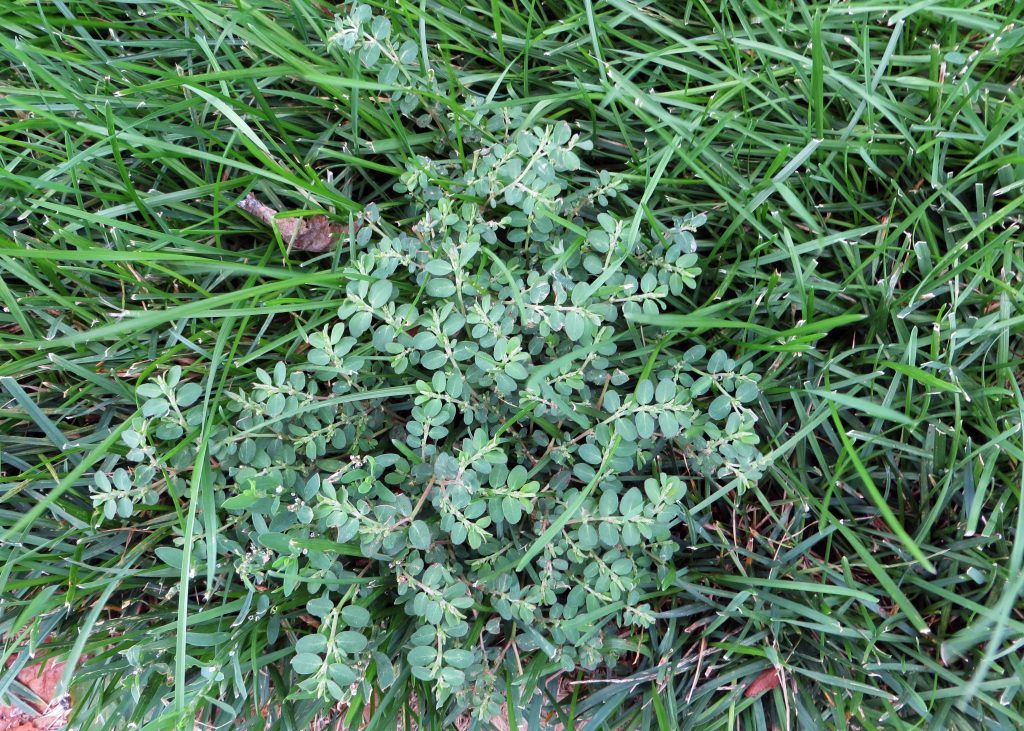
(Photo courtesy of New Mexico State University (NMSU) by Leslie Beck)
This plant appears in early spring. Use a hula hoe to remove when the soil is damp. Spurge is most often seen in patchy lawns with sprinklers. Spurge goes to seed very quickly, so removal should happen the moment you first notice it. The milky sap of this plant is toxic, be sure to avoid touching eyes and wash your hands after handling.
Tumbleweed, Salsola tragus
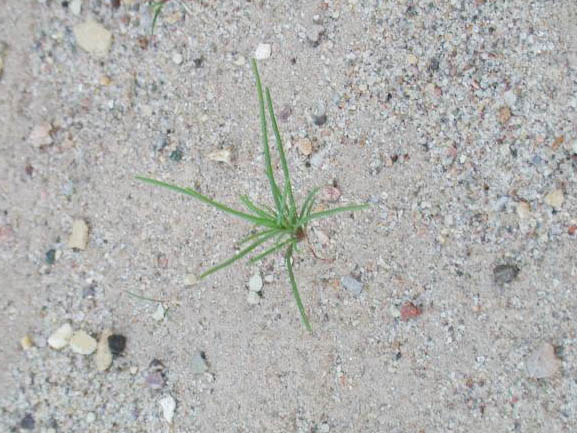
(young plant)
(Photo courtesy of NMSU)
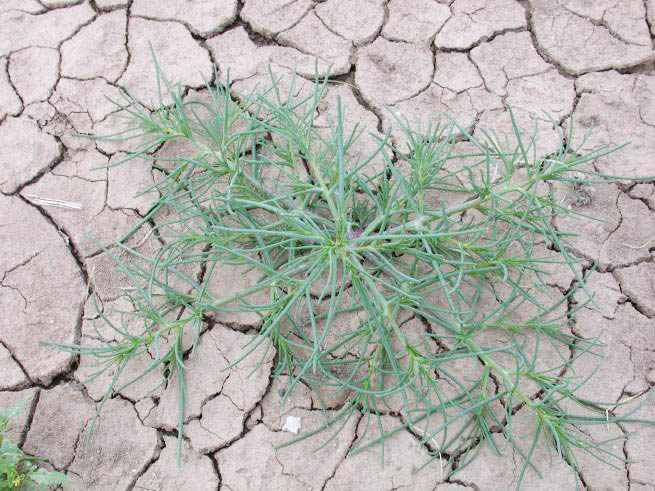
(Photo courtesy of NMSU)
Infamous around the state, this plant appears in early summer. Seedlings and small plants look very different from the dry tumbleweeds seen blowing across the highway in the fall. Learn how to identify these when they are young as early removal is recommended. Use a hula hoe to remove when the plant is less than 4 inches tall and the soil is damp. Hand pull plants larger than 4 inches. Eradication of tumbleweed seed can take between 2-3 years because of the numerous seeds in the soil. For more extensive recommendations on removal visit this website.
Fox Tail, Hordeum murinum
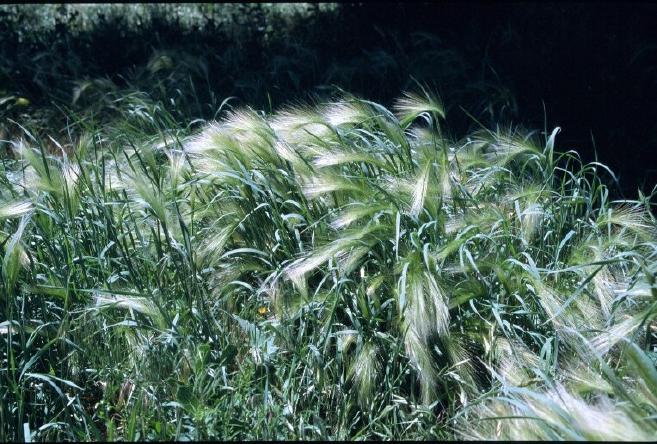
(Photo courtesy of NMSU)
This winter weed has seeds that can get lodged into pets’ paws, coat, nose and ears and cause extreme danger in the animal if not removed promptly. The fox tail has very shallow roots and is easily removed by hand or hula hoe.
Silverleaf nightshade, Solanum elaeagnifolium
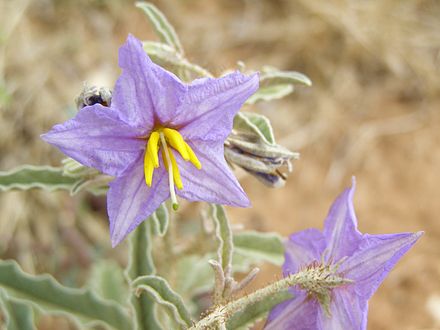
Purple flowers appear between April and August. This plant is in the nightshade family and can be toxic if consumed by humans or cattle. Its prickly branches produce purple flowers followed by yellow berries. The deep taproot can be difficult to remove, so deep watering, a hand weeder, and gloves are recommended for removal. This is a native plant, so consider leaving it for pollinators to enjoy the purple flowers. But never let it grow where it may be accidentally consumed by pets or children.
Bindweed, Convolvulus arvensis
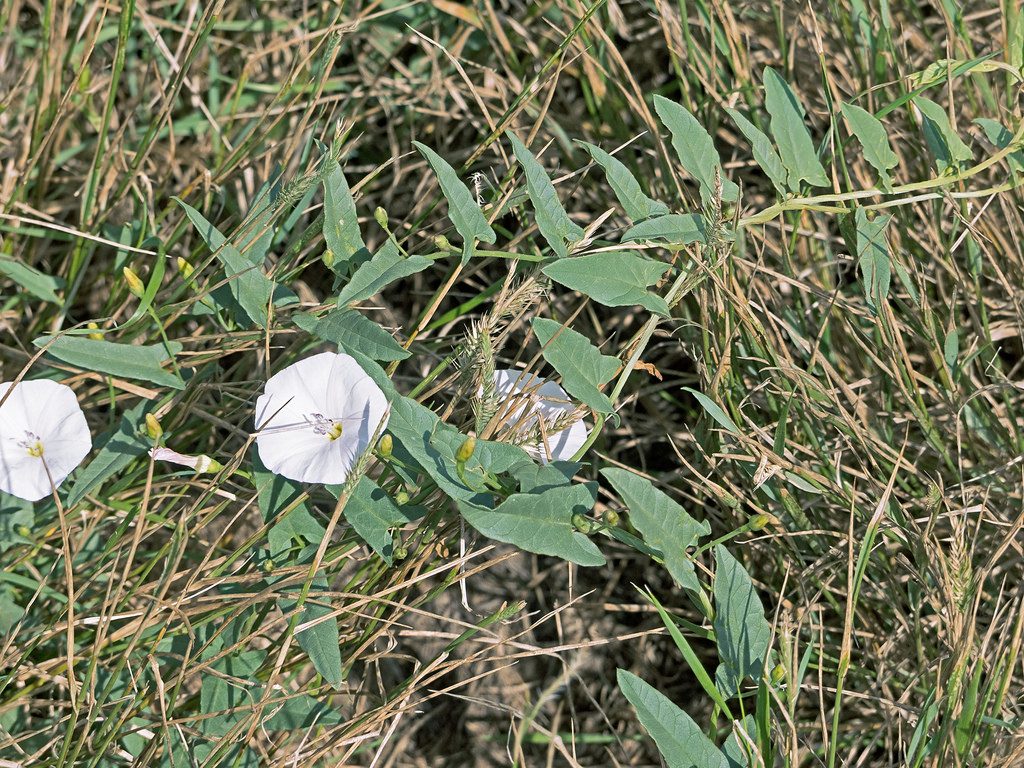
Pink or white trumpet shaped flowers appear on this weed in June. The leaves are shaped like arrowheads and the first sign of this weed appears as thin stems wrapped around existing plants. Bindweed is a tenacious plant, powered by a root system that can reach 20 feet deep, and a dense root system that looks like a bowl of noodles. Repeated hand removal is the key to eliminating this weed because it forces the plant to use up the energy reserves in its root system. You may have to pull the tops every 5 days for several months to get it under control. Never put these in the compost.
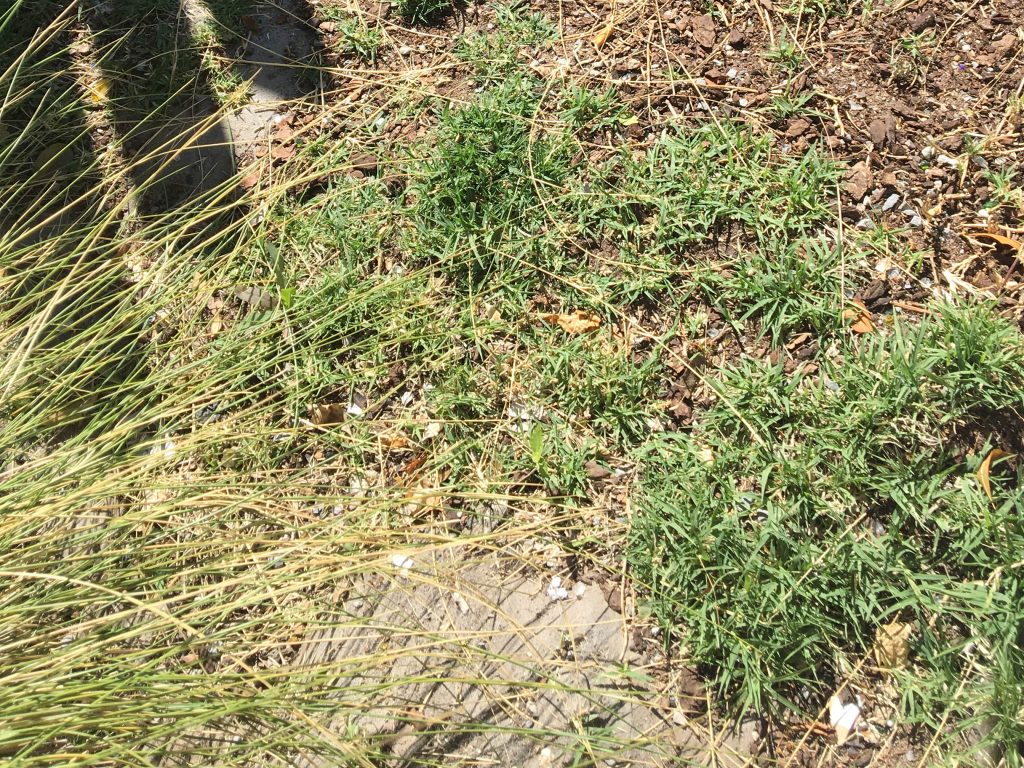
Bermudagrass: Cynodon dactylon
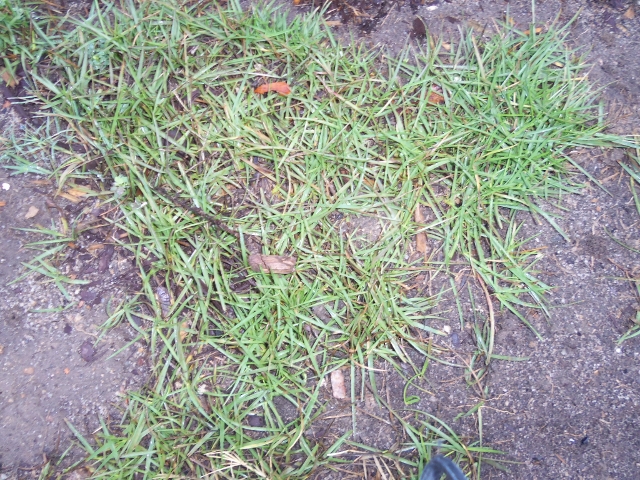
Bermudagrass was the main grass planted as a lawn in Albuquerque homes 50-60 years ago. This plant can make a great durable low water lawn but can be a nuisance in every other situation. This grass is considered a warm season grass, meaning it is green from the spring to the fall and dormant in the water. Licensed professionals can be hired to eradicate large areas of Bermuda grass with an herbicide. Like bindweed, this aggressive weed grows from persistent underground roots called rhizomes. Rhizomes allow the plant to store energy and continue to resprout many times and allow it to grow up through mulch and even weed fabric. It is important to prevent this plant from becoming established and to continually pull the tops to reduce energy reserves. When removing this plant, the grass lawn can be dug out with digging forks and shovels to loosen the soil then remove and dispose of the rhizomes by hand.
WEED PREVENTION
Have you ever driven across the city and wondered why the parks and medians are weed free, yet your yard seems to be their breeding ground? The City has a specific weed management plan for the parks and medians to prevent weeds from germinating. Homeowners can benefit from a management plan or strategy, as well.
Even with a good weed management plan, it takes an average of three years to really control a weed problem. Each weed requires a different approach, too. One of the best prevention methods is to avoid the conditions that allow weeds to grow.
The most common conditions that allow weeds to proliferate is sprinklers from a lawn over-spraying into a planting area. This can be due to mismanaged or poorly adjusted sprinklers. Check your sprinklers each month and adjust as necessary to prevent overspray. The Water Authority offers free one-on-one irrigation consultations for those interested in improving the efficiency of their irrigation system and improving the health of their landscapes.
For persistent weed problems in a lawn, consider converting the lawn to a desert-friendly landscape with drip irrigation. This will greatly reduce both weeds and your water bill. The Water Authority offers generous rebates for lawn to desert-friendly conversions -- learn more here.
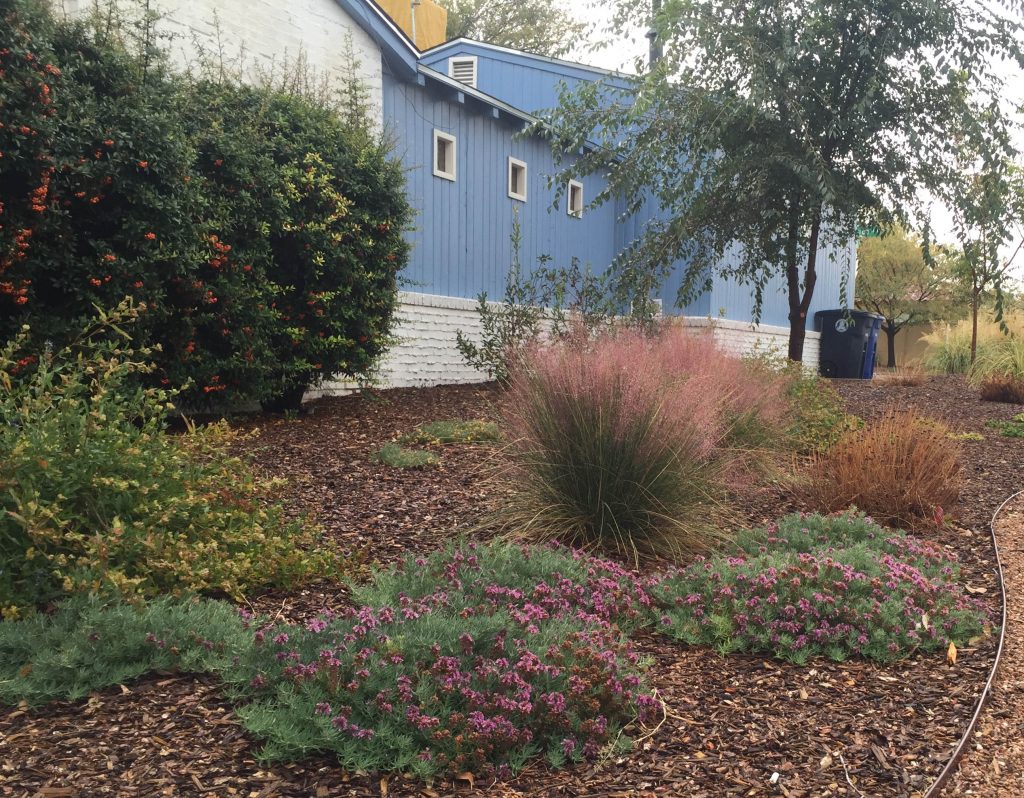
Another common condition that encourages weeds is bare dirt. Weeds thrive in bare dirt, so cover the dirt with organic mulch or plants. Organic mulch is a natural covering, and includes such material as straw, chipped wood, shredded wood, or pecan shells. (The phrase organic refers to material relating to or derived from living matter. It’s not related to the food or farming method of food production without the use of chemicals.) Organic mulch spread on the ground around plants has the added benefit of preventing excessive evaporation and erosion. Organic mulch will also enrich the soil as it breaks down. A depth of 4 inches of organic mulch will inhibit weed growth by preventing sunlight from reaching weed seeds. The Water Authority offers a rebate for mulch when used around trees – check out our Treebate here or information on converting lawn to desert-friendly landscape.
Covering your yard with plants is another great way to prevent weeds. Weeds don’t typically grow in the shade of other plants. The more you plant, the fewer weeds and more beautiful yard you’ll have!
You might be wondering about weed fabric (also known as landscape fabric). There are a few things to keep in mind regarding this product. Weed seeds can still germinate and grow on top of weed fabric as the New Mexico winds blow in new seeds and dust every season. Those new seeds are happy to grow in the dust that collects over the weed fabric.
Landscape fabric is also not a permanent solution. It has a limited lifespan in the landscape, and many weed roots will grow through the fabric, making their removal even more difficult. Weed fabric can also be expensive, it’s difficult to install, can restrict growth of plants you actually want. Additionally weed fabric can also inhibit the soil fertility by not allowing leaves to decompose back into the soil or allowing oxygen exchange and plant roots to “breathe”.

Author: Jill Brown, ASLA Landscape Architect and owner of My Landscape Coach in Albuquerque, NM.
 Full Sun, Part Shade
 Low Water