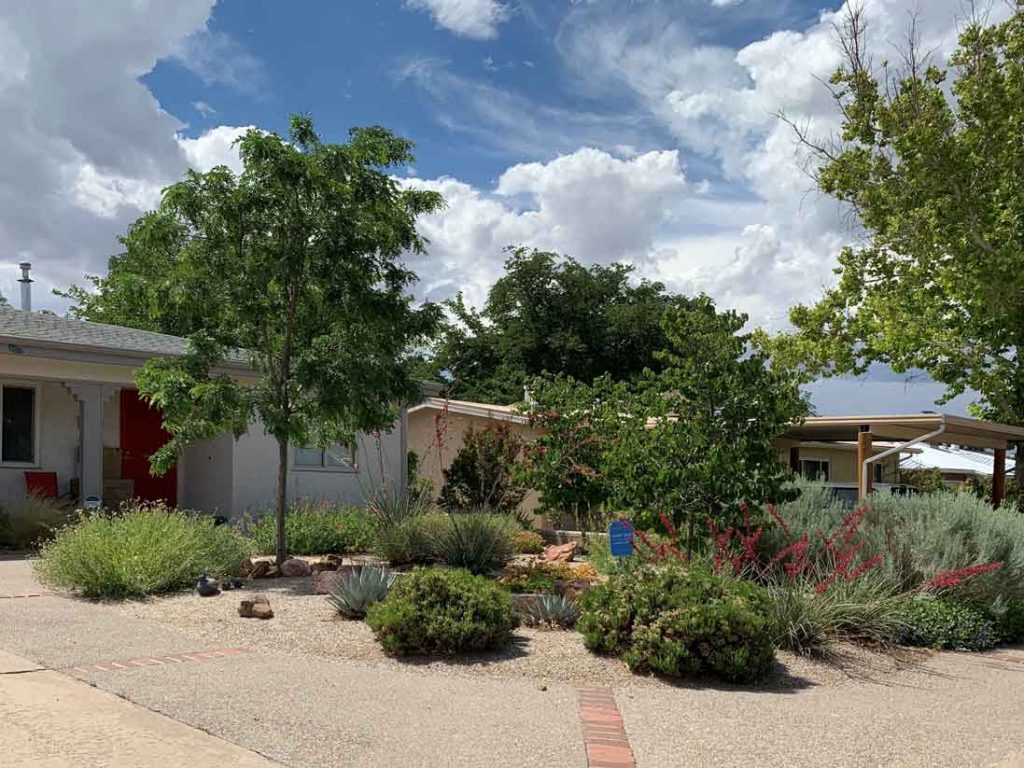
Water Authority customers have been inspired to convert their turf to sustainable, resilient xeriscapes that save water, time and money and provide habitat for wildlife and pollinators for many reasons. Below are some of our favorites:
“We just didn’t see the point of maintaining and paying to water the grass in the front yard. No matter how much we water and fertilize, the front lawn never looks good, and we don’t want to be the last house on the block with a not-so-great lawn.”
“Now that the kids are out of the house and we no longer have dogs, we don’t want to have such a high water-use landscape that requires weekly maintenance. We want to do our part in saving water for future generations and create a beautiful patch of nature in our backyard, especially now that we’re into birdwatching.”
“We may downsize someday, and our realtor said that having a beautiful low water use landscape is a good selling point.”
“We just moved to Albuquerque from another part of the country where grass grows easily, and we spent several hours a week mowing and weeding. We are done with mowing. We want a landscape that is regionally appropriate, with native and low water use plants and trees.”
“Our irrigation system seems to always need repair, and the grass never really looks that great.”
“We needed to replace our sewer line which meant digging up the front yard. It seemed like a good time to ditch the grass and convert it to a low maintenance landscape with new drip irrigation.”
Qualifying conversion projects by Water Authority residential customers may receive $1.00 per square foot of converted turf grass. This rebate has a specific application process. Only projects that have completed the application and passed inspections will qualify for the rebate. For more information visit our rebates page.
Pro Tip: Are you ready to convert your lawn to a xeriscape? Here is what local landscape contractor Tyson Hafler, owner of Southwest Horticulture, wants you to know before you start.
“Make sure you start with a green lawn. It is important to have a green lawn for two reasons. Water Authority needs to see a currently cared for, in good living condition green lawn to quality for the rebate. A live, green lawn is much easier and speedier to get rid of than a brown, dry, dead and dying lawn.”
Author: Amos Arber, Xeriscape Incentive Inspector with the Water Resources Division of the Water Authority. Pro Tip: Tyson Hafler, Landscape Contractor and Owner, Southwest Horticulture. Have a question about this article [email protected]
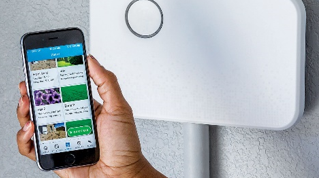
Smart technology has become popular at homes and businesses because it makes some aspects of daily life easier and more efficient. WaterSense Smart Irrigation Controllers are the Water Authority conservation group’s favorite smart technology.
These types of controllers adjust landscape irrigation schedules using weather data, plant type, soil type and other important factors to help you follow the seasonal watering recommendations.
Pro tip: “One of the advantages of Smart Controllers is that they help the user make good watering decisions during the set up process to ensure a healthy landscape throughout the year,” says Ken Schwartz, branch manager for Neumark Irrigation Supply.
Installing a WaterSense-labeled controller provides the following benefits:
A healthy, beautiful landscape: WaterSense-labeled controllers help landscapes flourish and remain healthy by providing the right amount of water for each plant zone. Underwatered or overwatered landscapes can be unhealthy and unattractive.
Water quality protection: These irrigation controllers reduce water runoff from the landscape, helping to keep local water bodies clean and healthy while avoiding water waste.
Savings of both water and money: WaterSense-labeled controllers help eliminate overwatering, so they may lower water-use expenses and conserve water
Convenience: Properly programmed WaterSense-labeled controllers save end-users the time required to continuously monitor and adjust irrigation schedules in response to changing weather.
Many of these controllers are compatible with mobile devices like tablets and smartphones to allow the user to interact with their irrigation system remotely. The Irrigation Association has assembled a list of smartphone-friendly irrigation controllers. You can find many of these controllers at your local irrigation supply store.
The Water Authority offers residential rebates of 25% up to $100, and commercial rebates of 25% up to $500, for WaterSense Smart Controllers. The rebate can be used for both purchase of the controller and the cost of professional installation. Before purchasing your new controller, make sure to visit the list of qualified WaterSense controllers located in the rebate section.
Look for the WaterSense logo when purchasing your new controller.
Author: Carlos A. Bustos, Water Conservation Program Manager with the Water Resources Division for the Water Authority. Pro tip by https://neumarkirrigation.com/. Have a question about the article? [email protected]
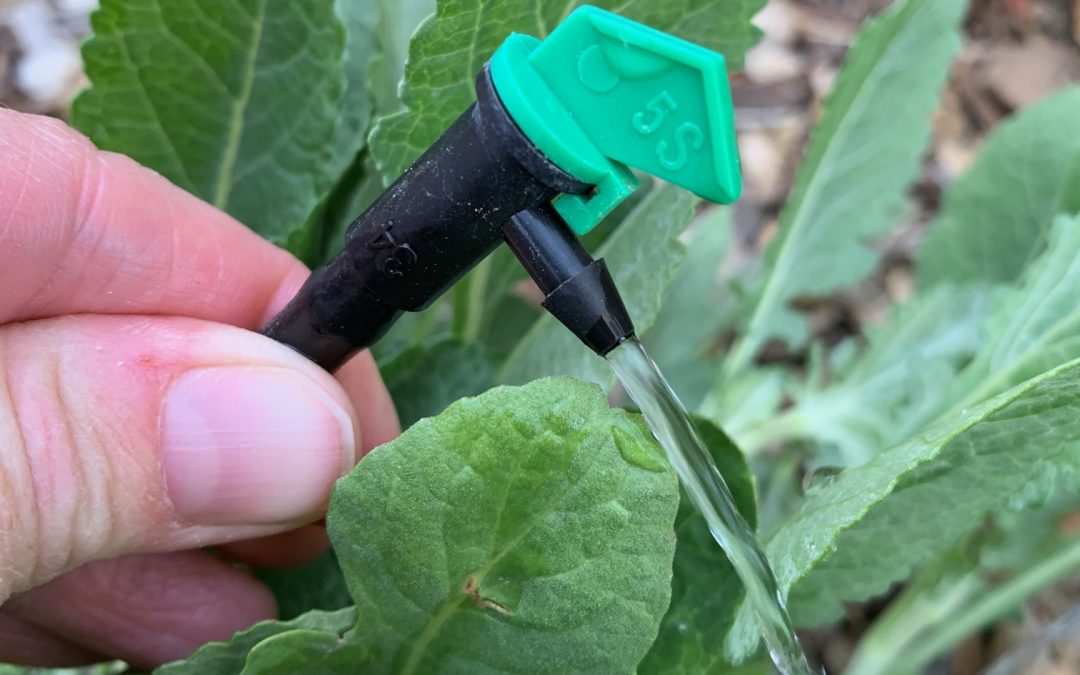
Your irrigation system is only as good as its aim. Adjust sprinklers and emitters to make sure they are delivering water to the landscape and not onto rocks, bare earth or pavement.
June is a great time to check and replace any clogged spray nozzles or drip emitters. Remember, each spray head also has its own filter insert that needs checked as well.
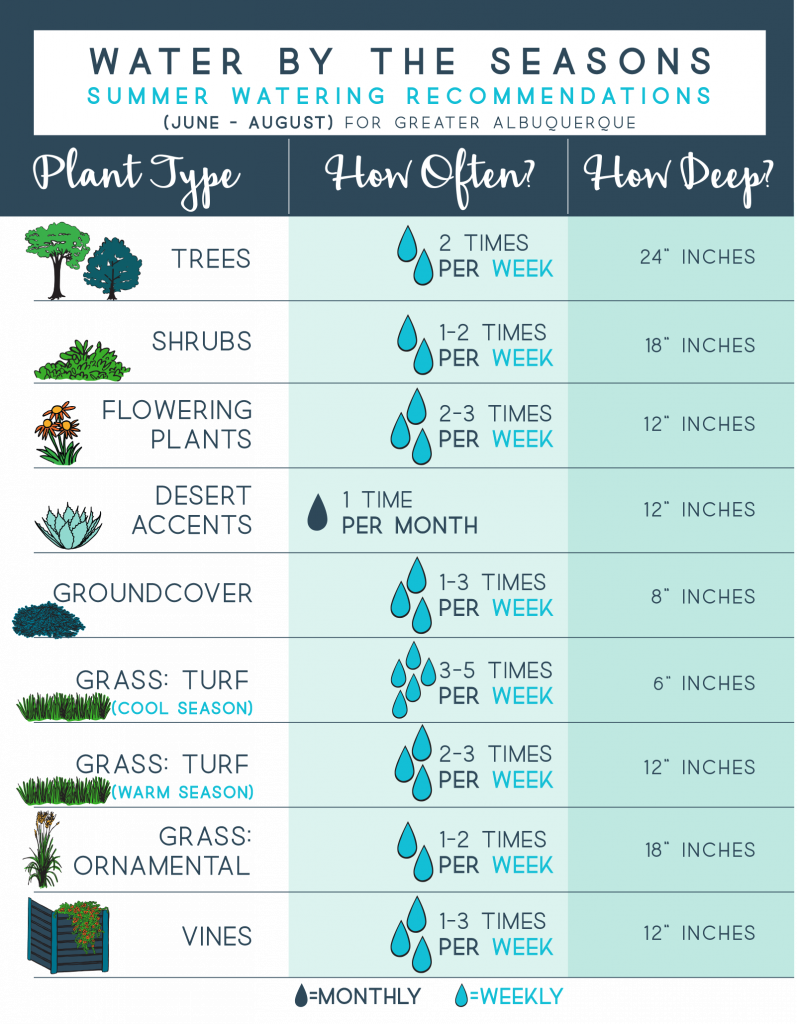
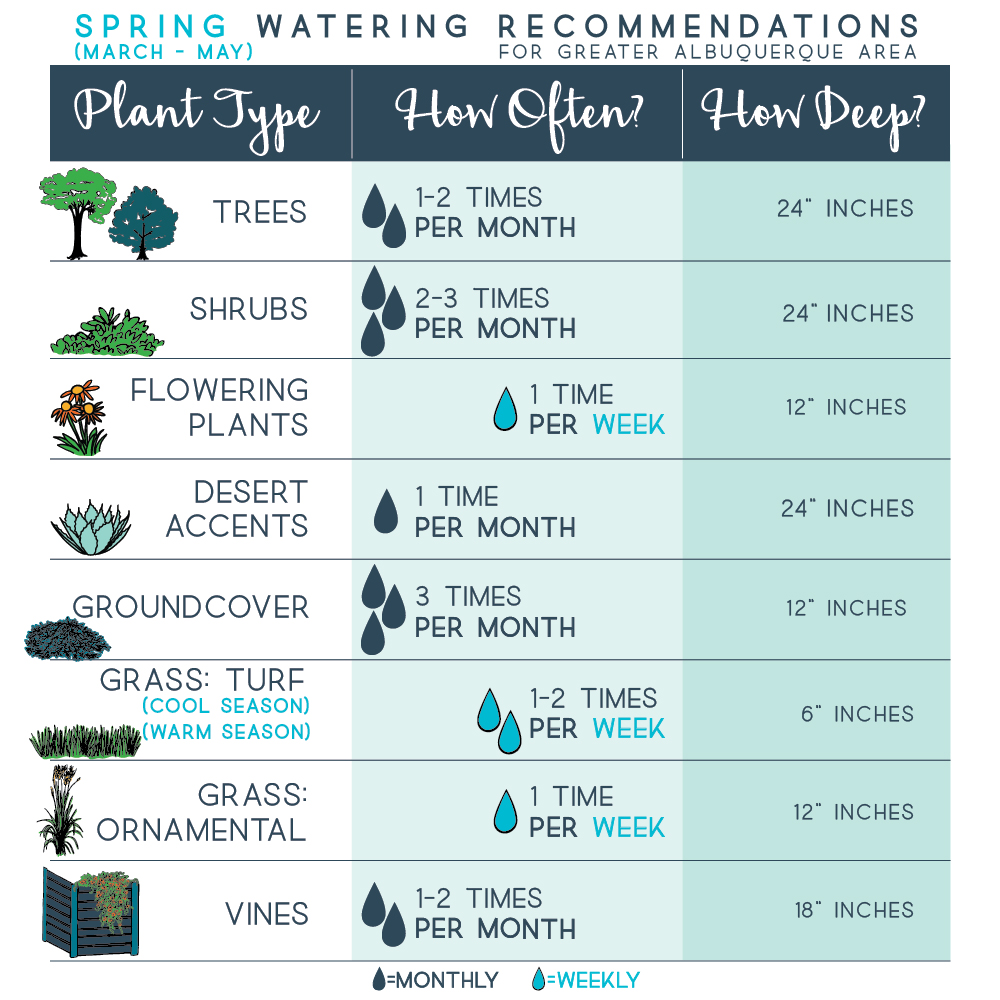
Watering Recommendations: Summer is here and so are hotter temperatures! Follow the Water by the Seasons Summer watering recommendations to keep your yard looking healthy. For turf, water 2-3 times per week. Start watering your trees and shrubs 1 time per week to keep them looking good.
Remember, if it rains more than a half inch you can skip your next scheduled watering as there is no need for supplemental irrigation.
Our urban forest (yes, the trees in your landscape are part of a forest) provides so many benefits too us – cooling, increased home values, beauty, and better mental health just to name a few.
Here’s what you can do to help keep your members of our urban forest as healthy as possible.
1. Water your trees to a depth of about two feet, because 95% of the tree’s roots are in the first two feet of soil. To check if you are getting down to that two-foot optimum, insert a long screwdriver or soil probe into the soil around your tree a day after watering to determine the depth the water has reached. Adjust your watering time, if needed, to reach that two-foot goal.
2. Water your trees a little inside and outside of the canopy edge (the outer ring of the tree’s leaves) because that is where the roots that take in water are located.
4. Check your trees for signs that they aren’t getting enough water: wilted leaves early in the morning, scorched leaf edges, twig die-back from the top down or a sparse leaf canopy.
5. Take advantage of rainwater by directing downspouts or canales toward existing trees. Consider planting new trees in lower areas to take advantage of captured moisture.
6. Surround your trees with 4-6 inches of organic mulch. Organic mulch helps to retain soil moisture, keeps soil temperatures more consistent, and keeps weeds out. Additionally, over time it loosens compacted soil, adds organic matter, and slowly adds nutrients to the soil. Note: organic mulch does not include bark (sometimes called ‘bark nuggets’ or ‘deco bark”). Use actual wood chips like what comes out of an arborist’s woodchipper. Many tree services offer wood chips for free and several local businesses sell wood chip mulches in bulk.
Author: Amos Arber, ASLA, ISA Xeriscape Incentive Inspector with the Water Resources Division for the Water Authority. Have a question about the article [email protected]
The amount of water needed and where that water should be applied changes as woody plants (such as trees, shrubs and vines) get larger. Woody plant material has two types of roots, stabilizing roots and feeder roots. Both types of roots do just what their name implies. Stabilizing roots are thick and dense to keep the plant in place and support its weight. Feeder roots are super fine and grow more like a net to take in water and nutrients. Feeder roots expand out as the plant grows.
Some woody plants require more water as they mature, but more desert-friendly species may not require extra water or may even be able to survive without supplemental irrigation once established. Perennials normally do not need to have expanded watering the same way woody plants do as they mature.
Some examples of this:
Plant Type
Plant
1st summer
2nd summer
3rd summer
Tree
Desert Willow (Chilopsis linearis)
60 gallon per month
120 gallons per month
400 gallons per month
Shrub
Butterfly Bush (Buddleia davidii)
60 gallon per month
70 gallon per month
100 gallon per month
Desert-Friendly Shrub
Chamisa (Ericameria nauseosa)
20-30 gallons per month
20-30 gallons per month
Usually possible to remove from irrigation
Vine
Trumpet Vine (Campsis radicans)
40 gallons per month
60 gallons per month
100 gallons per month
Woody Groundcover
Prostrate Sumac (Rhus trilobata)
20-30 gallons per month
40 gallons per month
60 gallons per month
For those plants that do have increased irrigation needs as they mature here are three easy ways to apply the right amount of water in the right place depending on the type of irrigation you are using.
Drip Emitters – Move the drip emitters out to stay in line with the outer edge of the plants leaves where the feeder roots will be. Increase the number of emitters watering the plant too, placing them evenly around the outer perimeter of the plant.
Netafim (in-line professional drip line) – this is typically installed in rings around the plant and additional rings can be added as the plant grows larger. Netafim can also be laid out in a grid pattern, particularly when being installed around an already established plant.
Hand-watering – Build and maintain a watering well at the outer edge of the plant perimeter. As the plant grows, increase the size of the well.
Author: Richard Perce, Irrigation Efficiency Specialist with the Water Resources Division for the Water Authority. Have a question about the article [email protected]
Service: April’s freeze
may have damaged your irrigation system, so make sure to inspect it for leaks,
or broken sprinkler heads and emitters!
Watering Recommendations: Spring rains are benefitting established landscapes! Follow these watering recommendations to keep your yard looking healthy: for grass (turf), water one-two times per week and for your trees water one-two times per month. To know how much to water, follow our Water by the Seasons spring watering recommendations. Remember, if it rains more than a half inch you can skip your next scheduled watering time as there is no need for supplemental irrigation.