The Basics of Fruit Tree Pruning

The Basics of Fruit Tree Pruning

Everyone should consider planting fruit trees in their yard. Because of our climate, fruit trees grow really well in our area. Besides the joy they bring when we harvest delicious fruit, they put on a beautiful show with spring flowers, create shade, and provide shelter and food for wildlife and pollinators. The Water Authority encourages the planting of fruit and shade trees by providing a generous annual rebate (click here for more information). Thinking of planting a new fruit tree? Check out our blog post about the proper way to plant trees here.

All trees require some amount of pruning, especially when young, in order to set up good structure. Fruit trees have a few special considerations related to our intense sunlight, specific pests, and where on the tree the fruit is produced.

Pruning has been called “one of the best, worst practices for trees,” because removing branches and leaves limits the tree’s ability to produce energy. Pruning wounds also create a place for decay to enter the tree. You should always have a reason for pruning a tree and understand why you are making specific cuts – not just because it’s a nice day and you remember reading somewhere that you should prune your fruit tree. Pruning is good because it reduces the length of branches to prevent breakage from heavy fruit years; removes dead or diseased branches; and/or reduces limbs to keep them from rubbing against a wall.

There is a ton of great information available online and in books about how to prune specific types of fruit trees. Below are a few resources. But remember that the way you care for your fruit tree will be a bit different than that of a commercial orchard. Besides producing fruit, the tree in your yard will also provide shade and beauty, so keep this in mind when studying resources about fruit trees and deciding which cuts to make.

Unlike in many other climates, our intense sunlight means that over-pruning can to lead to sunscald. This occurs when a branch is suddenly exposed to bright sunlight, causing areas of the bark to become burned and crack, exposing them to disease and rot. In order to avoid this, be careful about removing too many branches from the top, south and west sides of the tree. This exposes remaining branches to intense sunlight, causing sunscald.
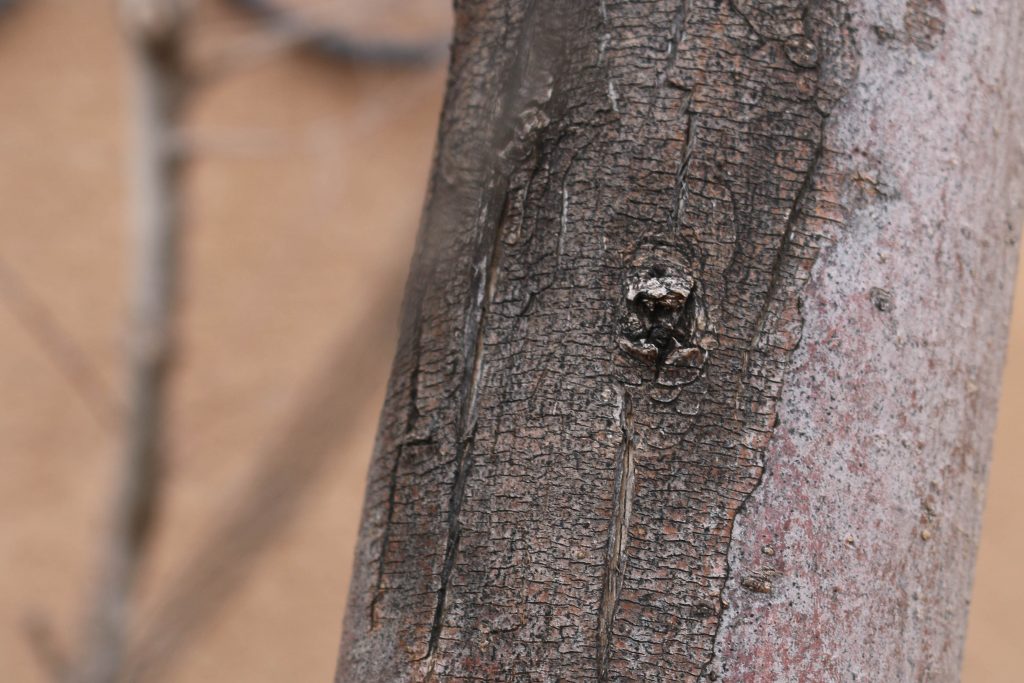
Darkening on tree on the south side is a sign of sunscald.

Stone fruit trees such as apricots, peaches, and cherries thrive in our area and can be really rewarding to grow. Unfortunately, there is also a pest called a borer (often referred to as a peach borer) that loves other fruit trees, too. This pest is very common and many feel that it is not a matter of if but when your stone fruit tree will get borers. Luckily a healthy tree can resist this pest on its own through natural defenses.

You can support and keep your tree healthy by doing the following three things:

  1. Selecting an appropriate irrigation system ensuring that it is properly watered (see our seasonal plant watering guide here)
  2. Adding mulch (see information about treebates for irrigation improvements and mulch)
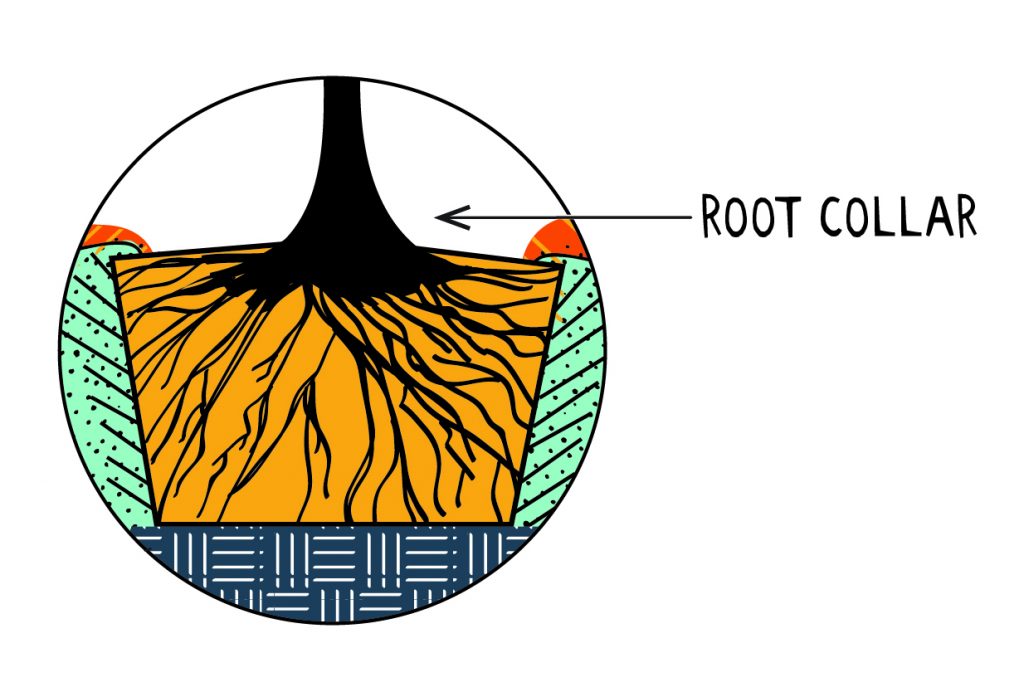
  3. Keeping the root collar of the tree exposed. (see tree detail)

Even trees that have borers can continue to live and produce fruit for more than a decade if they are well taken care of. Drought-stressed trees which have borers, on the other hand, often die within a few years.
If you think that you have borers in your stone fruit tree, there are several treatment options. These range from predatory soil nematodes to plant-derived and chemical pesticides that are sprayed, injected, or applied as a root drench. As with any plant pest treatment, the timing is critical. This is especially true with borers. If done at the incorrect time during the borer’s lifecycle, your effort will be completely wasted and you may kill beneficial insects that help your fruit tree. Resources or more information about borers here.
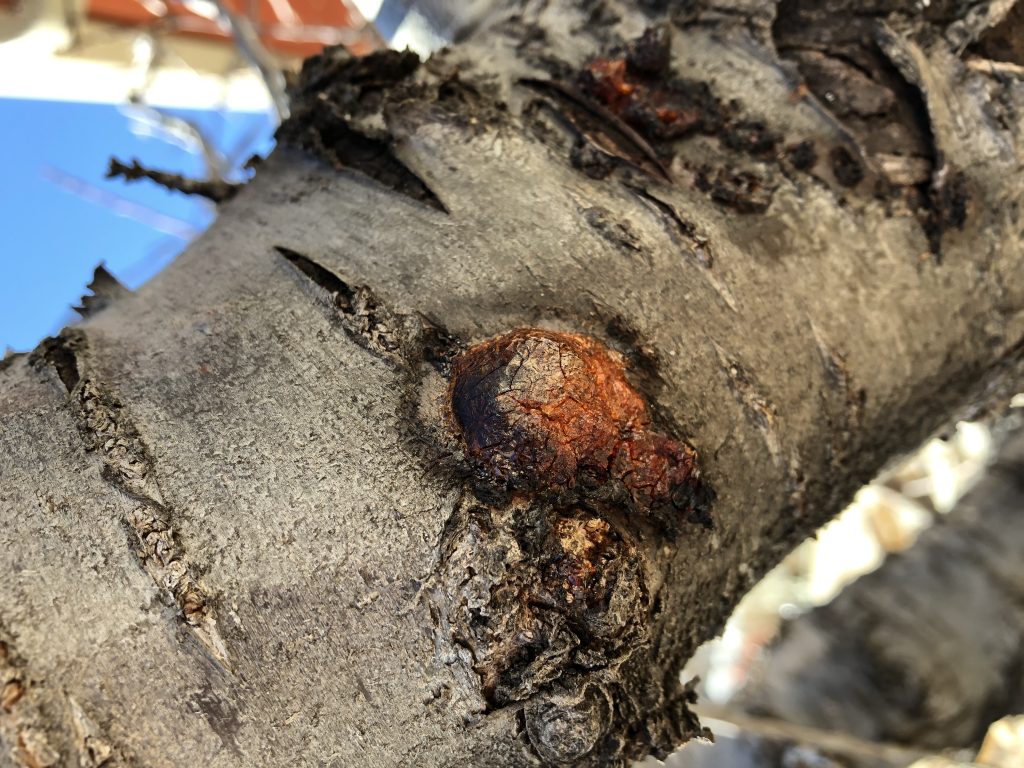
Fruit Tree Borer Infection

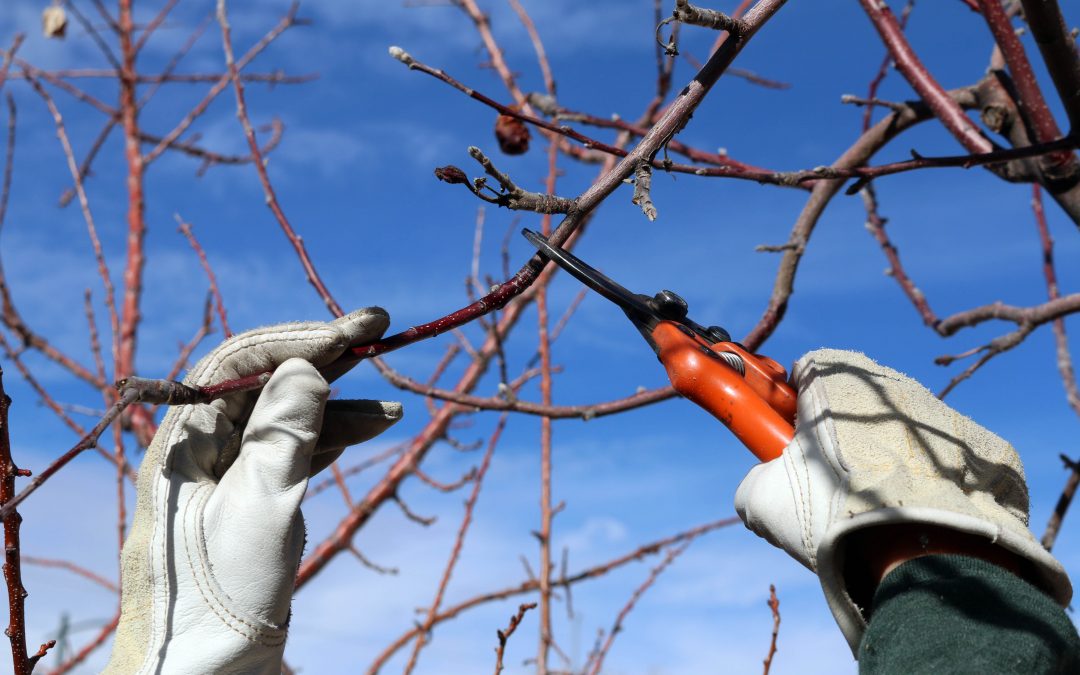
Fruit trees are usually pruned in late winter (February – early March) to adjust the tree’s structure. Summer pruning can also be done, but this is typically used to control or slow down growth. Removing dead, diseased, or dying branches can be done at any time of the year. It is important to remove dead branches so you can determine later if more branches are dying, and thus judge the general health and vigor of the tree. For young trees, it is especially important to leave as many small branches as possible. These help to produce energy for the tree as it is getting established, and can be removed later if they are not desirable for the mature tree structure. It is extremely important to never prune living branches if the tree is stressed by drought conditions.

Most fruit trees bear flower buds, then fruit, on specialized branch structures called fruit spurs. Fruit spurs will look different depending on the type of tree. Although variable, these usually occur on parts of the branch that are at least two years old, and individual fruit spurs can last for up to 10 years. In general, flower buds located on fruit spurs are fat, fuzzy and plump, as opposed to leaf buds which are pointed and flat. It’s important to know how to recognize these so you don’t prune off the coming year’s fruit harvest.

Because of how damaging bad pruning can be, and how valuable trees are, it may be worthwhile to hire an expert. Be sure that they have experience with fruit tree pruning in our area and are certified arborists by the International Society of Arboriculture (ISA). To find a local certified arborist, visit this site.

Author: Amos Arber, ASLA, ISA Xeriscape Incentive Inspector for Albuquerque Bernalillo County Water Utility Authority
Simple Steps to Get Started Designing Your Yard

Simple Steps to Get Started Designing Your Yard

A lot goes into designing a landscape, hence there’s an entire profession called landscape architecture devoted to designing outdoor spaces. We won’t be able to make you a landscape architect today, but we’re sharing six steps to get you started on a great landscape design.

  1. Brainstorm what you want in your yard.

Think of this as a “brain dump,” which simply means you’ll transfer to paper all the things you are considering, imagining, and dreaming of for your yard. First, find a window that looks out onto a part of your yard. Set up a chair there, grab a pen, clear your mind and set a timer for five minutes. Now write down anything and everything that comes into your head that involves your yard. Ready, set, go.

  1. Make a plan.

As the old saying goes, “All good things start with a plan.” It’s true! Think about how you approach your job; more than likely you have a general strategy about the steps you are going to take to perform the tasks on your to-do list. It’s the same with your yard:  Developing a plan will save you time and money, and is more likely to result in a successful end product.

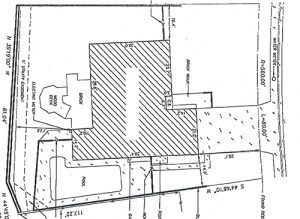
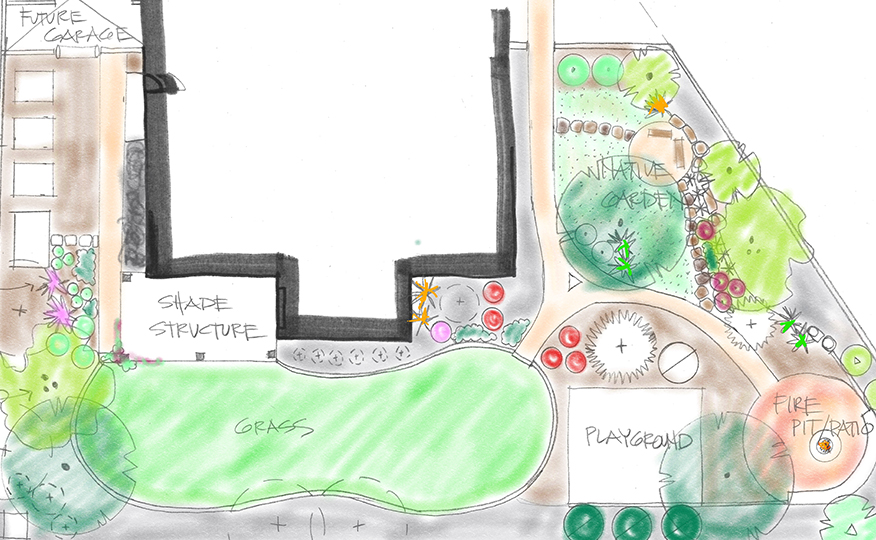
What is a plan? When it comes to landscapes, a plan is a scaled drawing showing your yard from a top-down perspective. To make sure the dimensions are accurate, it’s helpful to start with a “map” of your existing yard.  You can use either a scaled aerial photograph or a surveyor’s plat drawing of the lot on which your house sits, or both.

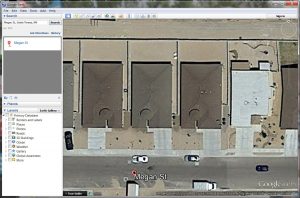
Scaled aerial photograph. Numerous websites provide free aerial photography.  Google Earth Pro, which can be downloaded for free, allows you to measure distances and save snapshots of satellite photography with a scale bar included.  Though this next step will be a challenge, the aerial photograph can then be opened in a program like Microsoft Paint where you can change the size of the photo and get it to a standard scale (like 1”=10’).  Resizing the aerial photograph to a larger-than-normal page size, like 11”x17”, may make it possible to fit your entire property onto one sheet at the desired scale.  Don’t forget that you can print large pages at a commercial print shop.

Surveyor’s plat drawing.What is a plat? It’s a map, drawn to scale, showing the divisions of a piece of land. This should be included in the huge pack of documents you received when you bought your home. It should show overall property boundaries, and basic dimensions of the home. It sometimes includes existing features such as driveways, and exterior structures like sheds. If it does not show these, you can use a tape measure to measure the structures and hardscape areas such as patios, driveways or sidewalks then note them in pencil on the survey plat.

Once you’ve got your aerial photograph or surveyor’s plat, you may want to buy a book of tracing paper, which is see-through and will enable your next steps.

  1. Take stock of what’s in your yard now

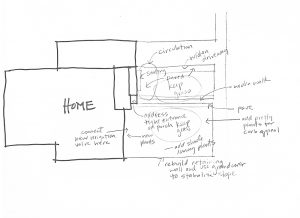
You’ve written down what you want to have in your yard, and you’ve got a photo or drawing showing the actual size of your landscape. Now you are ready to take stock of what’s already in your yard.  Put a piece of tracing paper on top of your aerial photograph or plat plan, and head outside. You’ll want to populate your tracing paper with information on existing conditions like plant locations and names, patio positions, roof downspouts, and drainage patterns. Be sure to locate any special site features, identify problems such as erosion, excess runoff, ugliness and decline, and identify positive attributes such as a good view, a nice specimen plant or typical travel patterns.

You’ll want to note compass directions on your drawings, since we experience large temperature swings in New Mexico it’s important to note the different levels of sun exposure in your yard. Typically, the south side of your house will receive sun all day long. Compare this with the north side of your house, or northern exposure, where the ground is shaded most of the day. Once you understand the different microclimates of your yard you’ll be able to choose plants that grow best in those conditions.

It may be helpful to use multiple sheets of tracing paper that can be layered to create a full picture of your yard’s existing conditions.  For help identifying underground utilities (like water lines) in your yard, call 811 (See https://www.pnm.com/call-before-you-dig1 for more information).

  1. Analyze your landscape -- do you have enough space for what you want?

Now that you have identified all the existing elements in your yard, you can reflect on how well those elements are working. Take some time to walk around your yard and think through all your existing elements and spaces. Keep these questions in mind: Why is this located here? How does this space relate to the others? What are the pros and cons of my existing spaces?

These questions will help you analyze your yard.  Through that process you’ll discover constraints and opportunities for improvement.

  1. Research other landscape designs to get ideas for your yard

Now that you’ve done the hard work above it’s time to look at other people’s designs for some inspiration. The templates provided here were designed for the Water Authority by local landscape designer Judith Phillips, and landscape architects George Radnovich and David Cristiani. These templates can serve as thought-starters to guide homeowners in creating beautiful waterwise landscapes with color, logic, beauty and purpose.

You’ll want to read through each design and note the aspects of each that you like. Circle your favorite plants, materials and how they shape certain spaces. All of this will help inform your landscape design.

Landscape design templates

Kaleidoscapes (509KB PDF)

Judith Phillips creates vivid, striking plant arrangements with abundant textures and rotating, colorful perennials.

Greenscapes (508KB PDF)

David Cristiani combines contouring with groundcovers, grasses, vines, shrubs and trees for a lush, green xeriscape year-round.

Loungescapes (518KB PDF)

George Radnovich blends dramatic native and xeric plants for a spectacular lower-maintenance xeriscape.

Wildscapes (553KB PDF)

Judith Phillips balances copious blooming perennials with intensely aromatic plants to attract abundant local wildlife.

Hotscapes (91KB PDF)

David Cristiani fuses succulent textures and groupings that thrive in full sun and high heat for impressive visual impact.

Coolscapes (503KB PDF)

George Radnovich orchestrates an elegant, simple mixture of ornamental plants and features for north-facing xeriscapes.

  1. Draw out your own design

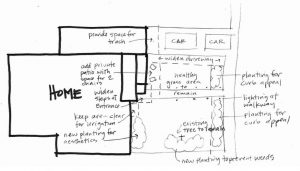
Now it’s time to try this for yourself. Grab your list of wants from your “brain dump,” pull out your plans with all your notes, and lay out the design templates in front of you. A pen, pencil, rule or scale bar, and some tracing paper will be everything you need to start marking up your plan with your new design ideas.

This is the fun part, all the stuff you just brainstormed, inventoried, analyzed and learned can all come together to help you design a really great landscape. Draw out as many ideas as you like and have fun with it. You are now on your way to a beautiful yard!

Author: Jill Brown, ASLA  Landscape Architect and owner of My Landscape Coach in Albuquerque, NM.

How to Plant a Tree

How to Plant a Tree

A correctly planted tree will grow more quickly, will be healthier and more attractive, and will live longer than an incorrectly planted one. A healthy tree will also have a stronger and larger root system better able to draw moisture from the soil. This allows it to better withstand the periodic droughts of arid New Mexico.

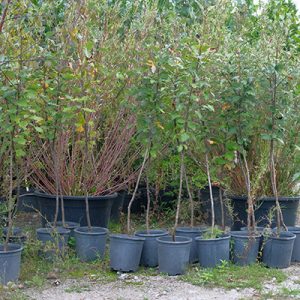
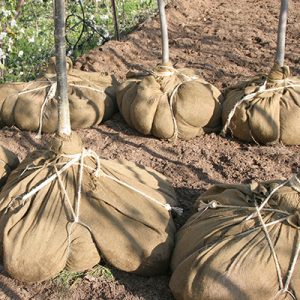
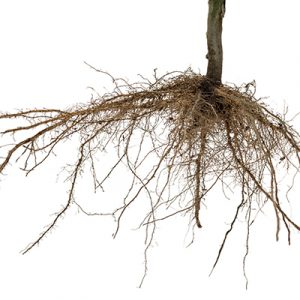
When you purchase a new tree from a nursery, it will come one of three ways: As a container tree, a ball and burlapped tree, or a bare-root tree. A containerized tree is simply a tree in a container (usually a plastic pot). Balled-and-burlapped trees are usually larger specimens that have been dug out of the field. After the tree is dug up, its root ball is wrapped in burlap fabric and covered with a wire cage. A bare-root tree, as the name implies, has no covering on the roots at all.  This is often the case with fruit trees.

Container tree

Balled-and-burlapped tree

Bare-root tree

To plant a containerized tree, follow the steps below:

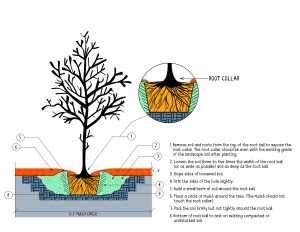
  1. Remove soil and roots from the top of the root ball to expose the root collar. Carefully remove the root ball from the container and set the tree on undisturbed soil in the center of the hole. The root collar should be even with the existing grade of the landscape soil after planting. (see sketch for more information.)
  2. Loosen the soil three to five times the width of the root ball (or as wide as possible) and as deep as the root ball. Tree roots grow best in loosened soil that has pore spaces for water and oxygen. The walls of the hole should be tapered away from the hole.
  3. Trim back roots that have begun to circle the root ball.
  4. Partially fill the hole with soil and firm it slightly. Water thoroughly and finish backfilling the hole with soil. Pack the soil firmly but not tightly around the root ball.
  5. Build a small berm of soil around the root ball. Fill the berm with water two or three times to make sure the soil is completely moist. Thereafter, begin a regular watering schedule.
  6. Place a protective circle of mulch, three feet wide or wider, around the tree. The mulch should not touch the root collar and should be installed at a depth of 3 to 4 inches for best results.
  7. Water your tree regularly. (See post on how to water a newly planted tree)

To plant a balled-and-burlapped (B&B) tree, follow the steps below:

  1. Remove soil and roots from the top of the root ball to expose the root collar. Carefully set the tree on undisturbed soil in the center of the hole. The root collar should be even with the existing grade of the landscape soil after planting. (see sketch for more information.)
  2. Loosen the soil three to five times the width of the root ball (or as wide as possible) and as deep as the root ball. Tree roots grow best in loosened soil that has pore spaces for water and oxygen. The walls of the hole should be tapered away from the hole.
  3. Carefully place the root ball in the center of the hole. The top of the root ball or bottom of the root collar (see photo) should be even with the soil level. Take note of the tree flair in the sketch.
  4. Remove twine or string, burlap, and if the root ball is surrounded by a wire basket, cut and remove the wire basket. Be careful to avoid breaking up the root ball.
  5. Partially fill the hole with soil and firm it slightly. Water thoroughly and finish backfilling the hole with soil. Pack the soil firmly but not tightly around the root ball.
  6. Build a small berm of soil around the root ball. Fill the berm with water two or three times to make sure the soil is completely moist. Thereafter, begin a regular watering schedule.
  7. Place a protective circle of mulch, three feet wide or wider, around the tree. The mulch should not touch the root collar and should be installed at a depth of 3 to 4 inches for best results.
  8. Water your tree regularly. (See post on how to water a newly planted tree)

PRO TIP: If possible, plant trees in valleys and depressions in the landscape so rainwater will naturally collect and give the tree a good soaking. Direct roof downspouts and canals towards trees.

Newly planted trees do, however, need water. Do a thorough watering at planting. Water again about 3 days after the first planting. Then water once a week for the next four weeks. Continue watering once a month for the rest of the winter. Every time you water, make sure it is a deep soak. That means watering to a depth of 24 inches. See how deep am I watering for instructions on how to measure watering depth.

Be sure to add mulch around your new trees. We recommend using an organic mulch installed to a depth of 3 inches around the tree, keeping mulch a few inches away from the trunk of the tree.

Staking a tree is not necessary unless your tree is located in a super windy spot. If you do stake the tree be sure the tie is not too tight. Promptly remove it one year after planting the tree.

Soil amendments are not necessary if you choose the right tree for the native soil conditions in your yard.

Hand watering hose tips

Hand watering hose tips

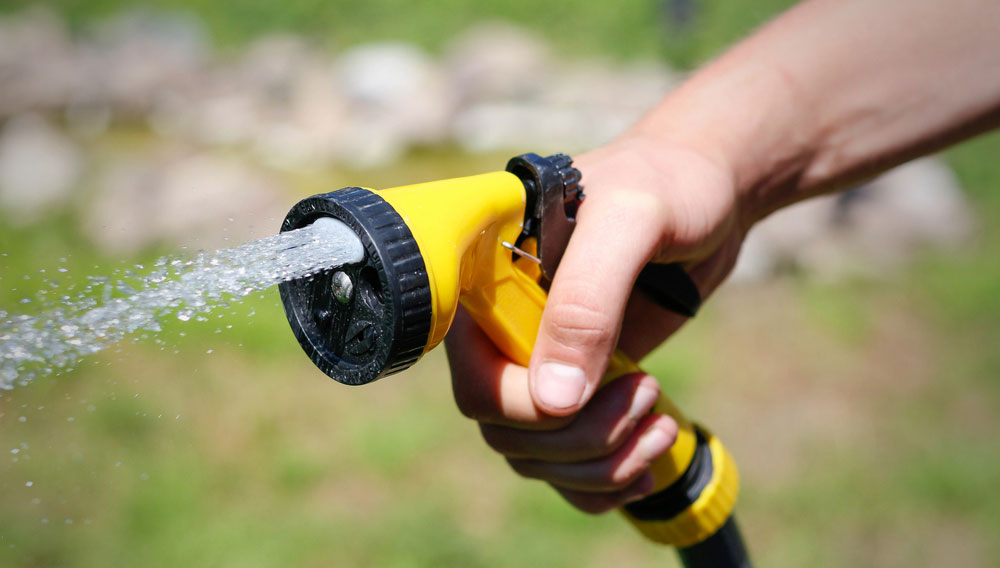
  • Use shut-off nozzles on hoses
    Shut-off nozzles completely turn off the water when you are not using it.
  • Install a hose watering system
    If you are not ready to invest in an inground irrigation system there are automatic hose systems available. Instead of dragging your hose around the yard, this system allows you to set up your hose with appropriate watering system and water your yard at a set time and for a set length of time. Basically, it is a timer attached to your hose. You can even build a hose watering system that has multiple valves. Each valve can be set to water at various times throughout the day. For example, you could set one valve to water your vegetable garden for 10 minutes daily and  another valve to water your perennials two times a week for 20 minutes.
Digging the Dirt

Digging the Dirt

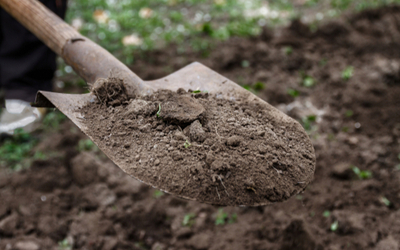
If you’re planting a lawn, a vegetable garden or fruit trees, you may need to add generous amounts of compost to your soil before you plant so that the soil absorbs and holds water more efficiently. If you’re landscaping with native and xeric plants, you probably don’t need to add any organic matter to the soil as these plants prefer lean soils. For arid-adapted plants, usually all you’ll need to do is loosen the soil well before you plant, and water deeply enough to encourage them to root extensively.