Grass lawns in the greater Albuquerque area need supplemental irrigation to survive our high desert climate. Most residential landscapes are watered by pop-up spray heads that include a sprinkler nozzle set into a spray sprinkler body.
We recommend switching out your older sprinkler nozzles and spray sprinkler bodies for more water efficient ones. Take a look below. They are easy to install; check out the pictures to see how simple it is.
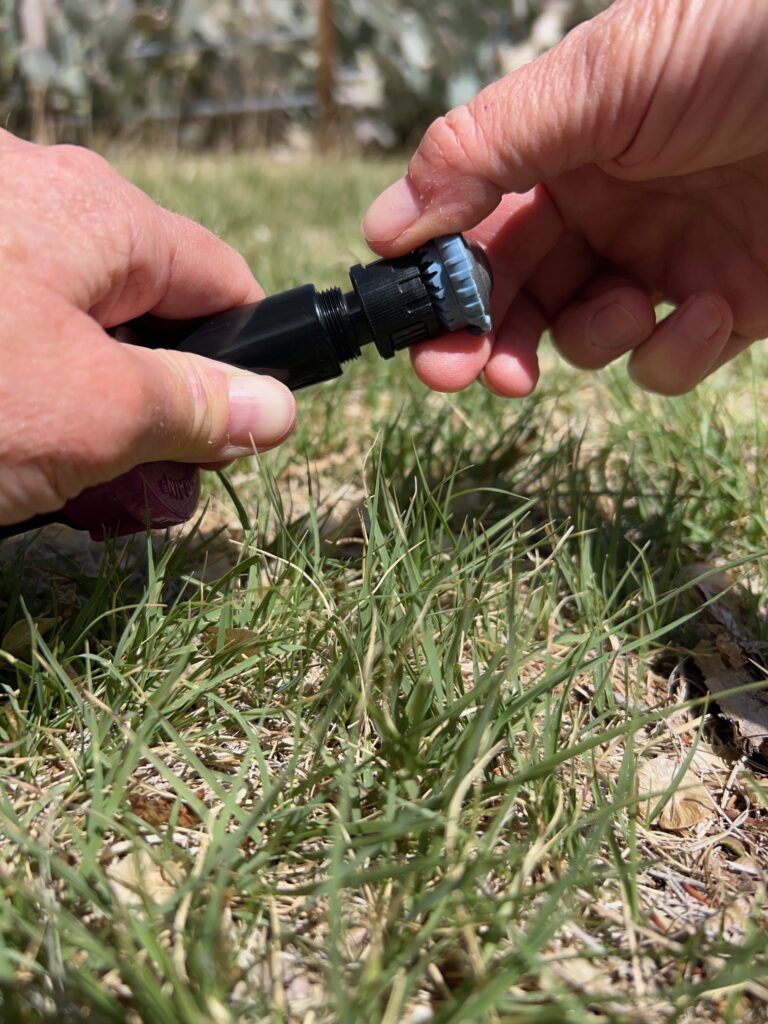
These devices provide pressure regulation at each individual spray head. The sprinkler body is the exterior shell that connects to the irrigation system piping and houses the spray nozzle that applies water to your landscape. WaterSense-labeled spray sprinkler bodies with internal pressure regulation can reduce water waste by providing a consistent flow at the sprinkler nozzle. When the sprinkler body maintains pressure near its optimal operating pressure, the connected nozzle is better able to generate the right amount of water spray and coverage for more uniform distribution of water across the landscape.
Installation is simple. First remove the old spray body by twisting it off and then twist on the new spray body.
High Efficiency Rotating Sprinkler Nozzles (multi-stream)
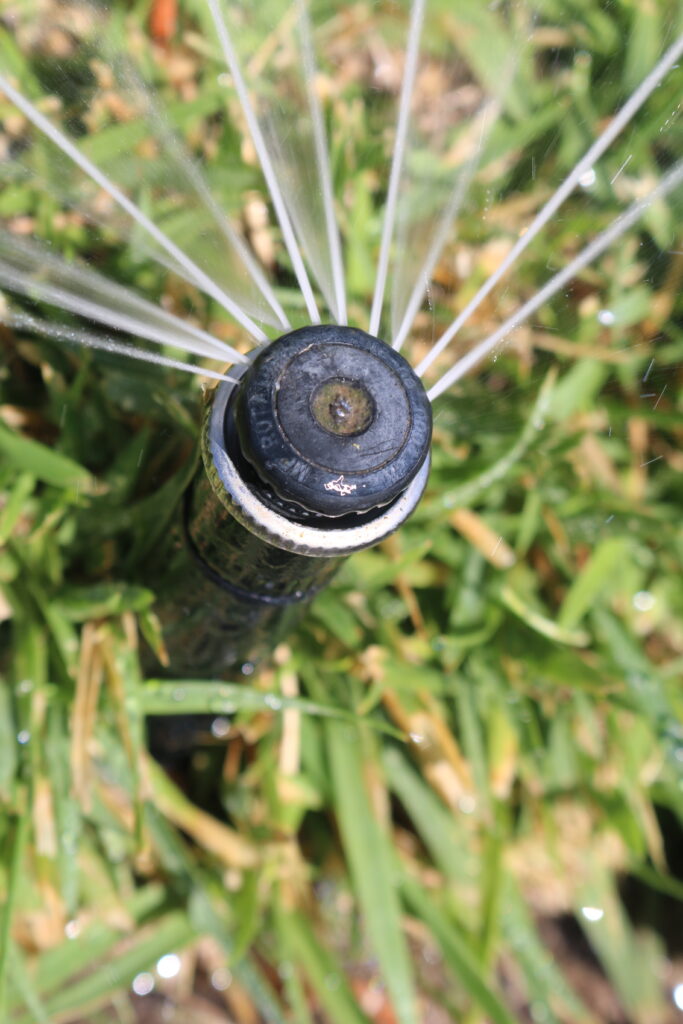
We also encourage you to change your existing spray heads to high efficiency sprinkler nozzles. These nozzles minimize water waste with unique, multi-trajectory rotating streams that deliver water at a steady rate. This slower application rate allows water to gently soak in at rates that soils can absorb. Use these nozzles to replace the sprinkler head on any conventional spray head body or pop-up sprinkler for water savings of up to 30%.
High efficiency sprinkler nozzles are a great solution for upgrading an old and poorly performing sprinkler system. These nozzles create a heavier droplet that is less affected by wind and reduce misting. These nozzles work especially well with pressure regulating bodies. These heads require longer run times. Don't worry it does not use more water, because rotary nozzles deliver water at a slower rate than typical spray nozzles. Therein lies the efficiency: water saturates deep into the root zone rather than running off and evaporating. This can also help reduce the frequency of runs, thereby saving water.
To make the upgrade, carefully pull the riser out of the sprinkler body, it's spring loaded so keep a hold of it while you unscrew the old nozzle and replace it. After you replace the nozzle you may need to turn the system back on and rotate the body slightly to adjust the spray direction. Pull up the existing nozzles in your sprinklers. While holding them, remove the cap from the sprinkler and install the appropriate spray nozzle, as indicated on the plan. If you are using Hunter brand nozzles be sure to also buy this little orange tool to adjust the spray arc. Rainbird nozzles can be adjusted by turning the ridged rings with your fingers.
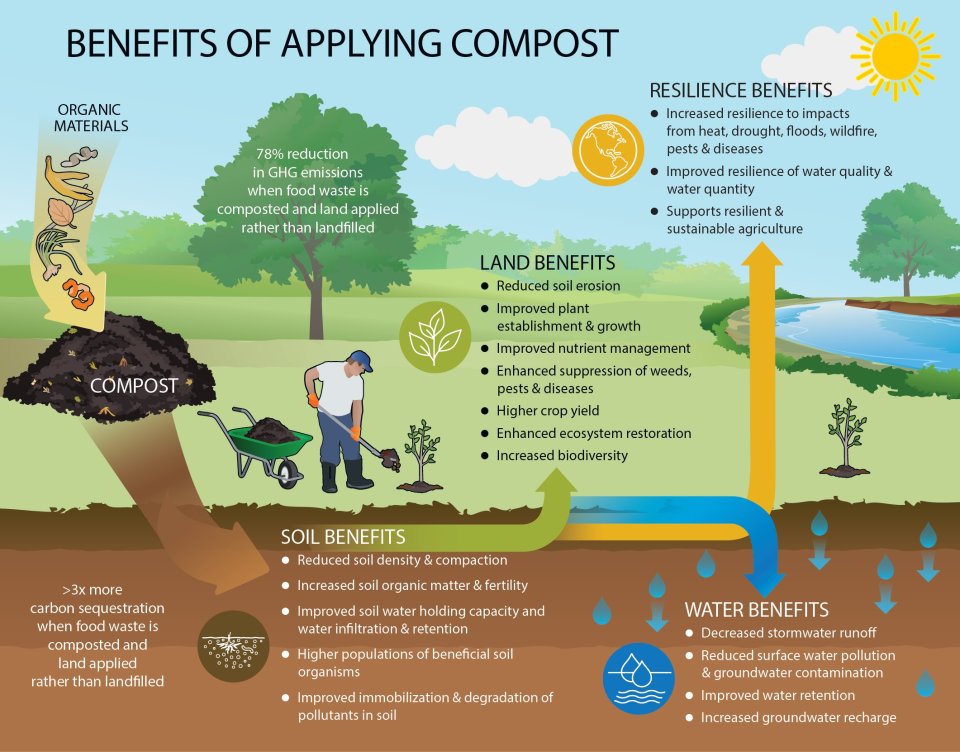
Compost is defined in the dictionary as “a mixture that consists largely of decayed organic matter and is used for fertilizing and conditioning land.” Some people call it black gold because adding to your garden can produce dark, crumbly soil that is like gold for your plants.
Courtesy of EPA.gov
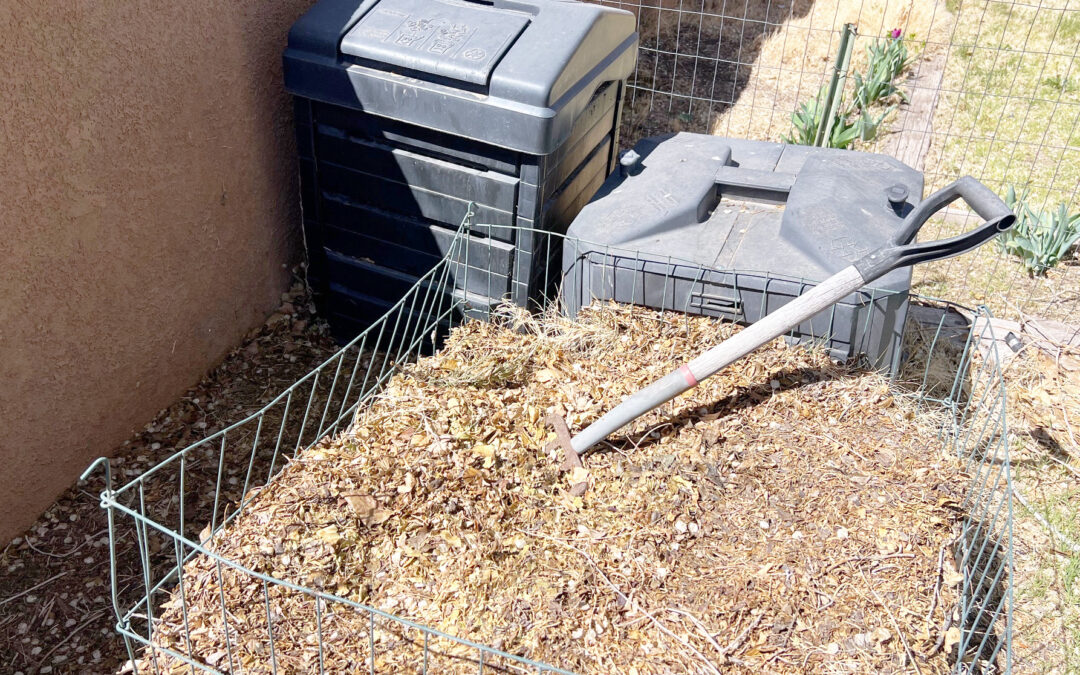
Composting requires three ingredients. The first is brown material from your yard like leaves, twigs and pinecones as well as newspapers, paper egg cartons, straw and so on. Green material, or food waste, is the second. For example, vegetable and fruit scraps, coffee grounds, crushed eggshells, or tea bags. The third is moisture — water goes a long way.
A new type of composter has hit the market: electric composters. These are simple indoor recycling machines that are plugged into the wall. The heat, grind and aerate food scraps to speed up the process, creating compost in a very short period. There are many types, some that sit on the counter and some that look like trash bins in your kitchen. One downside is that these machines can be pricey, ranging from $300 to $700.
Photo by Tomsguide.com
Composting Service
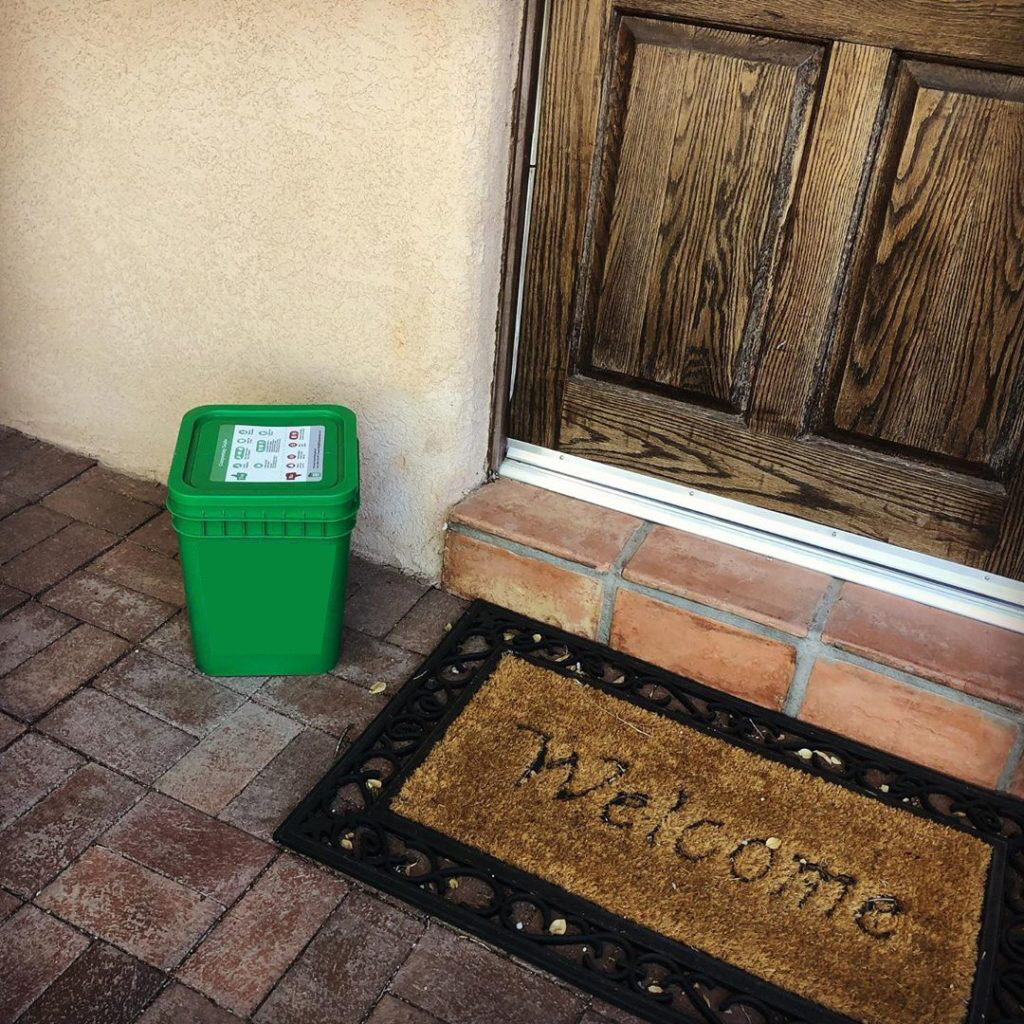
The last and perhaps the easiest method may be to drop all your food items into a bucket that you leave on your front porch. A service provider picks up the bucket and composts the material. You pay a monthly fee and after a bit you get compost delivered to your door. Prices are $22 a month for biweekly pickups.
The City of Albuquerque’s Sustainability Office is taking on Food Waste.Are you interested in diverting food scraps from the trash and turning it into compost to feed local soils? Please consider joining one of our community compost co-op sites.
Below are workshop options in April and early May.
Option 1: Take the compost science and hands-on learning classes.
Hands-on learning: Friday, April 25, 2-4pm at Barelas Senior Center’s community compost site. Note: We will plan more hands-on opportunities this summer.
Option 2: Learning Series at Barelas Senior Center.
Tuesday, April 22, 10:30-11:30am, Introduction to compost science and hands-on learning. Participants can choose a free plant!
AND
Tuesday, April 29, 10:30am-noon, Compost science, indoors. Register here.
AND
Tuesday, May 6, 10:30-11:30am, Hands-on learning.
Please help us spread the word about this opportunity to get involved in building healthy soils and community resilience. If you have questions, please email swest@cabq.gov.
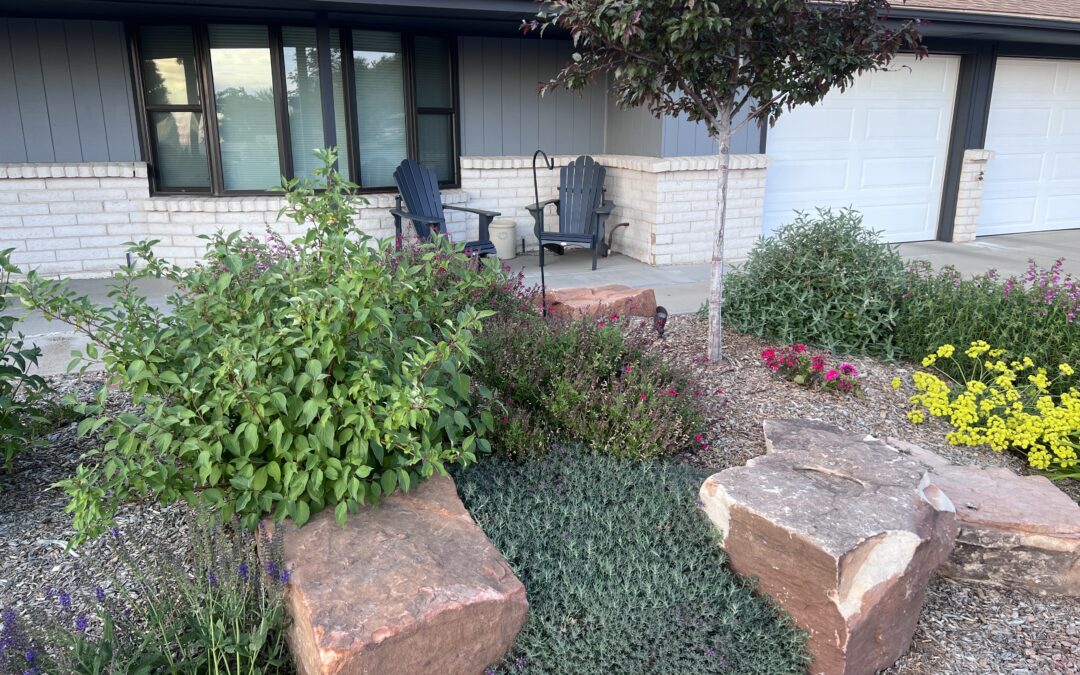
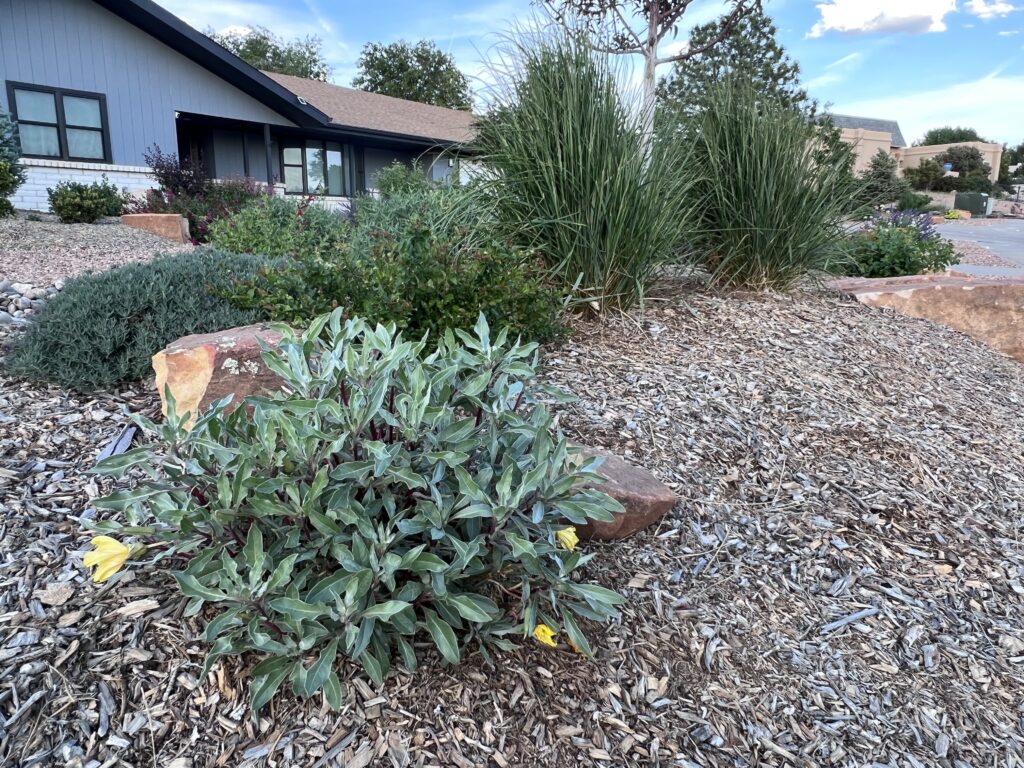
The Water Authority’s desert friendly xeriscape conversion incentive rebate has been around since the early ’90s and is still going strong. Millions of square feet of thirsty lawns have been converted to healthy xeriscapes that save billions of gallons of water. Although the rebate application process has a few more steps than our other rebates, our experts are here to help you along way. Remember to contact our xeriscape inspector, Carl Christensen, cwchristensen@abcwua.org, before you stop caring for your lawn or start tearing it up.
Water Authority residential customers who convert their landscapes to desert friendly xeriscape and use drip irrigation can qualify for a $3 per square foot rebate.
The rebate area of your new landscape must have 50 percent coverage (at maturity) of qualifying low- to medium-water-use plants, and the soil between and beneath all plants must be covered with at least three inches of mulch (organic mulch, gravel, etc.).
If you are interested in participating, please don’t start removal your grass until you have applied online to the program and received an official notice to proceed.
Several conditions must be met to qualify for the rebate. Projects that have been started or completed are not eligible for the incentive, and other terms and conditions apply. After submitting your application online, your project will be screened to ensure it meets minimum requirements and an inspection will be scheduled. The visit may take up to three weeks or more to schedule during the busiest part of the season. Water Authority conservation rebate requirements are subject to change without notice. Rebates are limited to available funds.
Does Your Landscape Meet the Requirements?
Do you have an operating spray irrigation system on your site?
Do you have grass turf on your site?
If you answered yes to the above questions, then go to Step 1 below.
Have more questions? Call 842-9287 and choose option 4 to learn more or check out our xeriscape conversion web page for rebate requirements and more.
Step 1: Develop A Landscape Plan
Draw a simple landscape plan or submit a plan designed by a professional. Use the approved desert friendly plants from our Xeriscaping Guide plant list. List each plant (using the scientific name) and rebate allowance points on the application.
Step 2: Start Your Online Application
Click here to set up your online application. You will need to log in or create a Water Conservation Portal account.
Step 3: Schedule Your Initial Inspection
Be sure you have set up and filled out your online application. Then call (505) 289-3026 to schedule the initial inspection at your property. Initial inspections occur between 9:00am-2:30pm Monday through Friday. Please allow three weeks for availability.
Step 4: Proceed With Your Project
Once your online application has been approved, you may begin your project. Funding will be reserved for the anticipated amount of your rebate, and you will have six months to complete your project. If you need more than six months, you may apply for a project extension provided funds are still available.
Step 5: Schedule Your Final Inspection After Completing the Project
Have hard copies of material receipts or a contractor’s final paid invoice available for the final inspection. Following final inspection and application approval, the Water Authority will apply the rebate credit to your water bill. Your rebate should appear on your water bill one to two billing cycles after your form is processed.
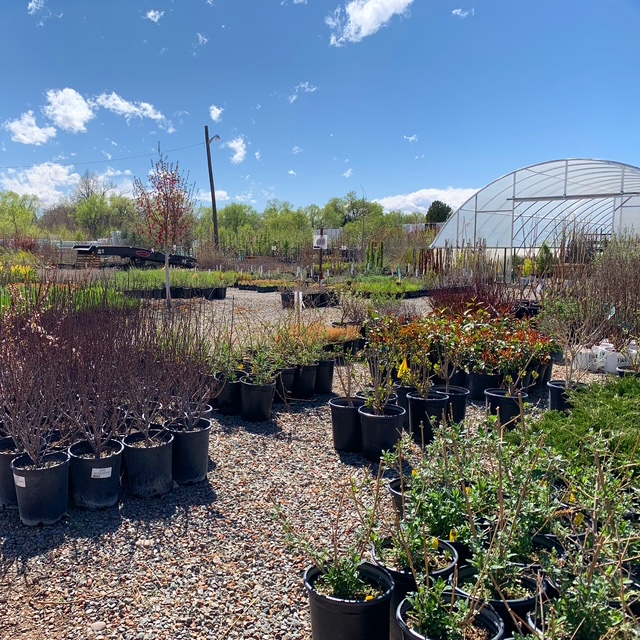
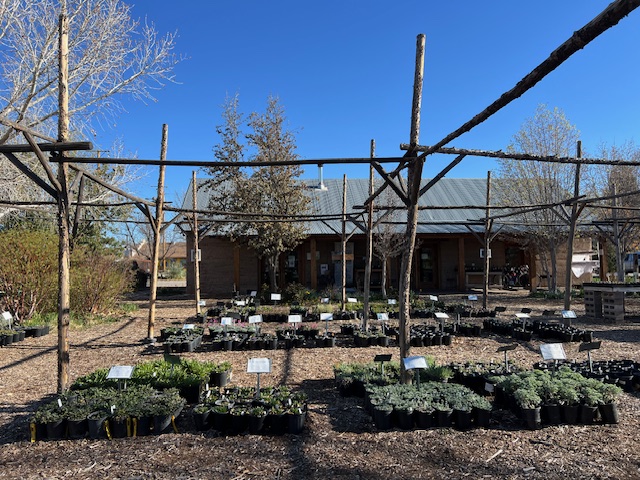
A popular question we get at 505Outside is “Where should I go to get plants for my yard?” We’re highlighting our local nurseries and the uniqueness of each of them.
Every yard has its own unique environment that includes things like sun and wind exposure, soils, drainage, climate, bugs, orientation, views, weather conditions and elevation. And certain species of plants like certain types of conditions. Nurseries pride themselves in getting plants that are specifically grown for your area. And the only way to ensure that you get a plant that is well-suited for your yard is to go to a local nursery. Plants that are grown in your region for your region are going to do much better in your yard.
Local nurseries have very knowledgeable staff experienced in dealing with all the variables of yards just like yours. But remember, they have limited time so go prepared with a list of questions. Make sure you note all the conditions of your space so the nursery staff can steer you in the right direction.
Check out some local nurseries below, listed in alphabetical order:
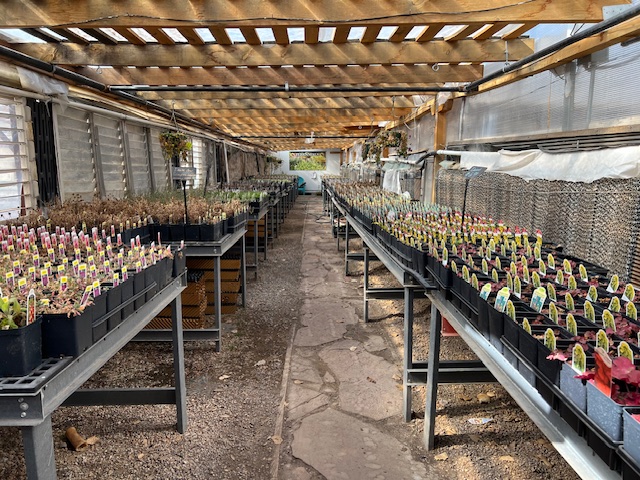
This plant nursery located along Alameda NW near Fourth Street is best known for its thousands of vegetable seedlings, making it a must-stop for all your vegetable needs. Of course, they also carry a ton of other plants like perennials, annuals, groundcovers, trees, roses and more — but go for the vegetables.
As the name suggests, this North Valley nursery specializes in aquatic plants and fish. However, they also carry a wide variety of locally grown perennials, trees and shrubs. You’ll want to linger as their garden offers a very pleasant shopping experience.
Located in the South Valley bosque of Albuquerque, this off-the-beaten-path farm and nursery specializes in edibles and resilient and native trees and shrubs, alongside egg-laying ducks and orchards. Grown onsite, you can find underrepresented trees and shrubs that grow well in the harsh New Mexico climate.
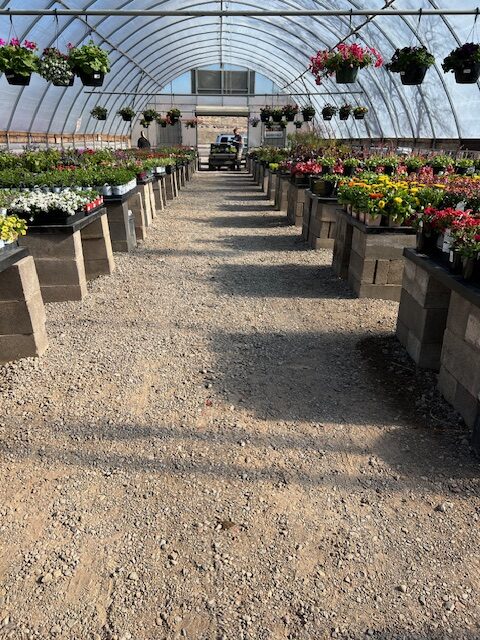
The shop is mostly known for home décor but walk towards the back of the store and you’ll find a well-stocked nursery with a good selection of annuals, perennials, shrubs, trees, succulents, houseplants and vegetables. They also carry a host of garden supplies and are easily accessible, being located along San Mateo NE near Interstate 25.
From a location near Balloon Fiesta Park, Jericho provides some unique items not found at other nurseries in town. Of course, they have the usual annuals, perennials, natives, trees, roses, shrubs and more, but you’d never guess they have all kinds of specialty miniature garden and fairy garden materials. You’ll also find a friendly staff and everything you need to make a terrarium, garden tools, outdoor décor and other garden products.
At this large nursery located on Osuna NE just east of Edith, you can find just about everything you need. Be sure to check out the native plant section. But one of the coolest features of Osuna is its Plant Pharmacy featuring certified staff eager and willing to answer all your wildest questions about your plants. Bring a picture of your aphids or leaves from the actual plant and they diagnose the problem.
Natives, natives, natives. Located on Fourth Street NW north of Chavez Road, this nursery sells native New Mexico plants and seed. Just about any plant you find here will grow with ease in your yard. You will also find a wide variety of seeds, from vegetables to any type of wildflower you’d like. The staff even curates specialty blends of wildflowers and grass lawn seeds.
Originally only a wholesale nursery, now anyone can shop here via the Garden Club, which costs $25 for a lifetime membership. Conveniently located on El Pueblo NE west of Edith, you will be able to find everything you need for your yard. In fact, Plant World sells some of the largest ball and burlap trees in town.
Known as your neighborhood nursery, this store located at 5801 Lomas NE has everything you need for your yard conveniently located near those in the Near Northeast Heights, Nob Hill and Uptown. The staff is extremely knowledgeable, and the deep family-like atmosphere and roots of this store shine through.
Trees are especially important in arid, urban environments like Albuquerque and Bernalillo County. They provide shade, mitigate urban heat, reduce greenhouse gasses and air pollution, and create wildlife habitat, among many other benefits. All trees, even climate-resilient and drought tolerant species, need to be watered adequately.
It’s worth the investment to keep our mature trees healthy. The mature trees on your property are worth much more than the cost of your treasured appliances and, yes, even more than your roof. Keeping our trees healthy and happy over their lifetime is a minimal investment and a valuable contribution to our community urban forest.
In Albuquerque, we tend to overwater our lawns and underwater our trees. It’s important to understand the basics of how best to water trees. For instance, a tree has two different main types of roots. The feeder roots lie within the first 6-24”of the ground, and the stabilizer roots can be at least 3’ deep You may think your trees’ roots can reach the water table, but you should think again — most of Albuquerque has a water table between 20 and 150 feet’ deep. Your roots are never getting that deep.
Due to the importance of our urban forest and how many people are seeking guidance on how to water their trees, the Bernalillo County Water Conservation Program, and Let’s Plant Albuquerque, partners collaborated to create this How to Build an Efficient Tree Watering System guide and the associated workshops.
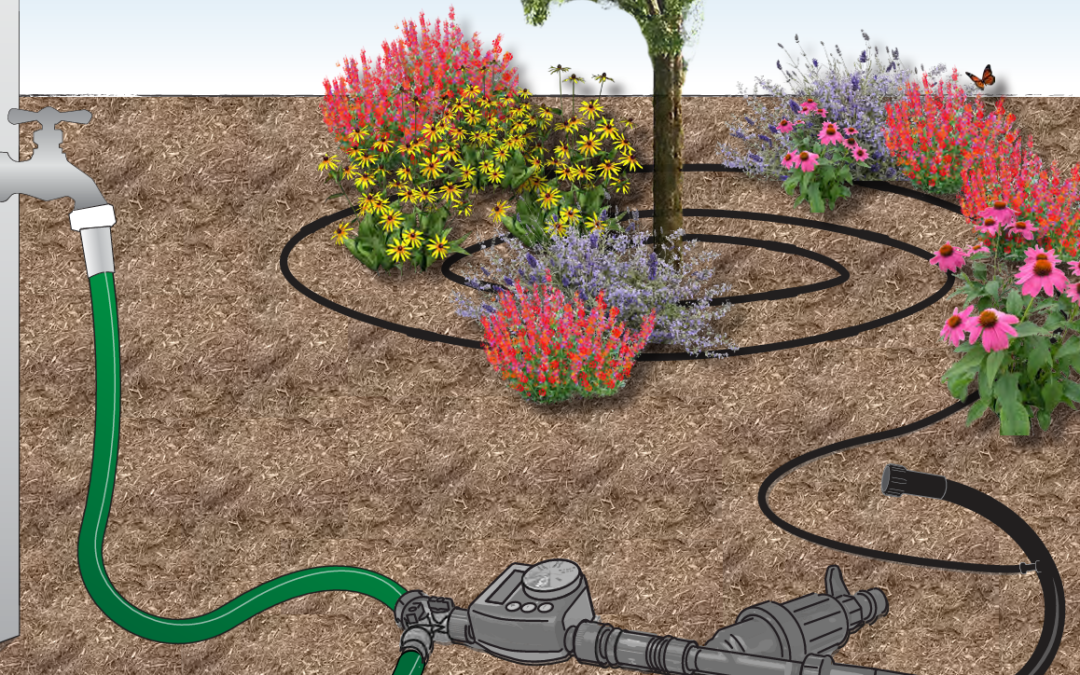
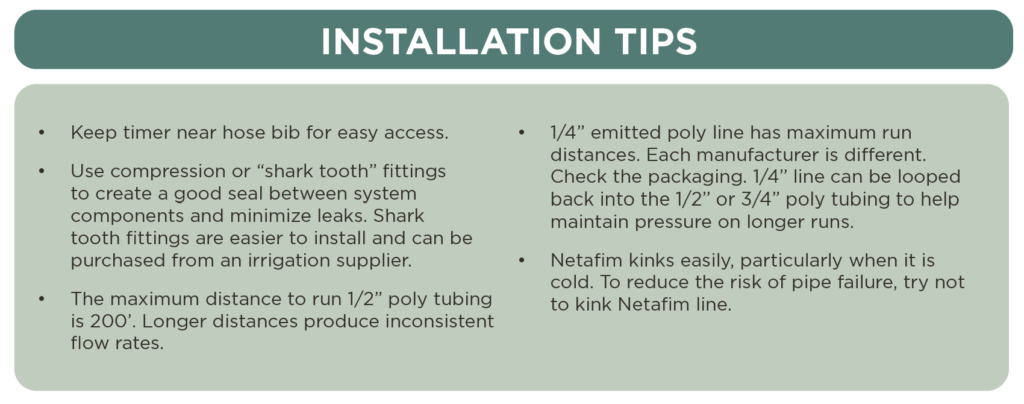
The tree irrigation system is inexpensive, flexible, easy to install and long-lasting. It uses drip irrigation attached to your hose bib and can be easily expanded as your tree matures.
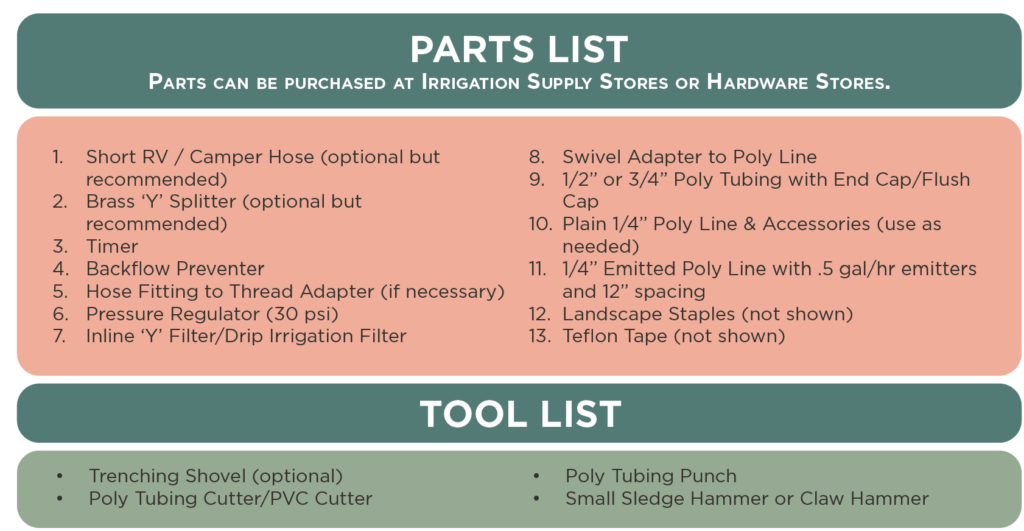
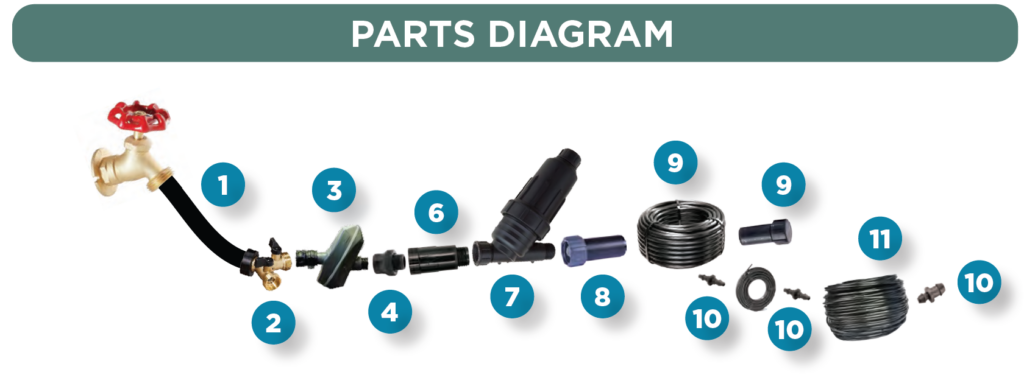
When assembling your system there are a few key parts to consider:
Teflon tape is needed to seal the threads at every connection to prevent water coming through.
Take note of the two different types of threads: hose threads and pipe threads. Hose threads are straight and require a washer to seal. Pipe and coupling threads are tapered for water use and will seal with just the application of Teflon thread seal tape.
Timers should be uninstalled and stored with the batteries removed over the winter. Some people like to install fresh batteries every spring to ensure there is no interruption during the growing season.
A pressure regulator is important for all drip systems due to the high pressure in our Albuquerque water lines. The regulator reduces the water pressure coming in from the main water supply. Then, it creates a constant low water pressure through the system, allowing the drip tubing to put out the correct volume of water per minute.
Distribution (lateral line) drip tubing comes in two general sizes, and each has advantages and limitations:
1/2” tubing is more common, and parts are available at big box stores. The run of distribution tubing must be less than 200 feet.
¾” tubing is available from irrigation supply stores. It holds pressure better, and tubing runs can be up to 600 feet.
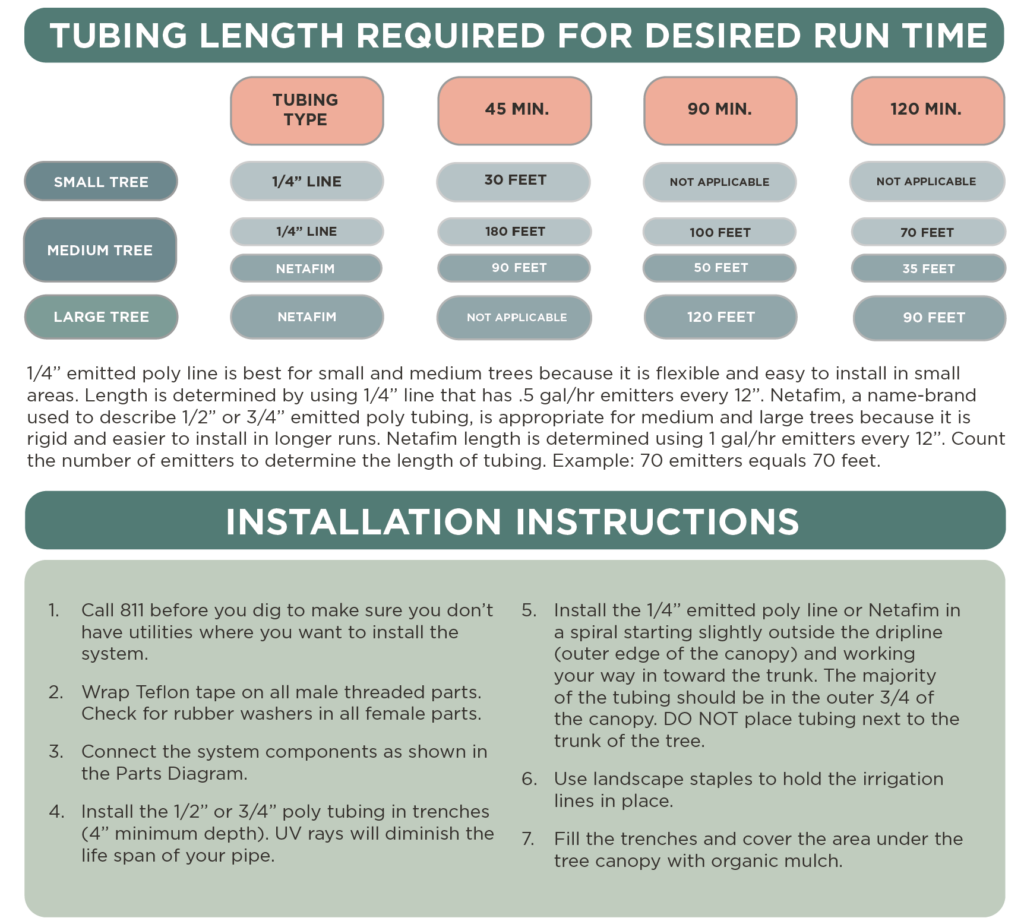
Inline drip line (emitter line) drip tubing comes in two sizes and includes drip emitters pre-installed in the line every 6”, 12” or 18”.
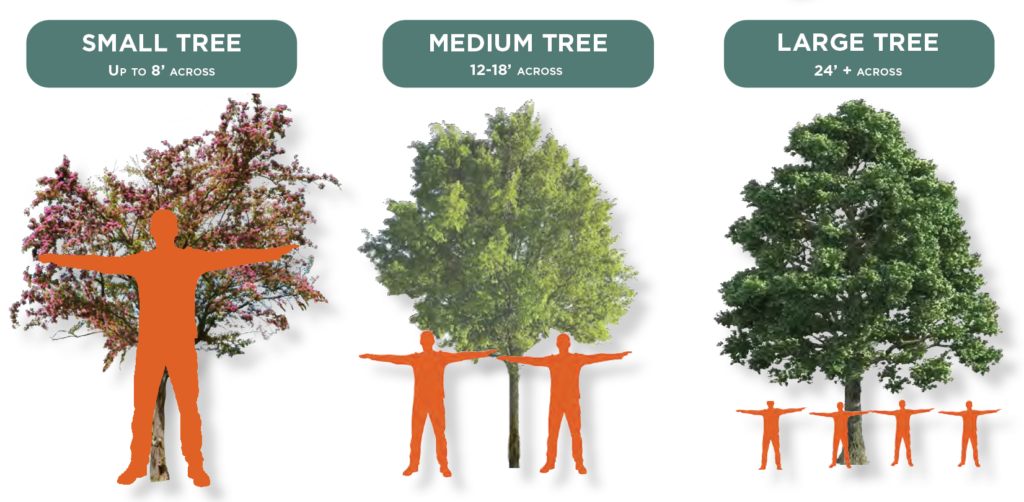
½” Netafim inline dripline tubing for use around medium and large trees. Use 12” emitter spacing.
¼” Netafim inline dripline tubing for use around small trees. Use 6” emitter spacing.
A flush type of end cap is handy for flushing out the system at season start-up or if a break occurs. It is recommended to remove and store flush caps over the winter.
The watering guidance for the system was developed to not under or over water most trees in Albuquerque. However, irrigation is highly dependent on site conditions such as soil type and microclimate as well as the species of tree. This guidance is meant to be a rule of thumb or starting point, and adjustments should be made based on the local conditions and tree species.
Below are some of the factors that should be considered in generating a watering schedule for your yard:
Soils affect how often and how long you need to water — see the Water Authority’s Irrigation Guide for more details. In general, sandy soils require shorter but more frequent run times while clay soils need longer but less frequent run times.
Always check your plants to evaluate irrigation scheduling. Most plants will look a little bedraggled at 3 p.m. during the summer so check in the morning. Do they seem wilted or pale or have cupped leaves? These can be signs your tree needs more water.
Be aware that symptoms of overwatering and underwatering may look similar.
Occasionally, feel the soil the day after irrigating or use a soil probe such as a screwdriver or coat hanger to evaluate the level of moisture in the soil. If the probe is easy to push in and there is a swampy smell, the soil has too much water. If you can’t get the soil probe more than 4” into the soil, it’s too dry. Ideally, the soil probe can be pushed 12”-18” into the soil 24-48 hours after irrigating.
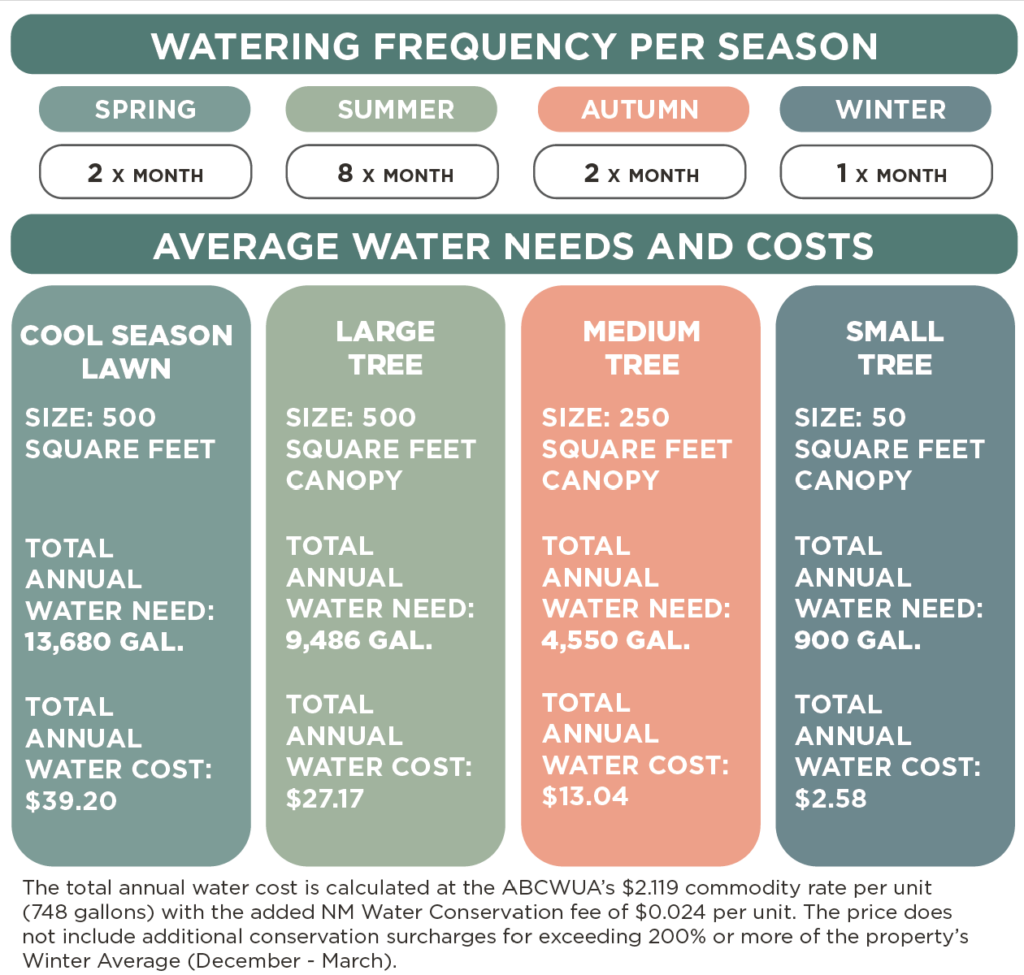
Consider what size tree you are trying to water. Check out the diagrams above and below to determine how much tube length you will need to meet the required water needs of your tree.
Sometimes you need help to create your perfect desert friendly landscape. Many times, this involves hiring a landscape contractor. The Water Utility Authority is committed to helping its customers. Below we share some tips to help you choose a landscape contractor.
It’s important to start with a to-scale landscape design plan. This may be done by a professional landscape architect or a landscape designer. Or perhaps you worked up your own design plan.
Hiring a landscape contractor requires research similar to what you would do when hiring any home repair contractor. It’s important to consider the following:
Is the contractor able to secure bonding and are they insured?
What are the contractor’s credentials (formal training, references, professional certification)?
Does the contractor belong to a local or national trade association and abide by its standards?
Does the contractor have a Water Smart Contractor listing through the Albuquerque Bernalillo County Water Utility Authority?
The contractor should provide references for projects similar in size, scope and design so you can talk to previous customers about their experiences.
The contractor should share photographs of other projects you can check out.
Estimate/Bid and Contract
The contractor should provide you with a detailed, line-item estimate for the work. This will include the price of the materials, labor, taxes and permit costs if applicable. A detailed estimate will help you accurately compare pricing and services.
A signed estimate may act as the official contract, a legal requirement that will protect both you and the contractor if anything goes wrong.
What is the payment schedule? Most contractors will ask for anywhere from 30% to 50% up front so they can purchase materials. They should provide you with a general timeline or payment schedule.
How long will the construction take, and what does the sequencing/schedule look like?
How does the contractor manage additional work that may be added in the middle of the project and is not on the plan?
During and After Construction
Who will be the contractor’s point person, someone you can go to with questions? How will they communicate with you and how often?
How will the contractor handle variabilities that come up during construction?
What happens if there is a delay once construction has started?
The contractor should show you how to maintain the landscape after it is built and how to work the elements installed, such as the irrigation controller.
What are the warranties for the project? What do they cover and exclude?
Does the contractor provide troubleshooting support during the first year after installation?