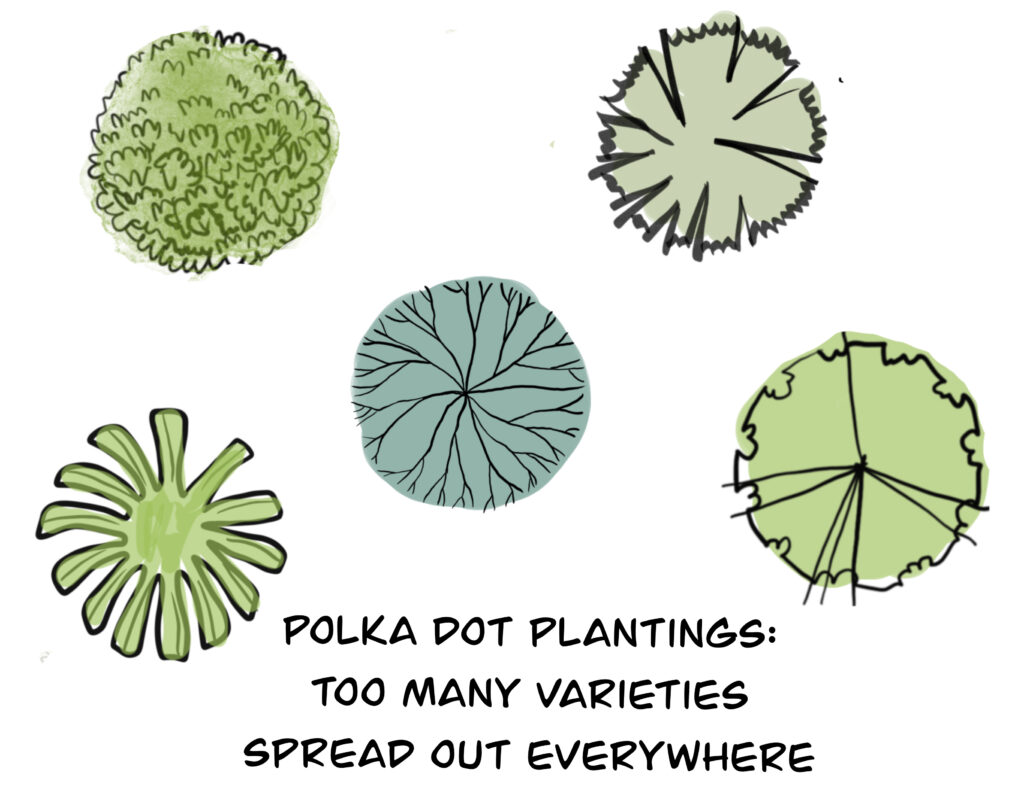
1. Too many different plants spread out like polka dots
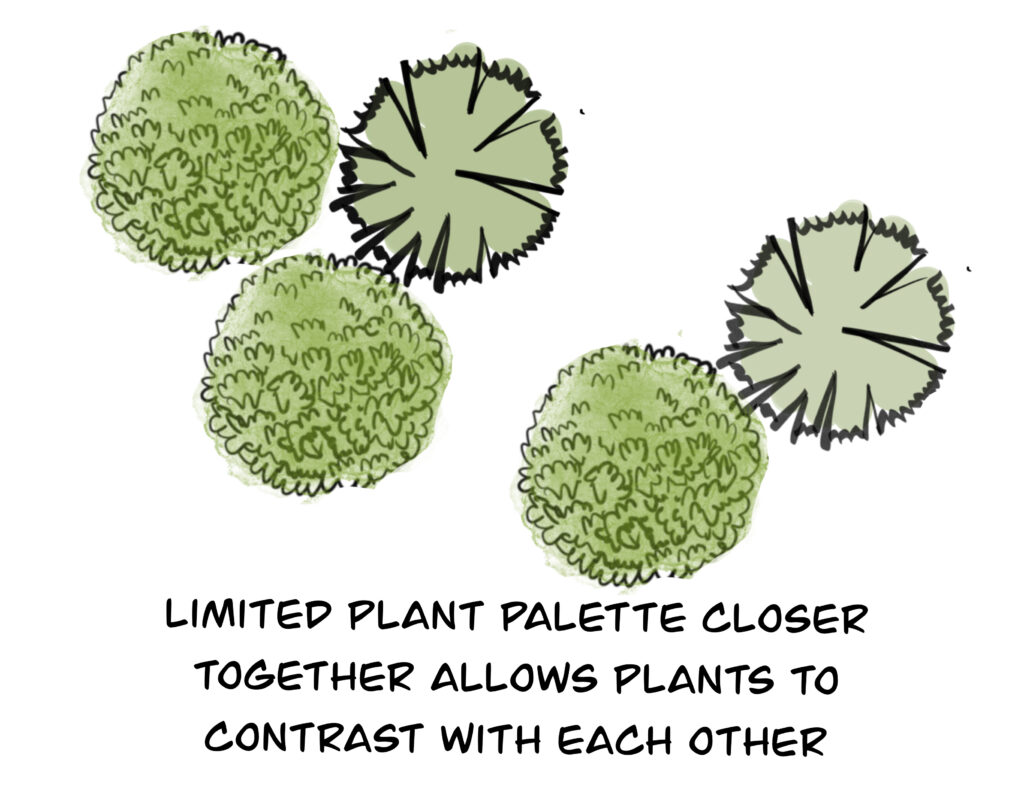
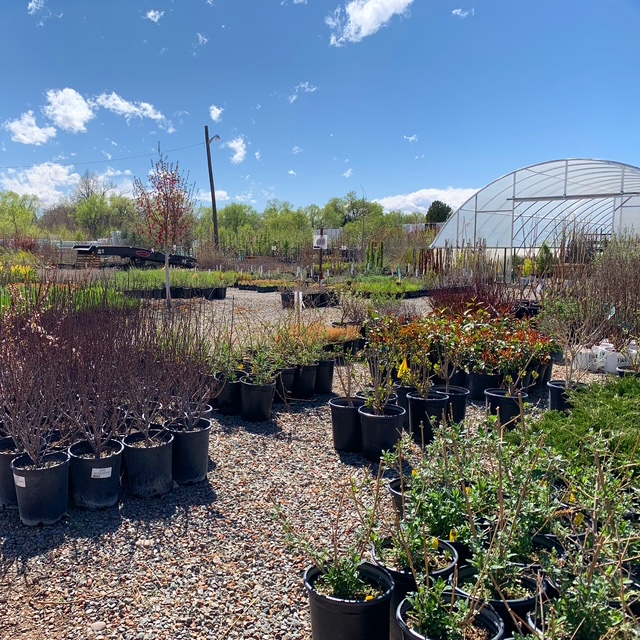
Often when homeowners begin to design their yard, they get excited by the variety of plants in our Xeriscape Guide. Similarly, going to a well-stocked nursery in the spring can be like going to a candy store — you might say to yourself, ‘I’ll take one of everything!’ However, it’s good advice to resist that urge and instead attempt a more cohesive ensemble of plants and trees. Grouping plants, especially smaller ones or perennials that have less dense forms, can maximize their effect by creating masses of various sizes and contribute to the feeling of a more natural landscape.
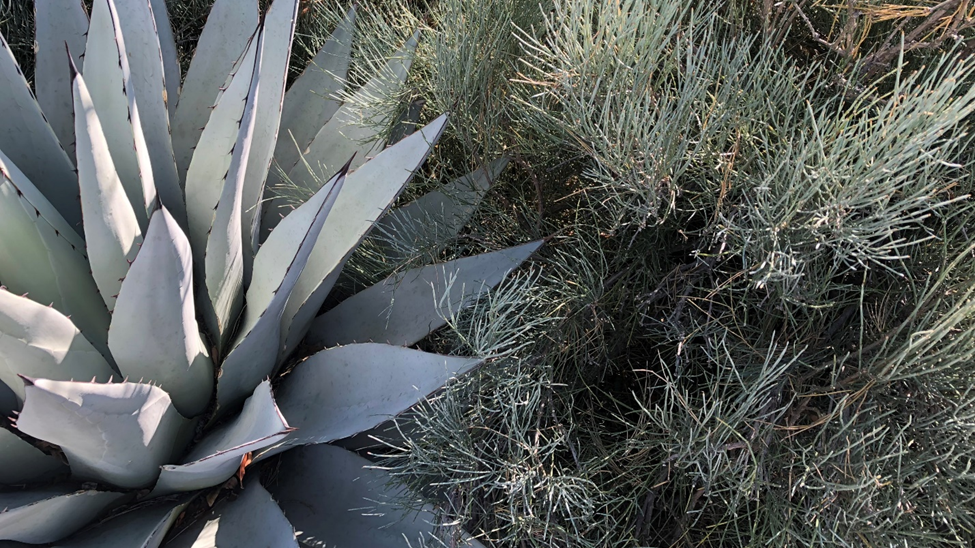
In these instances, you can pair plants that have widely different leaf shapes, like the agave and ephedra pictured below. The effect is something you wouldn’t appreciate if there was a large gap between the plants. A lot of flora have distinctive attributes like bark patterns, seedheads, dried flowers or an overall shape that allow them to stand out when accompanied by contrasting plants.
If you’re not sure where to start on your own yard design, check out our landscape templates here. You’ll notice there is a lot of variety in each design, but the same plant symbols appear next to each other throughout the yards. The three landscape architects and designers who contributed these templates have tons of combined experience designing beautiful and sustainable landscapes in New Mexico, and their templates are worth checking out!
Benefits of installing multiple plants of the same variety
Visual impact: Let’s take a really great flowering perennial like Gaura or whirling butterflies (Oenothera lindheimeri) as an example. It has airy small white (or light pink) flowers less than an inch wide atop thin branches that sway in the breeze — visually it doesn’t stand out unless you’re right in front of it. If you were to plant a single specimen of Gaura in the middle of a yard it could almost disappear. Instead, we suggest a group of three in a triangle or row closer to paths or windows to maximize their impact — just like they’ve done in this photo taken at Presbyterian Rust Medical Center on the West Side.
Attracting pollinators: Grouping flowering plants that attract pollinators can really make it worth the effort for them to visit. Perennials bloom at different times from spring to fall, and in a small yard you may have only one type of plant flowering at a given time. A group of at least three of the same perennial will be hard for pollinators to miss as they go about their business of collecting pollen and nectar. Then they’ll be able to save their energy for building nests and breeding.
Reduced maintenance: If you’re new to xeriscaping or gardening, having fewer varieties of plants in groups can make maintaining them (and learning names and growth habits) less overwhelming. Instead of starting out with a mishmash of plants installed everywhere, you’ll be able to get your head around the maintenance more easily because the yard is divided into manageable areas. Also, if you pay someone for yard care, you may need to explain to them when, how (and if) to do the work. A smaller plant palette grouped by variety can help simplify the job. You could say to them: “This year for all the woody evergreen shrubs next to the sidewalk, don’t use hedge trimmers but do remove one-third of the oldest branches at the base.”
So if you head to the nursery to buy 10 plants this spring, consider coming home with just two or three varieties that together will make a real impression.
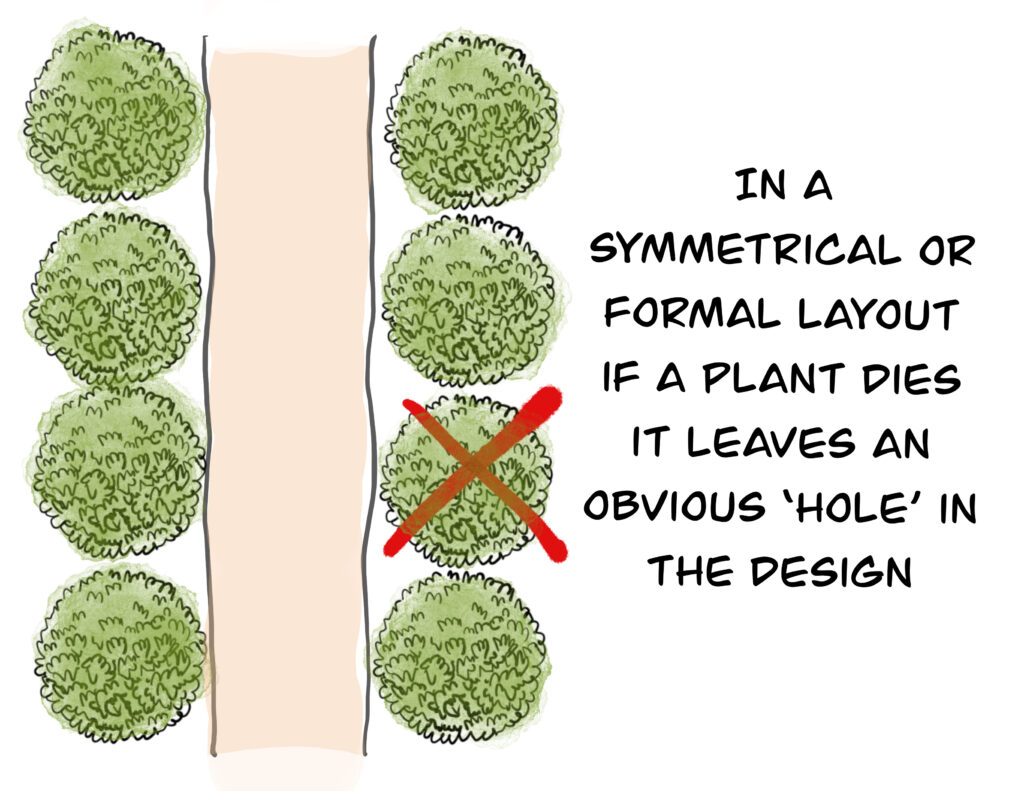
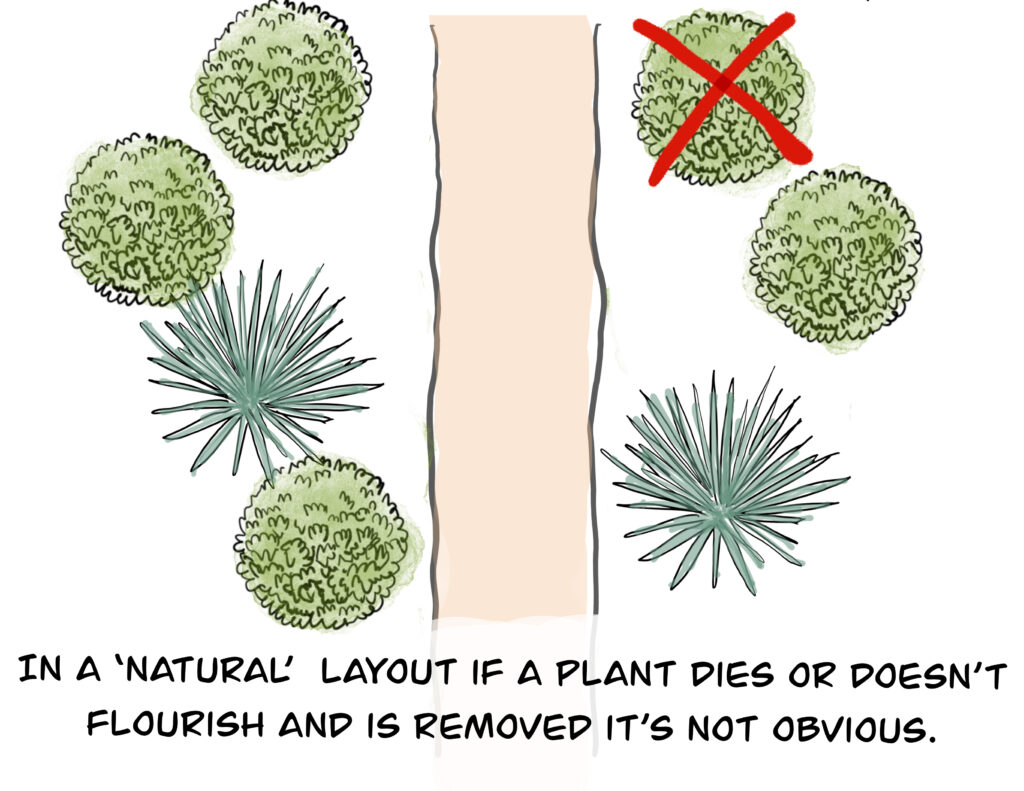
2. Symmetrical vs. informal plant layout
Another mistake DIYers sometimes make when designing landscapes is opting for a symmetrical layout for the new plants. For instance, they will have corresponding rows of evergreen shrubs on either side of a path as shown below. There are a couple of reasons why this is less than ideal. One is that an unhealthy plant (or worse, one that is dead) is immediately noticeable. Also, in a formal layout, you’re anticipating that the plants will grow to a uniform size and shape. However, this is not the case with native and xeric-adapted plants (and most plants, really). Once in the ground, they’ll be responding to all sorts of different conditions. Too much shade from a nearby tree limits a plant’s mature size, or extra water from the roof causes one to get larger than the others, for example. And if you did need to replace one plant in a formal layout, it could take a while for the new one to catch up to the others (assuming you able to find the same variety as the originals).
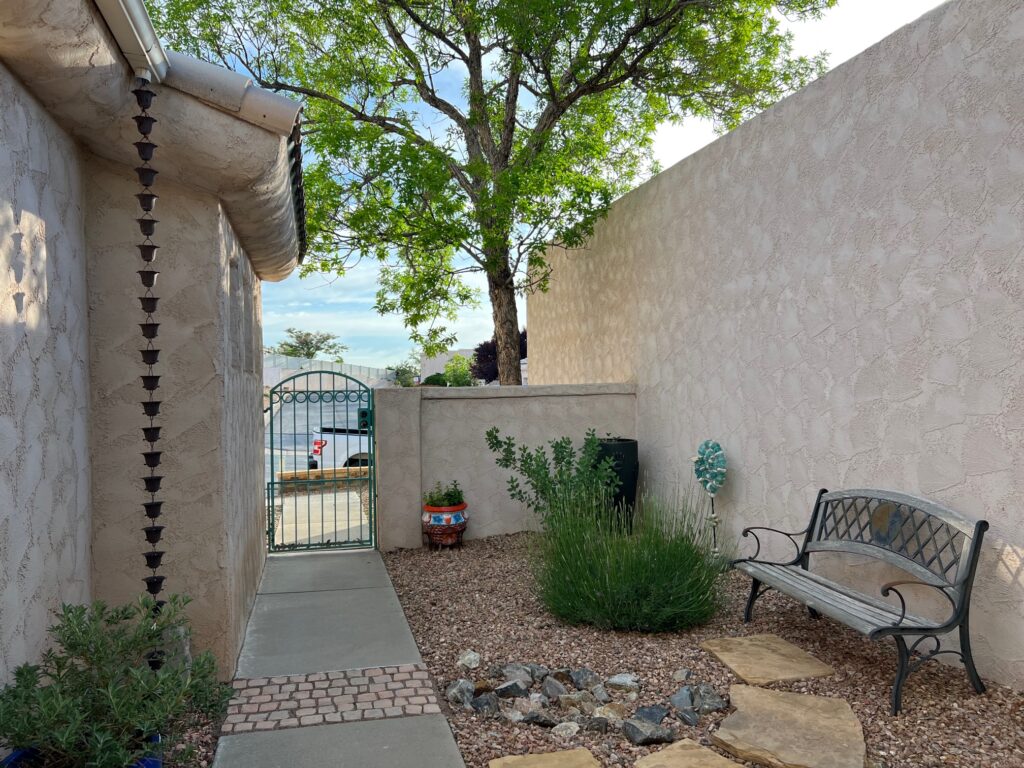
In an informal or “naturalistic” layout, a missing plant is not an issue because there’s not an expectation for that space to be filled. It also allows flexibility in the design — shade-loving plants near the tree, plants that can handle more water under the downspout. If a particular plant isn’t doing well, you can transplant it to another location. Using an informal or naturalistic planting design allows you to add to your garden over time as it matures and changes for years to come.
Selecting plants for your yard can feel overwhelming to a new gardener. We hope these tips help you avoid common mistakes, and remember that we're always here to support you. If you have questions about plant selection, feel free to send photos and details of your yard to askanexpert@abcwua.org — we’ll be happy to help.
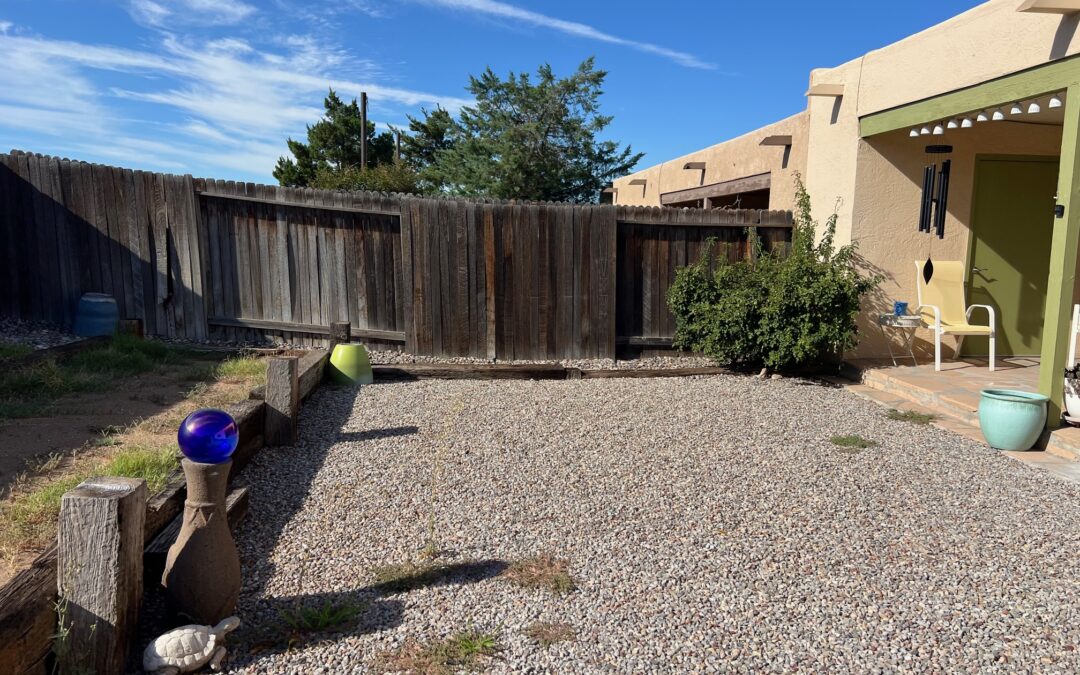
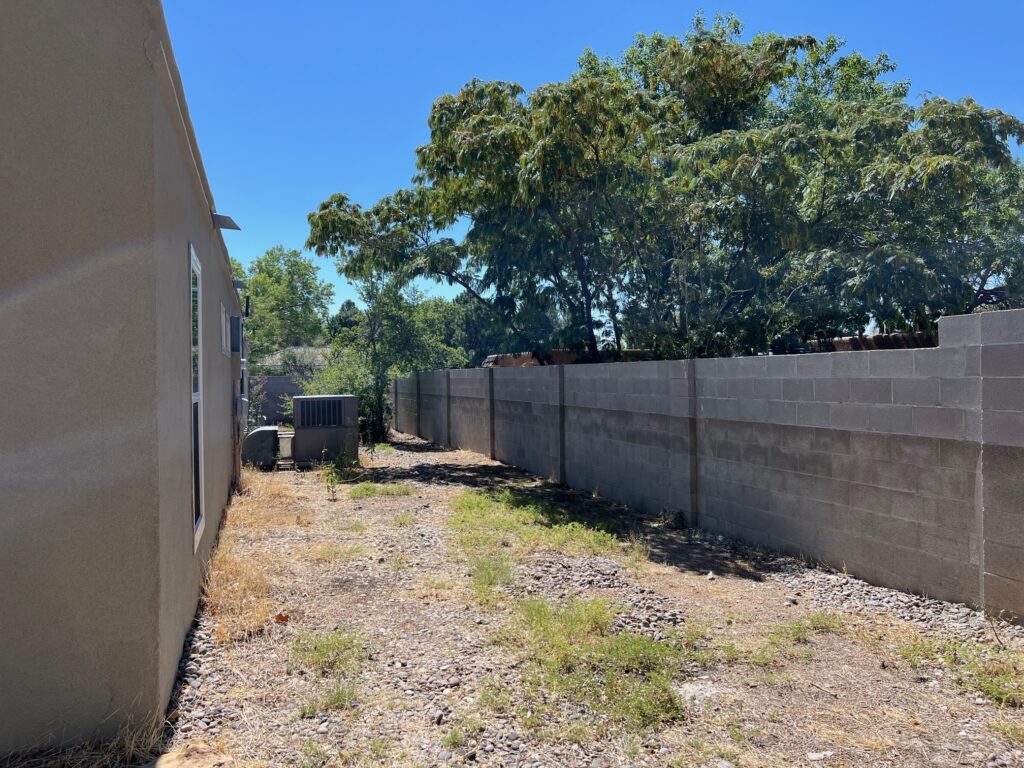
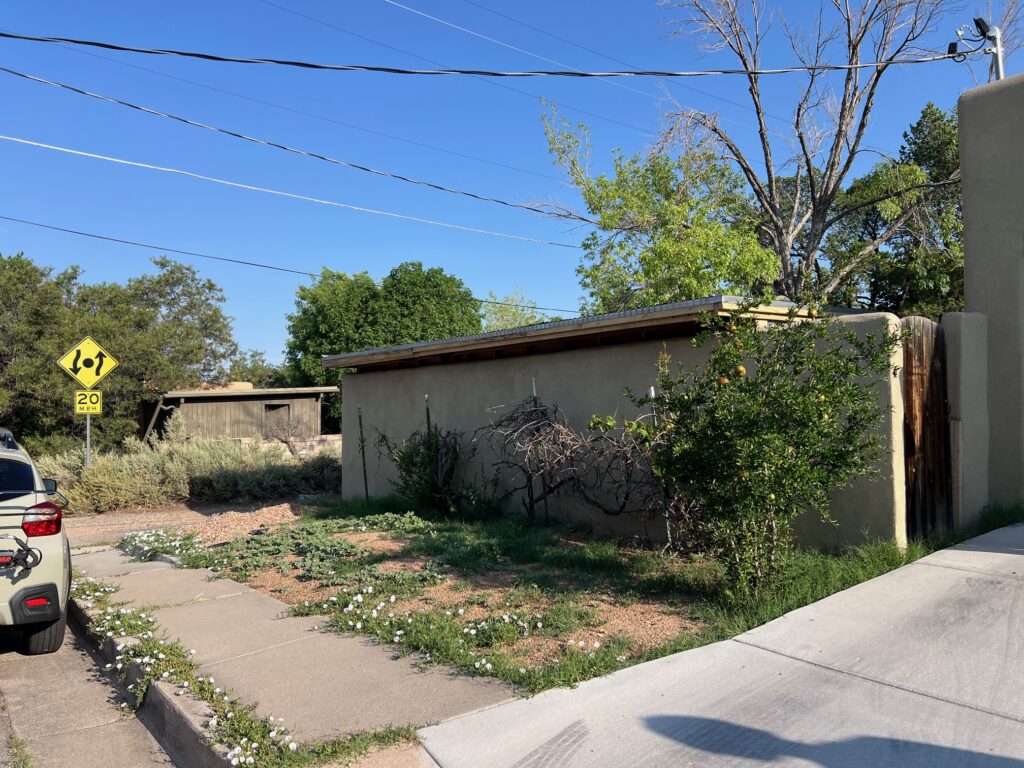
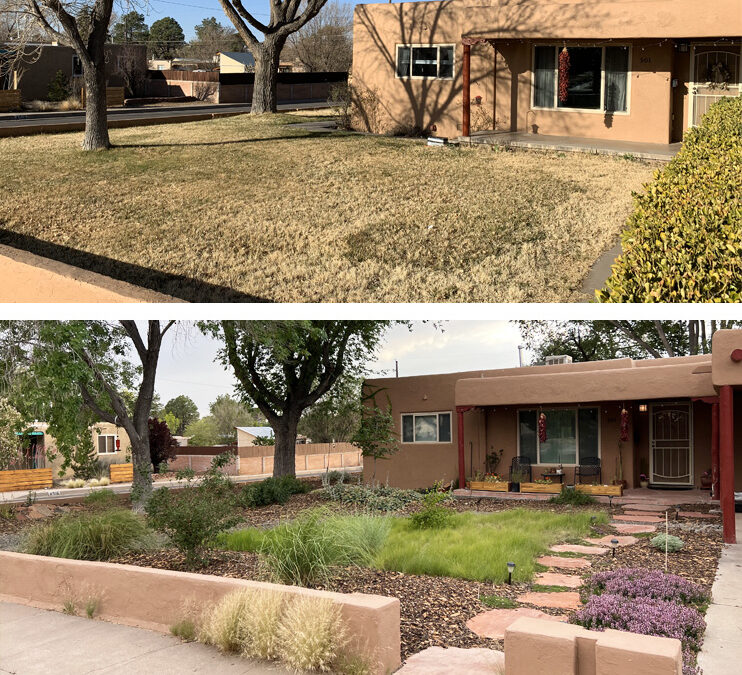
Maybe you recently moved into a house that has never been updated — think avocado tile in the bathroom and shag carpet in the sunken living room. You look outside and the theme continues — a sea of gravel and railroad ties. As with interiors, home exterior fashions and landscaping styles change over time. We once thought of gravel as low maintenance and tidy, but now are finding out isn’t the best choice as far as sustainability and community health. Thankfully, through the efforts of local designers, tree experts and Water Authority resources, there is a sea change in understanding the problems that gravel, weed fabric and plastic sheeting can cause in our neighborhoods.
Gravel soaks up heat and radiates it back into the neighborhood, warming up the city. We’ve also found out that gravel and weed fabric don’t discourage weeds, instead their seeds and dust settle on top, sprouting in no time. This leaves few options other than using herbicides, because pulling them can be difficult once they’re rooted in the weed fabric, and using a hoe is difficult in gravel larger than crusher fines. Additionally, tree and plant roots need two things: water and oxygen, neither of which permeate through old weed fabric clogged with silt. Wanting to install some flowering xeric plants near your new front door? That’s going to be a challenge — moving the rock out of the way, cutting the weed fabric and finding a way to install drip irrigation under the existing weed fabric and rock. Perhaps you’d like to invite pollinators to your new yard? Well, our native (and solitary) ground nesting bees won’t find a home in your yard because they can’t burrow through the weed fabric or rock to nest in the soil.
But all hope is not lost. Whether you’re aiming to remove all the gravel, just take out some around existing trees to improve their health or make your outdoor living space cooler and be sure water is soaking though the old weed fabric (or worse, plastic), there is help.
If you have a limited budget and time but want to do some good, use a piece of rebar to poke holes in the weed fabric around your existing plants. This will ensure they can use some of our precious rainfall and allow for oxygen exchange.
Have an existing tree that’s suffocating in heat absorbing rock? Time to grab the wheelbarrow and a shovel. If you’re removing small sections at a time, start with areas with the dripline of the tree. Here is where weed fabric is actually useful: In good condition it can make the gravel removal easier. Lift up the fabric carefully, using it to form the rock into piles that can be scooped up more easily. A square end shovel can be useful here because it’s less likely to rip the fabric underneath as you work. If you need to remove large rock like cobble, I recommend sitting on a protective pad and doing it by hand. Have a 5-gallon bucket or wheelbarrow right next to you to put it in. Some homeowners construct a basic wooden frame out of two-by-fours and wire mesh to make a screen to separate the gravel from dirt. Size it to fit over your wheelbarrow so you can transport the dirt more easily.
Albuquerque’s three convenience centers accept about two wheelbarrows full of rock (or dirt and concrete). Be sure not to take too much because you may be turned away. For larger amounts, you can try the Sandoval County Landfill in Rio Rancho or Southwest Landfill on Albuquerque’s southwest mesa; be sure to call first to confirm they will accept it. Alternatively, many homeowners are looking for gravel for erosion control under downspouts so try placing a FREE add on Craigslist, Facebook Marketplace or Nextdoor. It will most likely get picked up in no time.
Now if your whole yard is full of gravel, you’ll probably need to call in someone who is better equipped, someone with a skid steer (Bobcat). Front yards are easier, but backyards can usually be done with a smaller machine if access is limited.
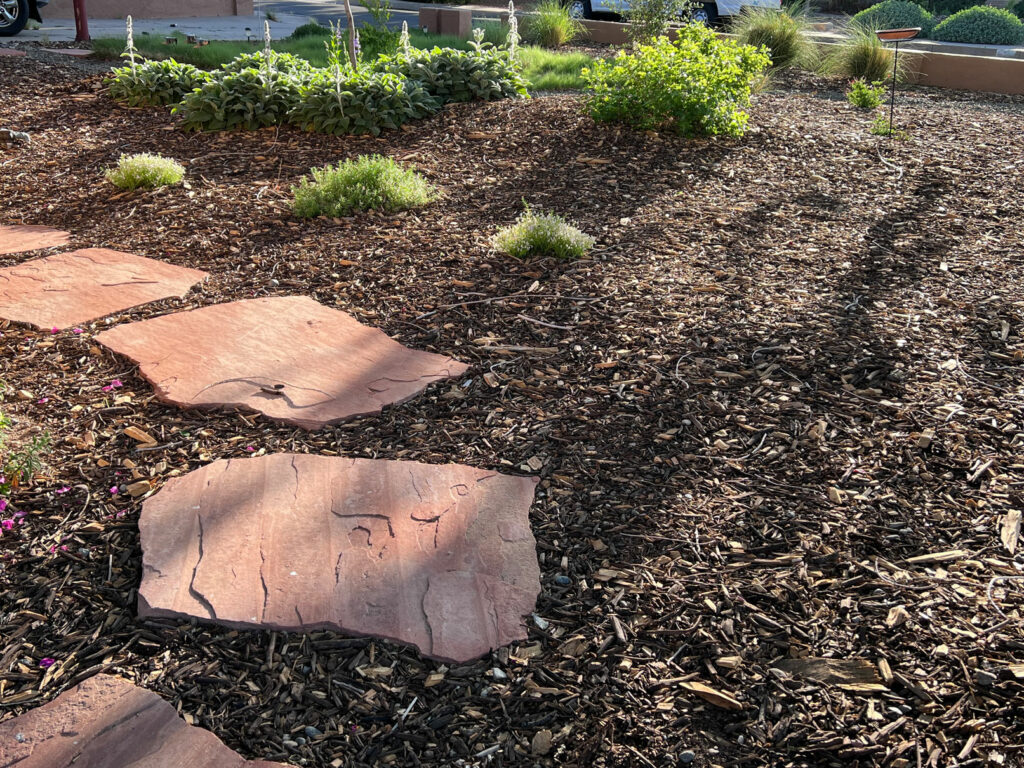
The obvious question to follow is, what’s next? We recommend wood chips spread to a depth of 4 inches. This mulch (without weed fabric) helps improve the soil over time and allows the tree and plant roots to breath. It also cools the environment a few degrees compared to rock. Several suppliers in the Albuquerque area sell mulch, and they all deliver. They’ll be happy to tell you how much you need if you know the dimensions. Additionally, several places offer free or discounted mulch. Call up large tree removal companies and see if they have any or head to the East Mountain Transfer Station in Tijeras and pick up a cubic yard for $5. There is also a great website called ChipDrop that connects tree service companies with homeowners who want mulch — you may have to wait a while for the stars to align but it’s totally free.
If you’d like to speak with our experts for more tips on removing gravel and having a healthy desert-friendly yard, reach out to us at AskanExpert@abcwua.org
As in most fields, change is slow. Older ways of thinking permeate the landscape industry, but some steps in the right direction (like wood chips instead of gravel) can make a difference over time.
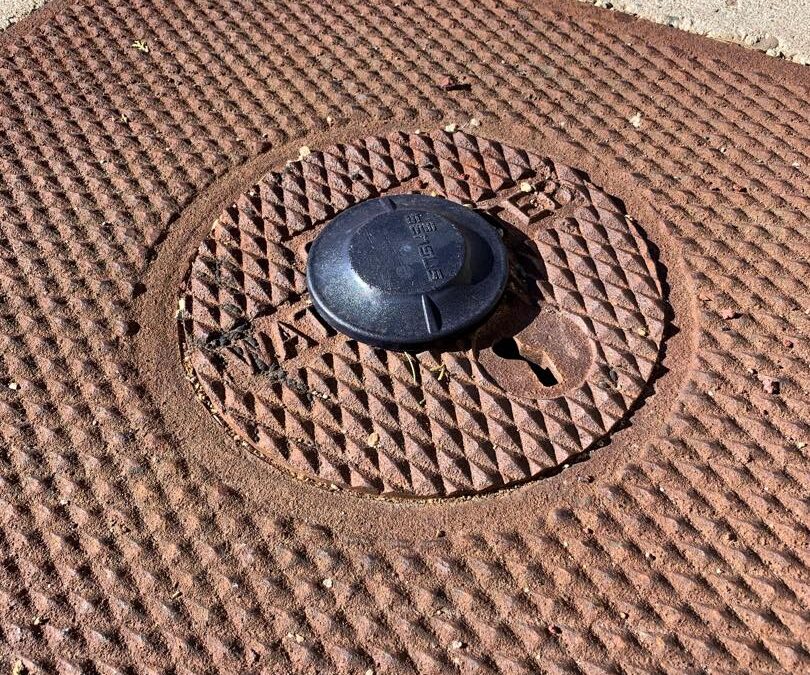
If you have a meter equipped with AMI (Advanced Metering Infrastructure) as shown in the photo above, you can log into your Water Authority account and see your hour-by-hour usage. This may help you locate any issues in your house or yard, such as a continuous water leak in toilets or irrigation systems. It can help you understand how much water you use throughout your day and serve as a guide to better decision-making in how you use your water. If you don’t have an AMI meter installed yet, it will produce an average use graph for your home.
Start by going to www.abcwua.org. Click on “My Account” in the top menu bar (shown below with a red arrow) to create an account if you haven’t done so already. You’ll need your billing information. Once you’ve created an account, you can view and pay your bills, as well as see your daily water usage.
Here is an example of the account page. We are going to focus on the “View Water Usage” section. It can take a few moments to add the dashboard information.
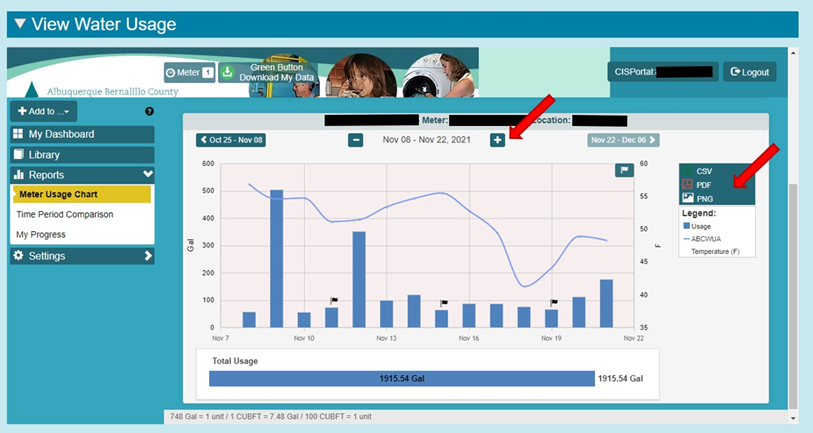
Initially, you will have two screens in your dashboard: “Water Usage” and “My Progress.” You can expand each one by clicking on the icon in the top left corner (red arrows). This will make the information easier to read and provide access to some additional features.
Below is a graph that provides you with a glance of your daily usage, along with the average temperature for that day. Two features highlighted in this photo are: 1) the “+” sign will change the date parameter and provide hourly usage and 2) the “PNG” feature will export your usage chart if you want to save it as a picture.
On the right-hand side, where the red arrow is, the “PDF” feature allows you to download the current month’s hourly data. An example of this is shown in the following image.
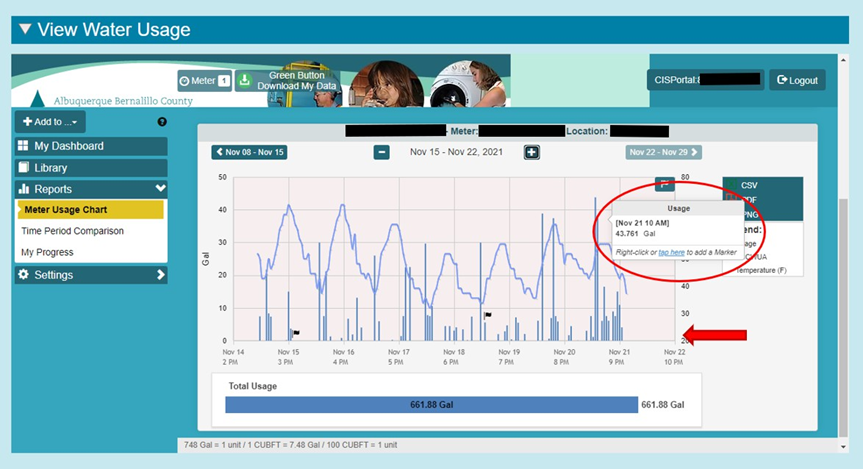
Below is an example of an hourly chart of your water usage, with the hourly temperature shown as well. Note: You can view your actual usage on each line of the graph by hovering your pointer over it. This is where you may see a possible leak if you have vertical lines (hourly usage) each hour, daily. A red arrow highlights where you would see that.
Next, we’ll look at a monthly comparison. To do this, choose “Time Period Comparison” on the left (highlighted by the red arrow). This example shows consecutive months, but you can adjust the view using the “slider” above the graph to click on the months. You can compare your usage for the same month from one year to the next. This is great if you are trying to track savings from changes in your household or irrigation.
You can add a threshold notification that will inform you when your water use passes a set amount. The threshold should start at your “normal” daily usage. So, if your normal usage in the winter is 100 gallons a day, you can add that as your threshold, and our system will notify you if you’ve gone above the threshold. This picture shows you how to add a threshold. You can add an email address or phone number to receive the notifications.
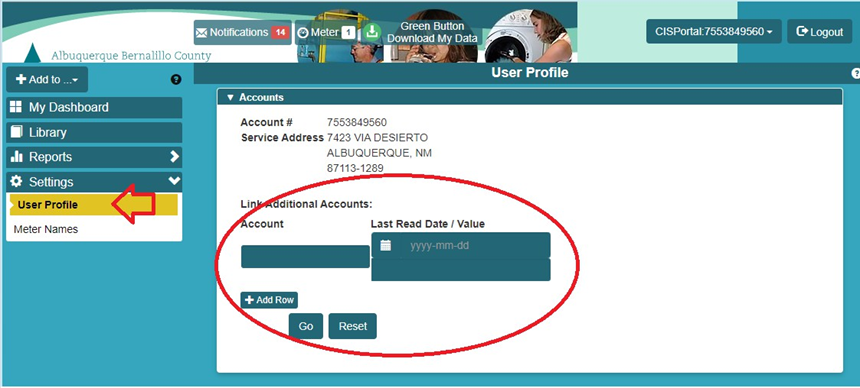
If you have more than one account that you watch over, you can go to the user profile tab and add additional account numbers to your profile.
Watch our How To Video below!
https://www.youtube.com/watch?v=EsZ1C65MQMc
Author: Amos Arber, Water Conservation Program manager. Have a question about the article on AMI reader and Home Connect? AskAnExpert@abcwua.org
Growing winter veggies is a fun and valuable effort more people should experiment with in our area. In many ways, winter gardening is a lot easier than trying to garden in the summer — there are fewer pests, cooler temperatures require less watering and common winter veggie’s seeds are super easy to germinate and then cultivate. Two things are important to ensure success: the timing of starting seeds and modifying the climate to extend the season.
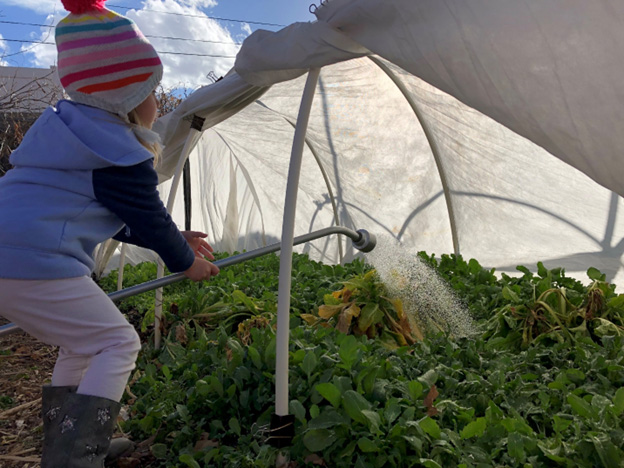
If you're hoping to enjoy sweet, delicious, and healthy salads and other dishes all winter long, it's important to start your seeds by the middle to late August. Unfortunately, by then, we're usually very tired of the heat and of taking care of the plants in our yards. It’s not a time we often think about starting new seeds. However, it's important to start seeds early so the plants can reach a good size before it gets cold. This is where being able to modify the climate in your garden is important on both sides of the spectrum. When starting seeds at the end of the summer and it's still hot, having some sort of shade fabric to keep things a little bit cooler makes all the difference. Later, when it starts to get cool, being able to cover your garden bed with a row cover material, sometimes called Reemay (white polyester nonwoven fabric), modifies the climate in the other direction by making it a few degrees warmer and more protected — crucial for having productive beds of kale, Swiss chard, beets, lettuce, spinach, radishes and other yummy veggies. Most of those veggies are super easy to germinate, usually popping up within a couple of days — another reason why this kind of gardening is especially fun for beginners or people feeling frustrated with starting seeds.
Winter Gardening with Hoops
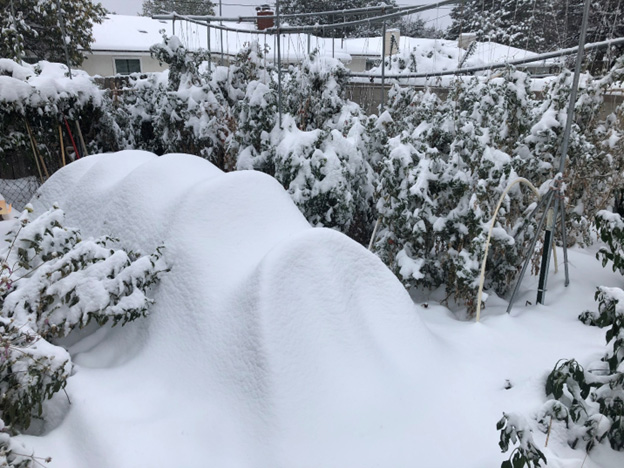
Being able to walk out to your garden and harvest a colander full of fresh kale and Swiss chard is a true delight and can save a lot of money if it's something that you purchase at the store regularly. Winter gardening is easier because the temperatures are cooler and you have to water only once about every two or three weeks, December-February. Also, the cold temperatures don't allow for many pests. Some of my favorite veggies to grow in the winter are kale — I really enjoy red Russian and Dino — beets and collard greens, all of which increase in sweetness substantially once the temperatures begin to drop.
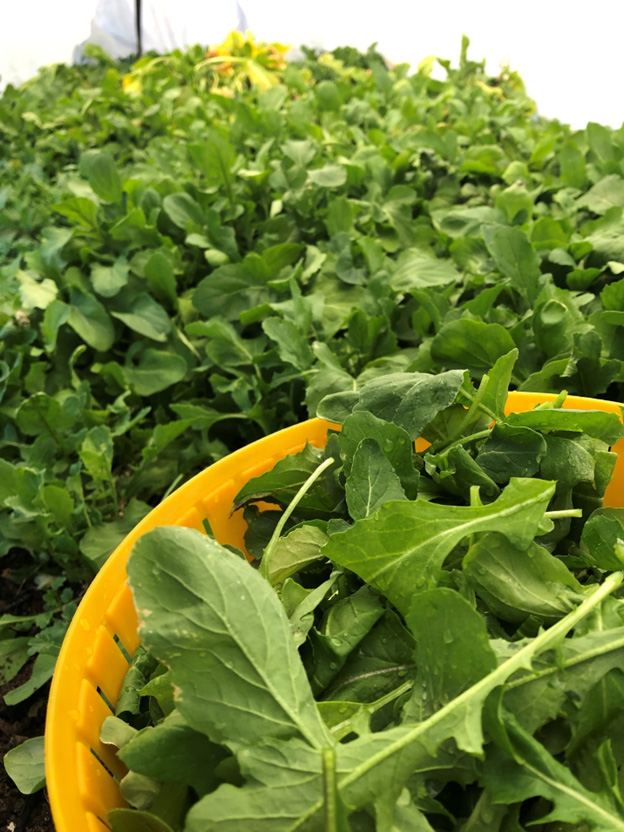
Winter bounty of Arugala
There are substantially less pests in the fall, winter, and early spring compared to the summer. Two pests that you might encounter are aphids and cabbage worms which are relatively easy to manage. Cabbage worms can be avoided by covering your plants with the row cover material to exclude the cabbage moth from laying eggs on your tender greens.
Another advantage of having hoops and shade or frost fabric is that it can protect plants from hail damage. Similarly, some people like to start their tomatoes under row covers to exclude leaf hoppers which can transfer the curly top tomato virus (Learn More in this article by NMSU.)
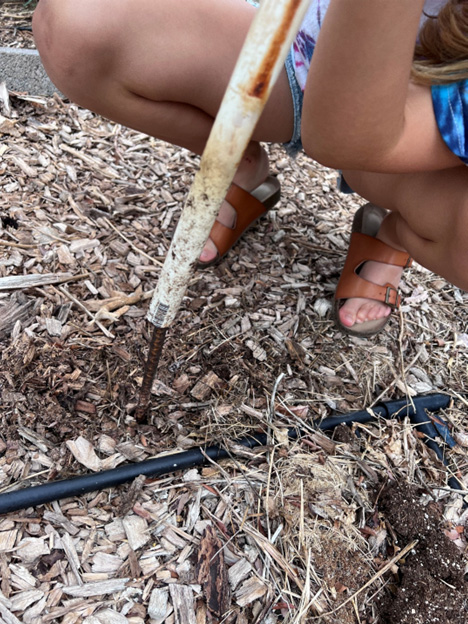
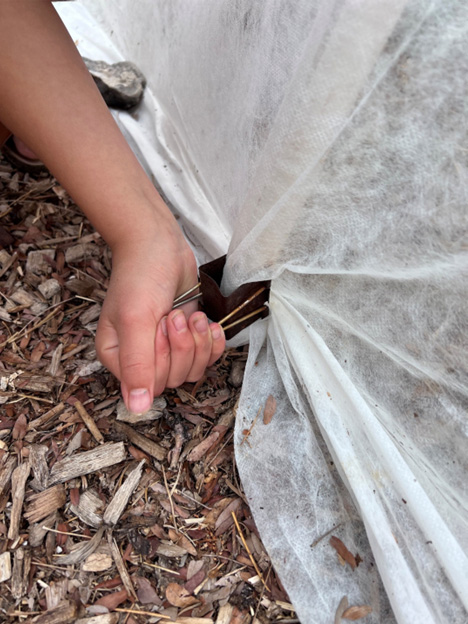
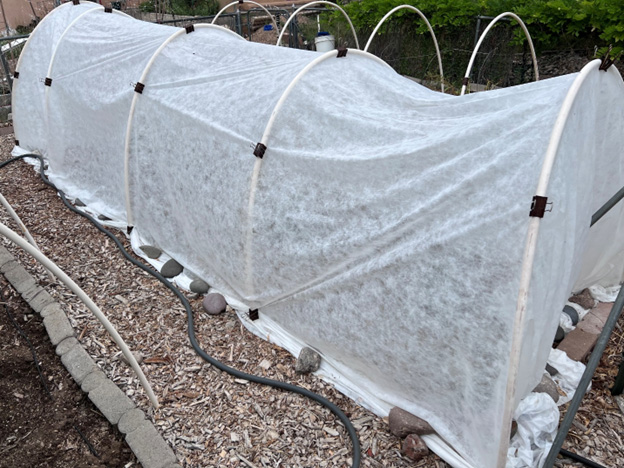
Creating hoops for your garden to help modify the climate and extend the season is easy to do using common materials — ½” by 10-foot lengths of PVC, 2-foot lengths of 3/8” rebar (both items can be purchased pre-cut at home improvement centers), extra-large binder clips (available at office supply stores), row cover material or shade fabric (available at some local nurseries and greenhouse supply stores), and some stones or bricks to help hold down the fabric at the edges and ends. You may also consider having loose-weave burlap to lay on the soil to facilitate seed germination and keep foraging birds at bay.
Installing hoops on rebar stakes.Clipping fabric to hoops.Hoop garden.
Other Tips:
Use burlap to help retain soil moisture between waterings and keep birds away when germinating seeds.
A thick, 3-4” layer of mulch such as straw or leaves (once seeds have germinated) is incredibly helpful for keeping moisture in the soil and regulating soil temperature.
If you have room, allow winter veggies such as arugula to flower and go to seed. Arugula flowers are beautiful and beneficial for pollinators. If left to go to seed, they also benefit birds and often result in new “volunteer” plants the following year.
You don’t need much space for a winter garden — a thriving 4’ x 8’ bed of leafy greens is plenty for a small family.
Installing hoops is simple: Pound the 3/8” rebar about 12”-14” deep, slip the ½” PVC over the rebar, clip the fabric to the PVC with extra-large binder clips and weigh down the edges and ends with stones.
A 10’ length of PVC on a 4’ wide bed makes a hoop about 4’ tall. Having a 12’ wide piece of row cover fabric allows for 1’ on each side to secure it with stones.
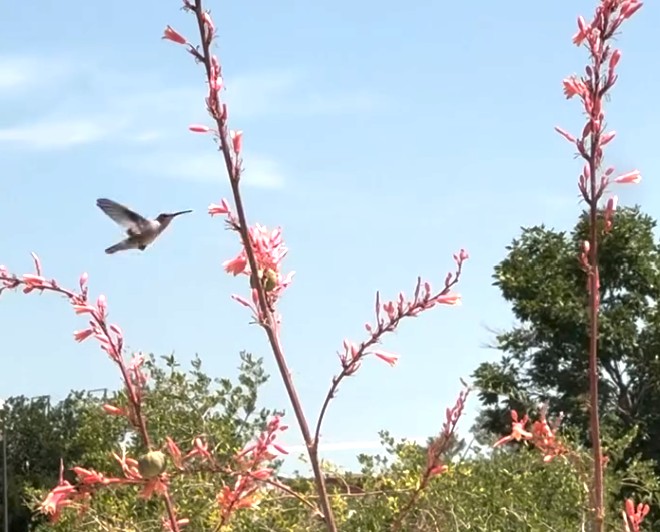
The ABQ Backyard Refuge Program is working with greater Albuquerque residents to create a mosaic of habitat across the city that will support a wide variety of both year-round and migrating wildlife. The program, which is managed by the Friends of Valle de Oro National Wildlife Refuge, was developed by more than 40 partners, including local government agencies, university departments and conservation organizations. The program provides resources for residents, including an introductory guide that features a list of plants that both thrive here and attract wildlife as well as a workbook for building and documenting your refuge. In addition to recruiting homeowners to build habitats in their yards, we are working with our partners to increase green space in the communities most affected by our changing climate.
Any space can be certified, including a front yard, patio, balcony, community space or, of course, a backyard. As of May 22, the program has certified about 166 acres with 629 individual and business participants. That surpasses the initial goal of certifying as many habitats as there are national wildlife refuges in the nation (572). Next, the program hopes to match Valle de Oro's 570 acres. Every bit of habitat counts!
Whether you have a balcony, a patio (where you can put potted pollinator plants) or acreage at your home, you can make changes that benefit wildlife. Here are some tips:
Leave a few dead branches in your yard, as long as they don’t pose a safety hazard. They can provide great perches for birds and food sources or potential nesting sites for woodpeckers.
Allow some leaves to stay on the ground in the fall so more butterflies are attracted to your property in the spring.
Leave dried sunflowers and grasses in your yard because they provide food for wildlife during the winter.
Plant pollinator friendly species such as sunflowers, mistflower, yarrow, beebalm, salvias, penstemon, oregano, fennel, whorled milkweed or native buckwheats.
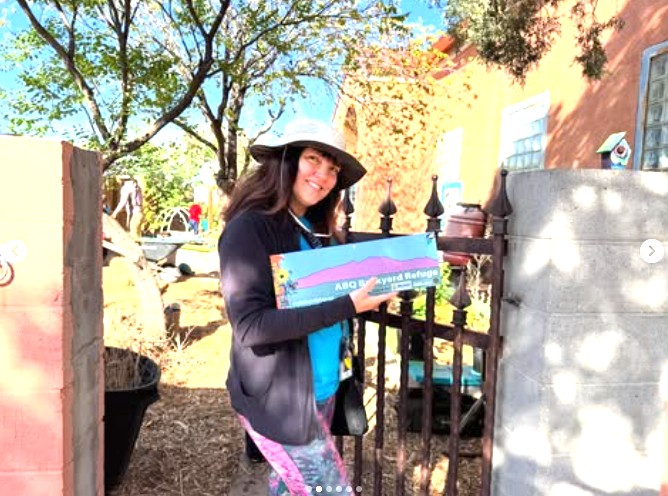
When you certify your space as an ABQ Backyard Refuge, you are helping to encourage neighbors to build wildlife habitats. As a member of the certification program, you will receive a metal sign with stickers that show your certification level.
The sign can be a conversation starter with your neighbors and help the program grow.
You undoubtedly have seen your neighbors and friends around town removing their grass lawns and replacing them with water efficient desert friendly xeriscapes. You may yourself be interested in doing the same with your yard but perhaps are overwhelmed by the tasks or concerned about how much it would cost. Don’t fret, it’s much simpler than you think. We’re walking you through the six steps to transform your lawn into a beautiful desert friendly xeriscape.
STEP 1
COME UP WITH A DESIGN, then apply for the $3-a-square-foot rebate.
No need to get overwhelmed by this step. You know your yard best, so observe and understand how you want to use your space. Brainstorm elements you want to include. Take into account existing plants and trees, views you want to preserve or hide, shady or very sunny spots, and downspouts/canales or other places where water collects.
Once you have your design, use spray paint or old hoses to lay it out on the ground. Walk around the space and make changes as needed.
Before demolition and removal of the lawn, call 811 to mark underground utilities. Also note existing tree roots that you need to protect during your work.
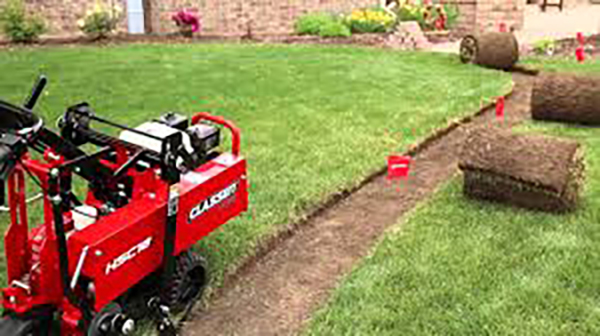
Lawn removal techniques: A sod cutter works best for most lawns unless there are large roots or the grass is Bermuda. Hand dig grass out around large roots so as not to cut any that are more than 2” thick. Use an herbicide to kill Bermuda due to its invasive and prolific roots. Along sidewalks you’ll want to dig down 4” by 12” wide to make room for 3” of mulch and slope the soil back up to the surrounding grade gently. Avoid using a skid steer to remove the grass, this can unnecessarily remove useful existing topsoil.
Drainage Considerations: Always grade water away from your house, masonry walls or walking paths and towards planting areas.
Install any hardscape elements such as walls, pergolas, sidewalks, pavers and boulders.
STEP 4
IRRIGATION
You’ll use a drip system to irrigate your new beautiful desert friendly xeriscape. Check that your existing spray valves are in good working condition. If so, you can reuse these valves. Simply have a licensed irrigator or plumber add a pressure reducer after the valve, then you can add your ½” drip polyline.
Irrigation Components: If your existing valves are damaged or non-functional you’ll need to install new ones. Typically, an irrigation specialist or licensed plumber would install your new manual shut-off valve, automatic valves, box, backflow preventers and pressure reducers. But if you want to do it yourself, do your research and reach out to local landscape irrigation suppliers for advice.
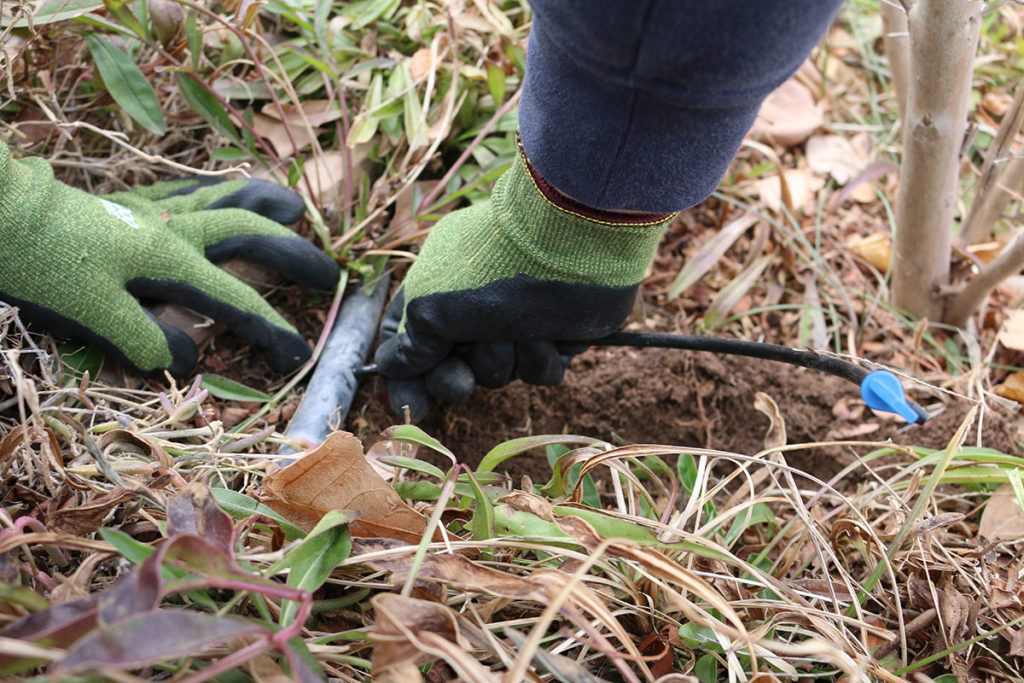
Drip Tubing: The drip tubing is everything downstream of the pressure reducers, and it’s relatively easy for homeowners to install. Uncoil the ½” or ¾” poly tubing in the sun until it’s flexible enough to manage (making sure there are no kinks in the process). Then, dig shallow 6” trenches, lay out the ½” poly in the trench, staking it with 6” weed fabric staples along the way, and snake the poly within a few feet of the plant locations. Wait until the plants are installed to cover the poly unless you have long lengths of it without plants.
Install the plants (link to article). Water your new plants with a hose right after they’re installed. You might need to create temporary basins around each plant to keep the water from running off.
At this point, you’ll want to set up the permanent irrigation. Use your drip tubing punch tool to create a hole for the ¼” coupler and ¼” tubing. Always punch the hole in the side of the ½” poly, not the top, so a footstep doesn’t damage the connection. Carve a small trench in the dirt and run the ¼” tubing to the base of the plant and attach the emitter (use a weed fabric staple to hold it in place if necessary). Avoid running ¼” tubing farther than 3 feet in order to keep things orderly. After the ¼” tubing is installed, cover it with dirt to protect it and keep it from being tripped over.
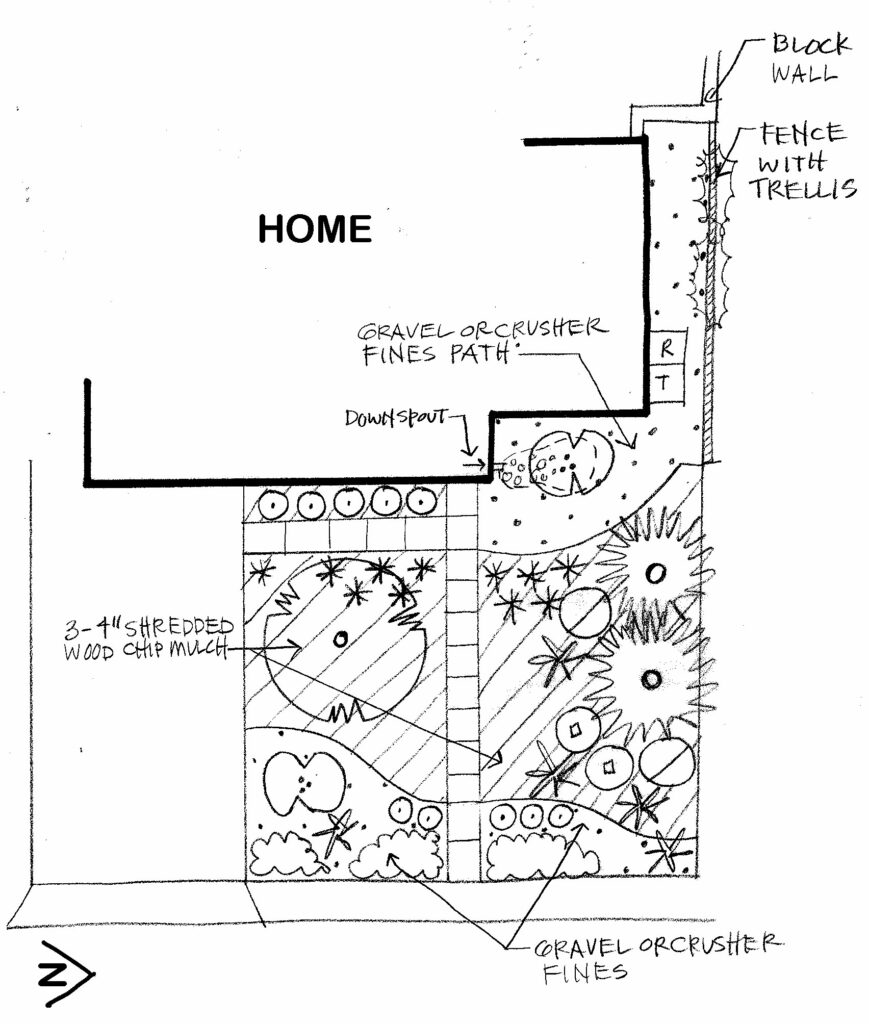
If you’re using gravel, the complexity and layout of your yard will determine whether you install weed barrier fabric before or after planting, but you do want the drip tubing under the weed fabric. For shredded wood chip mulch, lay the irrigation line down over the bare dirt then top with 3-4” of wood mulch.
If the mulch has been delivered in the street or on a concrete driveway, use a square shovel to scoop it up. From there, just load each wheelbarrow full and dump it throughout the yard. Spread it out with a rake and you’re done!