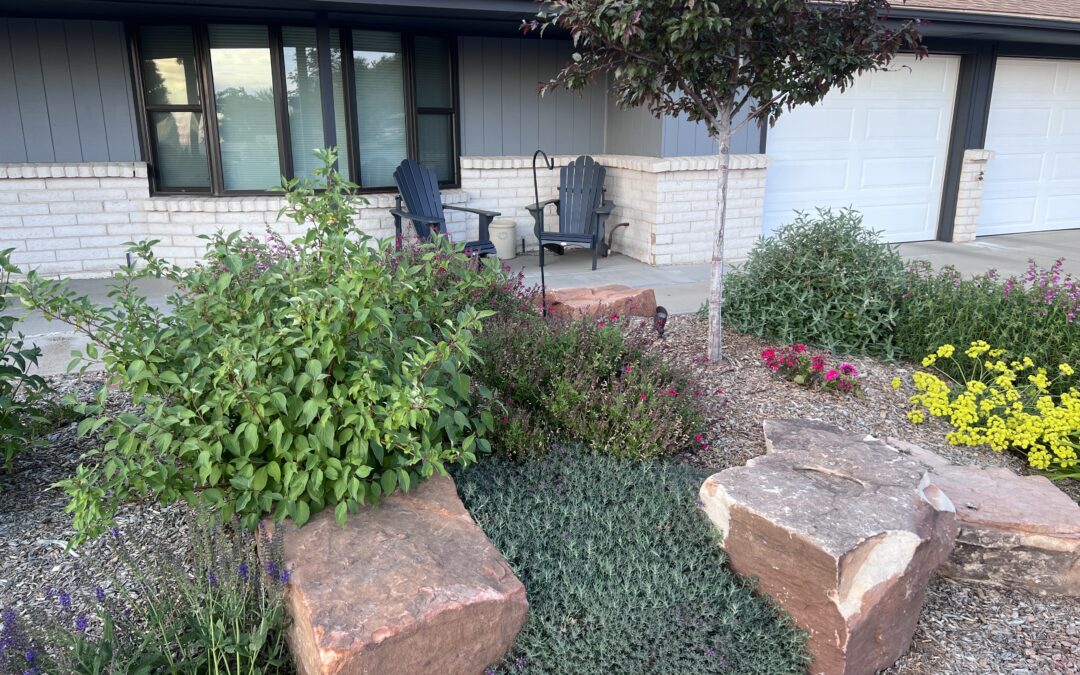
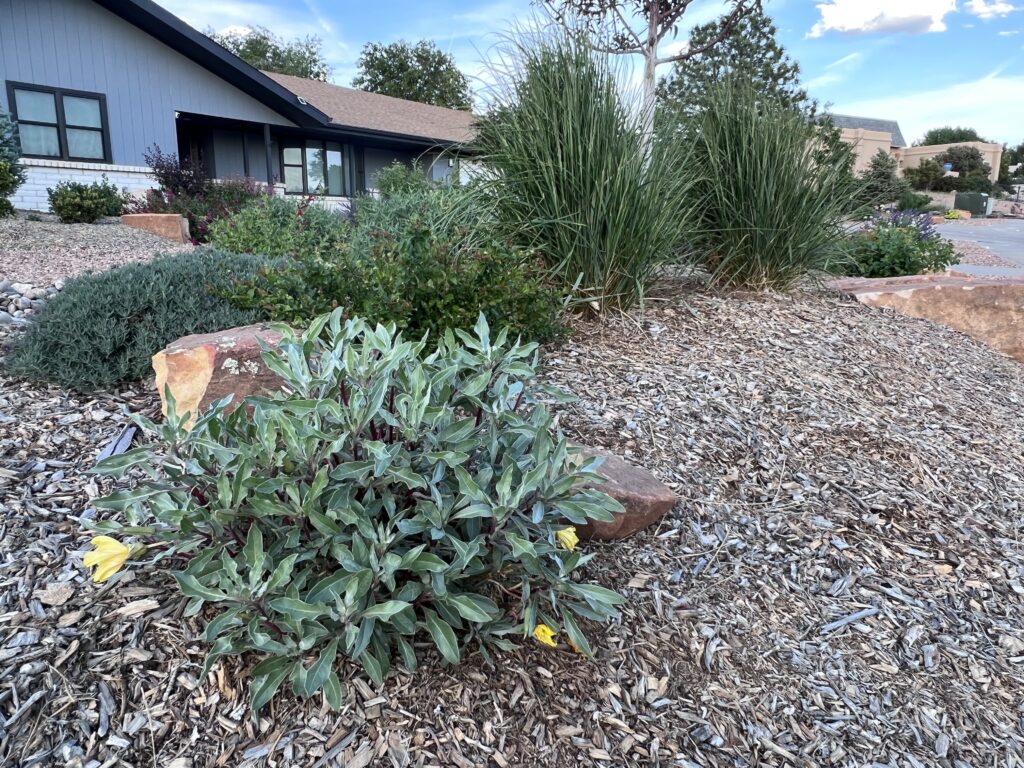
The Water Authority’s desert friendly xeriscape conversion incentive rebate has been around since the early ’90s and is still going strong. Millions of square feet of thirsty lawns have been converted to healthy xeriscapes that save billions of gallons of water. Although the rebate application process has a few more steps than our other rebates, our experts are here to help you along way. Remember to contact our xeriscape inspector, Carl Christensen, [email protected], before you stop caring for your lawn or start tearing it up.
Water Authority residential customers who convert their landscapes to desert friendly xeriscape and use drip irrigation can qualify for a $3 per square foot rebate.
The rebate area of your new landscape must have 50 percent coverage (at maturity) of qualifying low- to medium-water-use plants, and the soil between and beneath all plants must be covered with at least three inches of mulch (organic mulch, gravel, etc.).
If you are interested in participating, please don’t start removal your grass until you have applied online to the program and received an official notice to proceed.
Several conditions must be met to qualify for the rebate. Projects that have been started or completed are not eligible for the incentive, and other terms and conditions apply. After submitting your application online, your project will be screened to ensure it meets minimum requirements and an inspection will be scheduled. The visit may take up to three weeks or more to schedule during the busiest part of the season. Water Authority conservation rebate requirements are subject to change without notice. Rebates are limited to available funds.
Does Your Landscape Meet the Requirements?
Do you have an operating spray irrigation system on your site?
Do you have grass turf on your site?
If you answered yes to the above questions, then go to Step 1 below.
Have more questions? Call 842-9287 and choose option 4 to learn more or check out our xeriscape conversion web page for rebate requirements and more.
Step 1: Develop A Landscape Plan
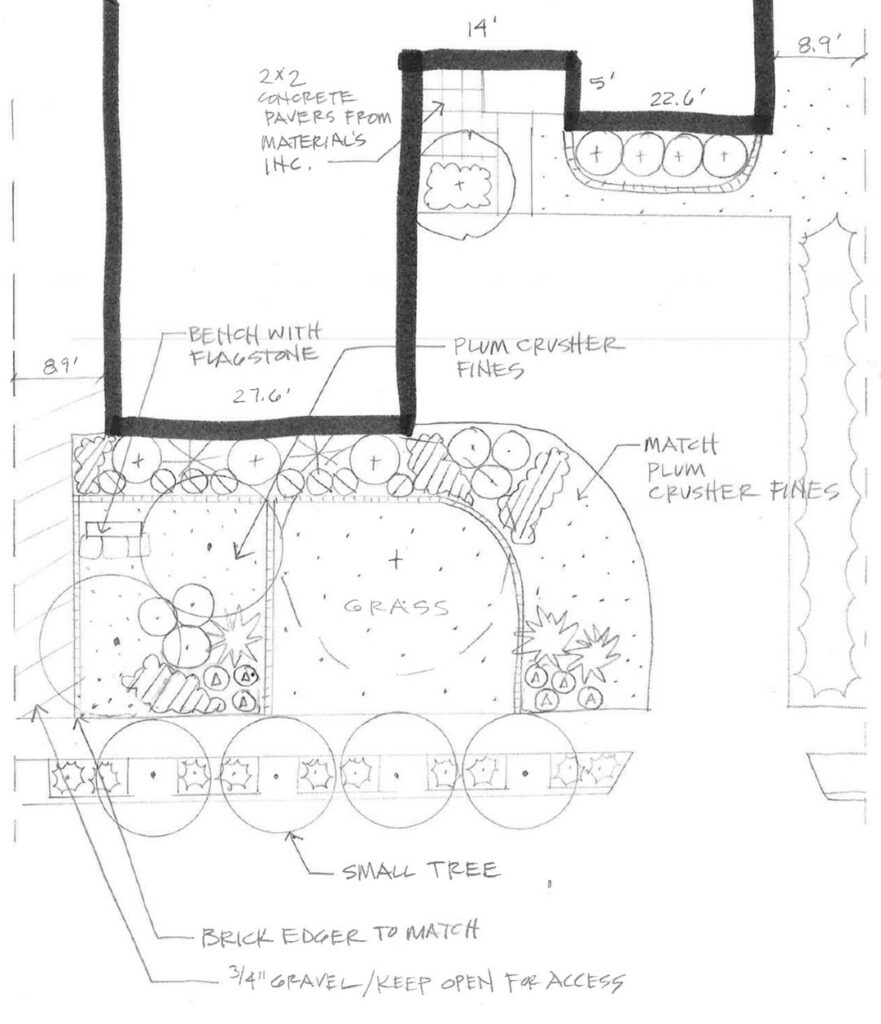
Draw a simple landscape plan or submit a plan designed by a professional. Use the approved desert friendly plants from our Xeriscaping Guide plant list. List each plant (using the scientific name) and rebate allowance points on the application.
Step 2: Start Your Online Application
Click here to set up your online application. You will need to log in or create a Water Conservation Portal account.
Step 3: Schedule Your Initial Inspection
Be sure you have set up and filled out your online application. Then call (505) 289-3026 to schedule the initial inspection at your property. Initial inspections occur between 9:00am-2:30pm Monday through Friday. Please allow three weeks for availability.
Step 4: Proceed With Your Project
Once your online application has been approved, you may begin your project. Funding will be reserved for the anticipated amount of your rebate, and you will have six months to complete your project. If you need more than six months, you may apply for a project extension provided funds are still available.
Step 5: Schedule Your Final Inspection After Completing the Project
Have hard copies of material receipts or a contractor’s final paid invoice available for the final inspection. Following final inspection and application approval, the Water Authority will apply the rebate credit to your water bill. Your rebate should appear on your water bill one to two billing cycles after your form is processed.
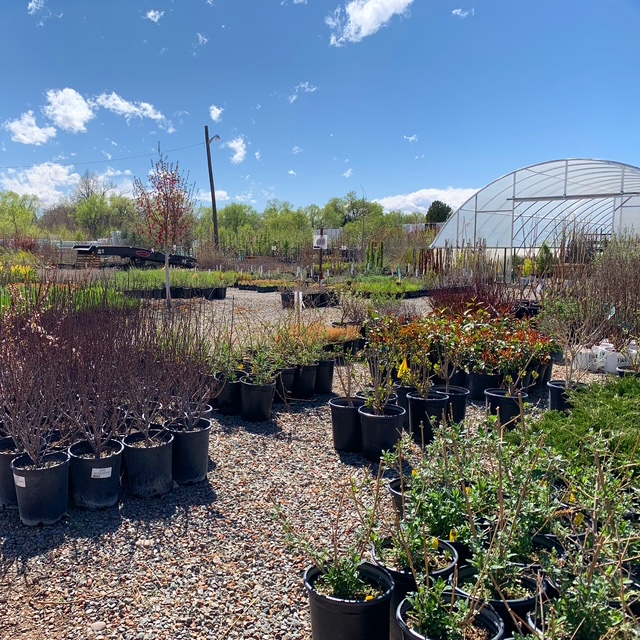
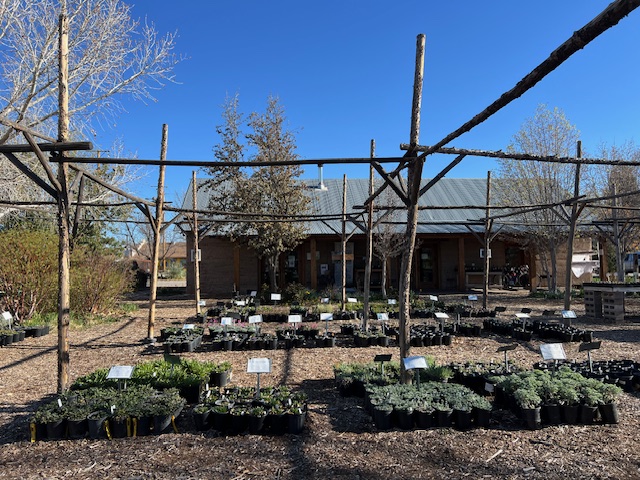
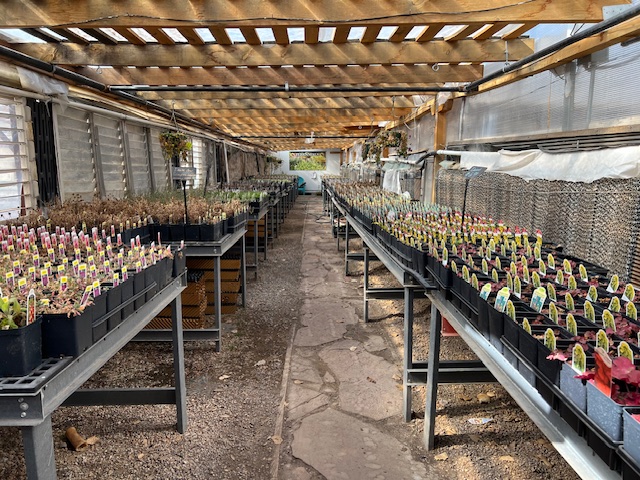
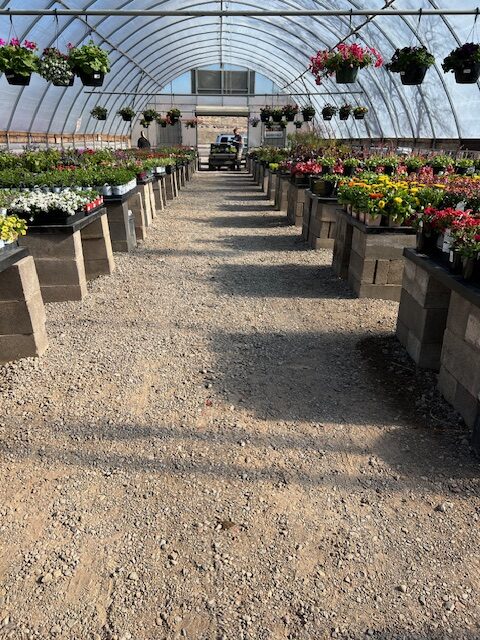
A popular question we get at 505Outside is “Where should I go to get plants for my yard?” We’re highlighting our local nurseries and the uniqueness of each of them.
Every yard has its own unique environment that includes things like sun and wind exposure, soils, drainage, climate, bugs, orientation, views, weather conditions and elevation. And certain species of plants like certain types of conditions. Nurseries pride themselves in getting plants that are specifically grown for your area. And the only way to ensure that you get a plant that is well-suited for your yard is to go to a local nursery. Plants that are grown in your region for your region are going to do much better in your yard.
Local nurseries have very knowledgeable staff experienced in dealing with all the variables of yards just like yours. But remember, they have limited time so go prepared with a list of questions. Make sure you note all the conditions of your space so the nursery staff can steer you in the right direction.
Check out some local nurseries below, listed in alphabetical order:
This plant nursery located along Alameda NW near Fourth Street is best known for its thousands of vegetable seedlings, making it a must-stop for all your vegetable needs. Of course, they also carry a ton of other plants like perennials, annuals, groundcovers, trees, roses and more — but go for the vegetables.
As the name suggests, this North Valley nursery specializes in aquatic plants and fish. However, they also carry a wide variety of locally grown perennials, trees and shrubs. You’ll want to linger as their garden offers a very pleasant shopping experience.
Located in the South Valley bosque of Albuquerque, this off-the-beaten-path farm and nursery specializes in edibles and resilient and native trees and shrubs, alongside egg-laying ducks and orchards. Grown onsite, you can find underrepresented trees and shrubs that grow well in the harsh New Mexico climate.
The shop is mostly known for home décor but walk towards the back of the store and you’ll find a well-stocked nursery with a good selection of annuals, perennials, shrubs, trees, succulents, houseplants and vegetables. They also carry a host of garden supplies and are easily accessible, being located along San Mateo NE near Interstate 25.
From a location near Balloon Fiesta Park, Jericho provides some unique items not found at other nurseries in town. Of course, they have the usual annuals, perennials, natives, trees, roses, shrubs and more, but you’d never guess they have all kinds of specialty miniature garden and fairy garden materials. You’ll also find a friendly staff and everything you need to make a terrarium, garden tools, outdoor décor and other garden products.
At this large nursery located on Osuna NE just east of Edith, you can find just about everything you need. Be sure to check out the native plant section. But one of the coolest features of Osuna is its Plant Pharmacy featuring certified staff eager and willing to answer all your wildest questions about your plants. Bring a picture of your aphids or leaves from the actual plant and they diagnose the problem.
Natives, natives, natives. Located on Fourth Street NW north of Chavez Road, this nursery sells native New Mexico plants and seed. Just about any plant you find here will grow with ease in your yard. You will also find a wide variety of seeds, from vegetables to any type of wildflower you’d like. The staff even curates specialty blends of wildflowers and grass lawn seeds.
Originally only a wholesale nursery, now anyone can shop here via the Garden Club, which costs $25 for a lifetime membership. Conveniently located on El Pueblo NE west of Edith, you will be able to find everything you need for your yard. In fact, Plant World sells some of the largest ball and burlap trees in town.
Known as your neighborhood nursery, this store located at 5801 Lomas NE has everything you need for your yard conveniently located near those in the Near Northeast Heights, Nob Hill and Uptown. The staff is extremely knowledgeable, and the deep family-like atmosphere and roots of this store shine through.
Trees are especially important in arid, urban environments like Albuquerque and Bernalillo County. They provide shade, mitigate urban heat, reduce greenhouse gasses and air pollution, and create wildlife habitat, among many other benefits. All trees, even climate-resilient and drought tolerant species, need to be watered adequately.
It’s worth the investment to keep our mature trees healthy. The mature trees on your property are worth much more than the cost of your treasured appliances and, yes, even more than your roof. Keeping our trees healthy and happy over their lifetime is a minimal investment and a valuable contribution to our community urban forest.
In Albuquerque, we tend to overwater our lawns and underwater our trees. It’s important to understand the basics of how best to water trees. For instance, a tree has two different main types of roots. The feeder roots lie within the first 6-24”of the ground, and the stabilizer roots can be at least 3’ deep You may think your trees’ roots can reach the water table, but you should think again — most of Albuquerque has a water table between 20 and 150 feet’ deep. Your roots are never getting that deep.
Due to the importance of our urban forest and how many people are seeking guidance on how to water their trees, the Bernalillo County Water Conservation Program, and Let’s Plant Albuquerque, partners collaborated to create this How to Build an Efficient Tree Watering System guide and the associated workshops.
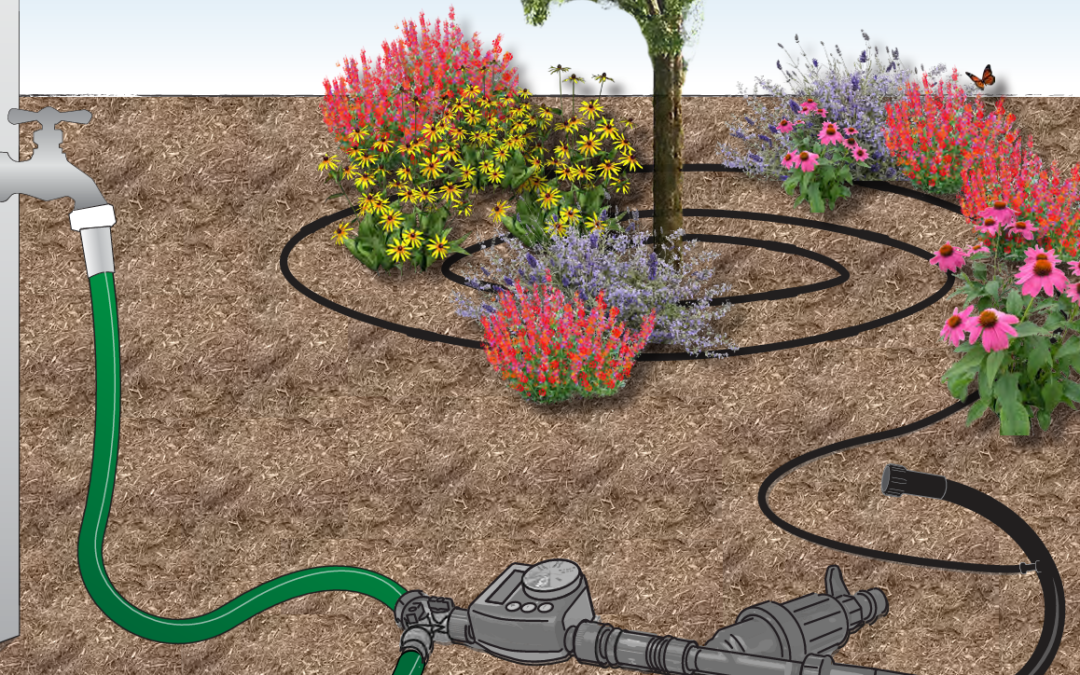
The tree irrigation system is inexpensive, flexible, easy to install and long-lasting. It uses drip irrigation attached to your hose bib and can be easily expanded as your tree matures.
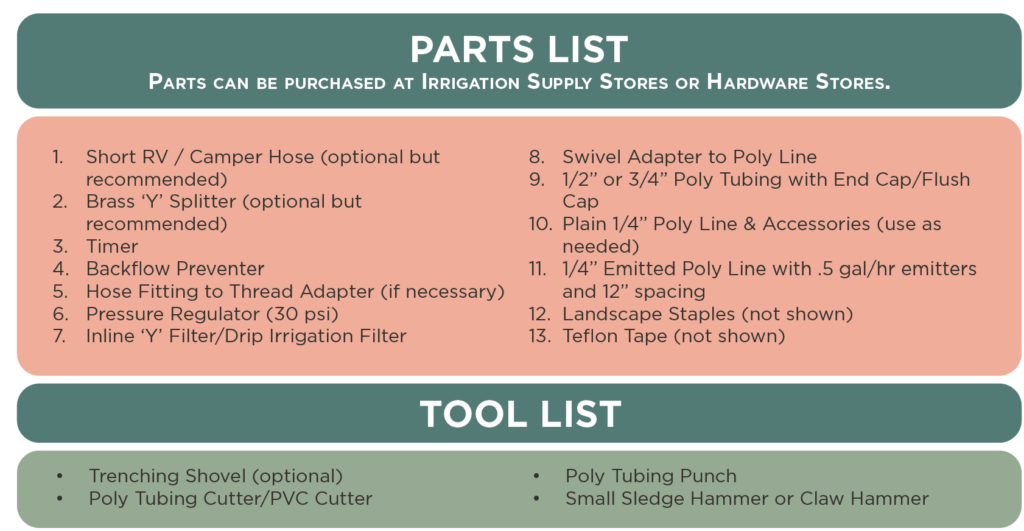
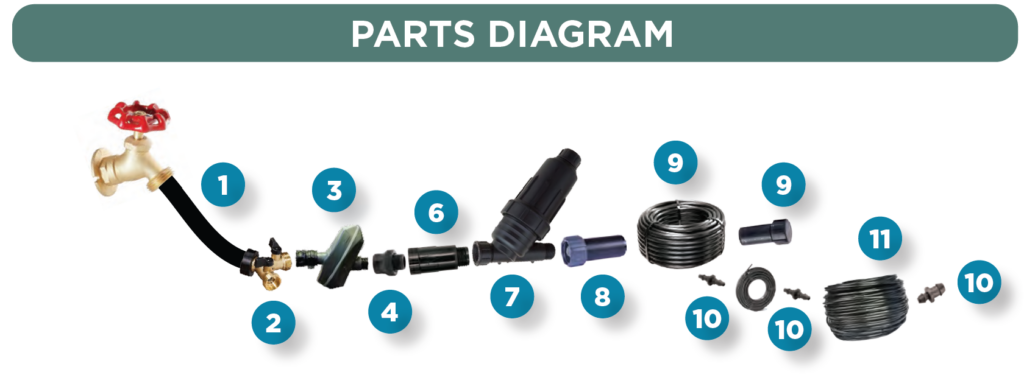
When assembling your system there are a few key parts to consider:
Teflon tape is needed to seal the threads at every connection to prevent water coming through.
Take note of the two different types of threads: hose threads and pipe threads. Hose threads are straight and require a washer to seal. Pipe and coupling threads are tapered for water use and will seal with just the application of Teflon thread seal tape.
Timers should be uninstalled and stored with the batteries removed over the winter. Some people like to install fresh batteries every spring to ensure there is no interruption during the growing season.
A pressure regulator is important for all drip systems due to the high pressure in our Albuquerque water lines. The regulator reduces the water pressure coming in from the main water supply. Then, it creates a constant low water pressure through the system, allowing the drip tubing to put out the correct volume of water per minute.
Distribution (lateral line) drip tubing comes in two general sizes, and each has advantages and limitations:
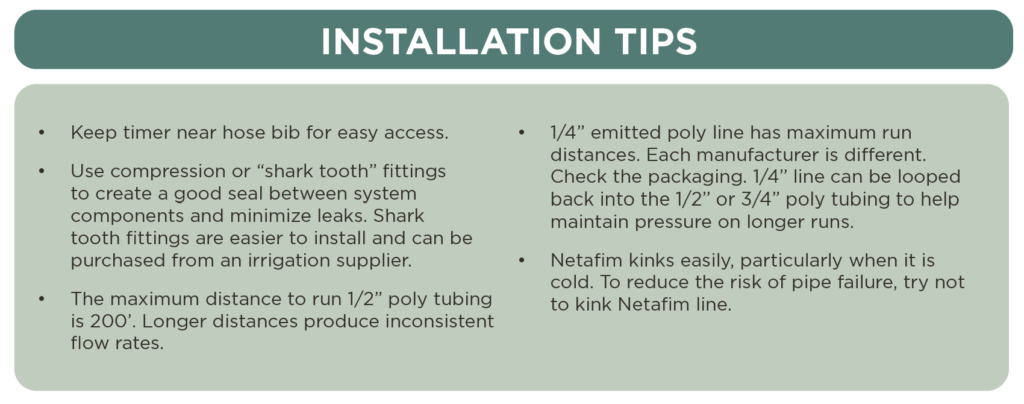
1/2” tubing is more common, and parts are available at big box stores. The run of distribution tubing must be less than 200 feet.
¾” tubing is available from irrigation supply stores. It holds pressure better, and tubing runs can be up to 600 feet.
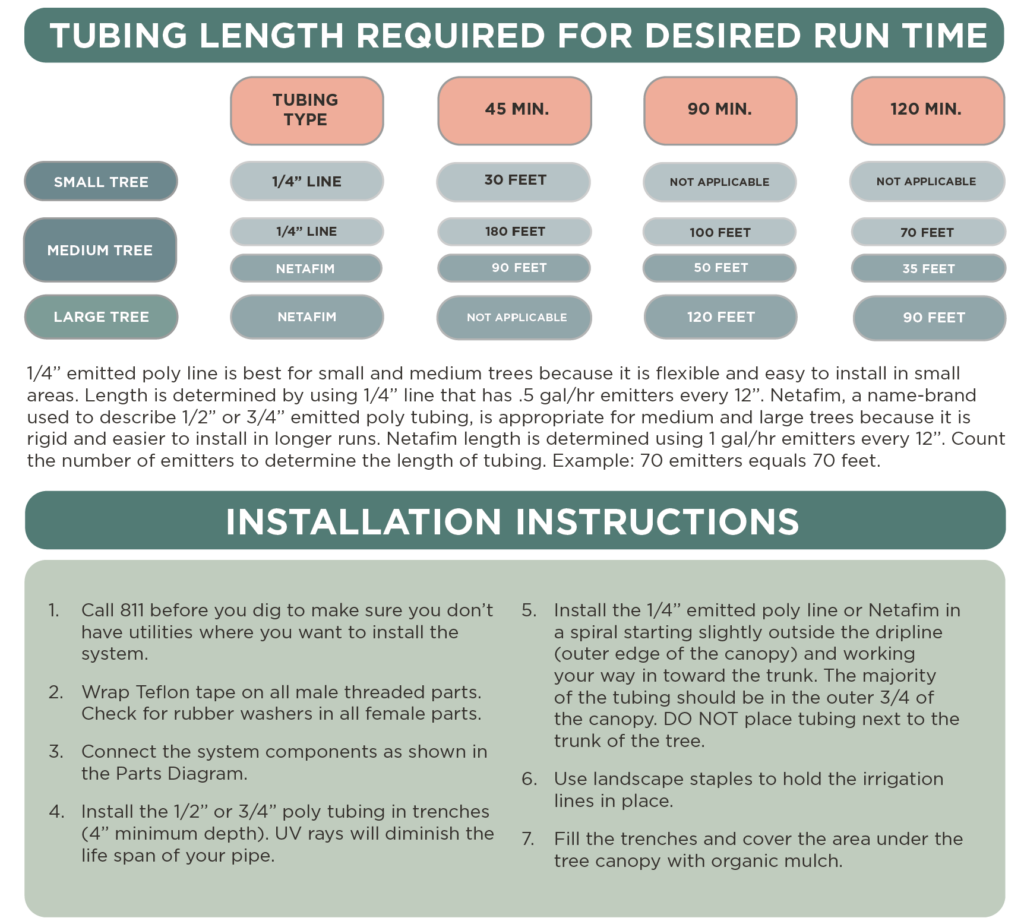
Inline drip line (emitter line) drip tubing comes in two sizes and includes drip emitters pre-installed in the line every 6”, 12” or 18”.
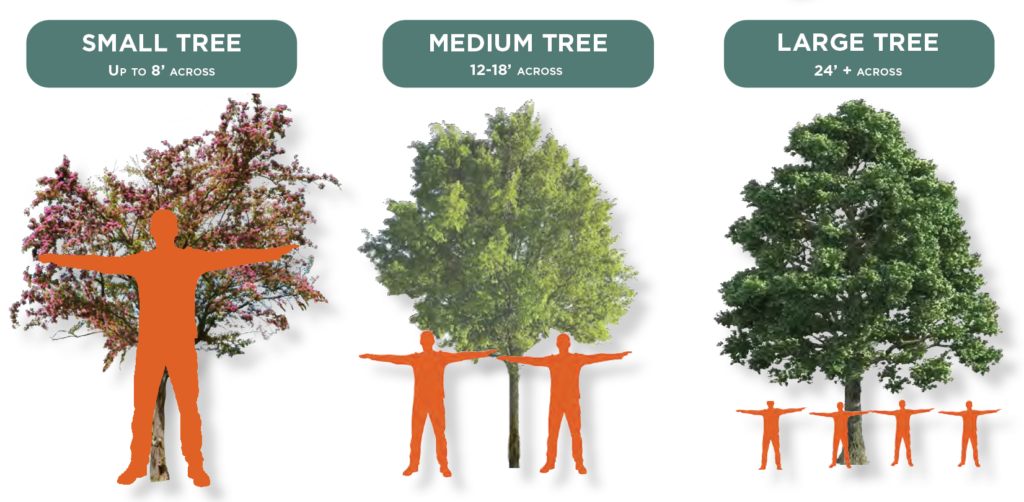
½” Netafim inline dripline tubing for use around medium and large trees. Use 12” emitter spacing.
¼” Netafim inline dripline tubing for use around small trees. Use 6” emitter spacing.
A flush type of end cap is handy for flushing out the system at season start-up or if a break occurs. It is recommended to remove and store flush caps over the winter.
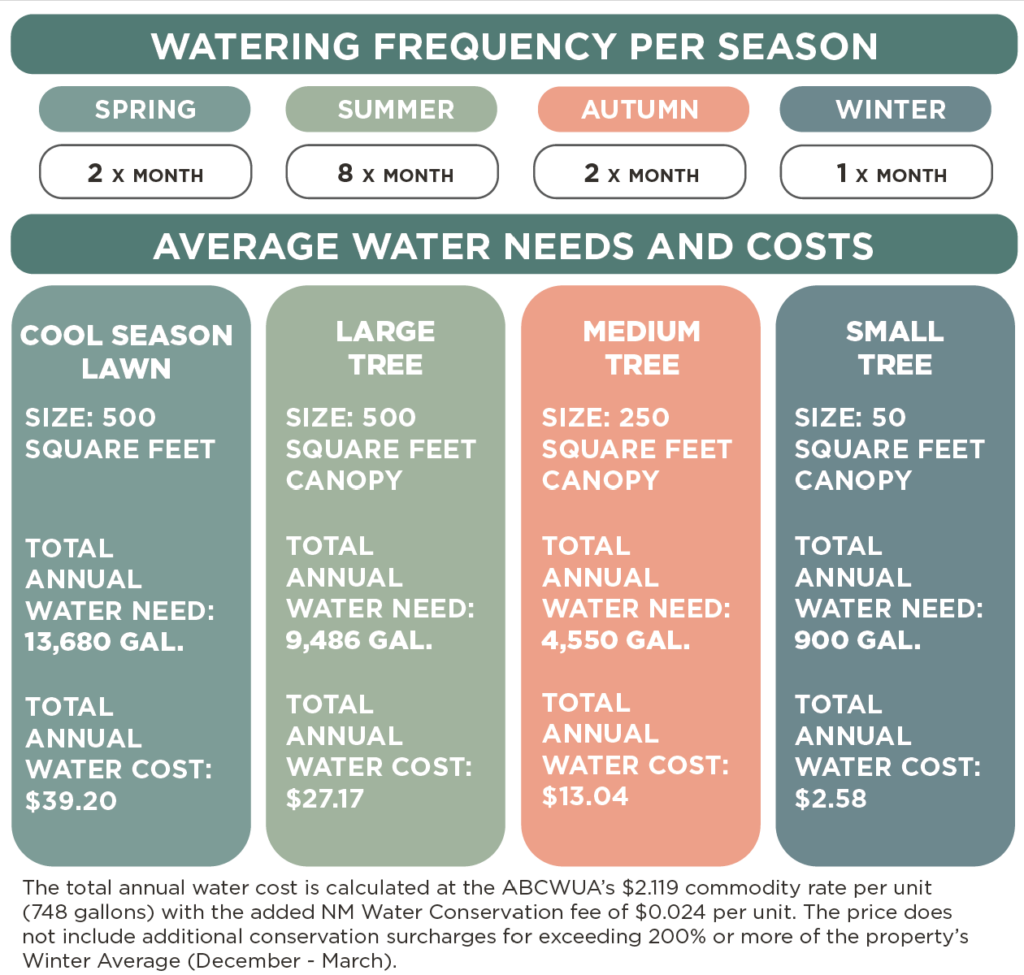
The watering guidance for the system was developed to not under or over water most trees in Albuquerque. However, irrigation is highly dependent on site conditions such as soil type and microclimate as well as the species of tree. This guidance is meant to be a rule of thumb or starting point, and adjustments should be made based on the local conditions and tree species.
Below are some of the factors that should be considered in generating a watering schedule for your yard:
Soils affect how often and how long you need to water — see the Water Authority’s Irrigation Guide for more details. In general, sandy soils require shorter but more frequent run times while clay soils need longer but less frequent run times.
Always check your plants to evaluate irrigation scheduling. Most plants will look a little bedraggled at 3 p.m. during the summer so check in the morning. Do they seem wilted or pale or have cupped leaves? These can be signs your tree needs more water.
Be aware that symptoms of overwatering and underwatering may look similar.
Occasionally, feel the soil the day after irrigating or use a soil probe such as a screwdriver or coat hanger to evaluate the level of moisture in the soil. If the probe is easy to push in and there is a swampy smell, the soil has too much water. If you can’t get the soil probe more than 4” into the soil, it’s too dry. Ideally, the soil probe can be pushed 12”-18” into the soil 24-48 hours after irrigating.
Consider what size tree you are trying to water. Check out the diagrams above and below to determine how much tube length you will need to meet the required water needs of your tree.
Author: Megan Marsee is the Water Conservation Program Lead for Bernalillo County and can be reached at [email protected] Have a question about the article? [email protected]
Sometimes you need help to create your perfect desert friendly landscape. Many times, this involves hiring a landscape contractor. The Water Utility Authority is committed to helping its customers. Below we share some tips to help you choose a landscape contractor.
It’s important to start with a to-scale landscape design plan. This may be done by a professional landscape architect or a landscape designer. Or perhaps you worked up your own design plan.
Hiring a landscape contractor requires research similar to what you would do when hiring any home repair contractor. It’s important to consider the following:
Is the contractor able to secure bonding and are they insured?
What are the contractor’s credentials (formal training, references, professional certification)?
Does the contractor belong to a local or national trade association and abide by its standards?
Does the contractor have a Water Smart Contractor listing through the Albuquerque Bernalillo County Water Utility Authority?
The contractor should provide references for projects similar in size, scope and design so you can talk to previous customers about their experiences.
The contractor should share photographs of other projects you can check out.
Estimate/Bid and Contract
The contractor should provide you with a detailed, line-item estimate for the work. This will include the price of the materials, labor, taxes and permit costs if applicable. A detailed estimate will help you accurately compare pricing and services.
A signed estimate may act as the official contract, a legal requirement that will protect both you and the contractor if anything goes wrong.
What is the payment schedule? Most contractors will ask for anywhere from 30% to 50% up front so they can purchase materials. They should provide you with a general timeline or payment schedule.
How long will the construction take, and what does the sequencing/schedule look like?
How does the contractor manage additional work that may be added in the middle of the project and is not on the plan?
During and After Construction
Who will be the contractor’s point person, someone you can go to with questions? How will they communicate with you and how often?
How will the contractor handle variabilities that come up during construction?
What happens if there is a delay once construction has started?
The contractor should show you how to maintain the landscape after it is built and how to work the elements installed, such as the irrigation controller.
What are the warranties for the project? What do they cover and exclude?
Does the contractor provide troubleshooting support during the first year after installation?
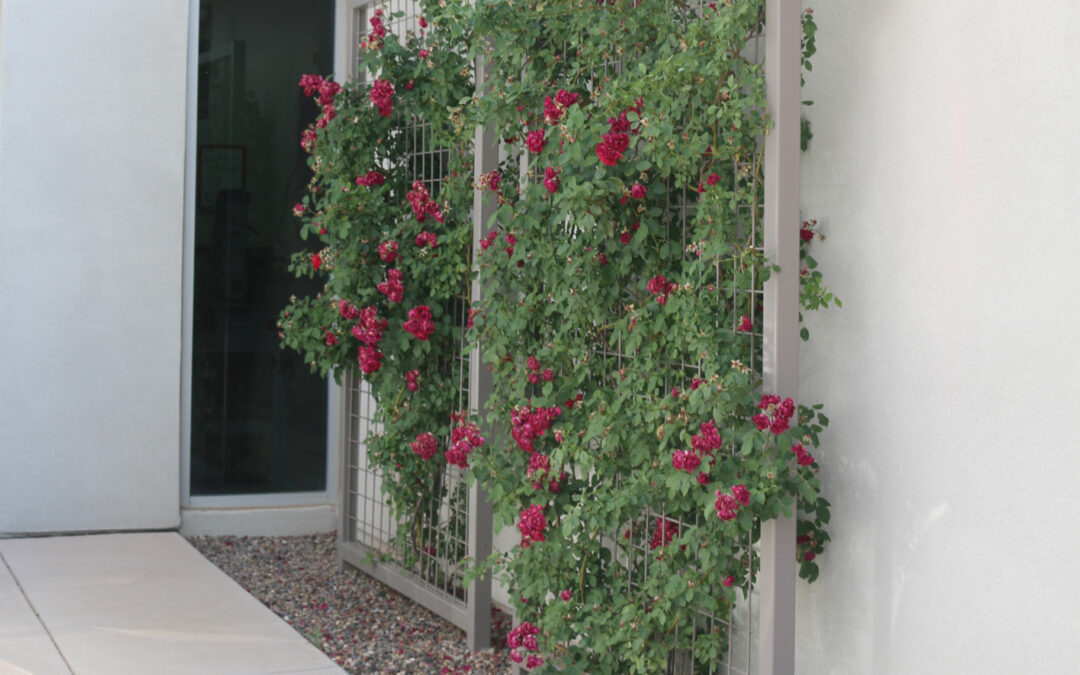
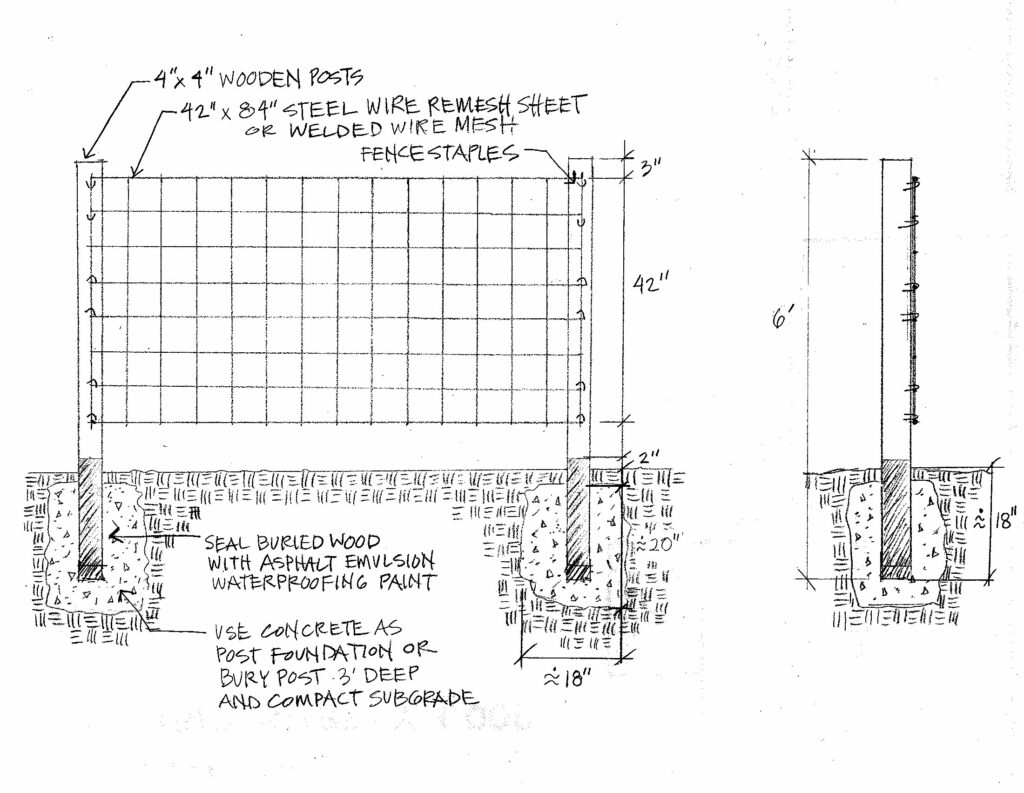
One of the questions the Water Authority xeriscape inspector gets asked most often is how to inexpensively build a trellis for vines. You can make a DIY trellis from materials that are easy to find at your local hardware store. Off-the-shelf trellises can be expensive, and more than likely they are too small. Most homeowners are looking for a trellis to go next to a house or concrete block wall or to divide spaces. Below are two trellis options that will suit those needs.
Freestanding Trellis
Materials
4”x4” post (height according to specific project need)
42”x84” steel wire remesh sheet or welded wire mesh
12 fence staples
Asphalt emulsion waterproofing paint or spray paint
Concrete
Tools
Shovel or post hole digger
Hammer
Paint brush
Measuring tape
Level
Step by Step
Step 1: Dig holes for post.
Step 2: Apply waterproofing paint to the section of the posts that will be buried.
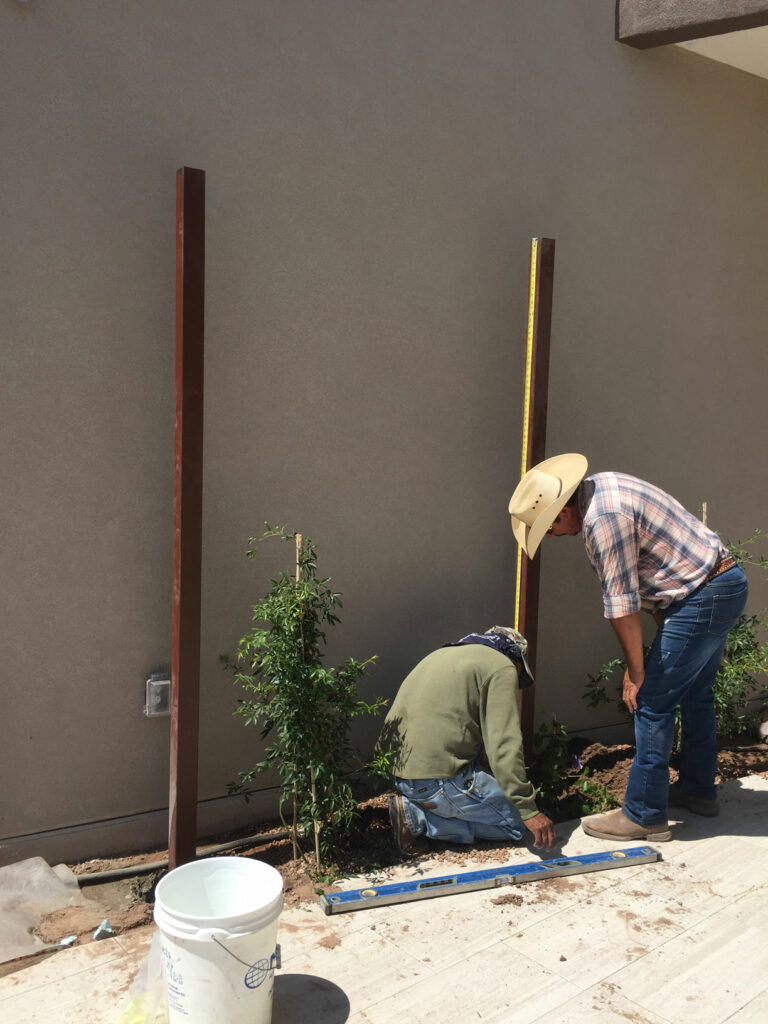
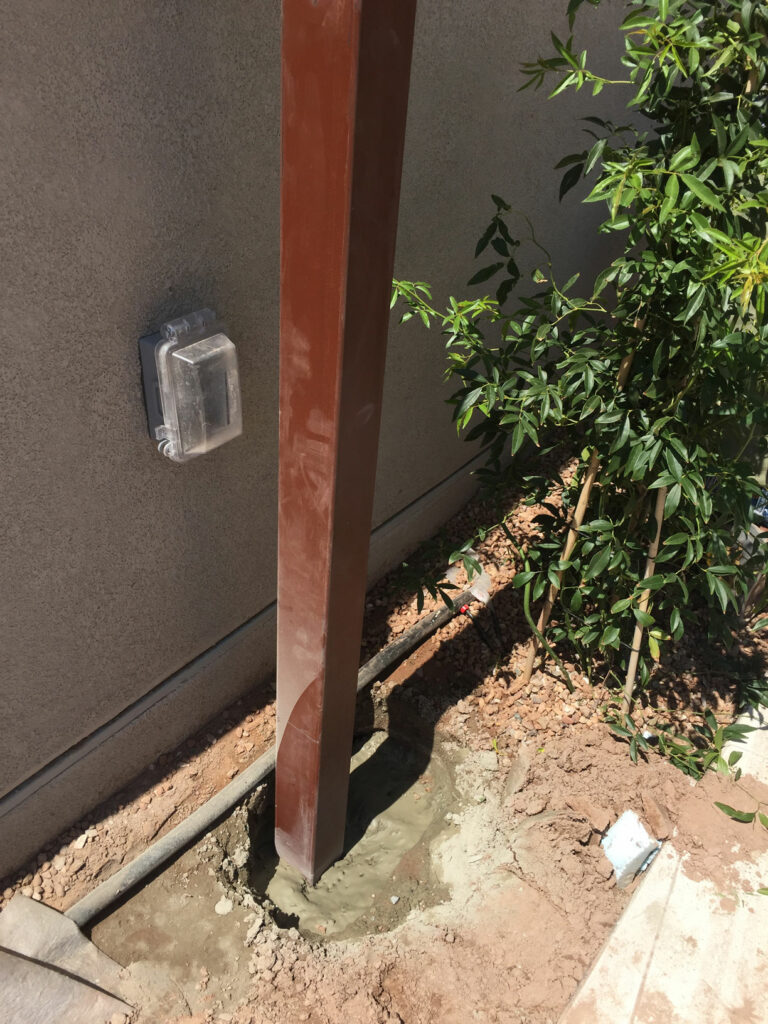
Step 3: Set post in hole. Measure and level post. Once leveled, fill the hole with concrete. If not using concrete, backfill with existing dirt, making sure dirt is compacted every four inches.
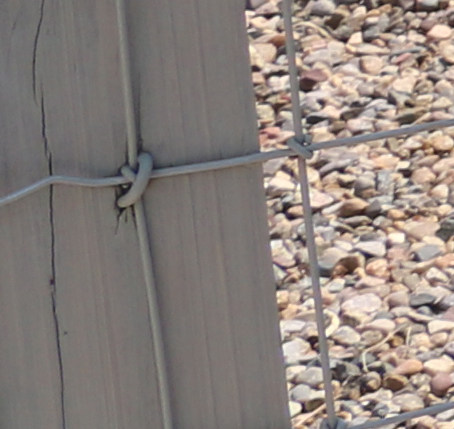
Step 4: Attach steel mesh to wood posts by hammering in fence staples.
Making sure post is the correct height and level. Concrete footing for post. Fence Staple
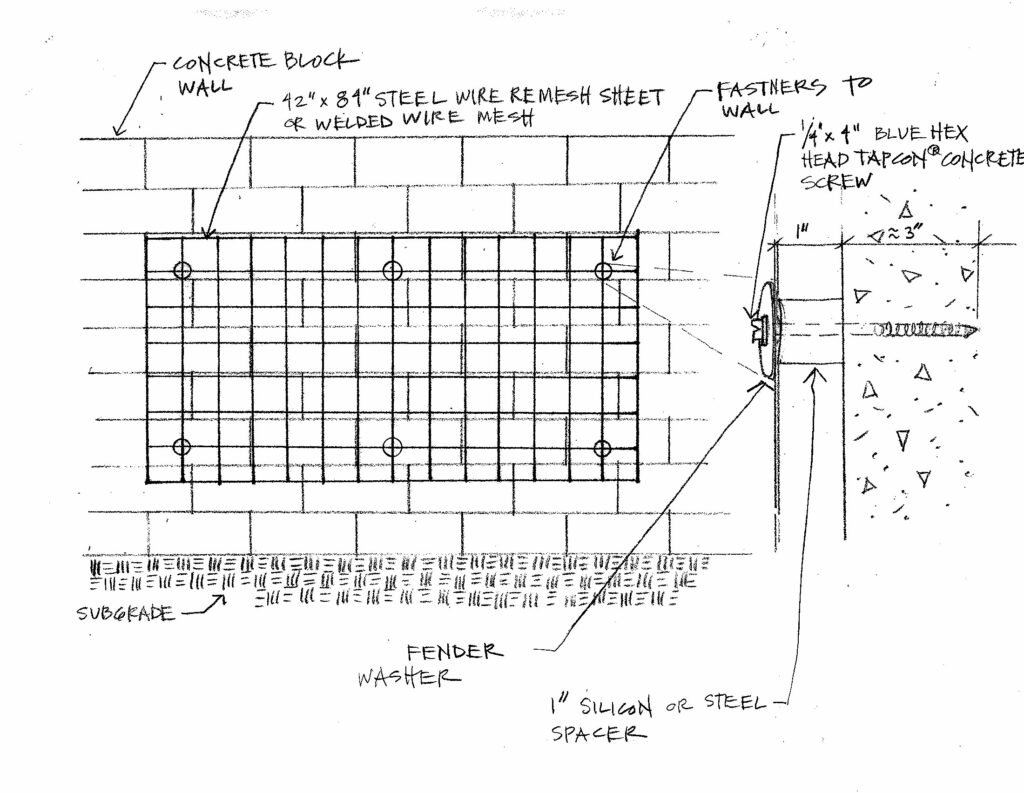
Trellis Attached to Concrete Block Wall
Materials
42”x84” steel wire remesh sheet or welded wire mesh
6 ¼” fender washers, 2” circumference
6 ¼” x 4” Blue Hex Head Tapcon® concrete screws
6 1” silicon or steel spacers
Tools
Drill with 3/16” concrete bit
Hammer drill
Measuring tape
Level
Step by Step
Step 1: Measure, level and mark locations to attach fasteners to the wall using wire mesh as a guide.
Step 2: Drill holes for the screws.
Step 3: Attach steel mesh to the concrete wall using suggested screws, washers and fasteners as shown in the diagram.
One of our favorite things to do at Bennu Organics is design container gardens. We like to talk about the “wow factor,” and containers are a fantastic way to add stunning, season-long color to our landscapes without digging a single hole in our hard, unforgiving soil.
Here are six helpful hints for creating your own successful container designs:
1) Location: Will the containers be in full sun, partial sun or full shade? In most cases, full sun containers in New Mexico require daily watering. If you don’t want to water every day, consider selecting plants that require less water, like succulents, cacti or perennials. Placing containers in partial shade will also save water. It’s important to know the amount of sunlight you will have available for each container prior to purchasing plants.
2) Size: What size are the containers, or what size do you want them to be if you’re purchasing them? You’ll need plenty of soil to fill or refresh the containers, and you want to make sure you have enough plant material to give your containers a nice, full look.
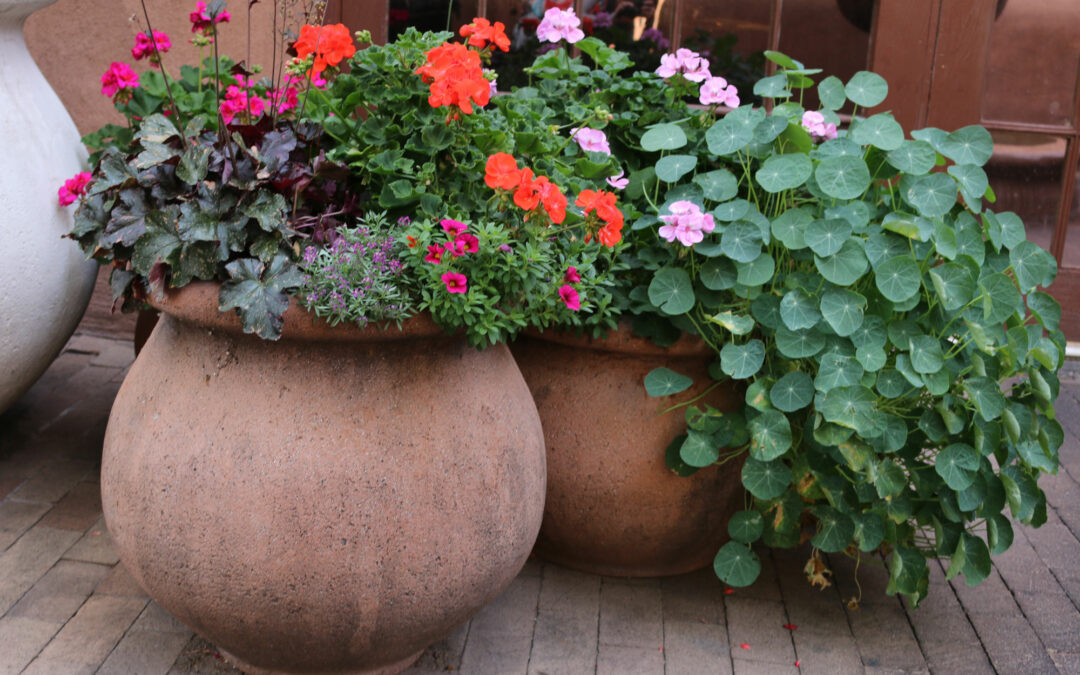
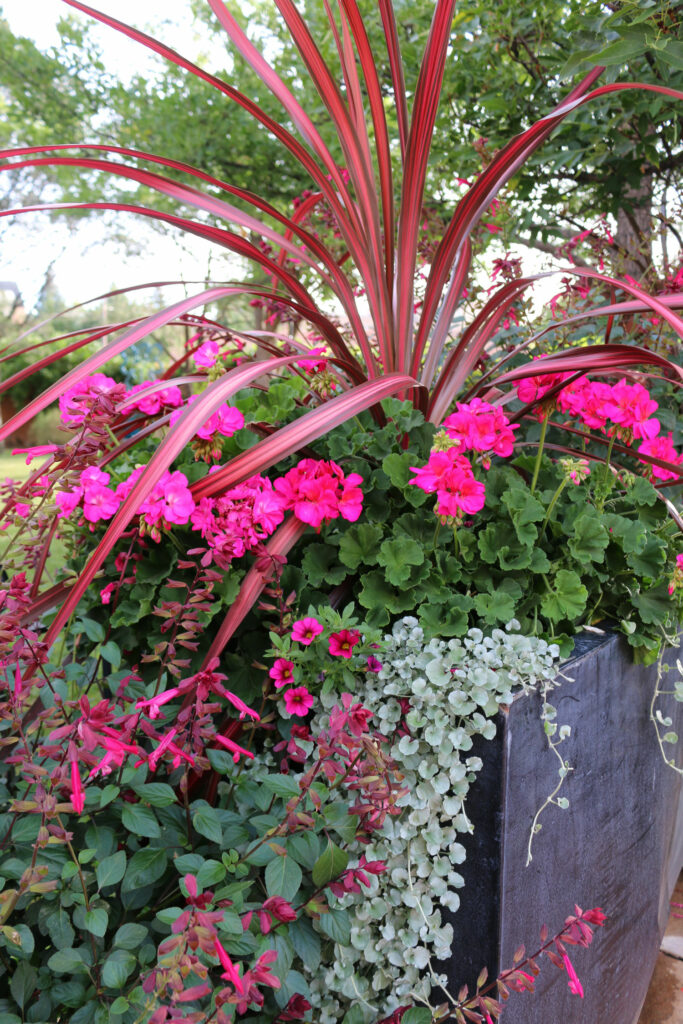
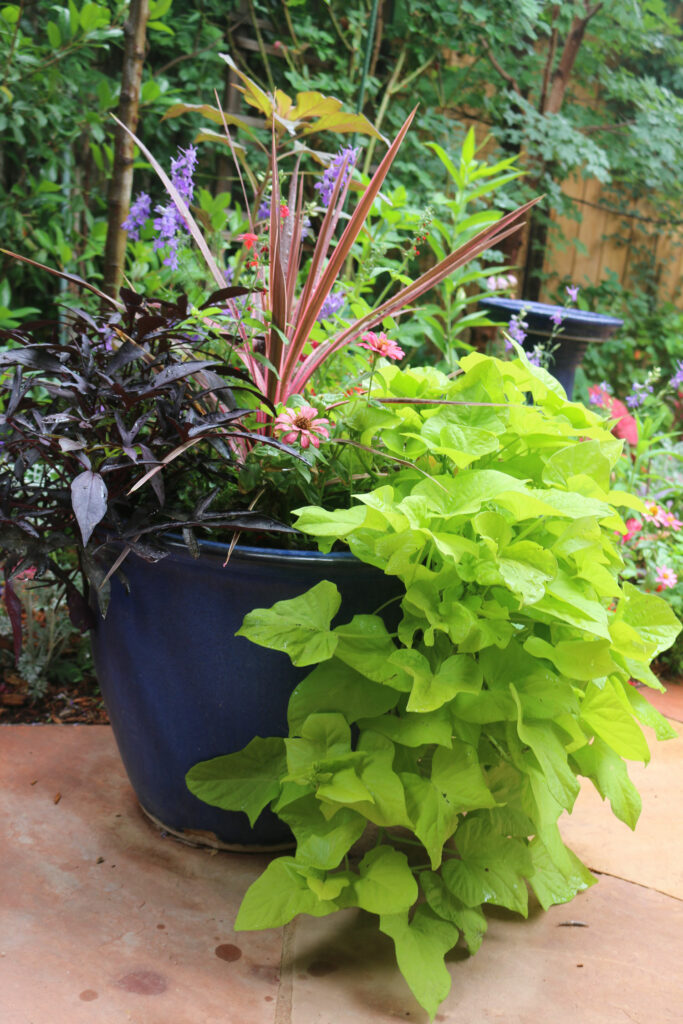
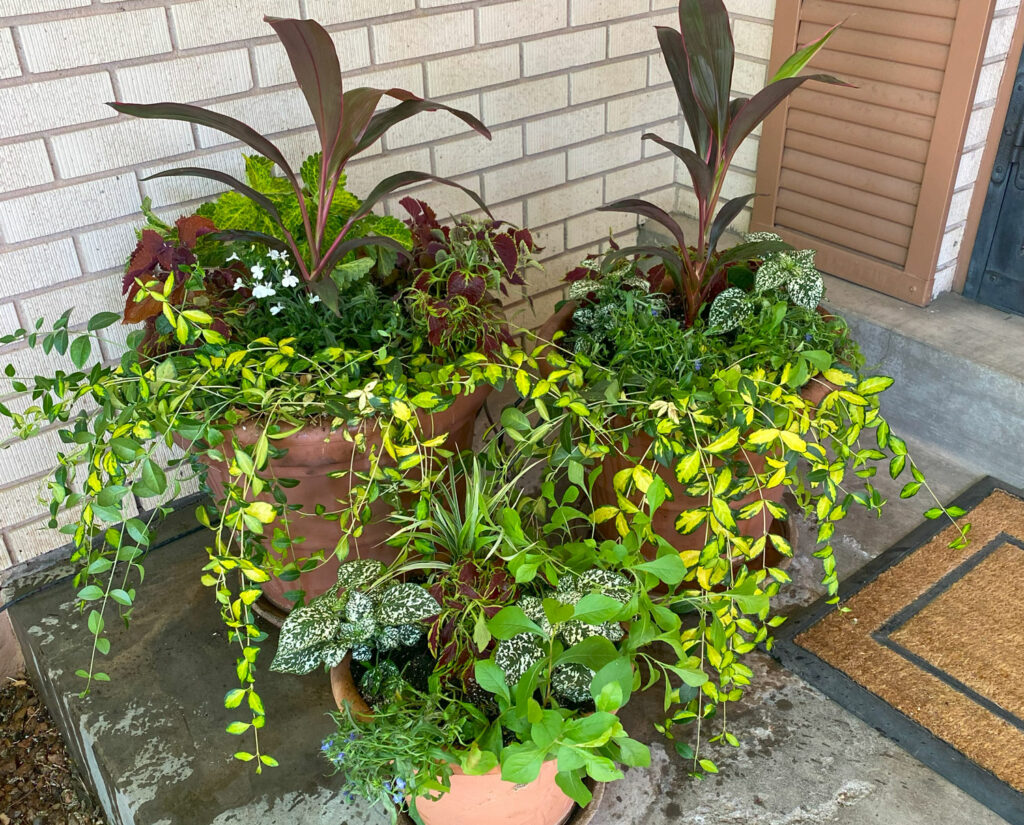
3) Design: Well-designed containers require three types of plants: thrillers, fillers and spillers. The thriller is something tall and showy, while fillers are shorter plants that fill in the spaces. Spillers are those low vining-type plants that spill gracefully over the sides of the container.
4) Color theme: I like picking a color palette and then selecting different plants within that palette. I don’t want my containers to be identical, but I do want them to complement each other. Also, depending on the locations of the containers, I will often do a “mirror image” design if the containers are on either side of an entry way, for example.
5) Lighting and water: Select plants that have similar lighting and water requirements. You don’t want to put a cactus as a thriller and wave petunias as your filler. One or both will suffer from too much or a lack of water.
6) Maintenance: Besides watering consistently, you will want to trim and deadhead your designs frequently. Petunias and calibrachoa (classified both as fillers and spillers) need regular deadheading to keep the blooms going strong. Trim them heavily when they get “leggy.” They respond well to a really good haircut. If you are consistent with your maintenance and watering, the containers should keep their “wow factor” all season long. Also, regular fertilizing is crucial to maintaining season-long blooms. In the active growing season, we fertilize our containers every two weeks.
While the following list of possible plants you can use in containers is hardly comprehensive, it should help get your creative juices flowing:
Shade/Part Shade
Thrillers: caladium, alocasia, sansevieria/dracaena, colocasia, cordyline, etc.
Fillers: bacopa, begonias, Boston fern, caladium, coleus, begonias, dusty miller, impatiens, etc.
Finally, your container designs should bring you joy, so get creative! What do you love? What are your goals? Do you want to attract hummingbirds and butterflies? Do you want fragrance? Do you want a color explosion, or are you looking for something more subdued? Your containers should reflect their designer, so pick things that you really enjoy — not just the plants you see on Pinterest or in magazines, although if you love the ones you see in those places, imitation is the sincerest form of flattery! Some people like to use all annuals, some like a combination of annuals and perennials and some even add edible plants into their designs. The sky is the limit!
As with all things related to plants, design and gardening, remember that everything we do is a grand experiment. Don’t feel guilty if you mistakenly combine a low-water plant and a high-water plant in the same container and one of them dies. Learn from your experience and simply replace the dead plant with something more suitable.