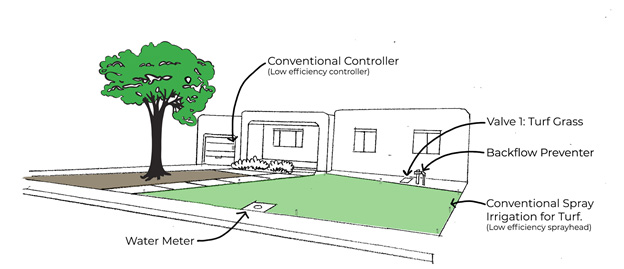
Since the Albuquerque area receives about 9” of rain on average per year and grass lawns can use up to 50” of water per year, the proper design of an irrigation system for a grass lawn is of utmost importance when it comes to water efficiency. Irrigation efficiency can save up to 30% of the water you use by avoiding water waste.
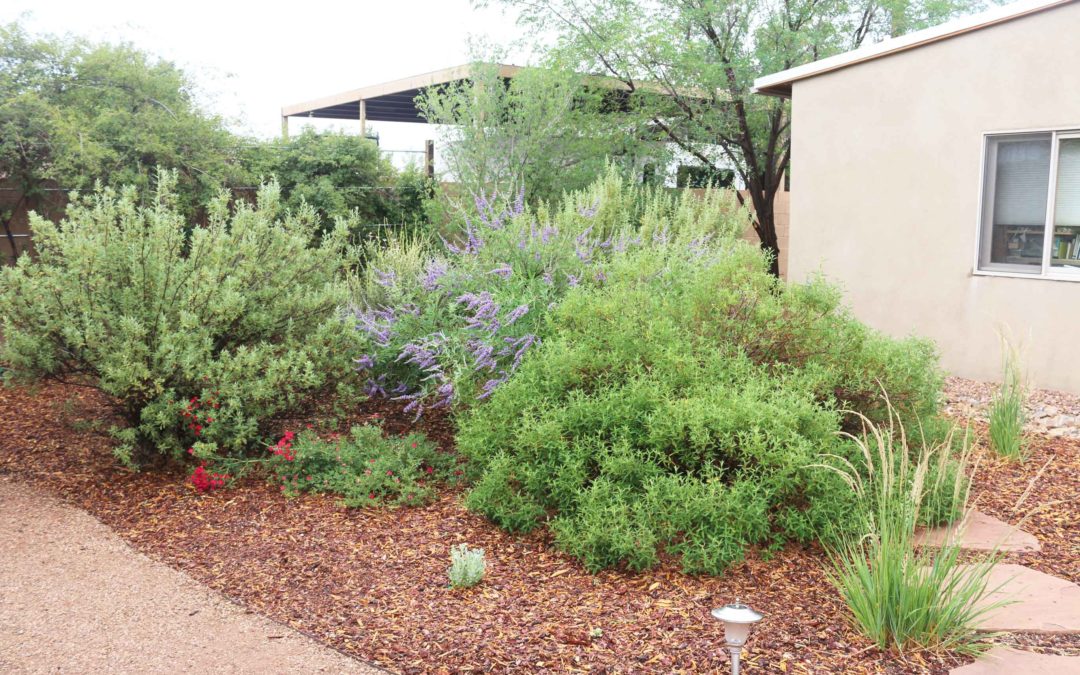
While the Water Authority does not encourage grass lawns, we understand that some homeowners may want to install new lawns or reduce the size of their existing lawns. If you are going to have a turfgrass lawn, we recommend that it’s a lawn you use and not just maintain for curb appeal. Proper irrigation layout and design are key to having a healthy and water-efficient lawn.
When designing your lawn, keep these tips in mind:
1) Lawns smaller than 10’x 10’ are hard to water with a spray irrigation system.
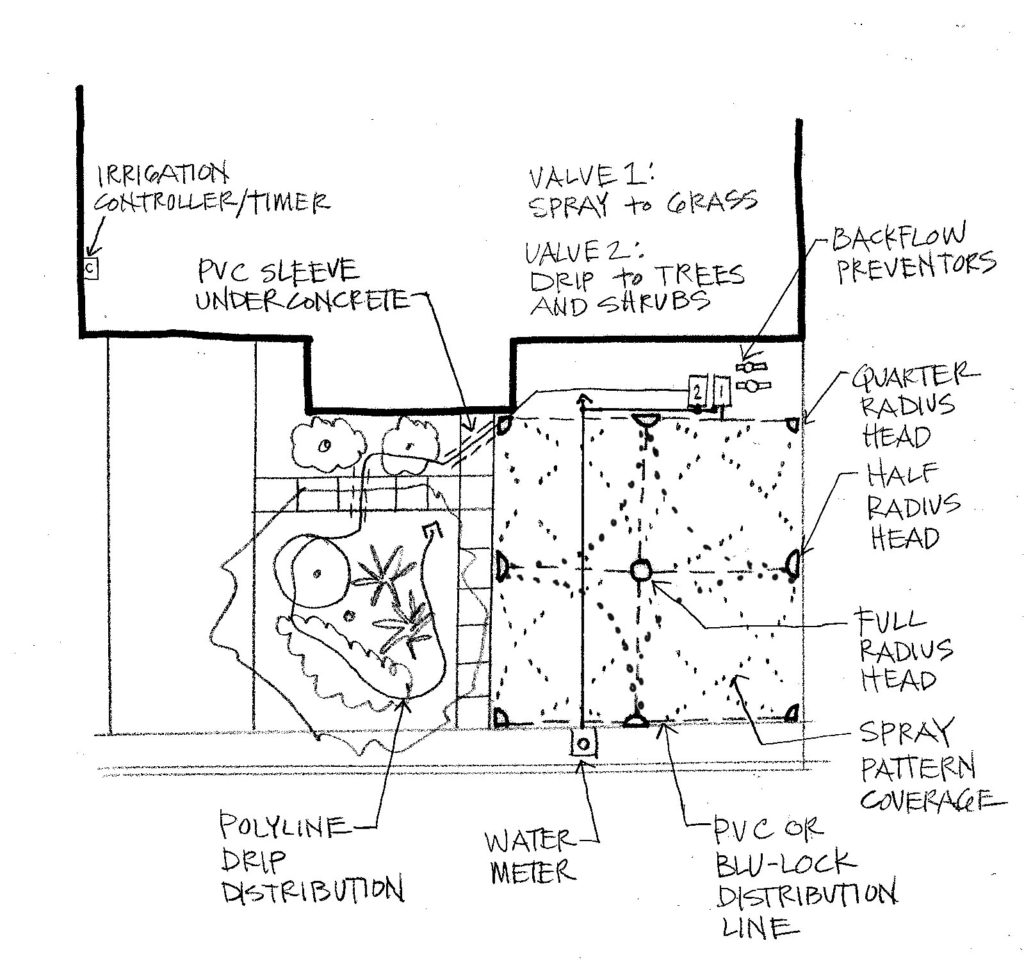
2) To get the most efficient irrigation coverage, design square and rectangular lawns since sprinkler heads spray in fixed patterns-such as a quarter circle, half circle or full circle-but not curves. If curves are necessary, broad curves have the best chance of being irrigated without over spraying, while zigzag narrow curves are the toughest to irrigate effectively.
3) We recommend using WaterSense Pressure Regulating Spray Sprinkler Bodies.
WaterSense labeled spray sprinkler bodies with internal pressure regulation can reduce water waste by providing a consistent flow at the sprinkler nozzle. When the sprinkler body maintains pressure near its optimal operating pressure, the connected nozzle is better able to generate the right amount of water spray and coverage for a more uniform distribution of water across the landscape. Customers can choose from a list of pre-qualified spray sprinkler bodies.
4) We also recommend using High-Efficiency Rotating Sprinkler Nozzles (multi-stream). These nozzles minimize water waste and feature a unique multi-trajectory rotating stream that delivers water at a steady rate. This slower application allows water to gently soak in at rates that soils can absorb. Use these nozzles to replace the sprinkler head on any conventional spray head body or pop up sprinkler. For more information on these nozzles read this post.
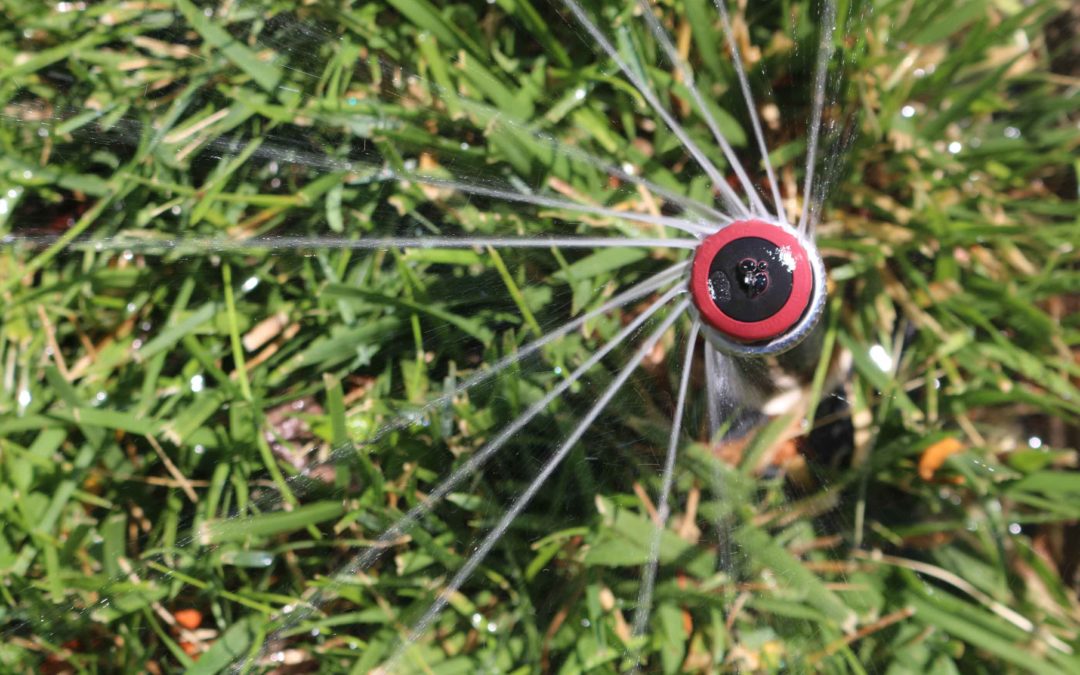
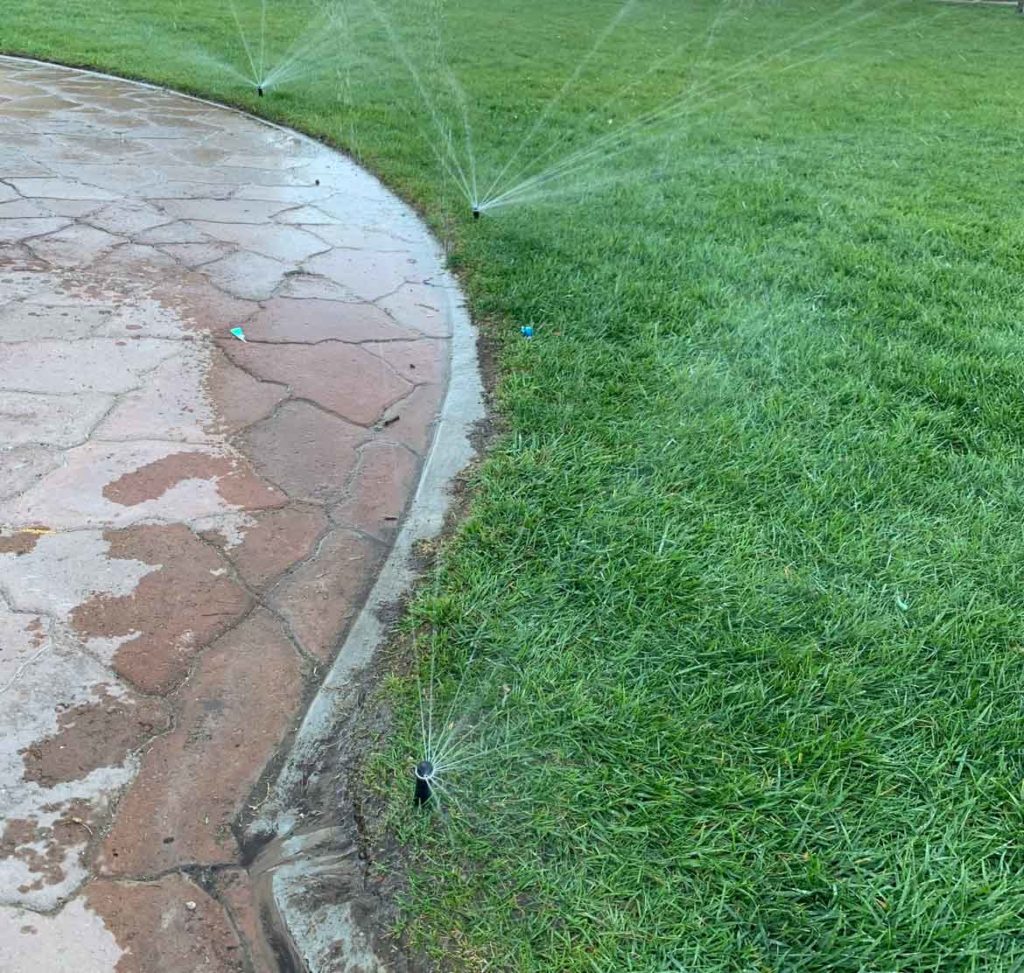
5) Irrigation sprinkler nozzles are designed for 100% overlap of watered areas, which means each sprinkle nozzle throws water to the next sprinkler in all directions. If a system is not built this way, there will be dry spots (see the below image).
Designing, reducing and changing the shape of your lawn doesn’t have to be an expensive project but it can save a lot of water. Visit your favorite local irrigation supply store for professional equipment and expert advice.
Learn more by checking out these other useful irrigation articles:
Author: Jill Brown, ASLA, is a Landscape Architect and owner of My Landscape Coach in Albuquerque, NM. Have a question about the article? AskAnExpert@abcwua.org
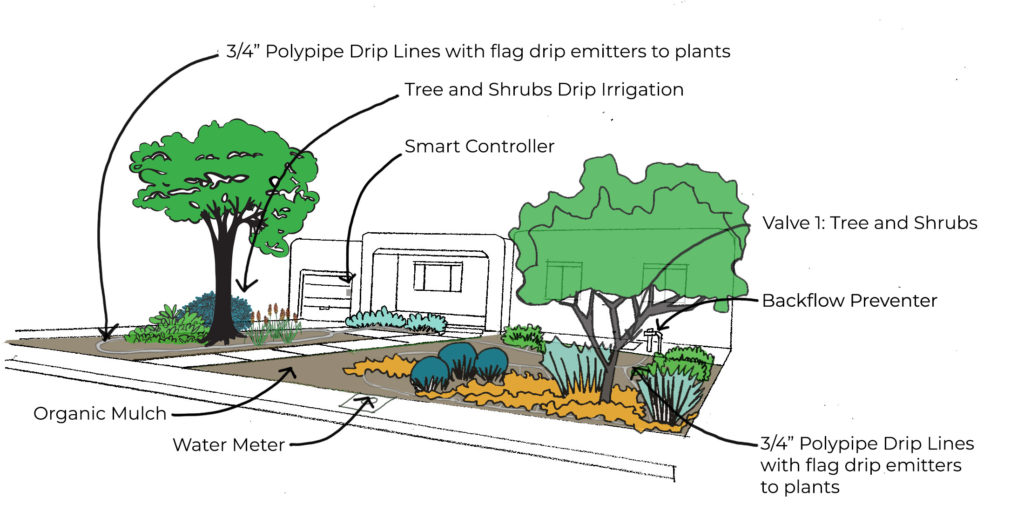
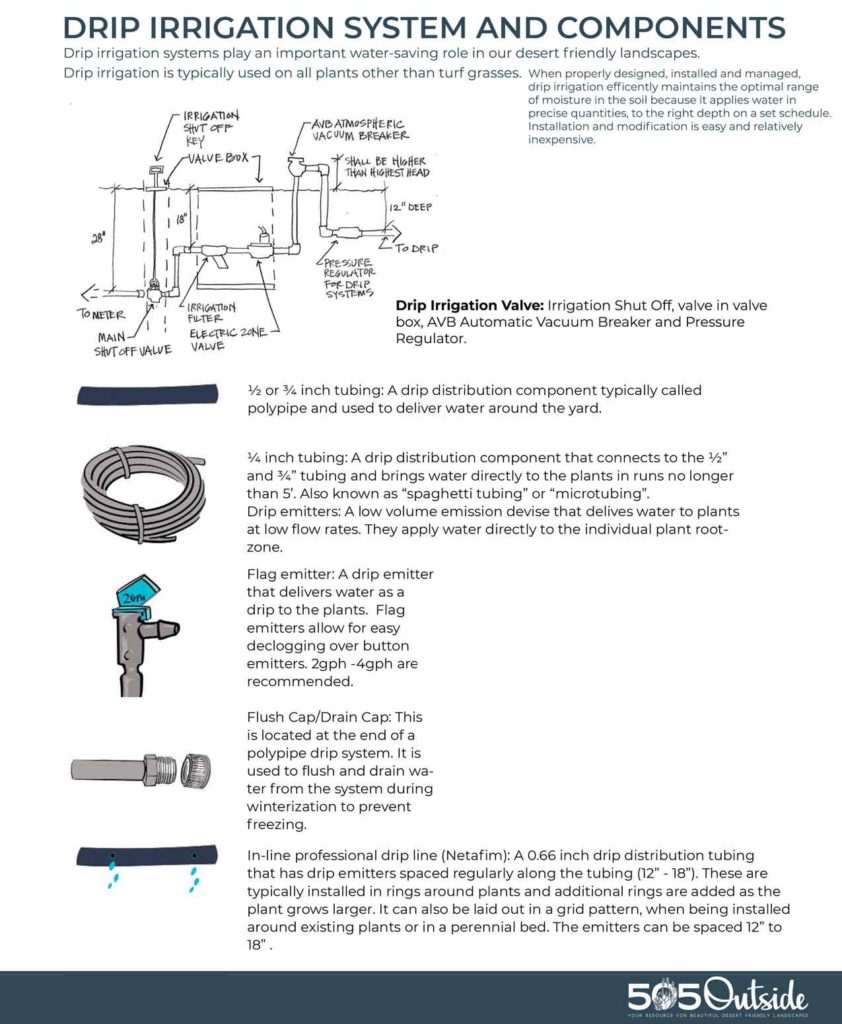
One of the biggest obstacles holding homeowners back from removing their high-water turfgrass and installing xeriscape is believing that setting up the irrigation system is difficult. Luckily, it is not as hard as you may think.
If you have an automatic irrigation spray system, you already have an existing valve and, most likely, an AVB backflow preventer. It may look something like this.
Desert Friendly Xeriscape with spray to drip conversion.
The first thing to do before converting to drip is to get the valves checked out by a professional to make sure they are in working order. When you know they’re fine, add a pressure regulator filter combo just past the existing valve and backflow preventer. Then attach ¾”polyline, snaking it around the yard to the new plants and inserting flag emitters at each plant.
The existing underground piping and spray heads are no longer needed. Simply remove all the existing spray heads. There is no need to dig up any existing pipe.
You may have seen the spray-to-drip retrofit kits locally available and wonder if this is a good approach. We don’t recommend this approach because studies show that nearly half of the water saved from converting a lawn to a healthy xeriscape comes from abandoning leaky underground piping and fittings. A Sprinkler system’s lifespan is less than 20 years. If you are not sure how old your system is, or if it is older than 10 years, it’s best to not rely on old underground piping. Since sprinklers typically run for 8-12 minutes and drip often runs for 45-60 minutes, if you have a leak in your old sprinkler piping and it is now part of the drip system you could be wasting a ton of water – negating the savings from getting rid of your thirsty lawn.
Drip irrigation tubing is very inexpensive per foot and only needs to be in a shallow trench. Properly converting to drip irrigation is not as expensive as many people think, while converting your sprinklers to drip the cheap and easy way with a retrofit kit is likely to cost more in the long run.Contact AskAnExpert@abcwua.org to learn more.
Learn more by checking out these other useful drip irrigation articles:
Author: Amos Arber, Xeriscape Rebate Inspector with the Water Resources Conservation Department for the Water Authority. Have a question about the article? AskAnExpert@abcwua.org
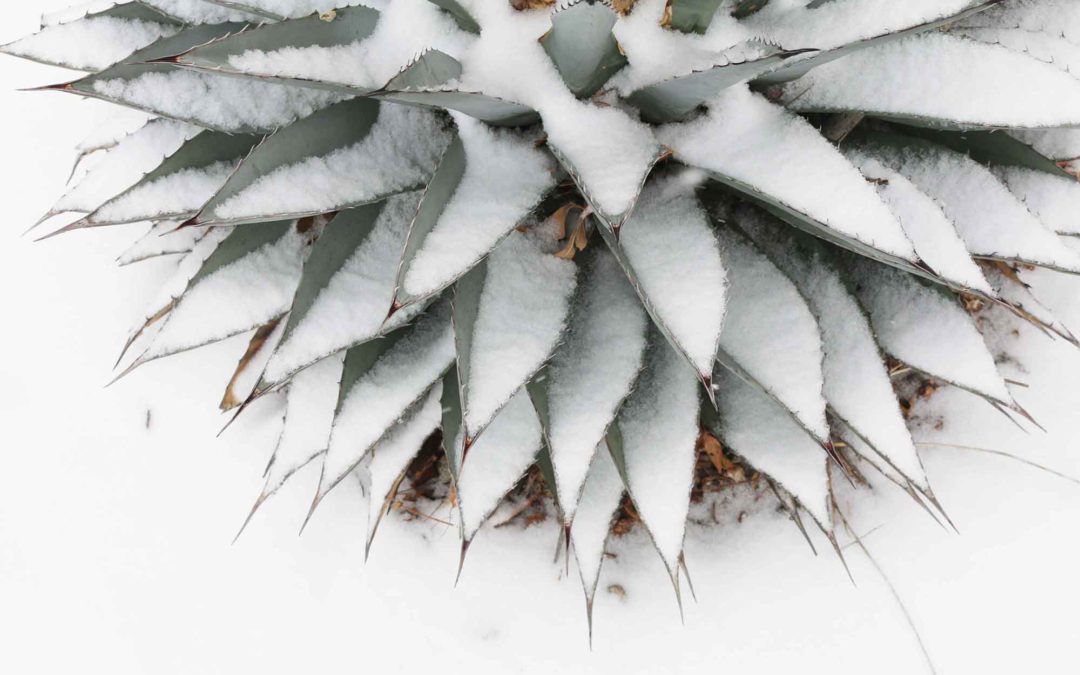
Baby, it’s cold outside. Or is it? How do you water during the cold and dry winter season?
The weather predictions are in, and we are headed into a very dry La Niña winter season. This means we need to water our plants this winter in order to keep them healthy. Due to our freezing temperatures we recommend turning off your irrigation system for the season and using your hose to water once a month during the middle of a warm winter day.
Watering Tips:
For cool season grass lawns, thoroughly water every other week.
For deciduous and evergreen trees, lilacs, photina’s, euonymous, rose of Sharon, spirea and forsynthia, water once a month to 24” deep.
Author: Richard Perce, Irrigation Efficiency Specialist with the Water Conservation Department for the Water Authority. Research: Farmers Almanac, Drought Watch New Mexico State. Have a question about the article? AskAnExpert@abcwua.org
In 1988, the Albuquerque Bernalillo County Water Utility Authority’s started a composting facility for biosolids produced. 505Outside recently visited the Soil Amendment Facility to check out the “Compost Del Rio Grande.”
Water Authority compost is unlike any other in town because it’s not just made with the typical green waste, manure, wood chip, and horse bedding. It also has one special ingredient: biosolids. Biosolids, also known as humanure, are organic matter recycled from sewage operations.
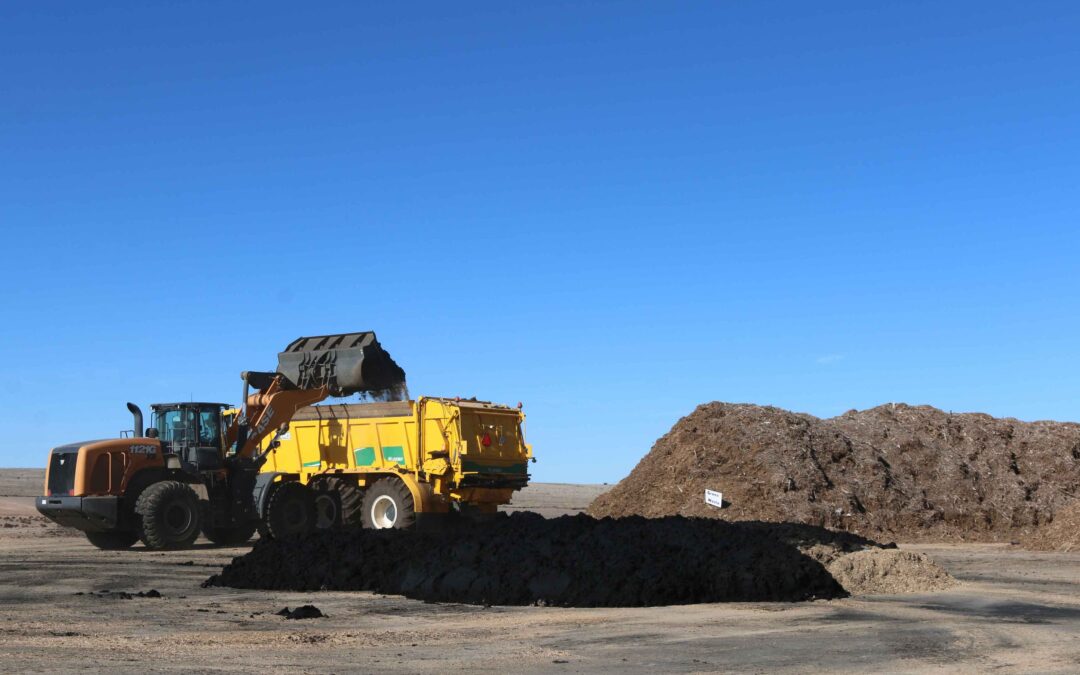
Compost del Rio Grande is responsible for reprocessing the biosolids that are a daily byproduct of the Southside Wastewater Reclamation Plant – about 360,000 pounds a day, or three truckloads three times a day are produced. While we were touring the facility, we got a chance to see three of these truckloads.
Biosolids are rich in organic matter, nitrogen, and trace minerals. The US Environmental Protection Agency (USEPA) encourages safe biosolids re-use. Properly managed, composting qualifies as a Process to further reduce pathogens under US EPA regulations, meaning that composted biosolids may be used in the production of crops for human consumption.
The facility accepts green waste from the community. They also will soon begin receiving food scraps from Intel and horse manure and bedding from New Mexico Expo.
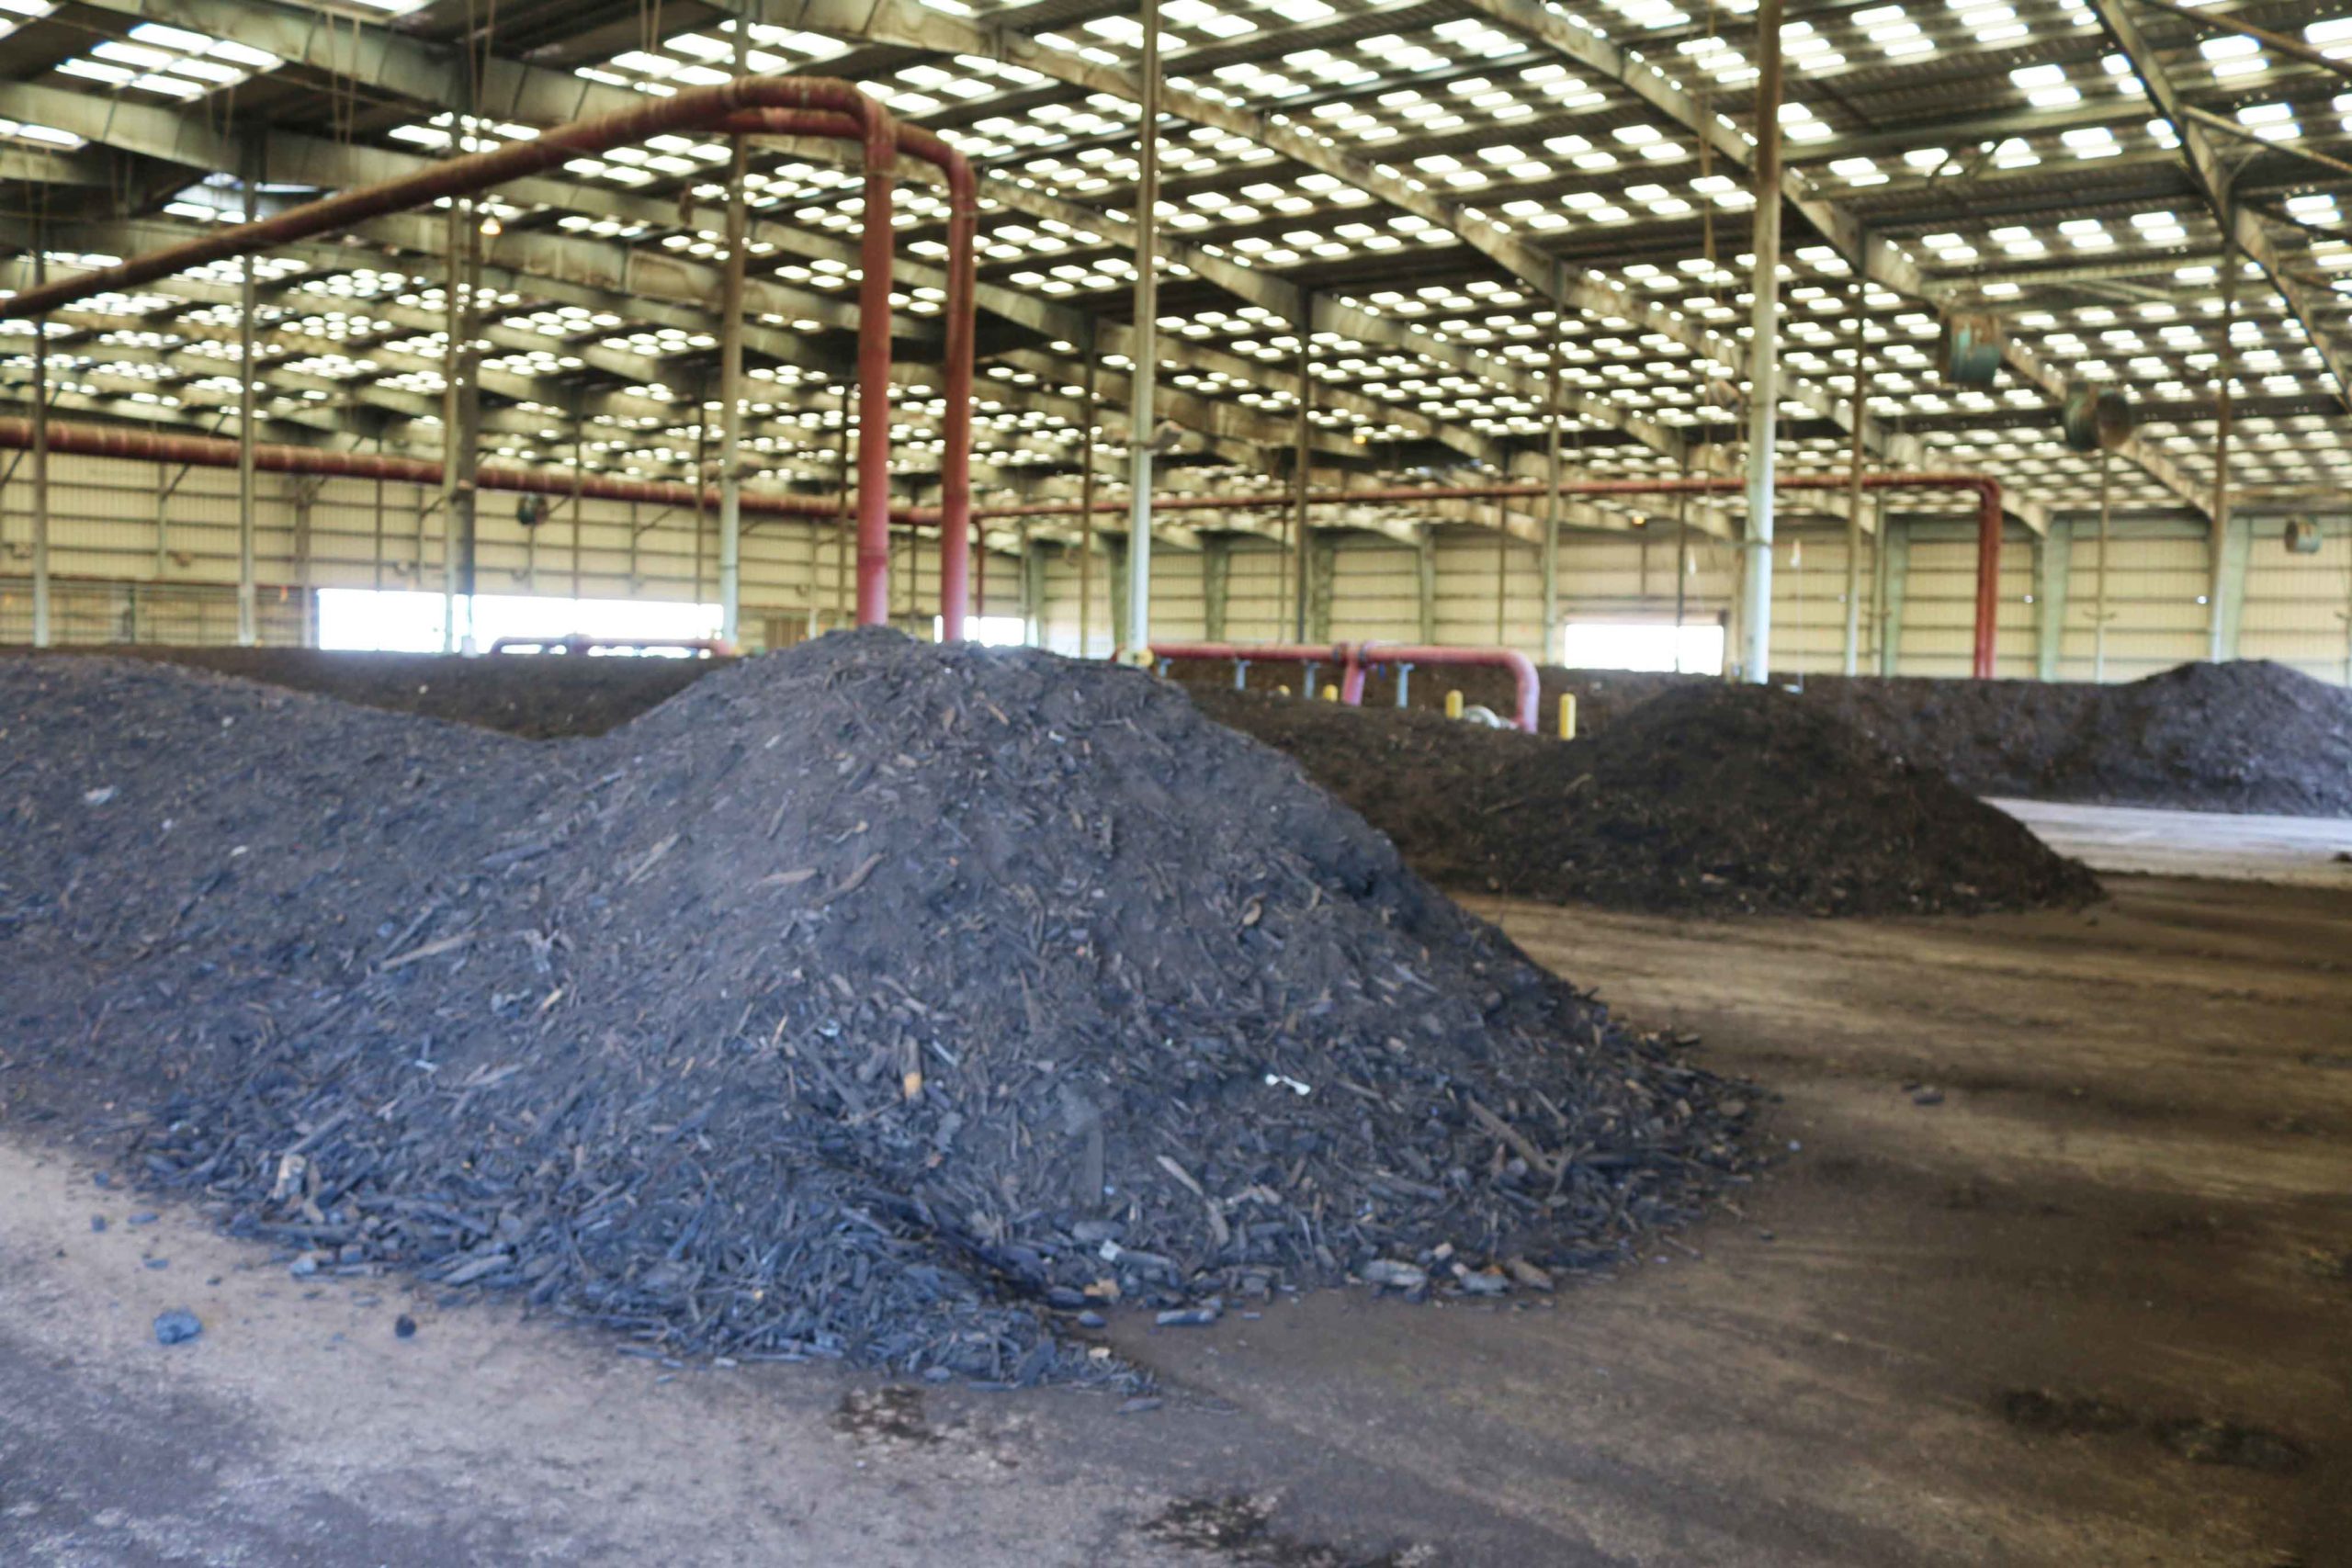
Certified biosolids compost of good quality is typically comprised of 25% animal stable bedding, 40% biosolids, 30% green waste (pulverized yard trimmings), and 5% wood chips. The facility can produce over 4,000 cubic yards of compost per month.
Compost del Rio Grande uses a recipe created specifically for the facility. The recipe consists not only of the materials that go into the product, but the process used to create the compost. This includes the temperature and length of time at which the materials cook and the number of times the compost is turned. After cooking for 8-10 weeks, the compost is ready.
The facility works closely with the New Mexico Department of Transportation (NMDOT). NMDOT uses large quantities of the Rio Grande Compost on highway reclamation projects around the state for erosion control, dust control, and vegetation growth.
Water Authority compost (“Compost Del Rio Grande”) is available to the general public for purchase. Click on the link for more information, or to find out how you can obtain compost for your outdoor projects. https://www.abcwua.org/customer-service-compost/
Author: Jill Brown, ASLA Landscape Architect and owner of My Landscape Coach in Interviewed: W. Shane Fitzgerald, SAF Superintendent, Albuquerque Bernalillo County Water Utility Authority.
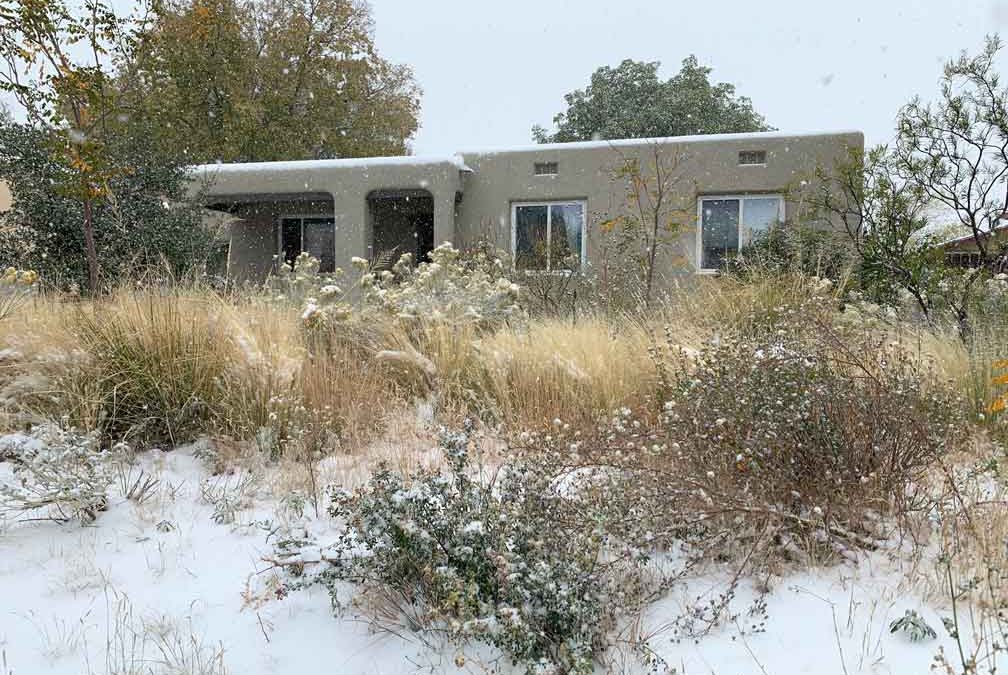
During this time of year, plants store most of their nutrients in the roots and find shelter in the ground. Also, this is the time of year to winterize your irrigation system.
To avoid damage to your irrigation system we recommend setting it to the OFF position. Since it is important to make sure your landscape stays healthy in the winter during times of drought, find a warm day once a month and deeply water your plants if we don’t get snow or rain. After watering, set your system to the OFF position again, and to avoid costly repairs, we recommend that homeowners take the following steps after watering:
1. Disconnect the water supply to your irrigation system.
2. If you manually water using a hose or if the irrigation system is attached to an outdoor spigot, you should disconnect it and cover your hose bib using a faucet cover.
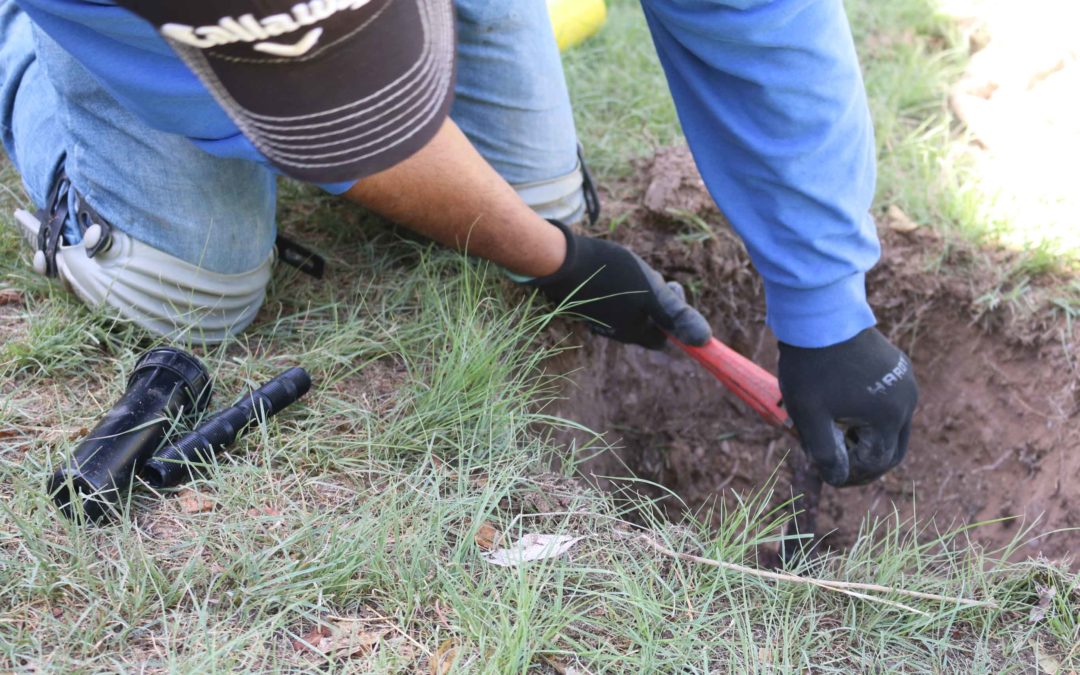
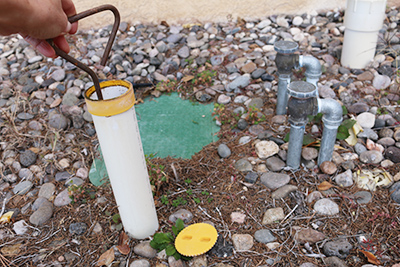
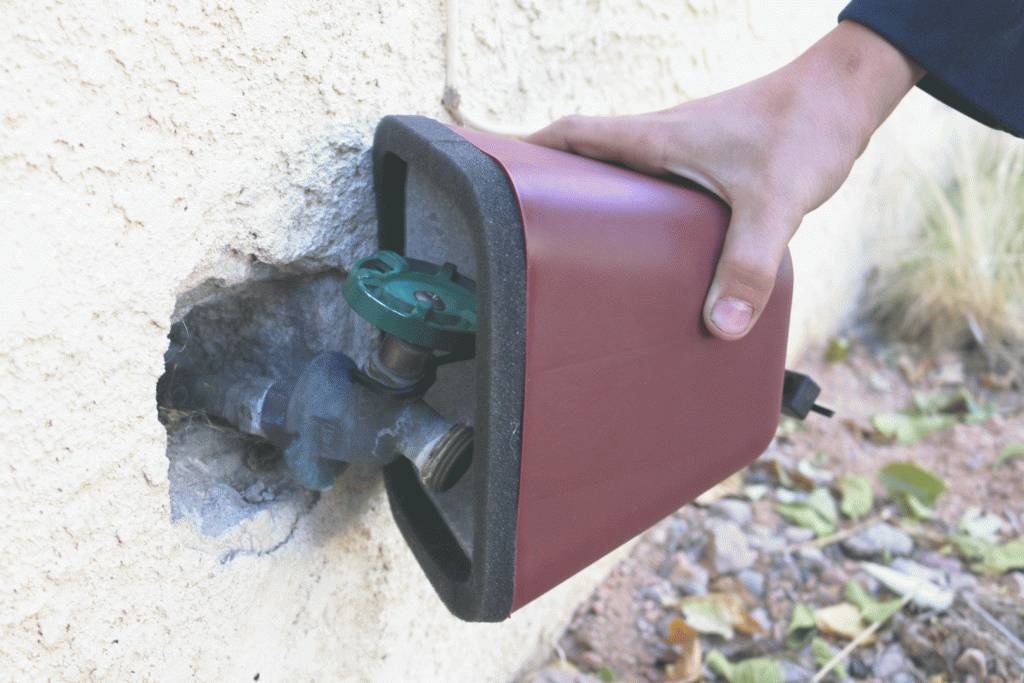
3. If you have a below-ground irrigation system, locate your shut-off valve (often hidden in a 3” PVC pipe; often with a white or yellow cap, as shown in the photo). Turn it to the right to shut it off. Be careful when turning so you do not break the valve.
4. Drain the water from all pipes, valves, and sprinkler heads. Learn more about protecting your irrigation system here see the article
How much should I water this winter season?
Water trees thoroughly once a month, to support your tree’s winter hardiness. Give individual trees 100-250 gallons.
Water turf only twice a month for about 5-7 minutes.
How can I keep my landscape healthy this winter season?
Mow your lawn to 2-2.5 inches. Grass left too tall over the winter can develop brown patches.
Aerating and dethatching your lawn will give it a chance to breathe before the grass goes completely dormant. This also provides relief from any compaction that has built up during the warmer months.
Rake or blow off the leaves that have fallen on your lawn. Leaves that are left on the lawn could become moldy, which invites disease.
Apply a thin layer of compost. Compost acts as a fertilizer adds moisture retention capacity and improves overall turf health.
Add mulch but keep it away from the trunk base of your trees. Mulch helps maintain the ground at a constant temperature and helps retain moisture.
Author: Carlos Bustos, Water Conservation Manager, Water Resources Division Have a question about the article? AskAnExpert@abcwua.org
Mulch is any material laid on the surface of the soil to improve growing conditions. Mulchinsulates plant roots from both heat and cold, reducing moisture loss from the soil by evaporation, feeding beneficial soil microorganisms that enhance plant growth, and improving soil health. Because organic mulches were once alive, they contain essential nutrients, minerals, and energy that nourish the soil ecosystem as they decompose. An important consideration when using mulches is to skip using landscape fabric, which prevents both the rich organic matter created by decomposition from working its way back into the soil and rainwater from soaking into the soil.
Below are the basic types of locally available organic mulches that we recommend. Remember to install to a depth of 3”-4” over bare dirt.
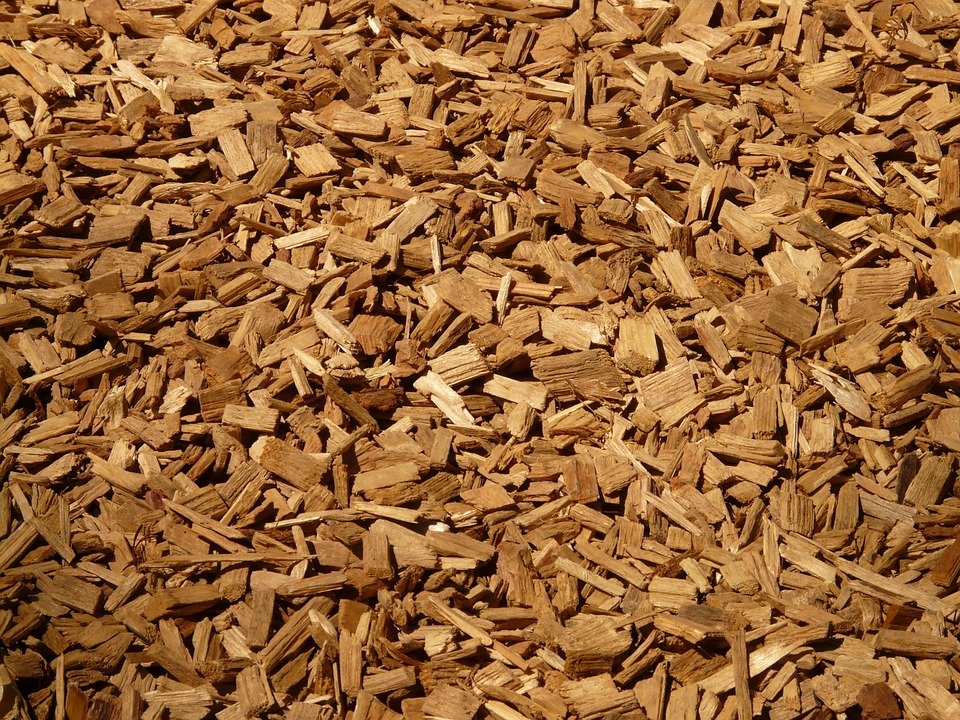
Wood chips: Wood chips are chipped pieces of trees. This is a long-lasting mulch that decomposes slowly over bare dirt, retains moisture, and prevents weeds. Most wood mulches available on the market are chipped flat and consistent in shape in size. These are great in areas that receive foot traffic as they compact down to a firm surface.
In areas of higher wind exposure or periodic inundation with water, use a shredded wood mulch that is more irregularly shaped and sized as the pieces will knit together better. This type of mulch can be recycled yard waste and tree trimmings as well as commercially available, locally processed wood products.
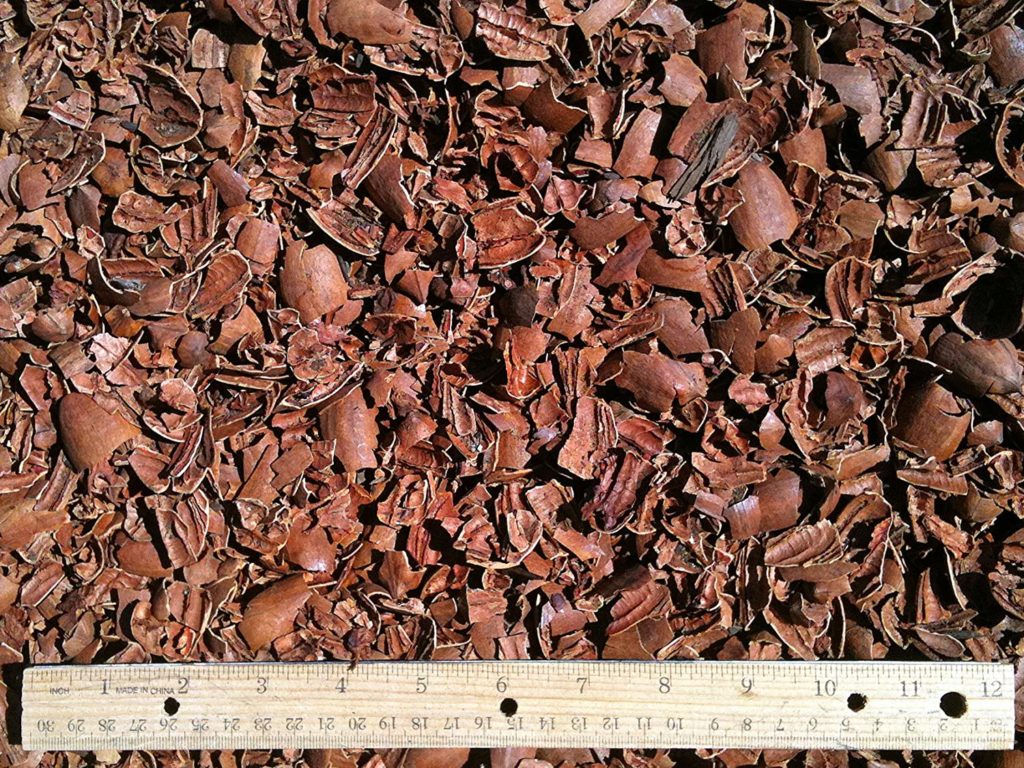
Pecan Shells: This long-lasting mulch has a nice color and good texture. It is very slow to break down into the soil. However, it attracts birds and rodents and blows in the wind unless partially cultivated into the soil. It also tends to mat together, creating a crust over the top of bare dirt.
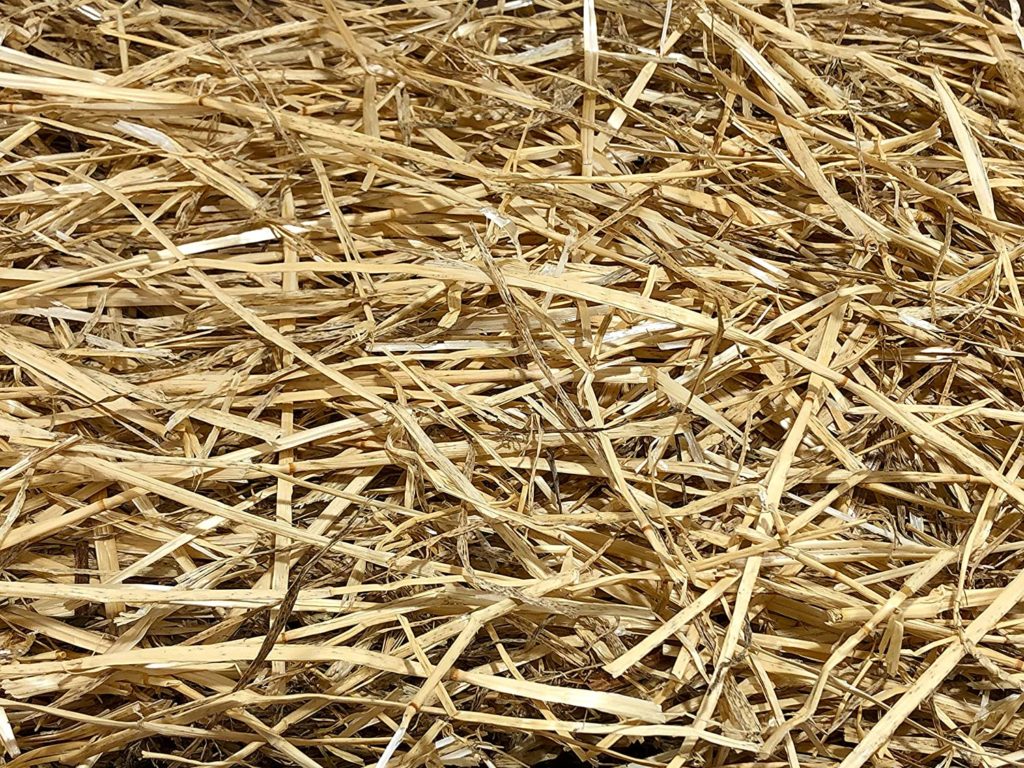
Straw: Straw breaks down quickly so it is most useful for mulching vegetable beds where it is renewed as crops are replanted. It is a good general mulch for winter protection and can be used on paths between vegetable rows. Keep in mind that it may carry weed seed.
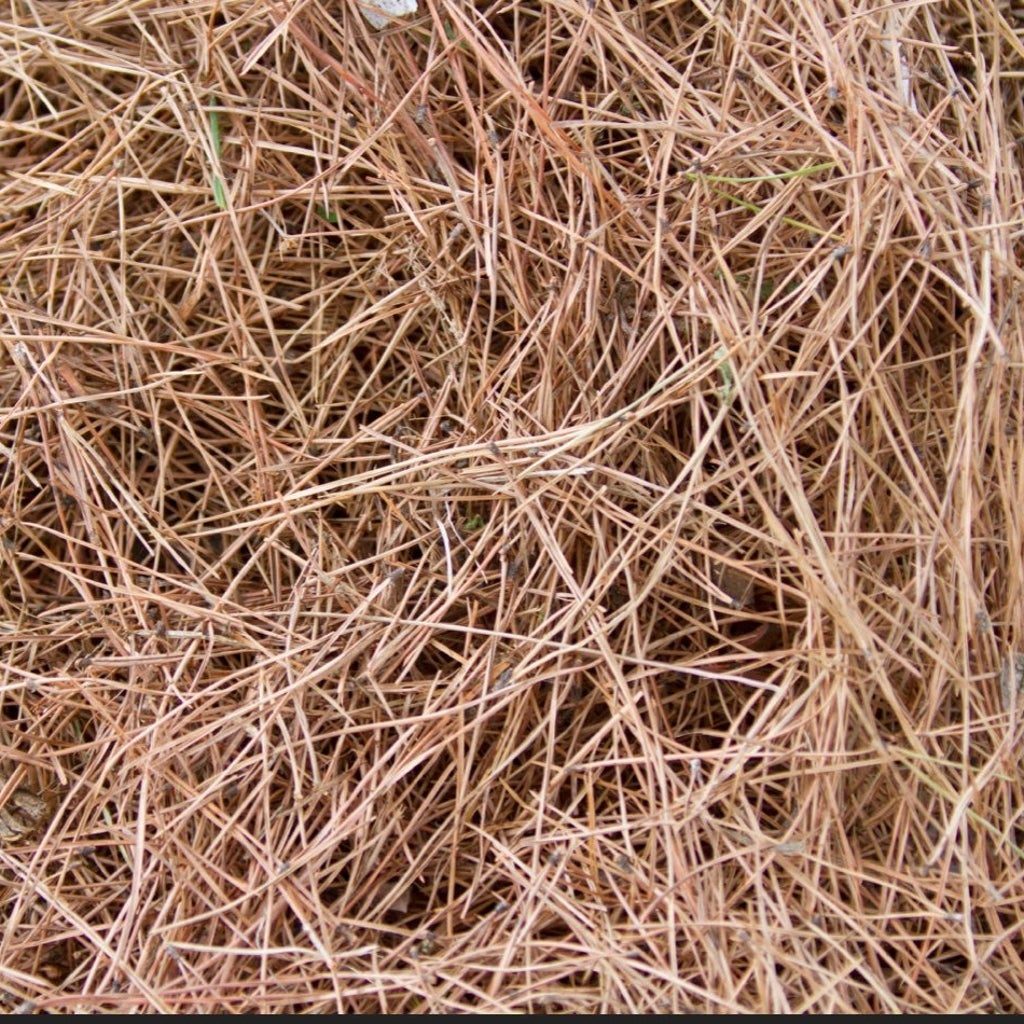
Pine Needles: Pine needles are a very good mulch. They are light, airy, and attractive but can be a fire hazard. These needles are safe to use as mulch around most plants, especially perennials, in your garden. Because pine needles contain high levels of resins, they repel water and decompose much more slowly than leaves from most deciduous trees. Because of their shape, they don’t become moist or compost rapidly. This makes them especially useful in areas where you will not be digging frequently. The fragrance of pine needles on sunny days is also an added benefit when they are used as garden mulch. No need to be concerned that pine needles are too acidic for use in our gardens. The added acidity, which happens slowly, is beneficial to our soils. They are very slow to compost, so they are often a better mulch than compostable material.
Other Mulches:
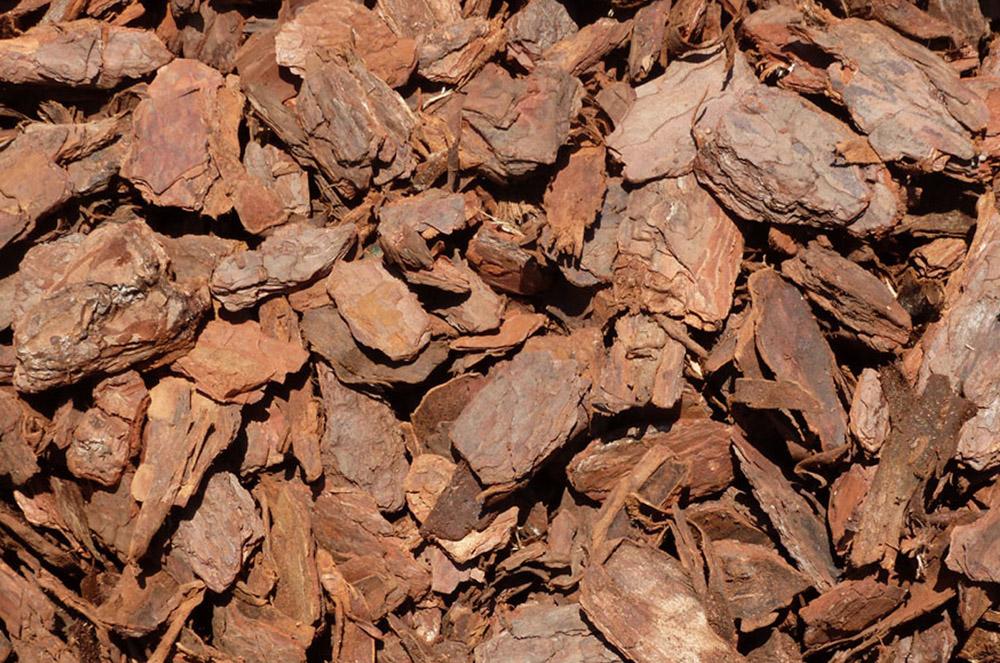
Bark: Large 2”-4” bark pieces are not recommended because they take too long to break down. The mulch made from bark tends to be lighter and can tend to migrate more easily. The bark is naturally water-resistant, so it has minimal value in feeding soil microorganisms and improving soil health.
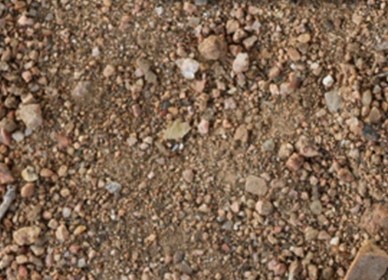
Crushed Stone, Crusher Fines, or Decomposed Granite: Crusher fines come in a variety of aggregate colors. They are recommended for use as pathways and patios or as mulch under plantings for heat-loving, desert-accent plants.
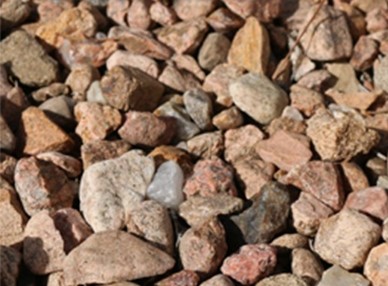
Gravel Rock and Cobble: While you see these used throughout the city in landscapes, they are best used to prevent erosion on steep slopes or in swale areas. They are difficult to maintain without regular weeding or pre-emergent treatments.
Useful tips: Mulch typically packs down over time. Use a 3”-4” layer of mulch, which is about one yard of mulch per 100 square feet. “Spend an hour deepening the organic mulch and save several hours of weeding.” By Judith Phillips