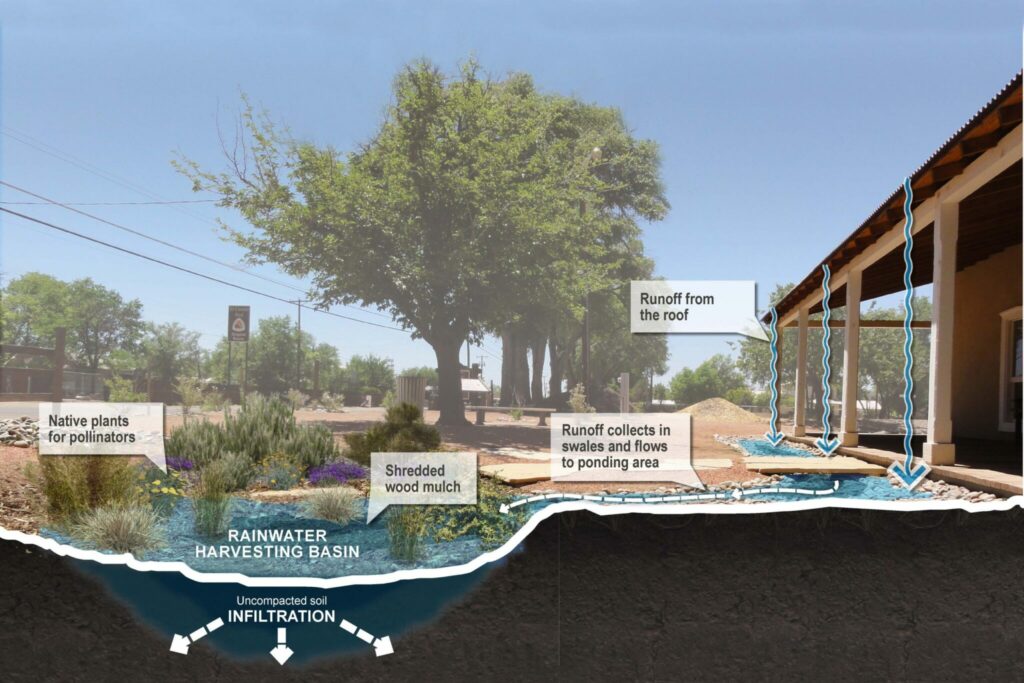
Passive rainwater harvesting allows you to collect rainwater runoff from roofs, patios and driveways as well as the overflow from rain barrels and cisterns (active rainwater harvesting sources) and direct it into the landscape. The water then gets stored in the soil where plants can take advantage of the moisture.
Several rainwater harvesting techniques can turn potential problems (i.e. erosion, flooding or excess moisture near foundations) into water for your plants. Rainwater contains extra nutrients not always found in potable water, so the plants receive additional benefits. Passive rainwater harvesting also helps filter out pollutants, increase infiltration to the aquifer and provide healthier ecosystem habitat.
Start by calculating the amount of water that flows from your potential runoff sources. For every 1,000 square feet of hard surface, 1 inch of rain will generate approximately 600 gallons of water. It’s easy to see why rain barrels or cisterns can quickly fill during medium to larger rain events, so a passive collection system for overflow is always a good idea. You want to make sure whatever system you create will be able to handle a
good-sized rain event (refer to the link above). It’s very important to create a directed overflow so that when there is a large rainstorm, the excess water will flow into a basin or other feature onsite or into the street (if your capacity is limited) without creating erosion.
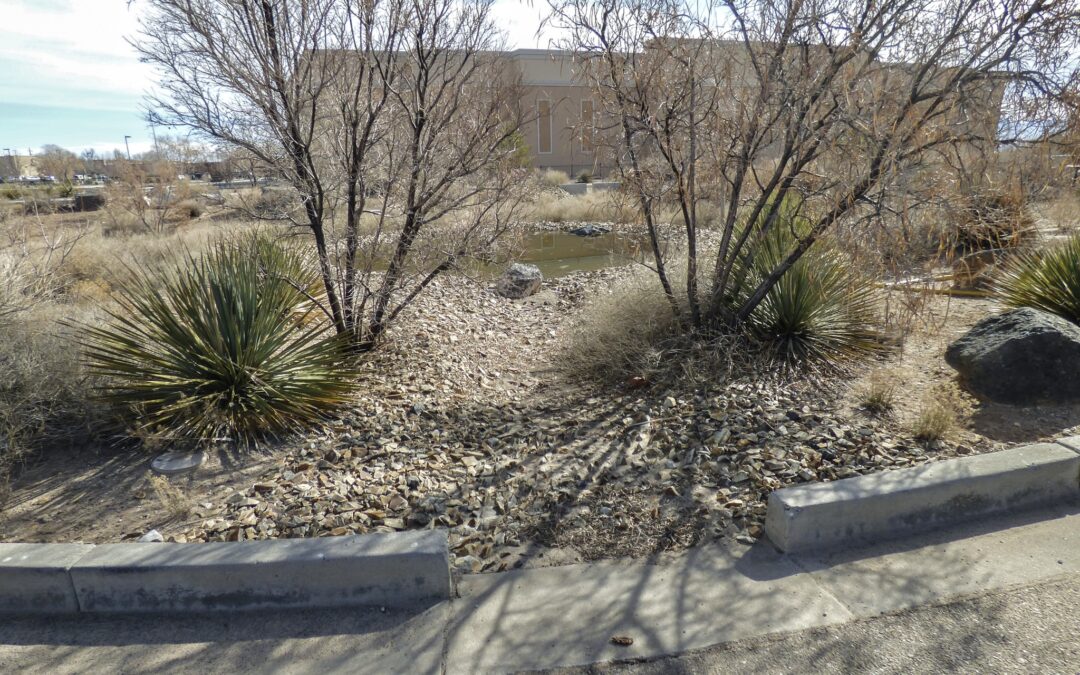
There are many different techniques, and some can be used together to enhance the benefits. These techniques include rain gardens, swales, basins, soil sponges, curb cuts, French drains and pumice wicks, check dams and gabions. Study your site and these techniques to determine the best option for your garden. Watch your site during a rain to see where the runoff comes from and where it goes. You may want to take advantage of existing patterns.
Rain gardens are depressions to catch surface runoff from slopes and are best planted with native plants that can take occasional flooding.
Swales are sloped depressions that convey water into basins or rain gardens from canales, downspouts or other drains. Make sure the slopes consistently move the water downhill and are large enough to not get overwhelmed. Swales are usually lined with large gravel or cobble to prevent erosion. If you have extra material onsite, this is a great recycling solution. Make sure that swales are designed to catch the slow drip of a light rain as well as the powerful flow of a heavy downpour.
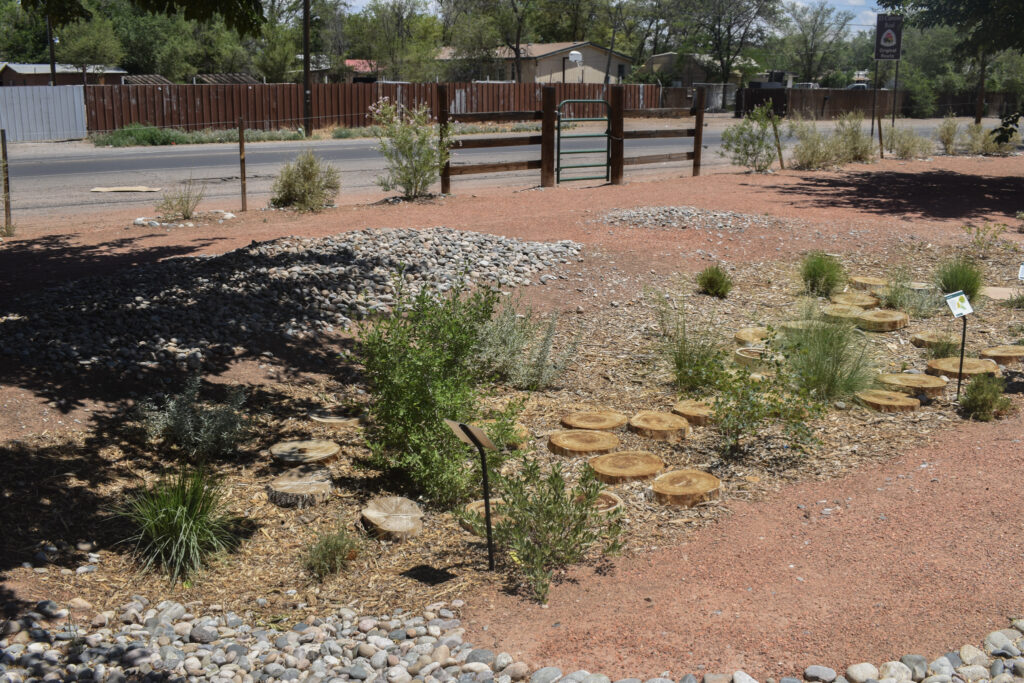
Basins are catchment ponds designed to handle large rain events and provide a great place to plant trees and larger shrubs or heavy water use plants that can benefit from the extra water. Calculating the size to match your runoff is vital here. The area where the runoff from your swale(s) enters the basin will need gravel to dissipate the erosive forces. Shredded wood mulch works best in the bottom of the basin. The capacity of the basin and the health of the plants can be further enhanced by installing soil sponges (see below) in the low points. In larger yards, you may want to create a series of basins to increase capacity and opportunities for plantings.
Soil sponges are post holes dug and filled with a soil mix containing compost to increase infiltration and introduce organic matter and beneficial microbes to the soil sponge and surrounding soil. These also provide an avenue for plant roots to quickly grow deeper, improving health and drought tolerance.
Curb cuts are made with a concrete saw to channel runoff into a basin. This can be done on your own property, but permission is needed to cut into a public curb to direct excess water into the street.
French drains and pumice wicks are progressively deeper trenches lined with geotextile fabric (to prevent silting up) and filled with gravel or pumice. These are best used when you have existing trees or large shrubs and the base of those plants is on the same level or higher than where your runoff originates. Aim them directly at the tree or shrub to minimize root damage while still providing additional water to the plants’ root zone. The open space in pumice provides additional water capacity.
Check dams and gabions are small dams used in areas where existing runoff has started to erode and cut deeply into the soil. These small dams slow down the water so it infiltrates and lessens erosion. Gabions are a type of check dam constructed of riprap (oversize gravel/cobble) held together with a wire basket. Generally, both have an area of cobble below to prevent erosion.
Passive rainwater harvesting is a great way to lessen your use of potable water, reduce erosion and provide a supplemental water source for your garden. Remember, you still will need to water your plants (through irrigation or hand watering) to establish them and, in most cases, to maintain their health.
Homeowners are constantly looking for that perfect plant for that exact spot. Unfortunately, there isn’t a simple answer. Landscape designers know there are so many factors that go into placing the right plant in the right place. Sun-loving plants should be planted in sunny spaces. Shade-loving plants should be placed under trees or next to walls where they’ll be protected from our intense New Mexico sun. Be sure the area is big enough to accommodate the plant when it reaches its full mature size, and remember to place plants with similar water needs together.
One of the most frequent requests is for a year-round green plant that hides and blocks an ugly view. For a narrow space (4’ and smaller) next to a wall or a neighbor’s driveway, check out the Skyrocket juniper. It’s a blue-green, narrow columnar tree growing 15 feet tall and only four feet wide, making it the narrowest of the juniper trees. A hedge of these works great in a small narrow space where you need some height. If your space is a little wider and you want some variety, you could add Texas ranger (also known as Texas sage) and ornamental grasses.
Whichita Juniper in narrow space screening the wall.
For those two-feet-wide spaces where you don’t have the room for a wide plant but you need lots of height, you’ll want to choose vines. For sun and light shade areas choose Lady Banks roses or desert coral honeysuckle. You’ll want to keep them in check by training them up a trellis until you get the desired coverage in the very narrow space.
Lady Banks Rose Vine in narrow space.
When you have a 5’- 6’ wide area — like along a driveway or between property lines — try planting curl-leaf mountain mahogany, evergreen, narrow. In our area you’ll see it used along a driveway to create privacy between neighbors. You can vary the space by interplanting it with New Mexico olive, which has a similar shape and size, or ornamental grasses like giant sacaton and muhlenbergia rigens (deer grass), if you want more visual contrast. To add some blue-green to the mix, bring in an Artemisia species like prairie sage as ground cover.
Mountain Mahogany along driveway trained to be a natural screen between houses.
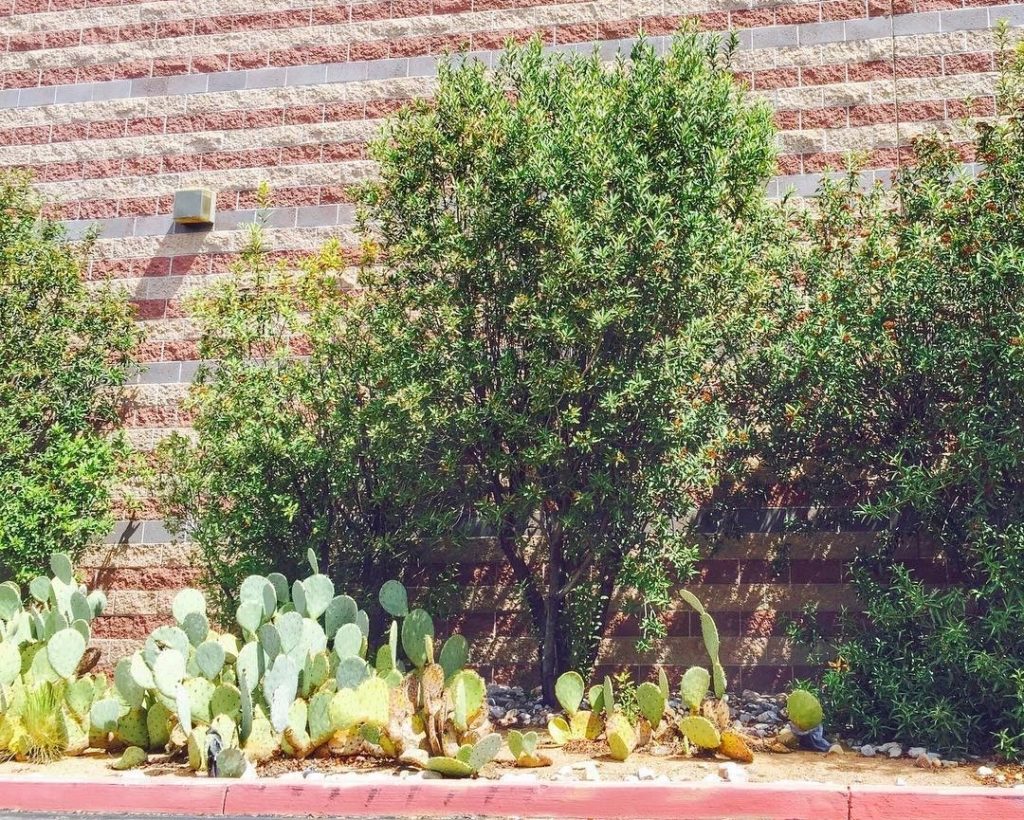
Another tried and true combination is the Arizona rosewood and prickly pear. They are beautiful together, plus they require little to no water after established.
Arizona Rosewood and Prickly Pear screening a wall.
Author: Jill Brown, ASLA, is a Landscape Architect and owner of My Landscape Coach in Albuquerque, NM. Have a question about the article? AskAnExpert@abcwua.org
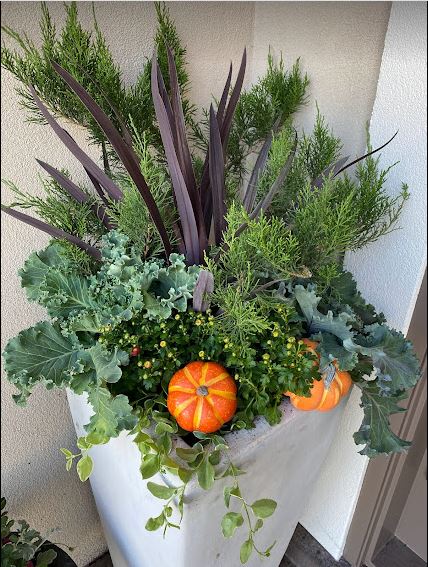
Containers are an easy way to add a splash of color to your garden, porch, balcony or patio, without ever having to dig a hole in our hard New Mexico soil. While you could drop pansies or geraniums in a pot and consider it complete, you could also plant a truly stunning container garden full of color, texture and fragrance. The right combination of plants arranged properly in a planter can be magical. After that, you only need to keep things watered and fertilized as you enjoy the colorful design all season long.
1. Choose the Right Container
Containers have their own unique characteristics to consider, including weight, appearance and sensitivity to weather changes. Also, consider your budget, space and style when selecting them. Keep in mind that the larger the size, the less you'll need to water. But whatever you choose, make sure your containers have good drainage.
2. Select a Color Theme and Plant Combinations
Starting with a color theme for your container garden can help with plant selection. When combining plants in your containers, it’s important to make sure they all have the same light requirements and watering needs. A good rule of thumb is to plant in odd numbers and combine three types of plants — thrillers, fillers, and spillers — in each container to add interest and balance to your design.
“Thriller” plants are the centerpiece of your design. They add height and a bold vertical element. Options include plants chosen for foliage, ornamental grasses or other upright plants. In larger containers, small shrubs or trees, topiaries, spirals and other vertical selections can be used. Thrillers typically go near the center of a container, but they can also be put toward the back of the planter, depending on its final location.
“Filler” plants tend to be more rounded and make the container look full. These are generally placed in front of or around your selected thriller. In a narrow, long container like a window box, fillers are placed halfway between the edge of the container and the thrillers. Violas, pansies, dusty miller, ornamental kale/cabbage, ornamental peppers, geraniums and mums are just a few of the many options for autumn fillers.
“Spiller” plants literally spill out of a container. If your container garden is going to be visible from all sides, be sure to place spillers all the way around. Some favorite autumn spillers are licorice plant (Helichrysum), English ivy, Dichondra 'Silver Falls', ivy geranium and perennial vinca (minor or major), also called periwinkle. I am especially fond of some of the brighter vinca varieties like Illumination or Wojo’s Gem.
3. Fill the Container with a Good Potting Mix
Once you've selected plants and a container, it's time to get started! Fill your container about two-thirds full with a good quality potting mix. If you have a really large planter and would like to use less potting mix, you can use empty water bottles or smaller empty nursery pots or containers turned upside down to take up some of the space in the bottom of the container. Fill around them with potting mix until your container is two-thirds full.
4. Arrange Plants in Your Container
When you're ready to add plants, remove the plants from their nursery pots, gently loosening the root ball with your fingers. Place them in your container and add soil, stopping about two inches from the top of the container to leave enough space for watering.
5. Water Your Plants
Water your container garden thoroughly to help the soil settle. After watering, add more soil if needed to insure good root coverage. Check your containers every 2-3 days, and when the top two inches are dry, it’s time to water again. Don’t forget container plantings may need water twice a day when it’s hot, especially if it’s also windy.
Don't be afraid to add different types of plants, such as annuals, perennials, herbs, cold-hardy vegetables, and even small shrubs, to the same container. The important thing is to select plants that require the same growing conditions. I really like using dwarf Alberta spruce or lemon cypress as the vertical element, surrounded by licorice plants, pansies/violas, dusty miller and ornamental cabbages. I will occasionally add artificial gourds, pumpkins and other décor to make them even more festive.
With a little planning and creativity, you can put together stunning container designs that can be enjoyed all season long.
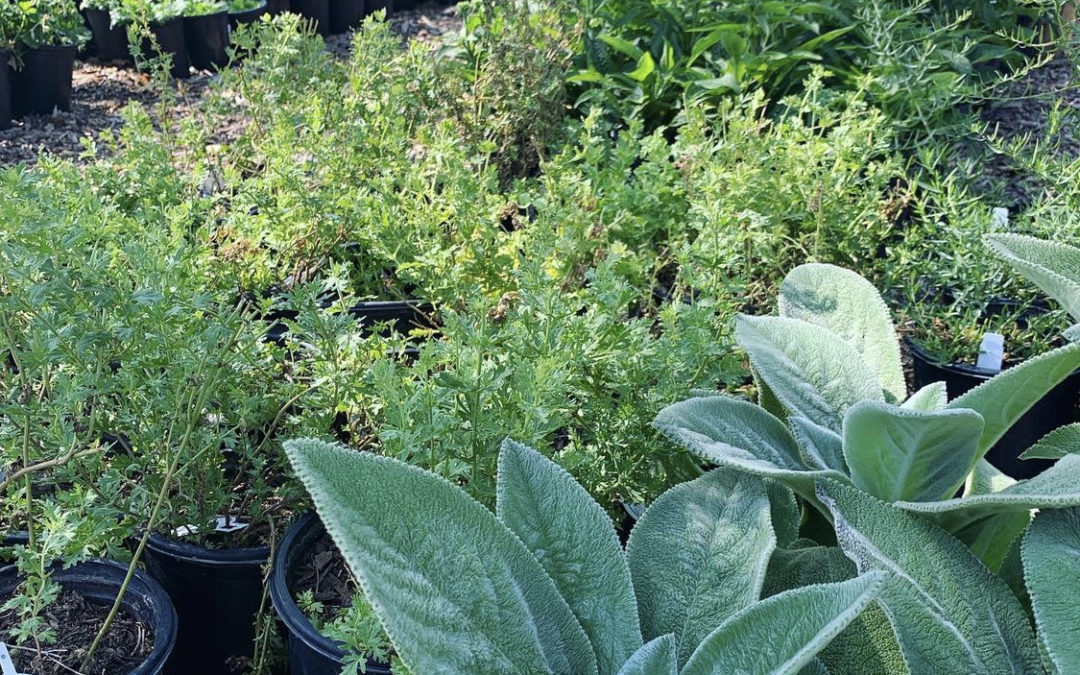
Fall can be a great time to plant, especially if you are planting higher elevation and temperate climate plants that are adapted to cooler, more humid growing conditions. In the fall, the soil is still warm enough to encourage roots to develop so watering properly makes a big difference on preparing them to survive in the winter season. What to plant? Most conifers, shade trees, cool season grass and moisture-loving fruit and ornamental trees, such as crabapples, apples and pears, are a great selection for planting in this autumn.
What not to plant this fall? The answer is plants from desert ecosystems like southern New Mexico and the Mediterranean natives. Their newly planted roots are less able to survive our winter cold. The same is true for perennial wildflowers and warm season grasses. These should be planted in the spring through early August. Succulents are another group of plants that thrive after settling into the garden during the warmer part of the growing season, so wait until the spring to plant them.
Knowing what to plant at this time of year will give you that edge you need to grow healthy plants!
Author: Judith Phillips, owner of Design Oasis, landscape designer, and garden writer with 30 years of experience designing arid-adapted and native gardens in the high desert. Photography:Plants of the Southwest. Have a question about the article? AskAnExpert@abcwua.org
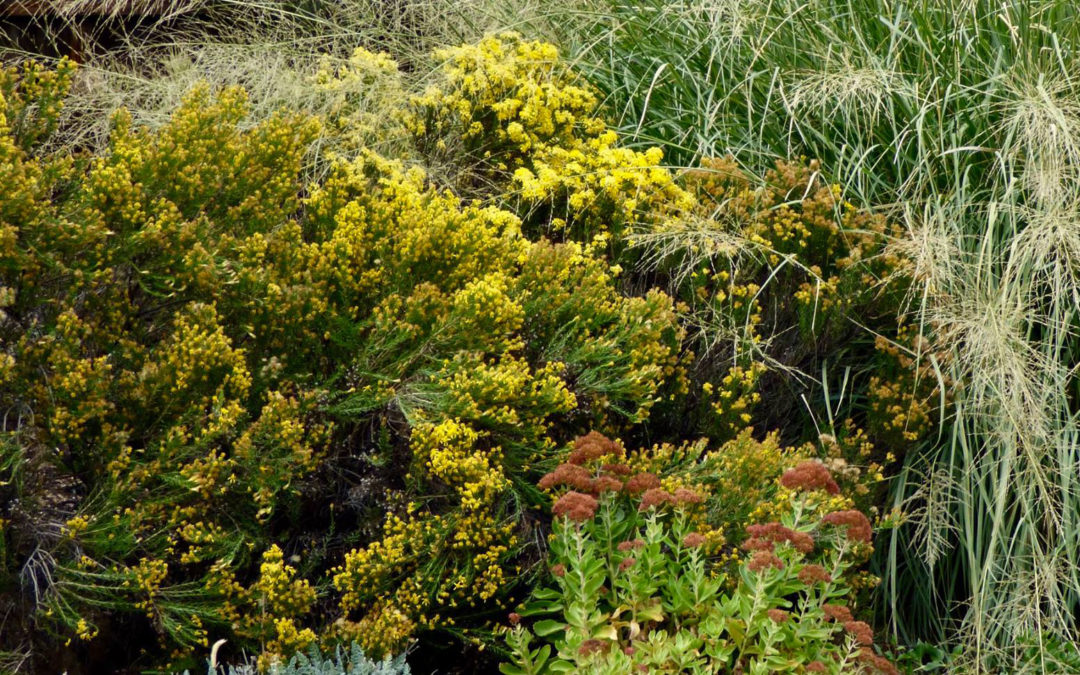
This evergreen shrub is a win-win in our high desert gardens. It has a lovely dark green color year-round, and in the fall, it has beautiful yellow blooms to brighten up the garden. There is no pruning needed due to its predictable rounded shape.
This bunchgrass is a warm season native grass used in reclamation plantings for erosion control in rural landscapes. It is recommended to seed with other prairie seed mixes because it is slow to establish. Once established it can withstand extreme temperature variations, drought and heavy traffic.