Albuquerque ranks third, after New Orleans and Houston, among cities with tree loss. Our trees are dying because they aren’t being watered properly or at all. How should we water established and mature trees?
To address this problem a landscape architect and a professional landscaper put together a Tree Watering Irrigation Kit that allows you to water established trees more deeply and consistently.
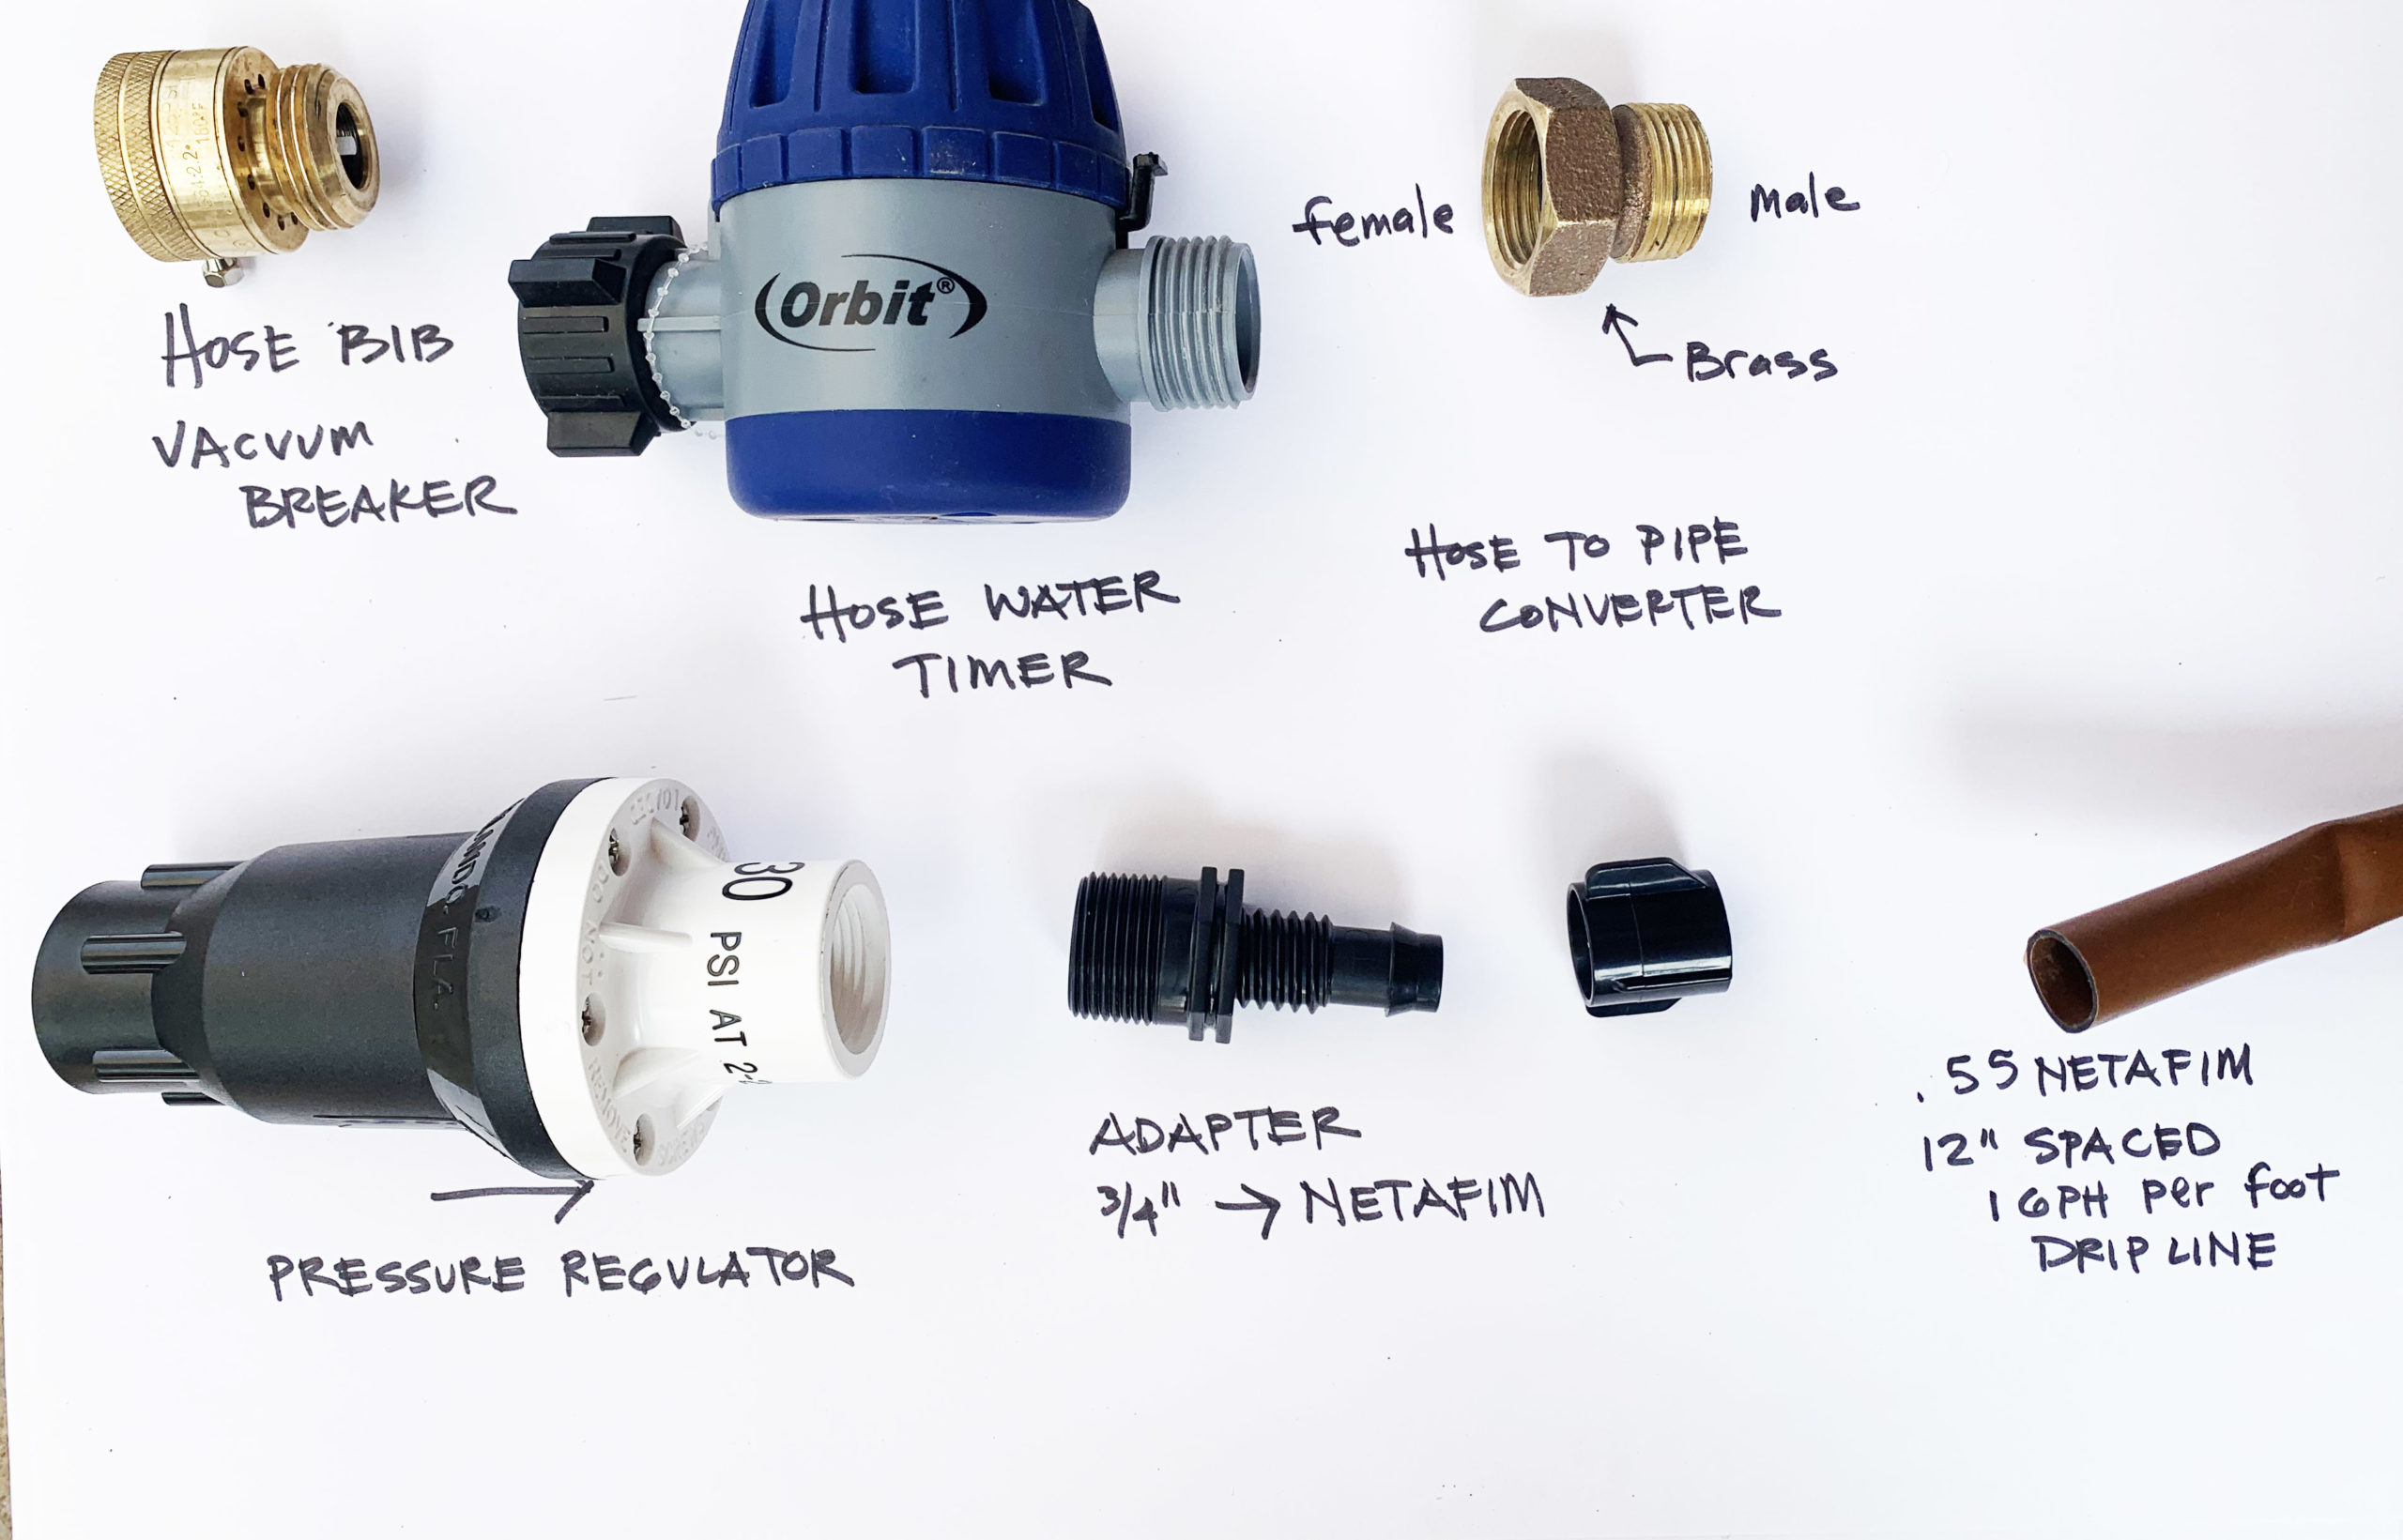
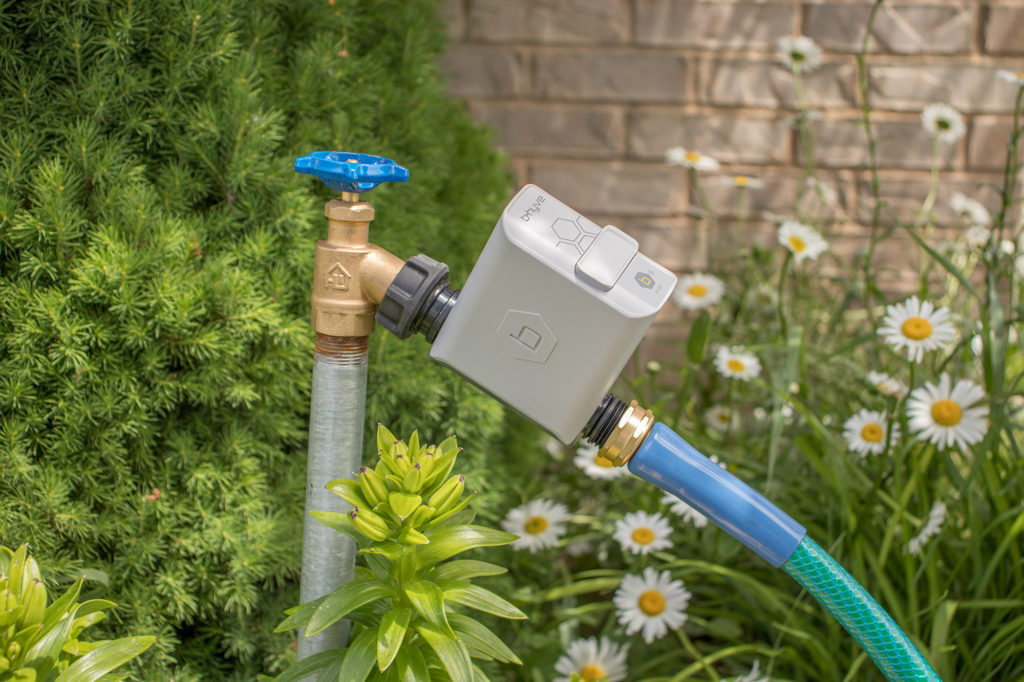
It’s easy for homeowners to assemble a similar kit that attaches to a hose spigot using the parts below, from left to right.
Startwith a hose bib vacuum breaker, which prevents water from siphoning back into the potable water system. Next in line is a hose water timer that works like a kitchen timer, opening and closing a valve at a pre-set time. Instead of a hose water timer, consider using a WaterSense Smart Controller (a rebate is available for this controller). Attach a female-to-male hose swivel converter to the timer or controller. This converter allows you to pop on a pressure regulator that drops our city’s water pressure down to 30psi, which is the best pressure for a drip system. After the pressure regulator, attach an adapter that connects to the ½” inline dripline. The inline dripline comes with 1gph emitters that are spaced every twelve inches. This allows the water to drip consistently and efficiently directly into the ground, deeply soaking the roots of the tree.
Once you have your system installed, a good rule of thumb is to set up a 45-minute run time. To know how often to water, follow the Seasonal Watering Recommendations .
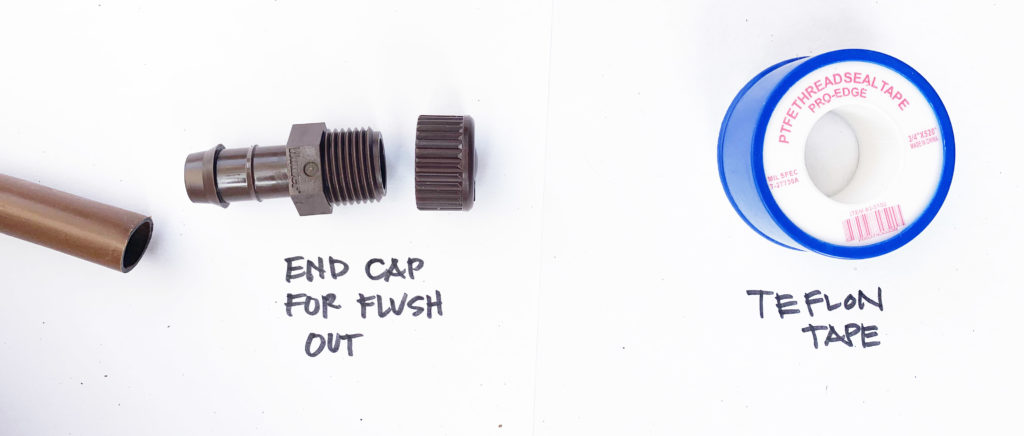
The end cap (pictured below) is installed at the end of the inline drip tubing. This can be opened to empty the line of water and prevent freezing.
Do you want to learn how to harvest rainwater to support a beautiful, regionally adapted, low -water-use landscape in your yard? A new video series launched in June provides instruction on how to design, install, and maintain residential-scale, passive rainwater harvesting features. In passive water harvesting, rainwater is conveyed directly to a landscaped area and infiltrated in the soil.
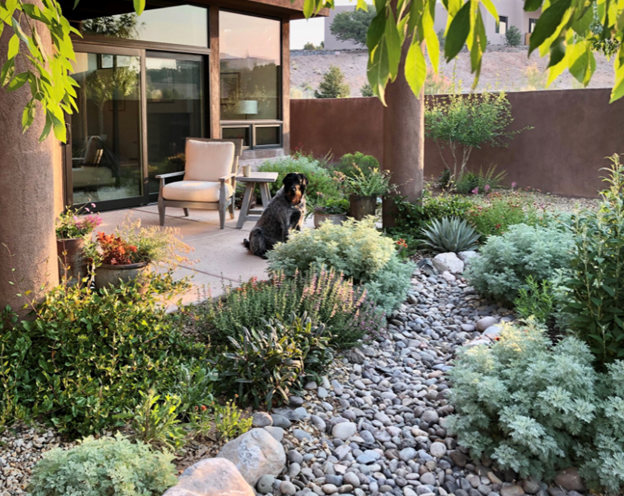
Landscapes that incorporate rainwater harvesting and native/drought-tolerant plants require little supplemental irrigation. Rainwater harvesting provides the deep watering that large plants like trees and shrubs need in our hot and dry climate. Capturing and infiltrating rainwater also reduces runoff that carries pollutants to the Rio Grande River.
In this series, you will learn how to construct some of the most common passive rainwater harvesting features in residential applications – basins, swales and soil sponges. The training addresses site selection, sizing basins, grading swales, installing soil sponges for enhanced infiltration and selecting plants. It is presented by four local experts on rainwater harvesting and arid-adapted gardens: Jim Brooks, Tess Houle, Judith Phillips, and Hunter Ten Broeck.
The video series was developed through a collaboration between Bernalillo County, Ciudad Soil and Water Conservation District, and the Arid LID Coalition, and included the installation of a Rainwater Harvesting Learning Landscape at the Gutiérrez-Hubbell House History and Cultural Center. Please visit the Rainwater Harvesting Learning Landscape in person to see an example of a rainwater harvesting feature designed for our arid climate.
Did you know that half of Albuquerque homeowners do not have an irrigation system? We’ve been talking to hundreds of homeowners, and it turns out that the reason they haven’t installed one in their yard is they think an irrigation system for a typical lot (1/8 acre or 10,000 sf) will cost $5,000 or more. The good news is this is a myth! The cost for one fully installed irrigation drip system plus a controller/timer is between $1,350 and $1,900. Prices will vary depending on the size of your yard, the complexity of your water connection and if you want to add additional valves for irrigating plants with different watering needs, such as existing mature trees, vegetable beds, container plants or a turf grass lawn.
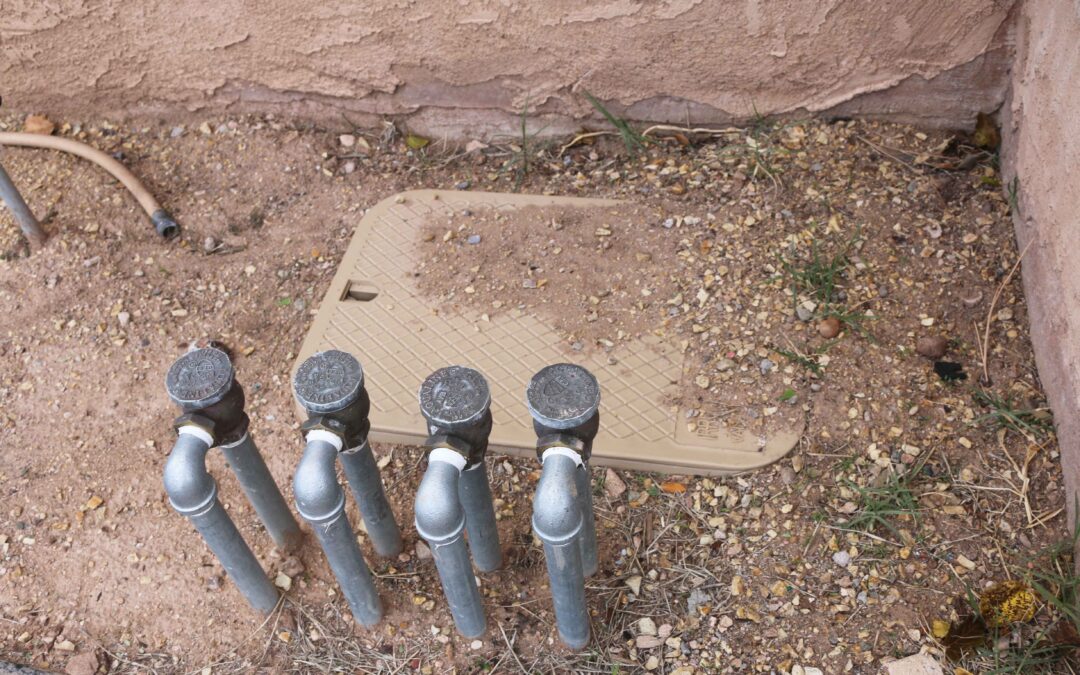
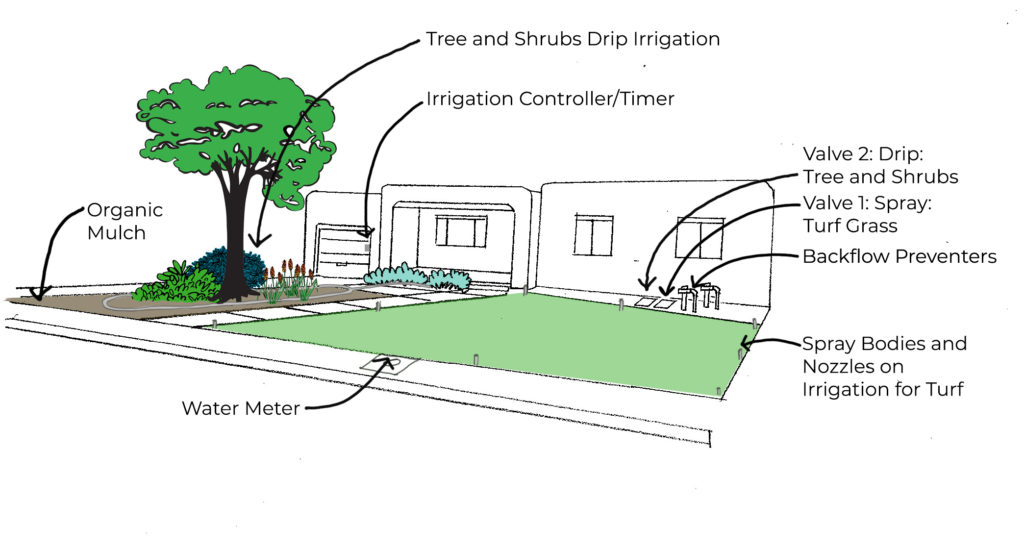
Here is what a typical irrigation system looks like. Do any of these elements look familiar to you? Perhaps you have a residential backflow preventer in your own yard and didn’t realize it or you thought it didn’t work because you’ve turned on the timer in your garage and nothing happens.
Many homes already have one or a couple of residential backflow preventers in the yard that are no longer in use. A local irrigation contractor usually can get those back up and running and include a new stub out for drip irrigation.
For those homes that don’t have any existing irrigation remnants, you’ll need to start from the beginning. One drip irrigation system is generally all you will need in a desert-friendly xeriscape for a 1/8 acre or smaller yard. Drip irrigation is the recommended method of delivering water to all your plants and trees (but not turf grasses).
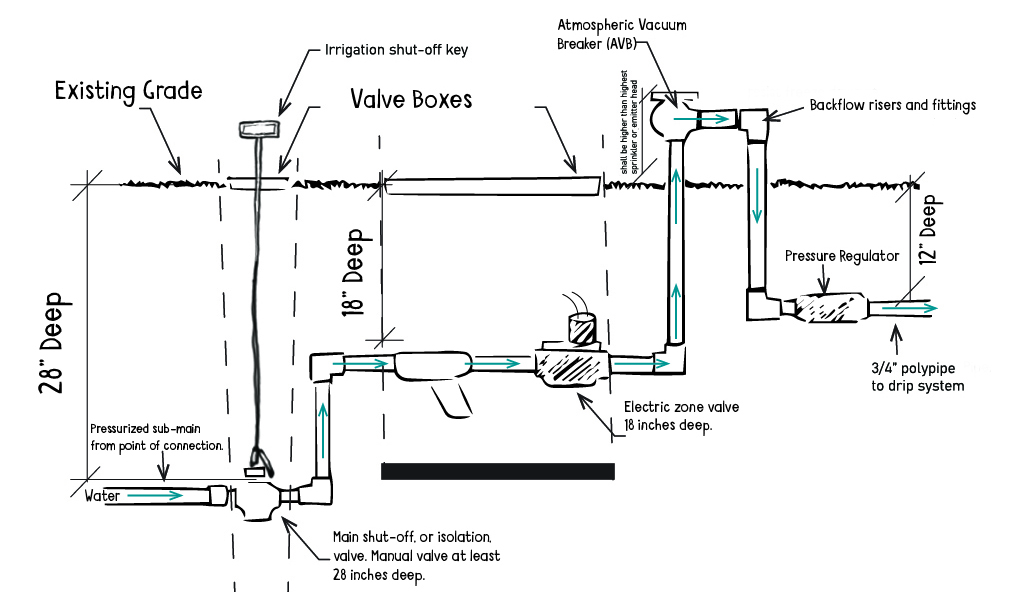
You’ll want to install one backflow preventer with one valve to run the drip system in the yard. A ¾” distribution polyline is connected to the valve. The polyline, which winds all around the yard, has ¼” spaghetti tubing connected to it so water gets directly to the plants. Due to our typically high water pressure, most drip irrigation systems require a pressure regulator to slow the water pressure, thereby reducing the chance of the drip emitters getting popped off the line.
Here is a breakdown of the costs:
One automatic residential backflow preventer with valve and pressure regulator with stub out to future dripline. $600-800 installed (includes parts and labor).
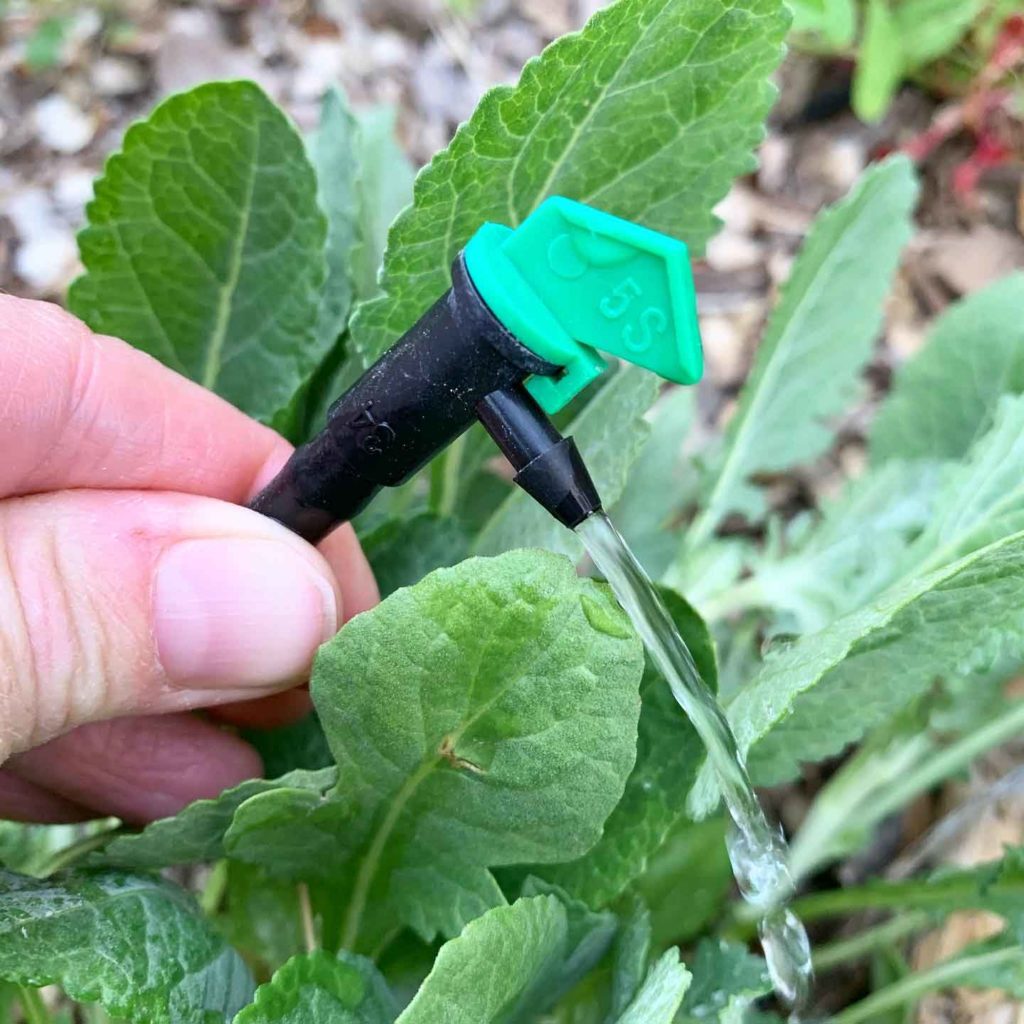
¾” dripline polyline connects to the stub out of a new valve or from an existing one and winds around the yard. Add ¼” spaghetti tube with drip flag emitters on the end to water each plant in your yard. $400-600 installed (includes parts and labor).
One automatic irrigation controller/timer (Smart Controller that connects to the Internet and your smartphone). $350-$500 (includes parts and labor) (rebates available)
A regular controller costs $350 (includes parts and labor).
Before hiring an irrigation designer and/or contractor, it’s advisable to ask them specific questions so you can make wise choices about design options and the kind of equipment you need.Click on this link to access a helpful guide put together by the Irrigation Association as developed by Cal Poly, San Luis Obispo. Adding an irrigation system (especially a drip system) means watering your plants using the least amount of water to provide optimal health. It is making sure that every drop of water you use goes to where it is needed and can be used most effectively by your plants. An irrigation system conserves water, produces a healthier landscape, saves time and is not as costly as you think!
Author: Jill Brown, ASLA. Landscape Architect and Owner of My Landscape Coach The prices quoted here are based on my experience as a landscape professional in the Albuquerque market. Prices will vary, of course, on size, complexity, and availability. Have a question about the article? [email protected]
June, July and August are the hottest months for Albuquerque. Our current drought intensifies the heat stress of plants even more because there is lower soil moisture content and higher than normal ET from plants (plants losing more water due to EvapoTranspiration). Regional plants have evolved to adapt to this type of stress, but they still need water. Don’t go overboard! Plants growing in soil that is too wet can be negatively affected, leading to the death of roots. Stunted slow growth and yellowing leaves could be a symptom of overwatering.
Follow these tips to assure your plant’s success and conserve water.
Tips for Watering Your Plants Using a Hose and Nozzle:
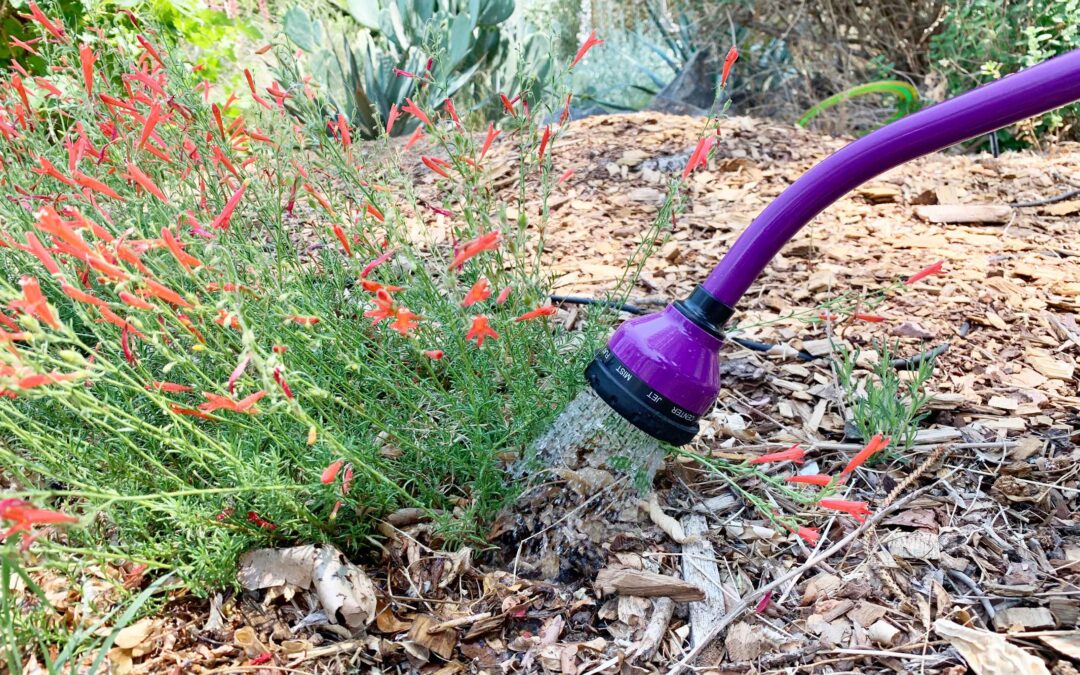
Make sure your nozzle or watering wand has an on/off switch that does not leak. This allows you to completely turn off the water at the hose end when you are not using it.
Make sure the wand or nozzle is set to “shower” or a setting that imitates rainfall.
To make sure you don’t have too much pressure, grab a five-gallon bucket and adjust your hose pressure with the nozzle or wand attached. Fill it up ¾ of the way in one minute. Set a timer (timers and stopwatches on your phone are great for this) so you know how long that minute is.
Once you know the correct pressure, we recommend writing down how many turns of the handle you did and use that as your reference. Or, using fingernail polish, put a dot on your faucet handle that also lines up with a dot on the faucet stem so you have a visual reminder.
If you are watering just a few plants located near each other, you will want to build a well around the plants. This makes sure the water stays where you want it to be most effective and avoids water waste.
Wetting plant leaves or the trunk base of a tree is not an efficient way to water and may damage the health of some plants. Instead, water around the plant, aiming at the root growing area.
If you are ready to invest in a more efficient irrigation system instead of dragging your hose around the yard, a Water Sense Smart hose timer is the way to go.
A Smart timer system connected to a professional landscape dripline can water your yard at a set time and for a set length of time. Hose timers can accommodate many several hoses and zones (usually from one to four). We offer a rebate on a Water Sense Smart Irrigation Controllers hose timer that adjusts to our weather and your plant’s watering needs. Each valve can be set to water at various times throughout the day. For example, you could set one valve to water your vegetable garden for 10 minutes daily and another valve to water your perennials two times a week for 20 minutes.
Drip Irrigation Tips:
Make sure you always have a pressure regulator on your drip line. Even if you are converting an old turf valve into a drip zone, use an in-line pressure regulator.
Using professional in-line emitted drip tubing around trees and shrubs is often the most efficient way to provide your trees with enough water.
Make sure you have more than one emitter per plant. That way, if an emitter clogs, you have less chance of that plant dying from lack of water.
“Walk the Line” at least once a month, looking and listening for any broken drip. You are listening for the sound of rushing water and looking for little fountains, excessive wet areas or wilted plants.
Make sure you know approximately where your polyline runs so it is easier for you to know where to plant and make repairs.
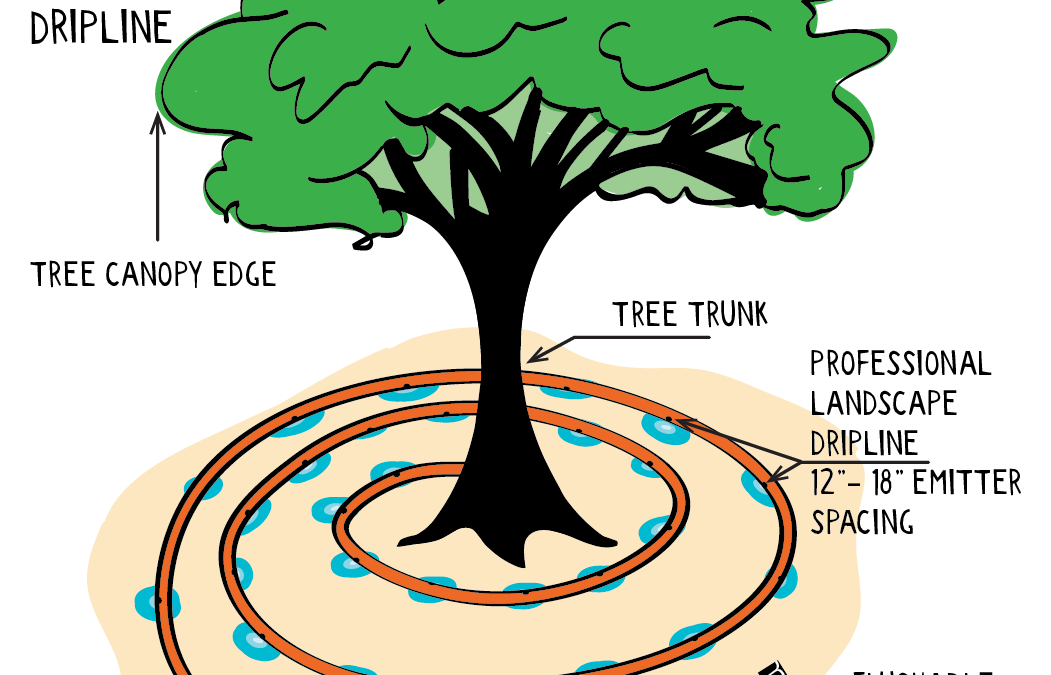
Make sure drip irrigation gets moved out to the edge of a shrub or tree canopy and increase the number of emitters as your plants get larger. This is especially important on trees and medium and high-water shrubs.
Your Desert Accent plants, and Rainwater-Only plants may not need supplemental drip irrigation after the third year, so plugging the emitters will help you save water.
Author: Richard Perce, Irrigation Efficiency Specialist with the Water Conservation Department for the Water Authority. Have a question about the article? [email protected]
Irrigation controllers can be intimidating, particularly because they only get adjusted seasonally and it is easy to forget how to program the timer correctly.
In this article, we are going to explain some terms and point out some functions which are universal, regardless of the type of controller you have. We are also going to provide some pointers on what will help you keep track of it all, as well as provide you with links to a few programming videos that discuss the most common irrigation controllers in Albuquerque. So let’s dig in!
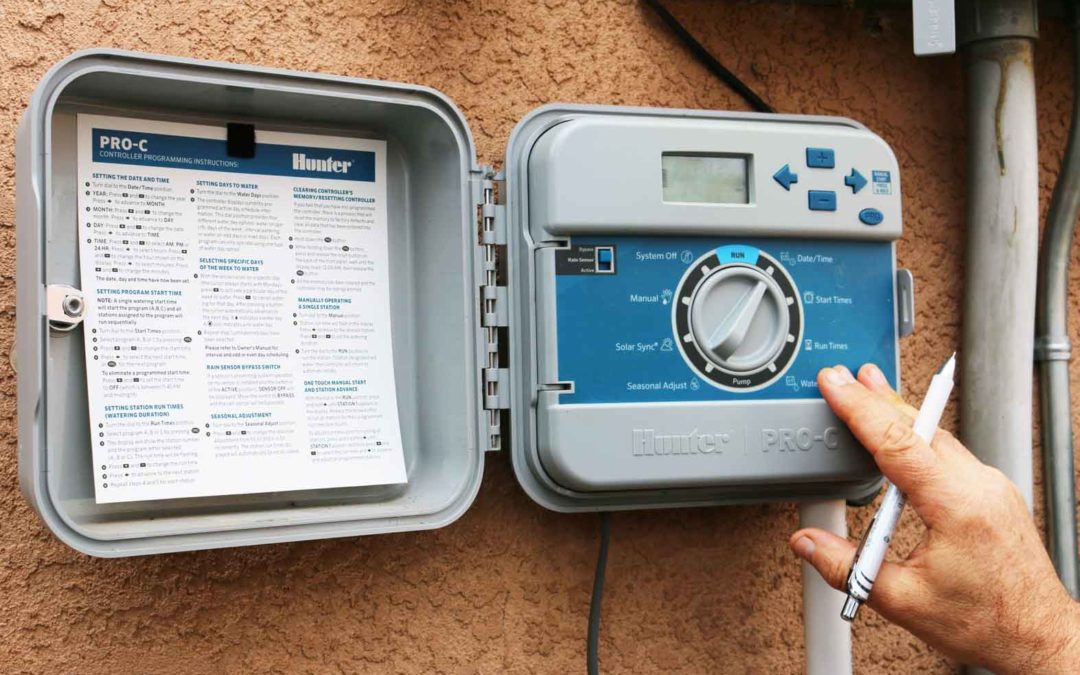
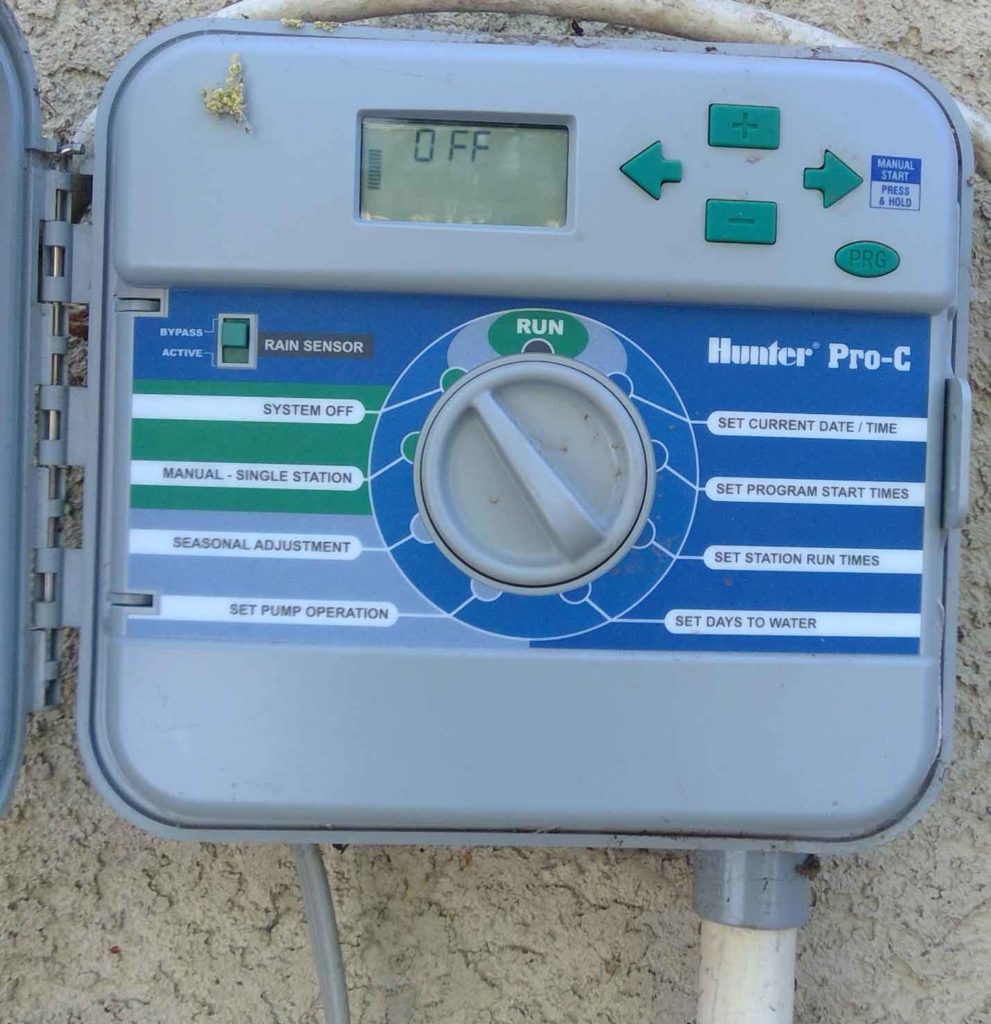
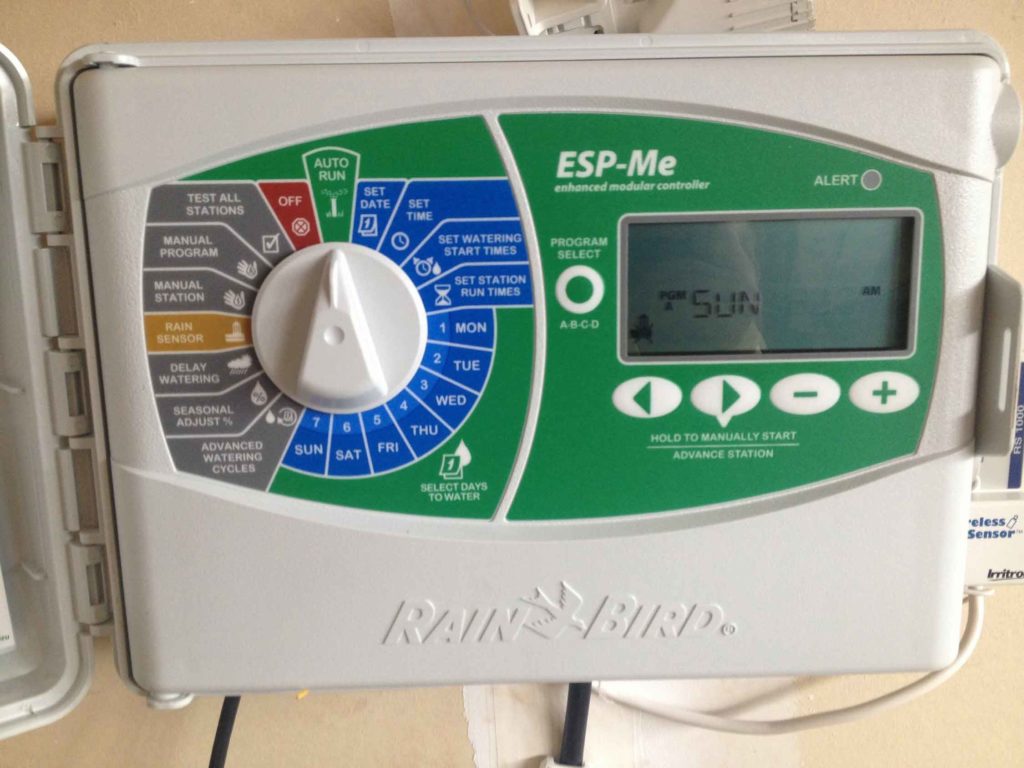
On nearly every controller you will find the following functions: program, time/date, start time, run time, days to water, autorun, and off. You will almost always have some +/- keys and some right and left arrow keys. These +/- and arrow keys are used to set your times and days. Other functions may be included on various timers as well.
Illustrated are two of the most common controllers installed in Albuquerque, the Hunter Pro-C and the Rainbird ESP-Me. They look different at first glance, but a closer inspection shows that they have essentially all the same functions.
What do you need to know to be able to set your controller this spring?
Time/Date: This is an important detail to keep up-to-date so that you are watering at the correct time and on the days that you want to water.
Zone/Station: A zone, or station, is all the sprinklers or drip lines that are controlled by a single valve. You may have one sprinkler valve and one drip valve split between your front and back yard. Each one is a separate zone which means you have two zones.
Program: Programs are how you group your zones that have plants with similar water needs. Using the above example:The lawn sprinkler zone would be selected on Program A. If the drip zone has similar water needs (trees and shrubs) you would group them both on Program B. This is because your lawn (Program A) needs to be watered differently from your trees and shrubs (Program B). If you have an additional zone, like for a vegetable garden, you will put that drip zone in Program C to water differently.
Start Time: It is important to know that the start time applies to the whole Program, not to each zone in a program. Controllers will run zones in succession within a program.
Run Time: This is the amount of time each station, or zone, waters every time it comes on
Example of spring programming:
Program A starts at 6:00 a.m.and your lawn sprinkler zone runs for eight minutes. Program A, zone 1, will quit watering by 6:08 a,m. If you had more lawn zones, they would water one right after the next.
Program B, your trees and shrubs zone starts at 10:00 a.m. It runs for 75 minutes so Program B would end watering at 11:15 a.m.
Days to Water: Once again, the days to water apply to all the zones, or stations in one program.
Example of spring programming:
Program A, your lawn, needs to be watered once or twice a week in the spring so you would set Program A to run twice a week.
Program B, your trees and shrubs, need to be watered only once a week in the spring so on Saturdays, for example, when you know that you have a better chance of checking the system for issues.
Tips & What to Watch For: Here are some tips to make programming easier and some tips to avoid common mistakes
Create a seasonal or monthly calendar and hang it up next to your controller.
Label each zone (Example: Zone 1 - front lawn close to the street)
Create calendar reminders for yourself, either on your phone or paper calendar, for each season.
Normally you won’t change the amount of time each zone waters seasonally, just how often you are watering.
Always double, or triple, check which program and zone you are on when you adjust the settings so you don’t end up setting a lawn zone to water like a drip zone.
Make sure you are back at Auto/Run whenever you have finished making adjustments. Your controller may not run at all if it isn’t, or it may revert to its emergency programming (usually 10 minutes for every zone, every day).
Replace your battery back-up every year. You don’t want to reprogram your whole controller if the power goes out.
Links to common controllers found in the Albuquerque area:
Author: Richard Perce, Irrigation Efficiency Specialist with the Water Resources Division for the Water Authority. Have a question about the article? [email protected]
Adopting water efficiency strategies will be the key to weathering the drought this year. These three simple steps can help you conserve water, rebates available for all three recommendations.
1. Update your controller with a WaterSense Smart Irrigation Controller
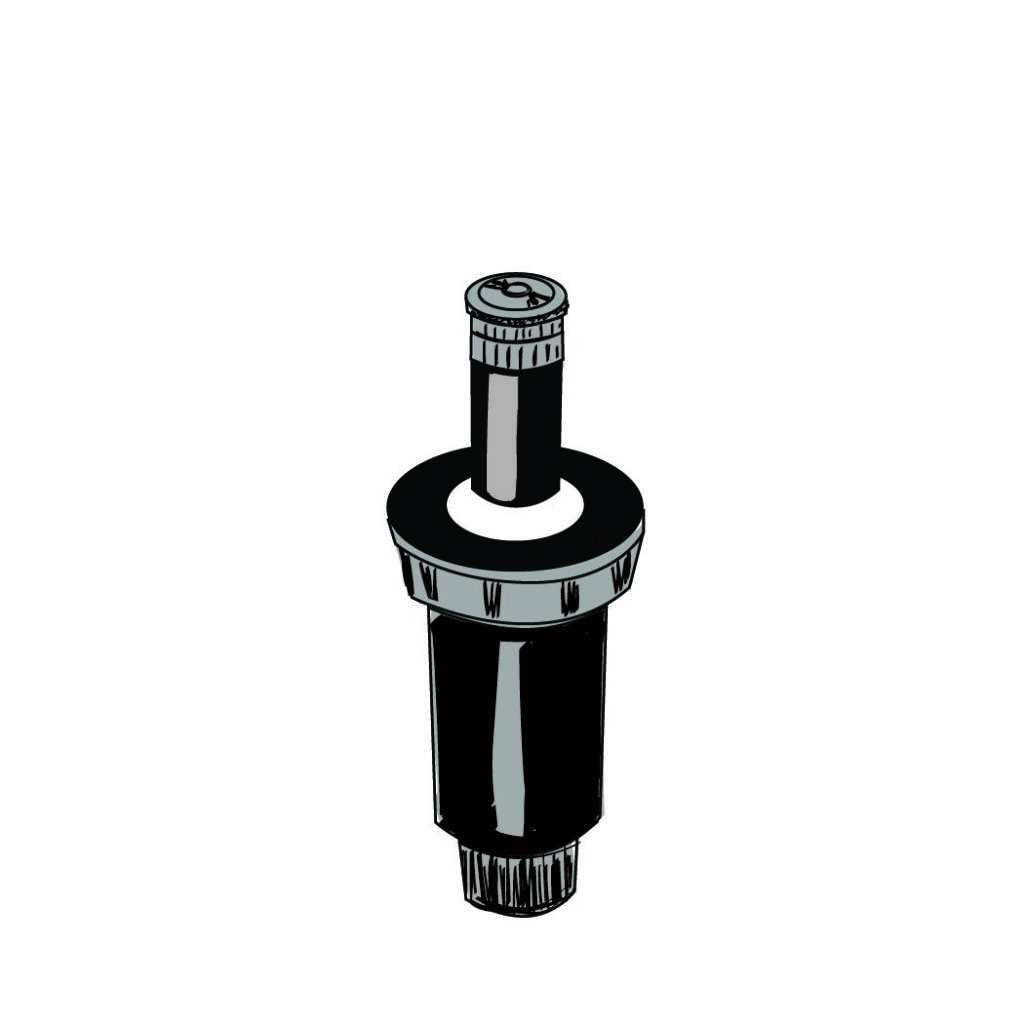
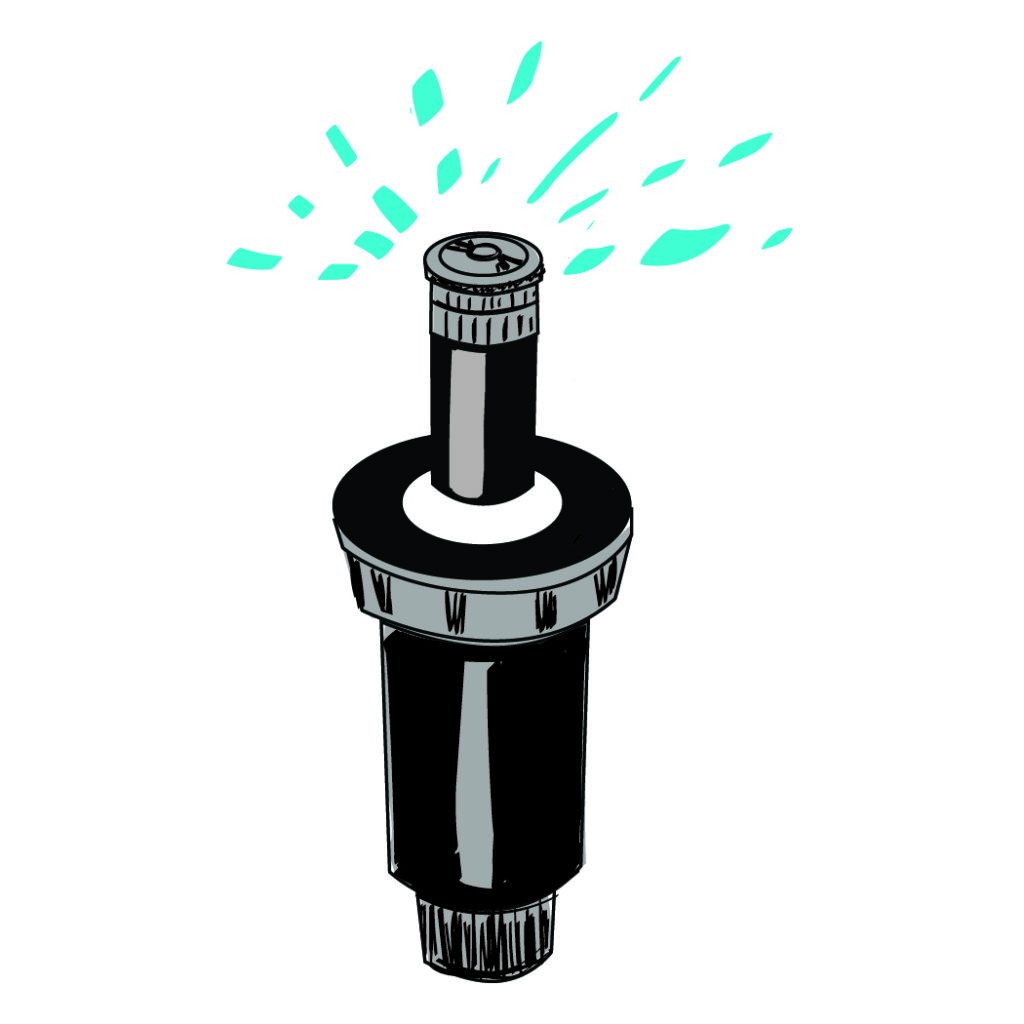
2. Replace your spray bodies with WaterSense Pressure Regulating Spray Sprinkler Bodies
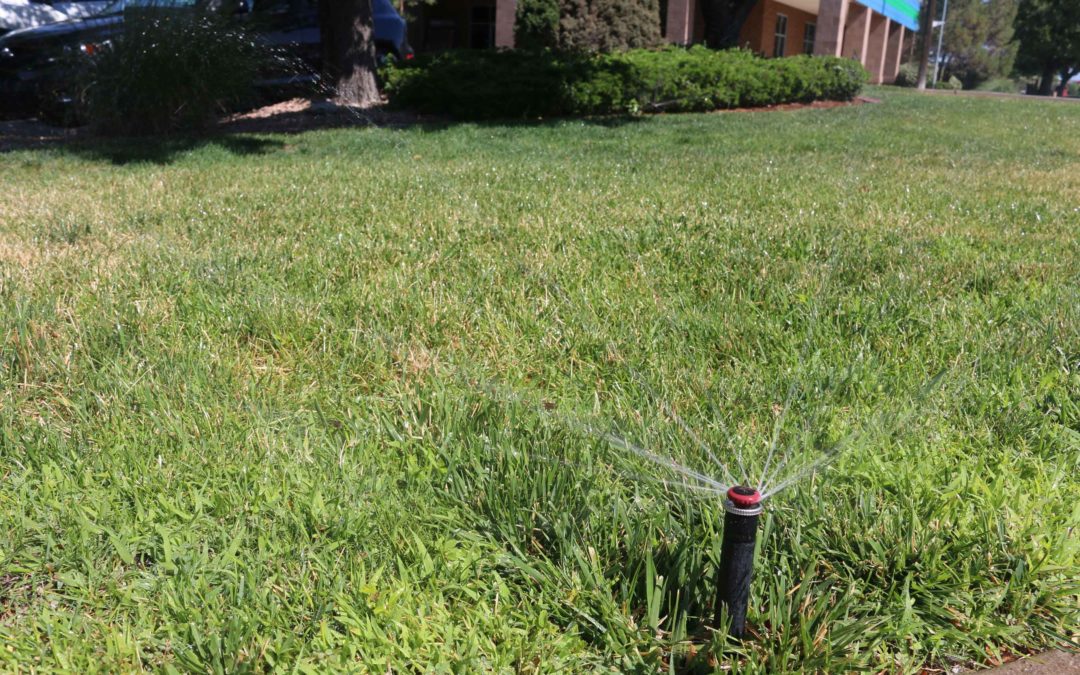
WaterSense labeled spray sprinkler bodies with internal pressure regulation can reduce water waste by providing a consistent flow at the sprinkler nozzle. When the sprinkler body maintains pressure near its optimal operating pressure, the connected nozzle is better able to generate the right amount of water spray and coverage for a more uniform distribution of water across the landscape. Customers can choose from a list of pre-qualified spray sprinkler bodies.
High-efficiency sprinkler nozzles are a great solution for upgrading an old and poorly performing sprinkler system. These nozzles minimize water waste and feature a unique multi-trajectory rotating stream that delivers water at a steady rate. This slower application rate allows water to gently soak in at rates that soils can absorb. Use these nozzles to replace the sprinkler head on any conventional spray head body or pop up sprinkler. In most cases, you just remove the old, water wasting spray nozzle and replace it with the new head. For more information on these nozzles read this post.
Making these simple changes can result in 30% water savings. For installation, questions contact your favorite irrigation supply store professional or send us a question at [email protected]
Author: Jill Brown, ASLA, is a Landscape Architect and owner of My Landscape Coach in Albuquerque, NM. Have a question about the article? [email protected]