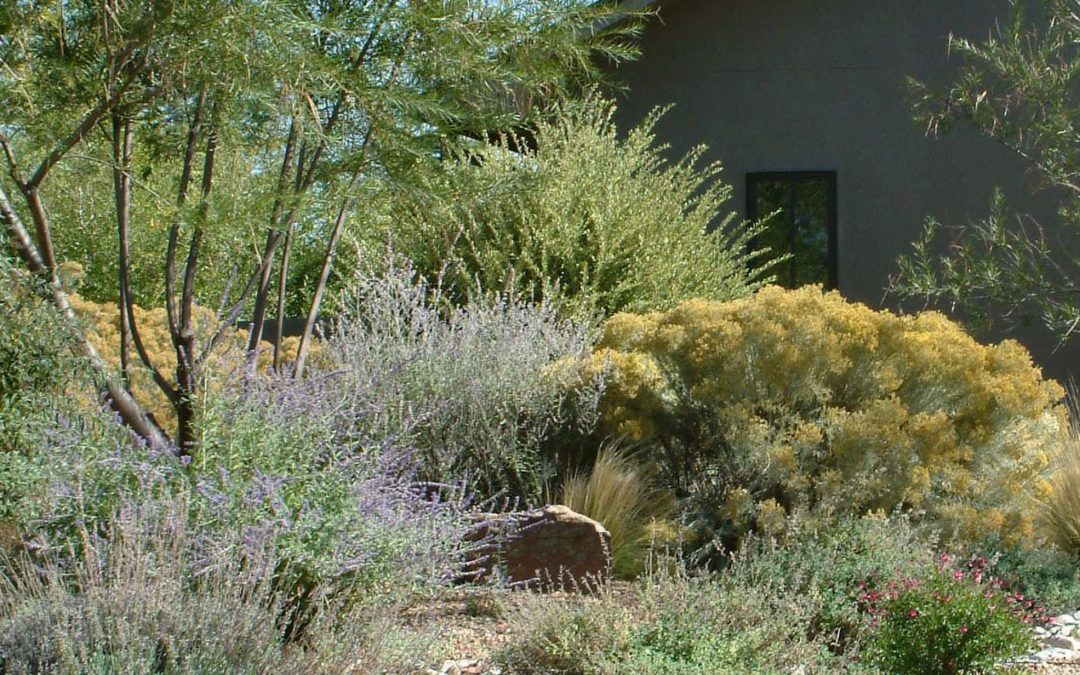
In these long, hot days of summer, especially if the summer rains don’t come, many plants really suffer from a lack of water. By incorporating native and very adapted plants into the landscape, we can still have attractive landscapes that don’t require a lot of irrigation, maybe even none in a good year!
These native plants are sometimes referred to as “luxury consumers." Their evolution, in an arid climate that occasionally has wetter years, has given them the ability to subsist reasonably well on low water. When there is an abundance of water, they take advantage of it and really grow. This kind of luxury growth may happen only every few years. In really dry years, they will lose some outer canopy. This adaptability helps them survive and even thrive in our natural landscape.
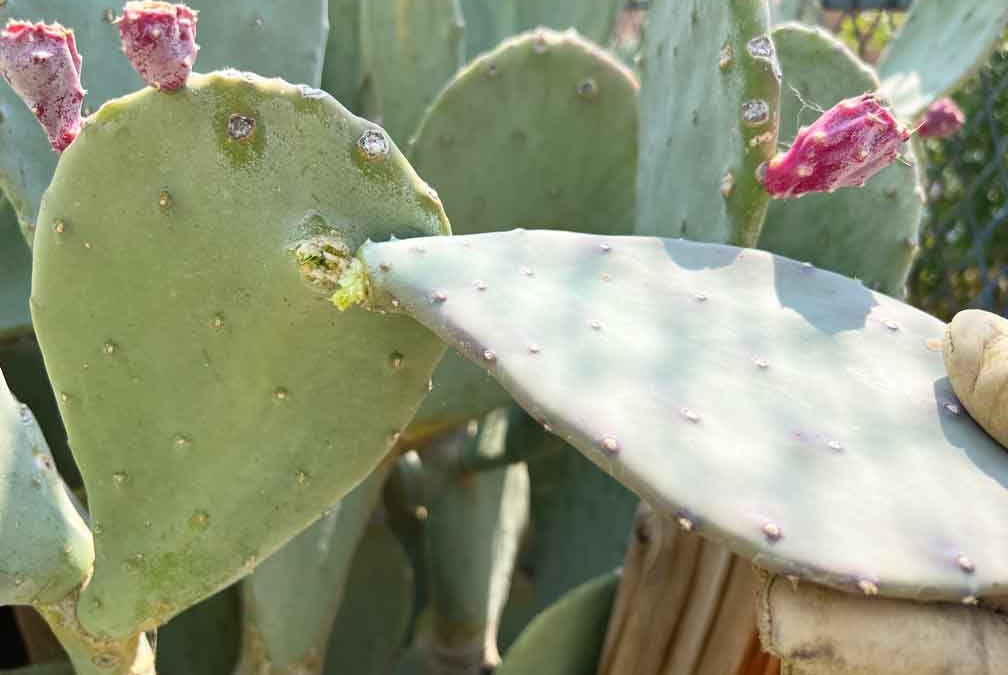
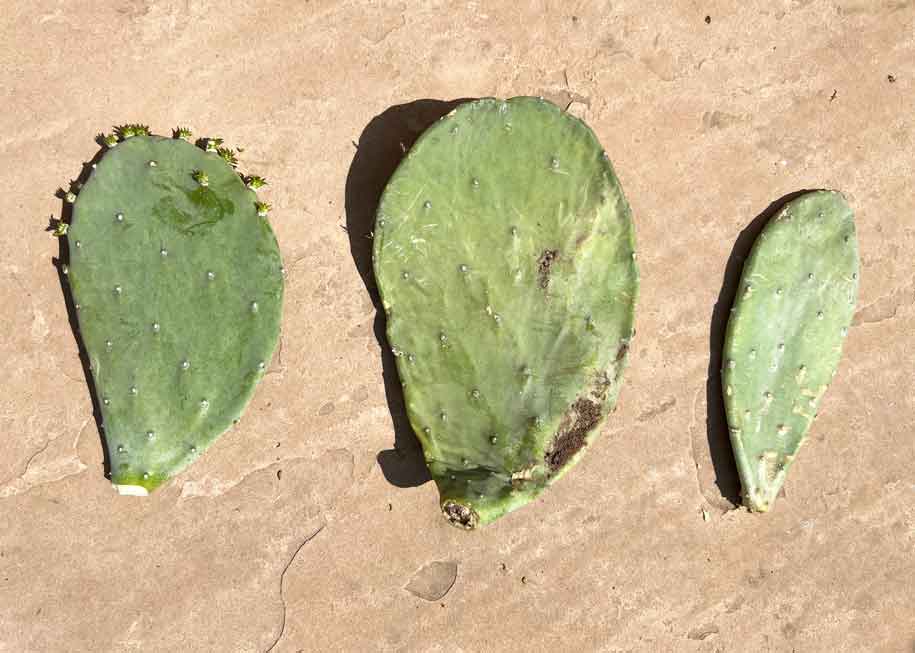
Among the plants that fit into this category are trees, shrubs, and native grasses: desert willow, Apache plume, three-leaf sumac, four-wing saltbush, chamisa, turpentine bush, and Mexican thread grass. There are others of a similar nature; native plants that really don’t need regular abundant water. Cactus is another type of plant that is easily over-watered. You might even end up killing it with too much water, as its roots rot away in constantly moist soil. If cacti don’t die, they may end up taking over a space.
One of the great aspects of xeric plants is that they are low maintenance. Small trees and shrubs live happily for years without needing pruning. Single stands of attractive, waving silky-looking grass seed heads don’t become a billowing menace when they quickly spread beyond the designed zone.
These plants should be irrigated regularly the year of planting but should be weaned to a lean water budget before they get too used to luxury living. A luxury level of irrigation should be saved for fruit trees and shade trees — plants that actually need that amount of water and produce fruit and shade.
To help save water, look for water harvesting opportunities in your landscape, especially when deciding where to plant. Where does water come off the roof, and where does it go on the ground? If you can redirect that roof water to a high spot that will flow into the yard — and maybe even contour the yard in shallow, subtle ways to get that water to spread out and slow down and sink in — then you can take advantage of the water by planting strategically along the flow line.
Mulches are a great water-saving step for native trees and shrubs. Rock is too hot for most things, except for ocotillo and some cacti, so use coarse chipped tree waste. Some local tree companies offer free mulch. Keep sunlight off bare ground around the plants and you will slow down evaporation from the soil while reducing the ambient air temperature enough to make a difference to the plants living out there all day, every day.
As far as shearing goes, this kind of pruning creates very tight outer canopies with lots of leaves (the resulting growth that follows previous cutting), usually in a simple geometric shape. Native plants that have less dense outer canopies end up having a higher water budget due to the excess foliage grown by shearing the canopy. A natural form could have the same overall size but with a more open, interesting branching framework supporting a more natural leaf density, and all of that on less water. It’s best to let the plant’s nature express itself through the form it grows without a lot of interference and to prune strategically to highlight well-placed branch systems and balanced mass.
Congrats to the ten winners of our first annual Water Authority Desert Friendly Landscape Contest! Thank you for sharing your beautiful gardens with us. They will be an inspiration for others to make the switch to desert-friendly landscapes.
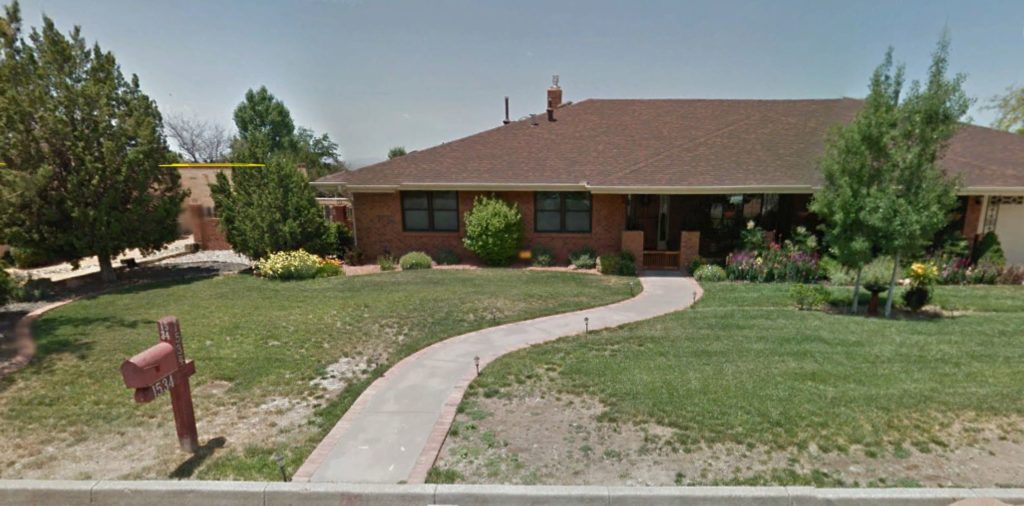
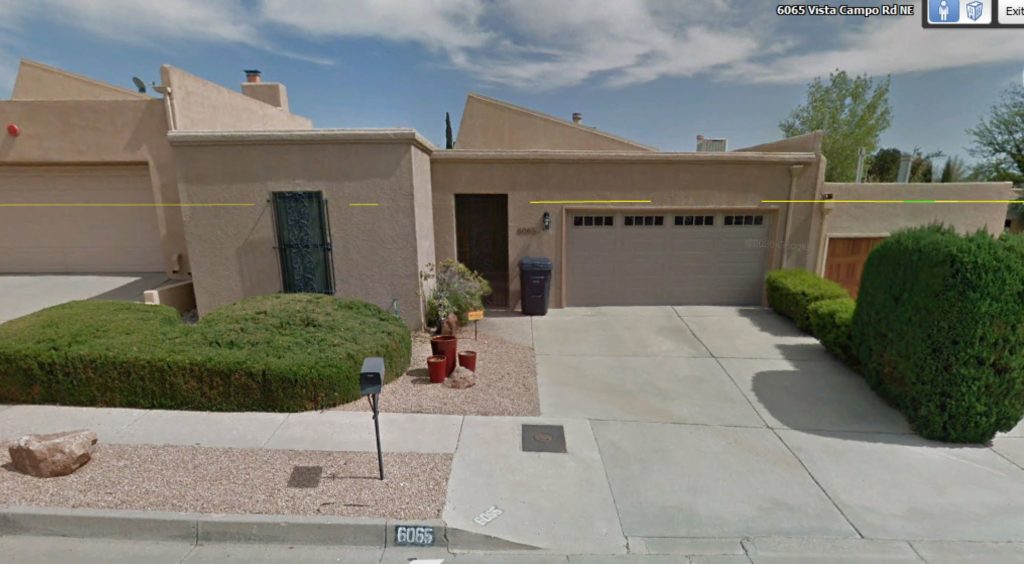
A transformation from an unhealthy-looking, high-water use turfscape to a colorful xeriscape medley.
Before
This family was ready to change out their high-water and high-maintenance front lawn grass to a desert-friendly landscape. Their new low-water and low-maintenance yard features 94 desert-friendly xeriscape plants. They worked with a professional company on the design, to remove the sod and to install the drip system and new plants. Plants were selected from the Xeriscape Guide provided by their contractor.
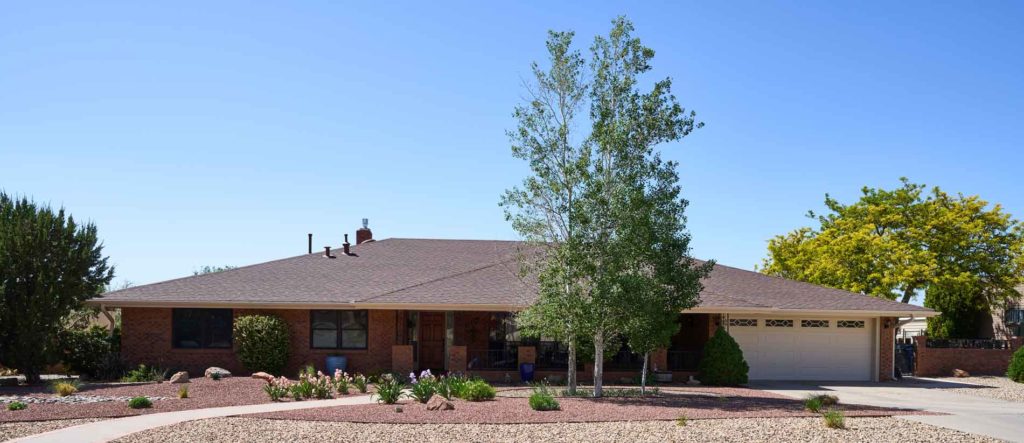
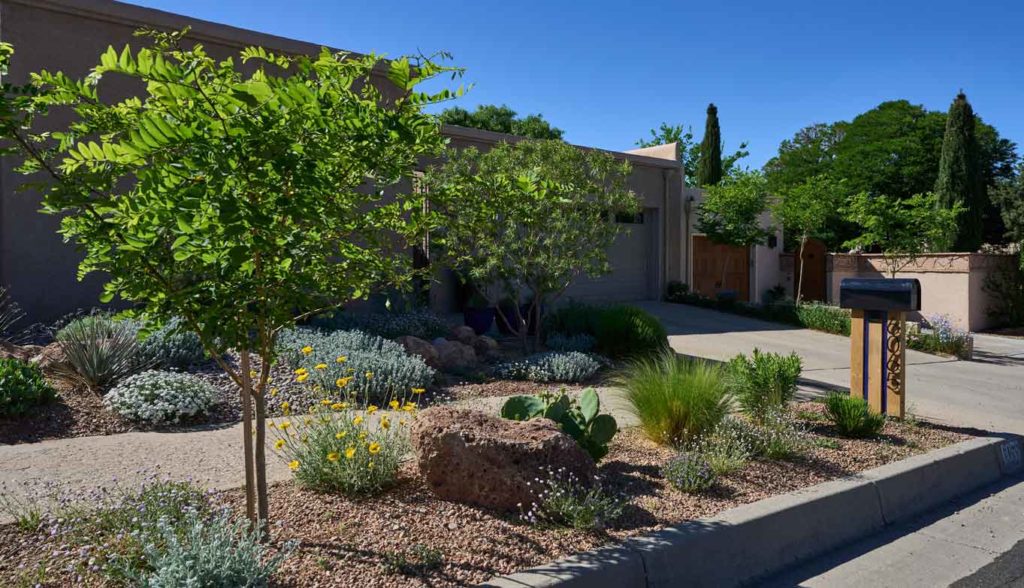
After
By transforming their yard to a xeriscape, they were able to save a total of 156,000 gallons of water within the first year and get a $1,300 rebate from the Water Authority for the conversion. They saved even more money because the contractor was able to reuse existing irrigation valves to convert the spray to a drip system. The best part, they say is “the variety of colors from the plants and the birds and butterflies the landscape attracts”. They also receive many compliments from neighbors and friends, which makes them feel proud.
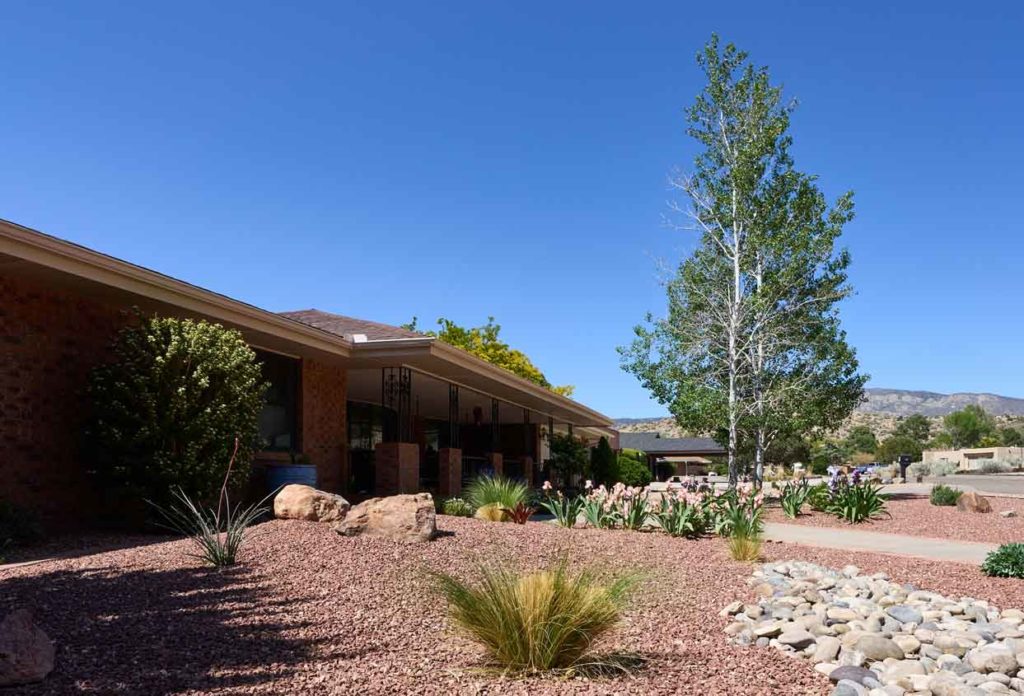
AfterAfter
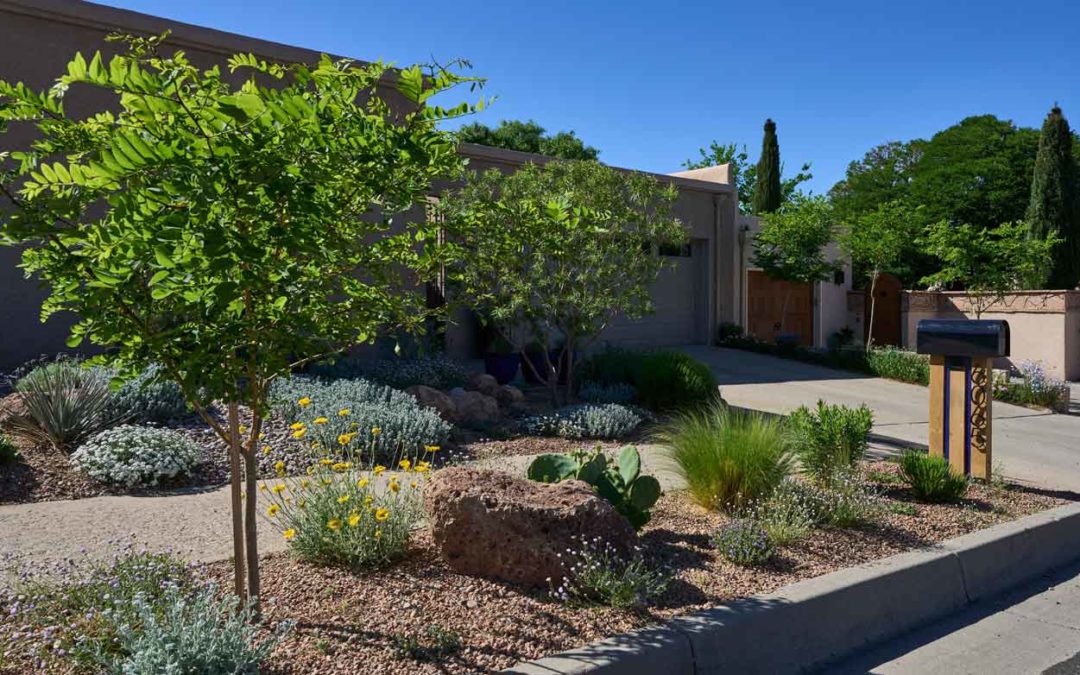
Talk about creating a diverse and lush yard! This desert-friendly landscape has all the right elements.
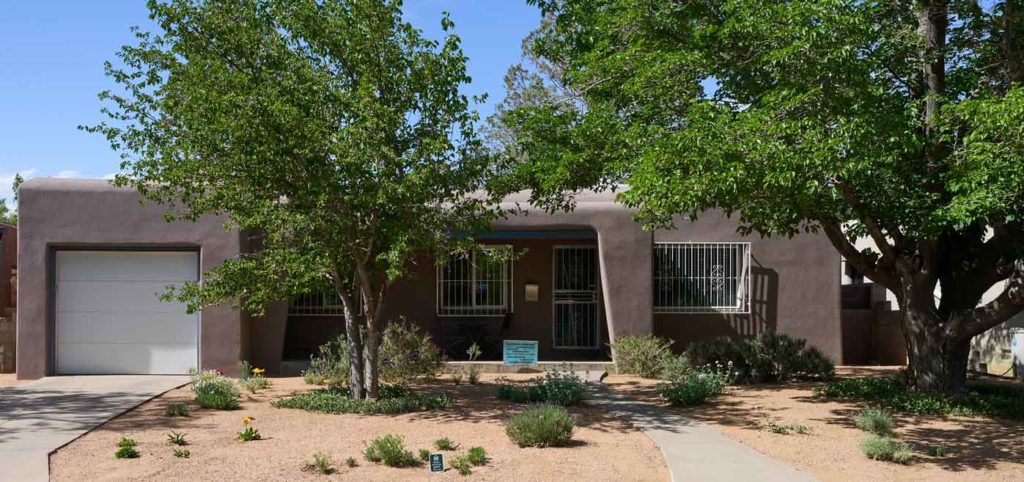
As a retired landscape architect Richard Bumstead had the pleasure of designing and installing his own landscape during the beginning of the pandemic. Like many Albuquerque yards, his front yard located in the center of the city was covered with junipers and gravel. Removing them opened up a large area, creating a blank slate and the opportunity to diversify his landscape. Having spent most of his career in Chicago, Richard was not very familiar with the local plants. He read many New Mexico plant books, including Judith Phillips, “Growing the Southwest Garden” and the “Down to Earth” guide from Albuquerque Master Gardeners. The staff at Plants of the Southwest and Jericho were also a big help as he prepared his landscape plan. His visible front yard is now full of native pollinator plants along with three trees that are local favorites: Pinon Pine, Desert Willow and New Mexico Locust.
Richard waters his established plants once a month in the winter and only once a week during the irrigation season. He says the key to having a good-looking landscape is to prepare the soil and water plants to the right depth.
Since he has a more protected backyard, Richard was able to add many shade-loving plants as well as foraging plants like strawberries, rhubarb, tomatoes, an apricot tree and a variety of herbs. Find his extensive plant list here.
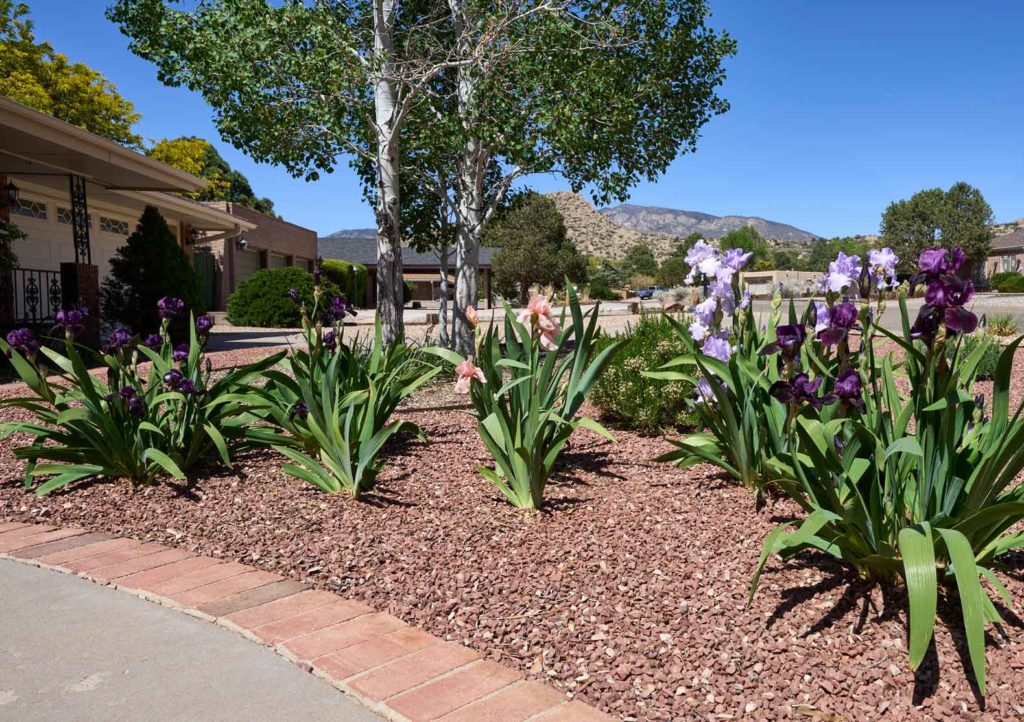
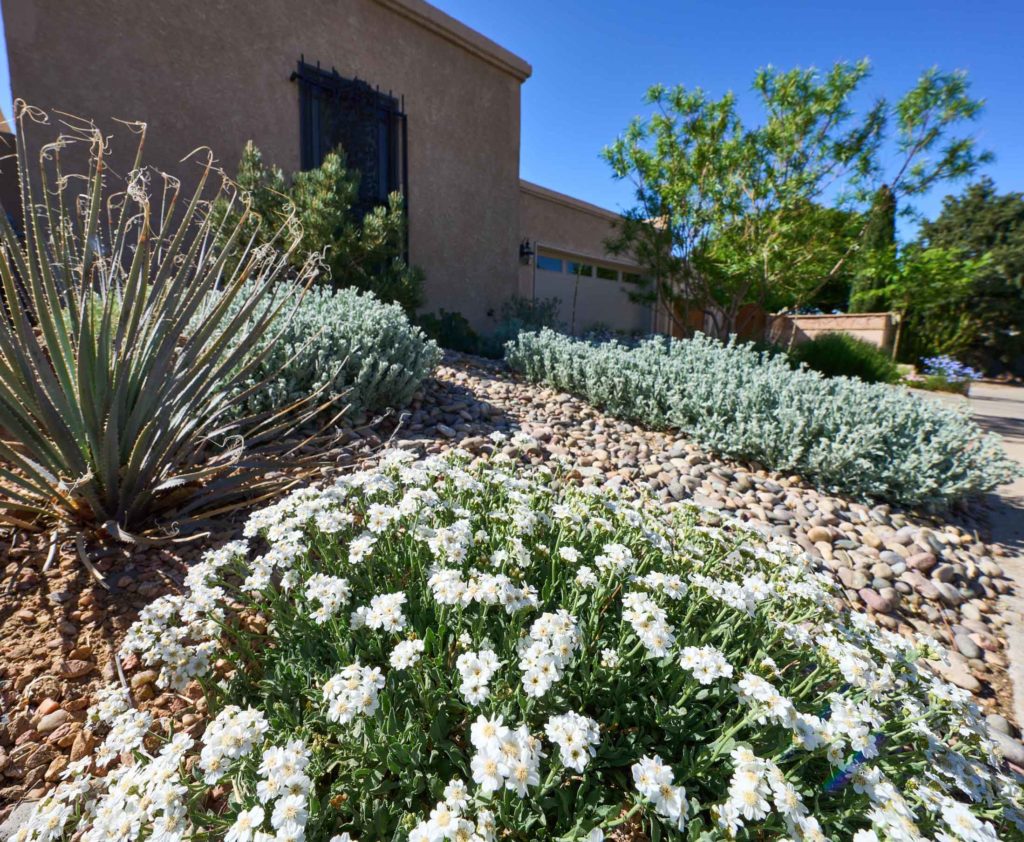
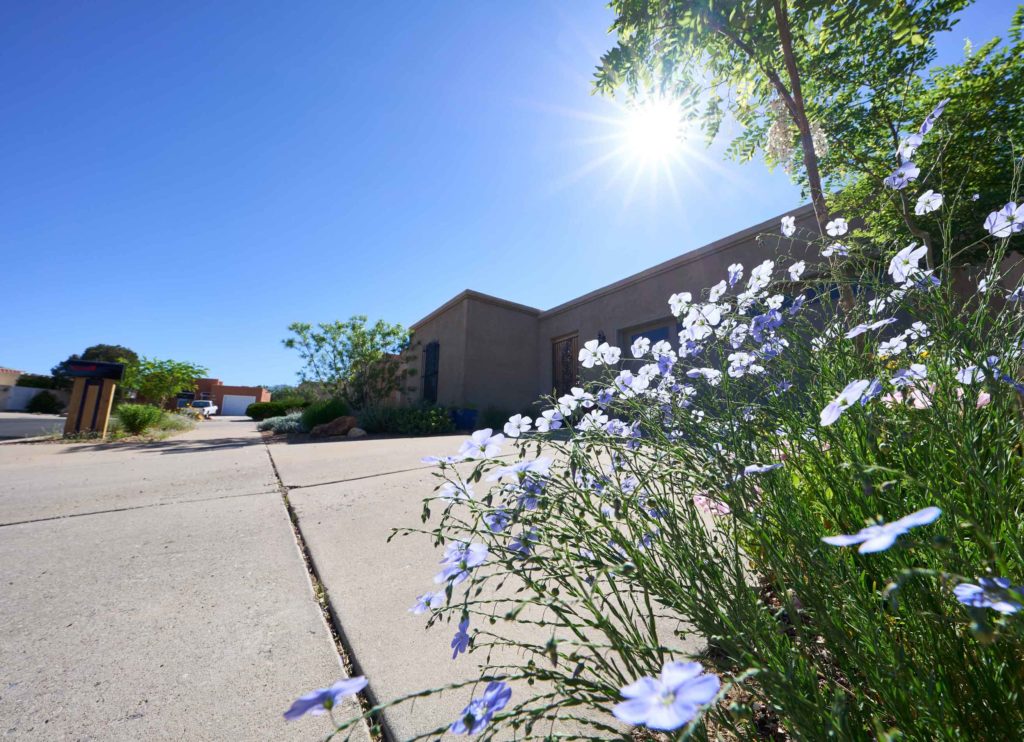
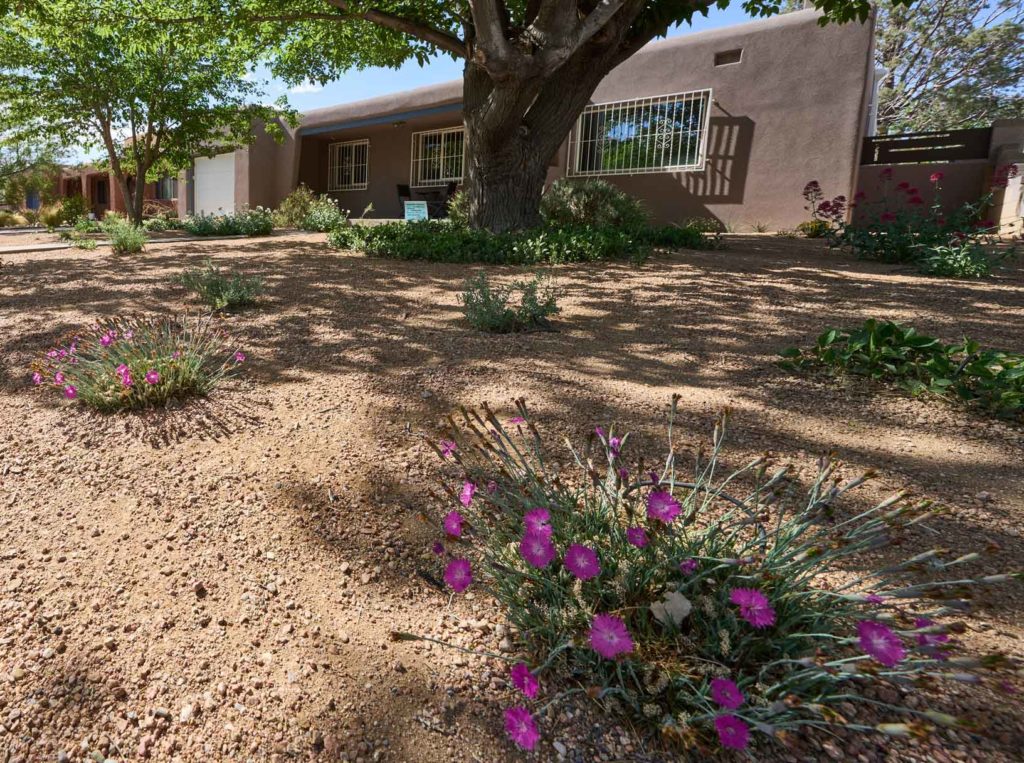
BeforeAfterAfter: Close up of Fleabane Daisy, with Grey Desert Spoon and Silver Mound artemisia in the background. After: Close up of Purple Flax
From Bermuda Grassland to a Desert Friendly Landscape!
Geri Martinez’s property, which is located in one of the older areas of town surrounded by large established trees, had the kind of yard that’s typically found in Albuquerque’s UNM and Ridgecrest neighborhoods. It was covered in Bermuda grass and had a large mulberry tree. Geri was ready to refresh the front yard of her 60+ year-old home. With the help of a landscape designer, she came up with a planting design plan.
After
Geri, an avid DIY’er, installed her own plants and irrigation system. To help her figure out what to plant and how to set up the irrigation system, she read local publications from nurseries, attended workshops and used a professional landscape design to determine plants locations.
Geri loves sitting outside and watching the birds and bees that are attracted to her landscape. Saving water has been her goal. She’s not only reduced her front yard water use but also the amount of water she uses indoors. She has low-flow fixtures inside the home and utilizes rain barrels to supplement her landscape’s irrigation during the rainy season. Geri is proud to have a visually-appealing landscape that conserves water.
It’s irrigation season. If you have a grass lawn with spray heads, it’s time to check out your system to make sure it is running smoothly. Run a one-minute test program on the controller and visually examine each zone. Look for broken, leaning, or clogged sprinkler heads. Check and adjust for irrigation spraying on sidewalks, driveways, patios, or streets. Look for uneven coverage and sprays that may be blocked by new landscape growth.
If any of the above issues are happening, you’ll want to go through each spray head and perform the following maintenance tasks:
Flush the sprinkler system by turning on the sprinklers for a few seconds without the nozzle.
Adjust the arc by turning the sprinkler on. While the sprinkler is watering, look at the right side and see if it is aligned. If it isn’t, you will need to align it by turning the entire riser to the correct position (to the right) as this is the fixed side of the arc. While turning the riser you will hear a noise. This is a ratcheting system that allows you to make an adjustment. Turn it clockwise to reduce the arc and counterclockwise to increase the arc.
Adjust the radius by turning the screw in the middle of the nozzle with a flathead screwdriver, turning clockwise position to reduce, and to reach farther turn opposite direction or counterclockwise.
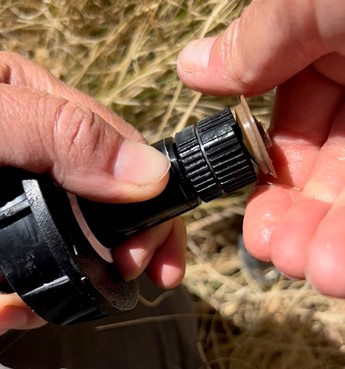
Clean the filter by pulling the riser up and holding it with one hand, while your other hand unthreads the nozzle and pulls the filter out. Clean the filter by dipping it into a bucket of water.
If your spray heads are putting out a very fine mist or fogging, your system may be operating over its design pressure. You’ll need to install a pressure regulator to reduce the water pressure at the irrigation system’s water connection, which is before the backflow and after the meter.
Learn more by checking out these other useful irrigation articles:
Author: Jill Brown, ASLA, is a Landscape Architect and owner of My Landscape Coach in Albuquerque, NM. Contributor: Greg at Sisco Irrigation, Albuquerque, NM. Have A question about the article? AskAnExpert@abcwua.org
The most efficient way to water your yard is by using an automatic system. Hand watering can be problematic because it can lead to inconsistent watering, causing you to overwater, underwater, or forget to water altogether.
If you are ready to invest in a more efficient irrigation system, a Water Sense Smart hose timer is the way to go. It’s an inexpensive way to get your plants on an automatic irrigation system, allowing you to water your yard on a specific day of the week, time of the day, and for a set number of minutes. You can put it together yourself for under $100.
The hose timer can attach to high-quality irrigation Polypipe with drip emitters or connect to a professional landscape dripline. The irrigation dripline can stay in the ground year-round and is easily connected to an automatic in-ground irrigation system.
There are a variety of products you can use, including smart controllers, easy twist and turn controllers, battery controllers, multi-valve controllers, and more. We offer a rebate on ones that adjust to our weather and your plant’s watering needs.
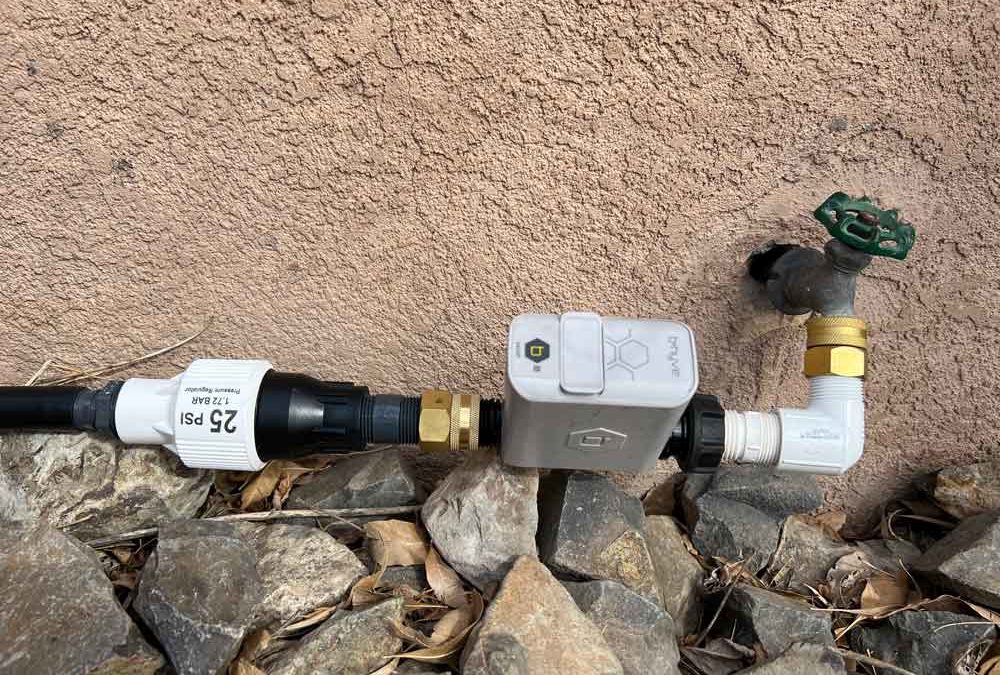
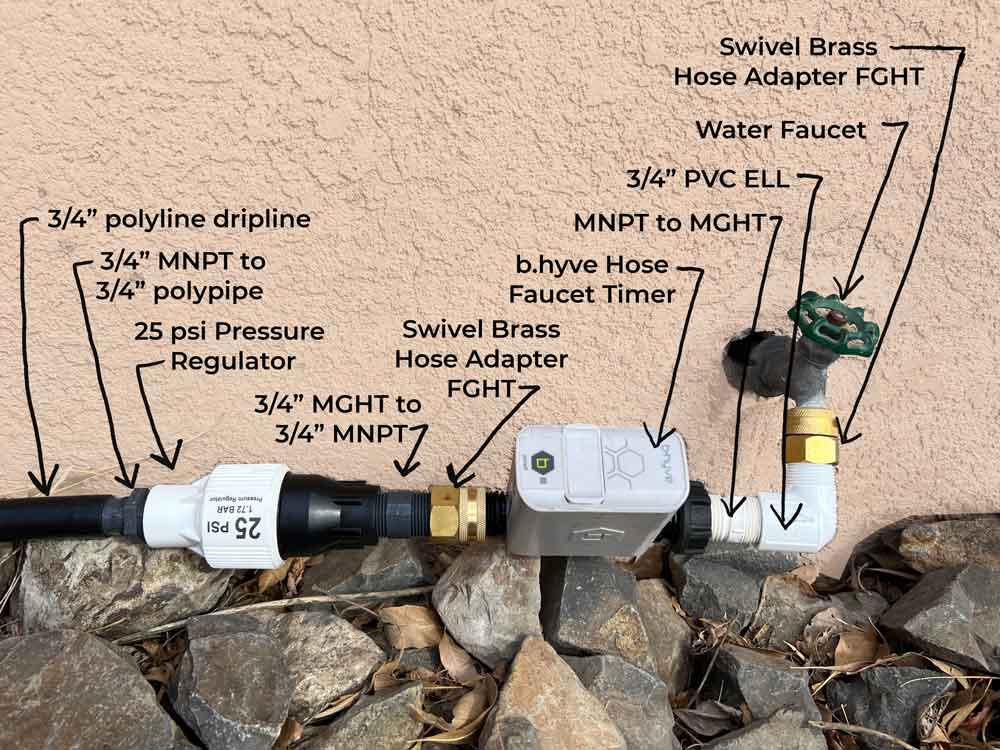
Below is an example of a hose watering system using one of the smart irrigation controllers —in this case, a B-hyve hose faucet controller— included in our rebate program. All the pieces and parts needed for this system are listed below, but if you have any doubts, take this picture to your local irrigation supply store and they’ll help you get everything you need.
Plants thrive on a consistent watering routine that allows the soil to dry out slightly between waterings. Setting up an automatic hose bib system is easy, inexpensive, water smart and the best thing you can do to keep your plants healthy.
Learn more by checking out these other useful irrigation articles:
Author: Jill Brown, ASLA, is a Landscape Architect and owner of My Landscape Coach in Albuquerque, NM. Contributor: Greg at Sisco Irrigation, Albuquerque, NM. Have A question about the article? AskAnExpert@abcwua.org
The most important part of watering is figuring out how deep you need to water your plants. Once you figure that out, you can easily follow our chart that tells you how often to water.
Here are six simple steps to figuring out your watering depth:
Step 1: Water your landscape for the usual amount of time. If it’s the first time you’re watering, start with the number of minutes found in this Irrigation Advice Chart.
Step 2: Wait 24 hours after watering so the water has a chance to percolate into the soil.
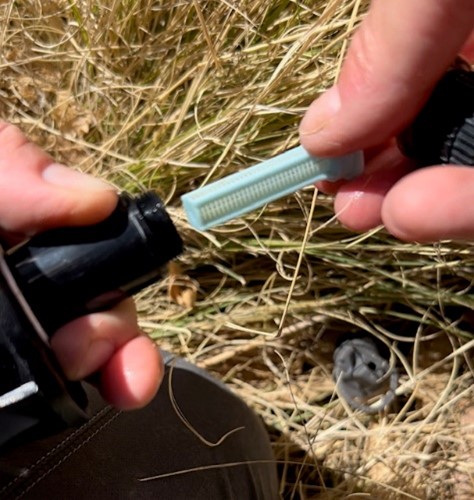
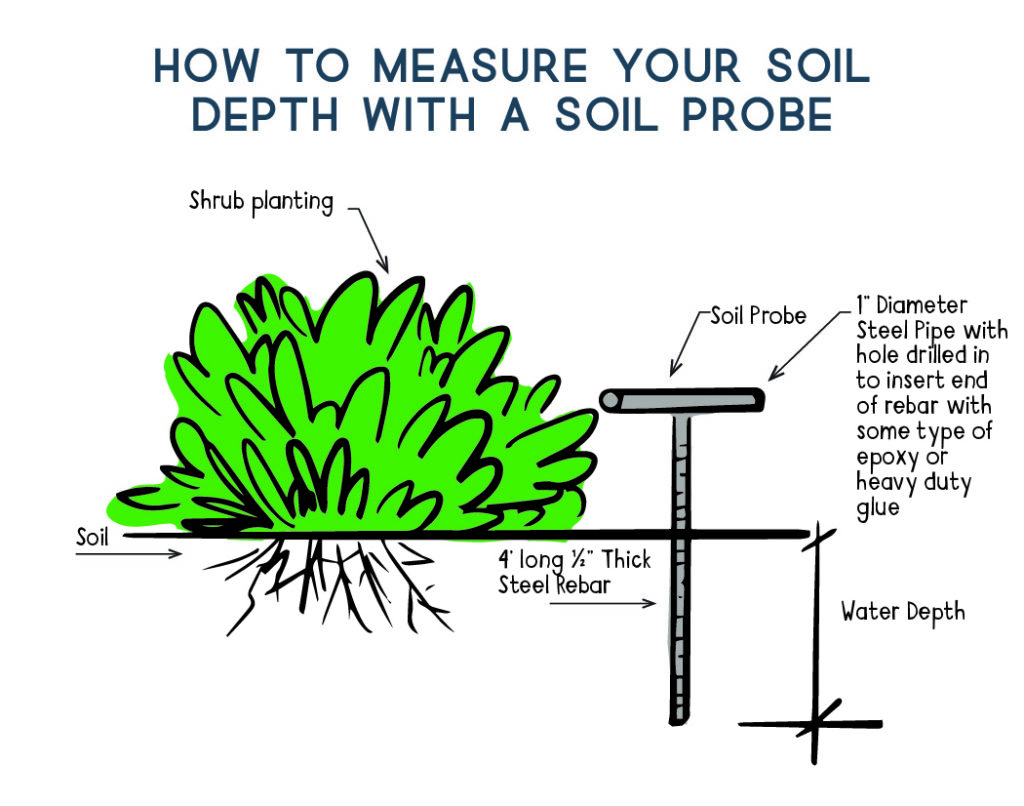
Step 3: Grab a measuring tool, such as an 18” depth screwdriver, soil probe, barbecue skewer or 24” long piece of rebar, and probe your tool into an area you didn’t water to check the soil resistance. Next, go to an area that you watered the day before. Push the probe in until it stops. It should go in fairly easily. Don’t try to push it in further once it stops because you can accidentally break a pipe. Mark the spot it went into with your finger, tape or a permanent marker. Pull out the probe and measure the number of inches. Those inches represent your current watering depth. Using the Seasonal Watering Recommendations chart you can find out the depth you need for your type of plant.
Step 4: Adjust your watering time to correctly determine the watering depth. Did you only water 4” but needed a 12” watering depth? If so, then add more time to your watering schedule and perform the test again. Did you water 24” but only needed 18”? If so, then subtract time from your watering schedule. Water again and wait 24 hours to retest.
Step 5: Once you figure out the amount of time you need to water so the water penetrates to the correct soil depth, you are set.
Step 6: Set your controller for the correct amount of time. Use our handy Seasonal Watering Recommendations chart to see how often you’ll need to water your plants.
Don’t overthink it. Our local, desert-friendly plants (native and adaptive plants typically found in our local nurseries) usually thrive in our native soil.
Learn more by checking out these other useful drip irrigation articles:
Author: Jill Brown, ASLA, is a Landscape Architect and owner of My Landscape Coach in Albuquerque, NM. Have A question about the article? AskAnExpert@abcwua.org