Your new xeric plants are in, and everything is looking good. What do you need to do to keep it that way? Start by looking at your irrigation controller. It may be programmed to apply water too frequently and/or for too long in order to get the plants started. If you hired a contractor, they may have set the controller to water every day because it’s easier than getting a call about a plant that doesn’t look great.
Many desert-friendly plants and trees evolved to survive on very little precipitation but also to make the most of abundant rainfall when it does happen. They’ll store the water in their roots or grow larger (and produce more seed for dry years) than they would with only adequate water. A xeriscaped yard doesn’t automatically “save” water — it is up to the homeowner to do the actual water saving by adjusting their irrigation controller. My dog would be “happier” if I fed her as much as she wanted, but it’s wasteful (among other things) to do so. Watering your desert-friendly plants too much may cause them to outgrow the space they were designed for, which might mean pruning them more than they need so they don’t grow against the house or over a path or outcompete other plants. Overwatering also creates lush, tender growth that is more attractive to pests and susceptible to frost damage.
A recent study in Arizona found that xeriscaped yards didn’t have reduced water usage because the homeowners applied the same amount of water as they would for a traditional yard with a lawn and non-natives.
Here are steps you can take to make sure you’re watering correctly for your new landscape and keeping your plants healthy:
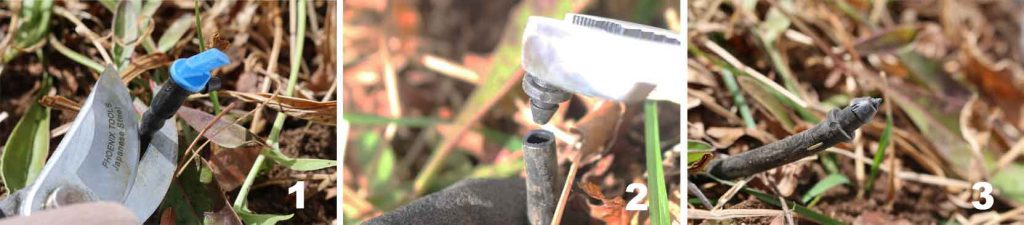
Reduce the number of emitters if needed: The best way to do this is by cutting off the drip emitter and installing a “goof” plug in the end of the ¼ inch tubing. This is preferable to trying to pull the ¼” coupler out from the larger line, which creates a larger hole that can’t be easily plugged.
Check your irrigation controller: You’ll want to keep the soil moist around the newly installed perennials, shrubs and trees for the first week, and that might mean watering every day if it’s above 90 degrees. After the first week, switch to watering every other day. Then on week three, switch to twice a week. Exceptions would be for cacti, which I would soak once when planting and then water once a week for the first month before tapering off to once or twice a month until established. (Perennials / grasses - 8-10 weeks, Shrubs - 1 year, Trees - 1-3 years.)
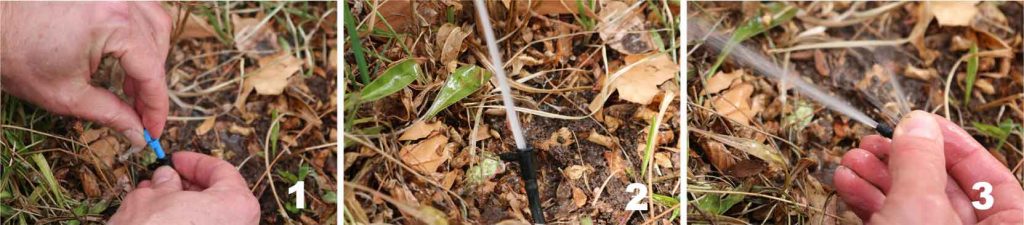
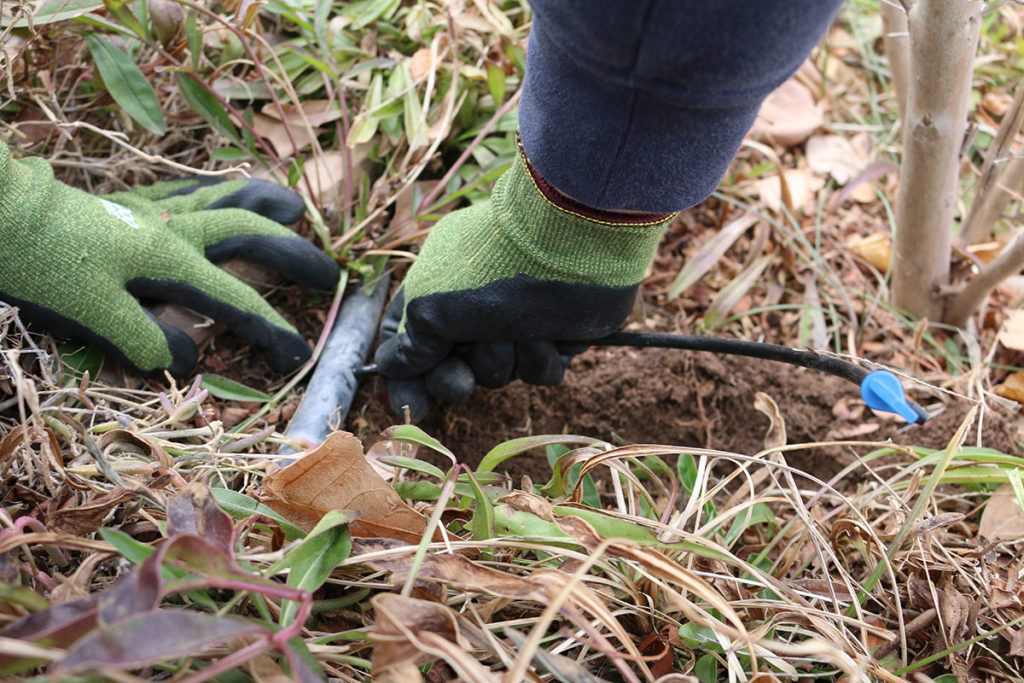
Check that drip emitters are working properly, especially if a plant looks wilted: Drip emitters often get clogged after a repair is made in the larger ½” or ¾” poly tubing. If you’re using “flag”-shaped emitters and one is not flowing, you’ll want to grasp the body of the emitter while you turn the top “flag” shape counterclockwise 90 degrees to allow the top to separate from the rest. You should do this while the zone is running so that you can see if any emitters aren’t working and so that the water pressure can clear the clog. Once you’ve twisted off the top, you should have a strong flowing stream of water coming out. Hold your finger over the water stream, forcing it into the drip outlet, which clears the clog.
If you’re using “button”-shaped emitters and one is clogged, you’ll need to cut it off and replace it. Don’t try to pull it off the ¼” tubing, just cut it off and plug in a new one so that the barbed insert has fresh (not stretched out) tubing to fit into.
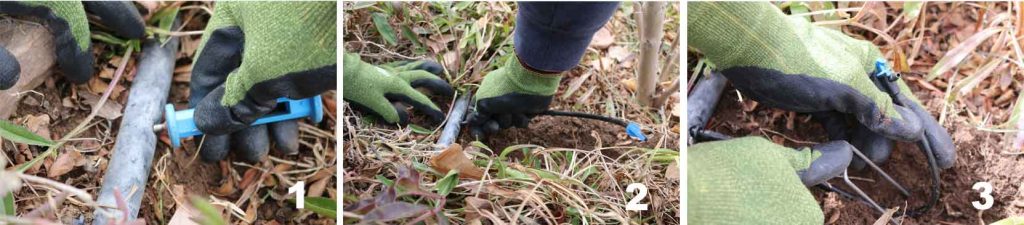
Keep up with plant growth: As your desert-friendly plants grow larger, you can move the emitters farther away from the base of the plant and add new ones if needed; larger plants require more water. There are several ways to do this. You can poke a new hole in the nearby larger poly tubing, insert a ¼” coupler, run an additional ¼” line to the plant and add an emitter. However, if the main poly line is more than a couple of feet away, install a ¼” “T” in the spaghetti tubing and go from there. It saves time and means fewer holes in the main poly line. Remember, when installing ¼” couplers into the main poly, always poke the hole in the side, not the top; that way if you step on them by accident, they won’t break off. Also, if your plants are on a slope, the emitter should be on the uphill side, so water flowing downhill will cover more of the root zone. Check that water wells are still in place and holding water around the plant.
Inspect your trees: Check the leaves for any insect damage and the underside of leaves for insect infestations. Also make sure the mulch or gravel isn’t covering up any of the tree trunk above the root flare, which traps moisture that can cause decay or rot. Particularly in fruit trees, this can also allow detrimental insects access to the trunk where they could bore into it.
Check the soil around the base of your plants: Often during initial watering, the soil will settle into the planting hole and can expose the root ball, which causes it to dry out quickly. If you observe or suspect this, kneel in front of the plants, move the mulch out of the way and scrape the surrounding soil back around the plant to cover up the root ball. Then replace the mulch and reposition the drip emitter as necessary.
Learn the common or scientific names of your plants: If you don’t have a list, plant tags or a detailed landscape plan, some newer smart phones have a plant identifier built into the camera app (no need to remember the app store password and download another app). The closer you can get to the plant — showing leaves, branch shapes and flowers (if any) — the better the app will work. The phone (as we all know) can be wrong, but it will give you a place to start. Alternatively, send an email with photos to [email protected] and we can help you identify
Once you know the plant names you can look them up in our xeriscape guide to reacquaint yourself with their water needs and mature sizes. Need help remembering the plant names? Often the plants themselves can tell you. Is it a catmint? Rub the leaves and smell the minty aroma. Turpentine bush? Lemony pine smell, for sure. Maybe it’s the shape of the leaves. Fernbush? Examine the leaves closely and see how they resemble an actual fern from a rainier climate.
As a landscape professional, one question I’ve always dreaded is, “How much should I water this tree?” Honestly, there are so many variables that giving a blanket answer is fanciful. More than likely, a part of the answer is, “More than you are now!” Trees are big plants with lots of leaves, and they can transpire a lot of water. That water is “lost” while the leaves are making sugars via photosynthesis, so trees have a high water demand.
If supply doesn’t keep up with demand, the tree gets stressed. How do you know if your tree needs more water? Learning to recognize signs of water stress can help you stay on top of your trees’ needs. There are some common symptoms and situations that may indicate that they are thirsty.
Water stress can be long-term (chronic) or sudden (acute). Chronic drought stress occurs commonly, as many irrigation systems are set up to be adequate for a newly planted tree. As that tree grows, though, it has more leaves and needs more water. Adding emitters and covering more ground is key to keeping up with the growth. Acute drought stress is less common; it happens when a tree suddenly loses most or all of its water supply, which up to that point was adequate. Finally, most rare of all, water stress can happen from too much water in the soil.
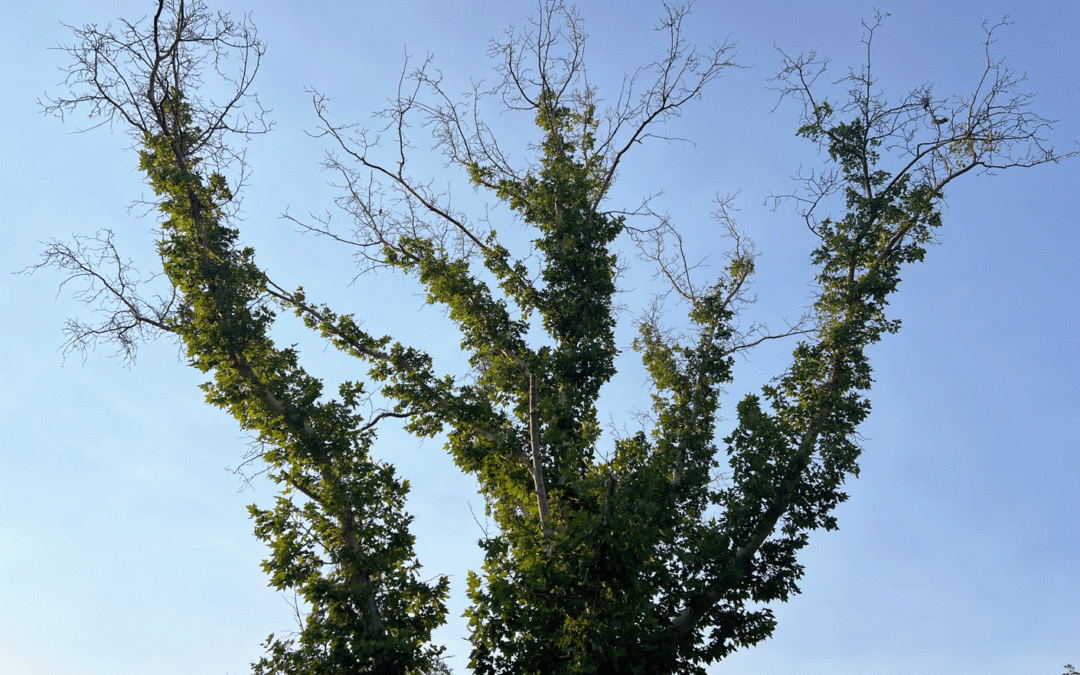
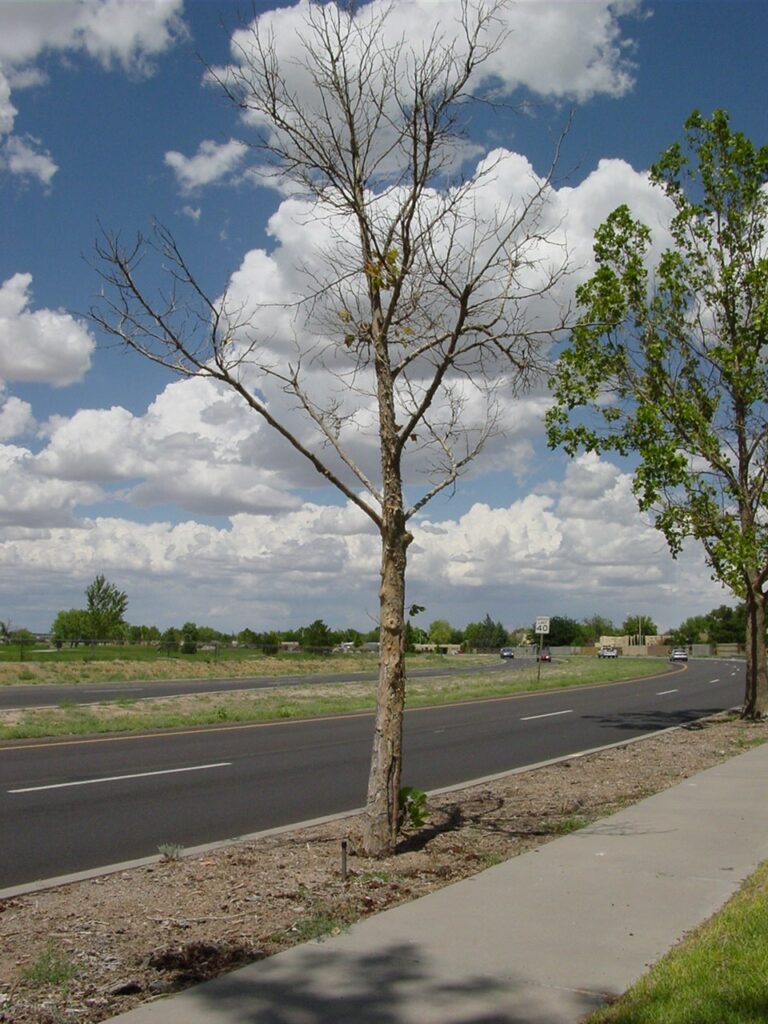
Chronic drought stress occurs when trees haven’t had enough water for some months or years. These trees will have smaller than normal leaves, and those leaves will be sparser in the canopy than normal for that species. They may be off-color, not as vibrantly green as normal. Often, there is dieback in the small, outer branches and twigs.
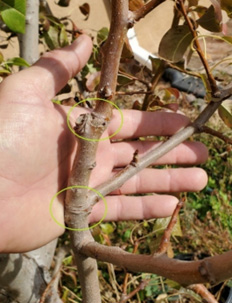
Annual growth will slow down. Evidence of this can be seen in small diameter branches if you can identify the ring scars that mark the annual growth segments. Ring scars are lines that circle all the way around the twig; they are not bud scars that form at each dormant bud and do not circle the twig. If annual growth segments are shorter last year than the year before, something bad is going on.
The short distance between these ring scars indicates a year of poor growth. This may have been the year it was planted, as that is stressful to trees.
In conifers, we see similar evidence — smaller and fewer needles and shorter growth segments. Often, pine needles will brown out from their tips, maybe just a little or maybe halfway. Conifers keep their leaves for several years, so partially browned needles can really slow down growth potential as the brown part isn’t making sugars. Chronically drought stressed conifers abound in New Mexico forests. They are more susceptible to bark beetle attacks than unstressed trees. Combine beetle-killed trees with very dry trees and wildfire becomes a huge concern.
Acute drought stress might happen when a trench cuts through the root system, such as with a new sewer line is installed. Acutely stressed trees tend to have sudden yellowing and then drying of leaves, maybe just on one side of the tree (the trench side, for example). Acute stress is hard for the tree to recover from.
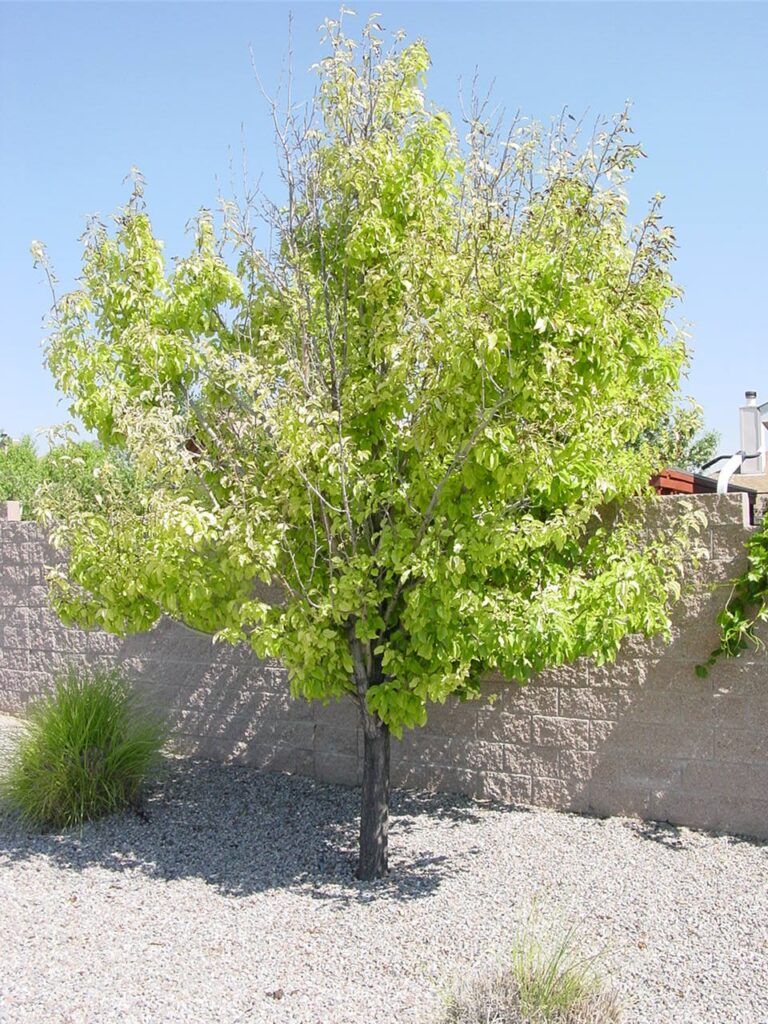
In either chronic or acute stress situations, leaves may develop brown and dead edges. Termed “marginal browning,” this happens when excess salt in soil water gets deposited at the furthest edge of the leaf, building up to toxic levels. Leaves will often turn pale and then yellow during mid-season, well before fall temperatures normally trigger that.
Yellowing of leaves can be a sign of stress.
How about those few trees getting too much water? In some ways, symptoms can mimic too little water. When the soil is very wet, roots stop functioning due to lack of oxygen. This is of most concern for dryland conifers like juniper and pine. Usually, it is linked to an irrigation system that only has emitters at the base of the tree that run often. The tree doesn’t have the fine root mass near the trunk to take up the water, so the soil remains wet. Fungal diseases are likely to pop up, leading to root death and then tree death. Another symptom of overly wet soils shows up in leaves on deciduous trees like cottonwood — oedema. These are corky scars on the surface of the leaf.
You can reduce tree stress with proper irrigation. Trees seem to do well when irrigation is deep, broad and not too frequent. Watering every day is actually not helpful, especially when right at the base of the tree. Cover the soil with an organic mulch to keep the soil cool and the moisture available to your trees.
Drought stressed sycamore tree, insufficient irrigation and small growing area.
Author: Joran Viers is an arborist at Legacy Tree Company. Contact him at [email protected]. He’ll be speaking about this topic in greater detail on July 25. Sign up here. Have a question about the article? [email protected]
Folks, it’s a hot, dry summer here in central New Mexico. No surprise, you say — we live in a desert. Even for our location, though, it’s hot and dry. This creates a little conundrum for us: keeping our landscape plants growing while using water efficiently.
Tree and surrounding plants being watered by inline drip irrigation.
This applies especially to trees because as large plants with lots of leaves, they need regular adequate water for their size and species to remain happy and continue creating positive benefits for your yard and the city as a whole. Call that a biological law and reality. As temperatures go up, trees’ water demand goes up. That is a good starting point to keep in mind — in times of drought, you should water your trees a little more frequently than you would in a year with abundant rainfall.
Drought stressed tree showing missing leaves and yellowing.
It turns out that over 90% of the water that comes into a tree simply escapes through the leaves as water vapor; the tree keeps very little water inside to grow. This loss of water vapor provides the “suction” that causes more water to enter the root system. It also cools the leaves and keeps them within comfortable working temperatures. Someone once said trees (and plants generally) have figured out a way to guide the natural movement of water from soil to atmosphere, channeling it through their bodies and using it to grow and function, which is one part of the water cycle. Having trees increases moisture in the air, allowing your swamp cooler to perform better.
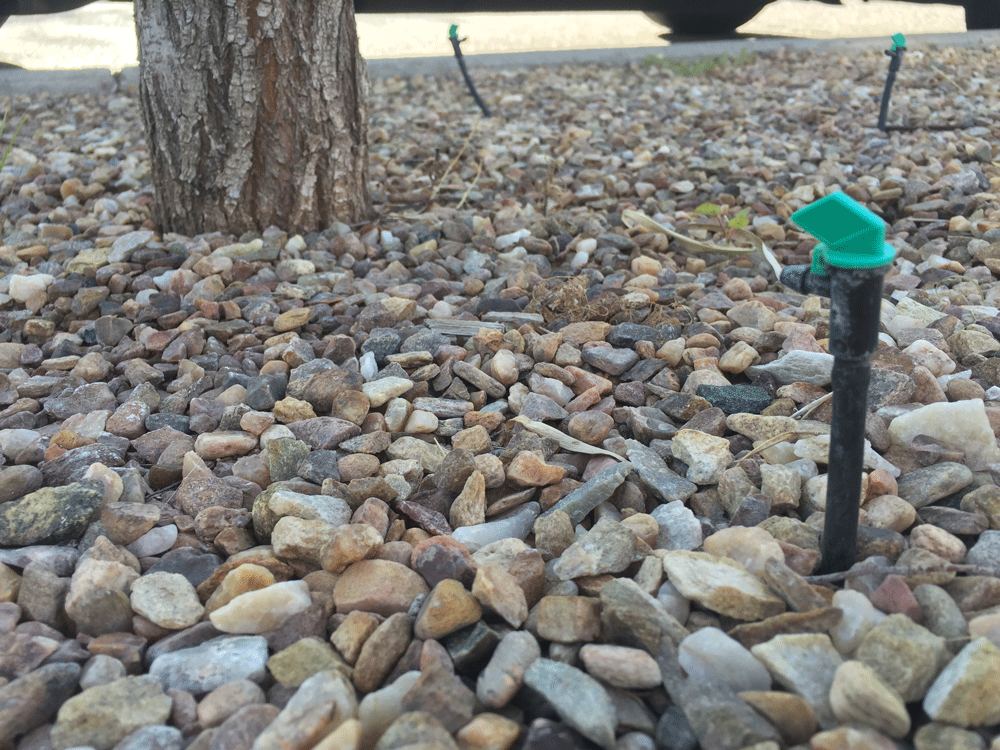
Trees “drink” very differently than you and I. We have one fairly large mouth into which all the water goes. However much we need, we have one target to hit in order to drink that water. Trees, on the other hand, take water in through their tiny, young roots out in the soil. Water has to get to a lot of soil in order to hit enough of those “mouths” to matter. A lot of tree irrigation eventually fails because there are only a few emitters (and those are often too close to the trunk). Those few emitters cannot put out enough water to satisfy the tree’s demand, nor do they wet enough surface area. (See examples in the photos below.)
Drip emitters located very close to the tree trunk.
What matters to a tree is the volume of water it has to work with. That volume is entirely dictated by the volume of soil that is holding water. And THAT volume is dictated by the surface area that received and absorbed water. The key is to disperse the water throughout the main root zone and do it in a way that allows the water to soak in where applied and not flow to low spots on the ground (which often are gutters. Science has found that most tree roots are located within the top three feet of the soil surface and quite likely even more shallow in landscapes that have not been deeply irrigated for the life of the tree, which is a common condition in Albuquerque.
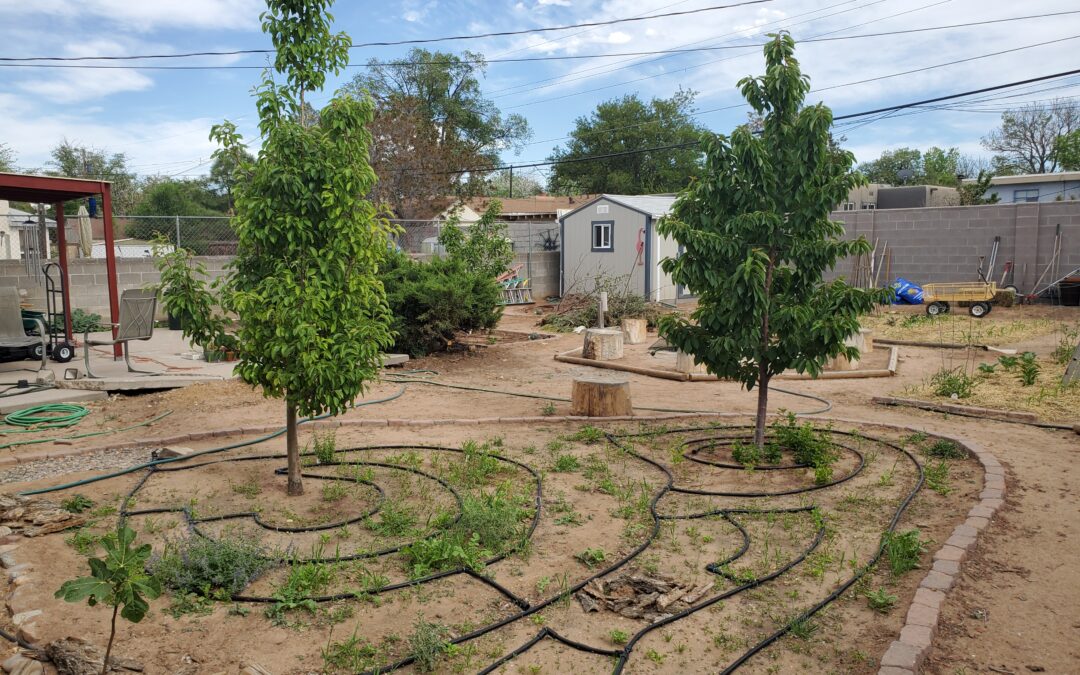
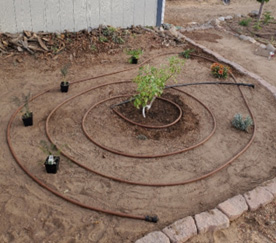
To properly water your trees, you will need some sort of irrigation system. It could be a bucket you fill from the sink or a state-of-the-art sensor-controlled automated drip system. But somehow you need to put water on the soil surface in a slow, controlled manner so that it can soak into the soil where it is applied. While buckets and hoses work, their simplicity makes them very labor intensive. In-line emitter drip tubing, laid out in a spiral or concentric circles, does a much better job. Once in place, these drip systems can be set to run for two to four hours at a time, about once a week during the hottest part of the year and less often during other seasons. Irrigation improvements qualify for the Water Authority Treebate. See our rebates here.
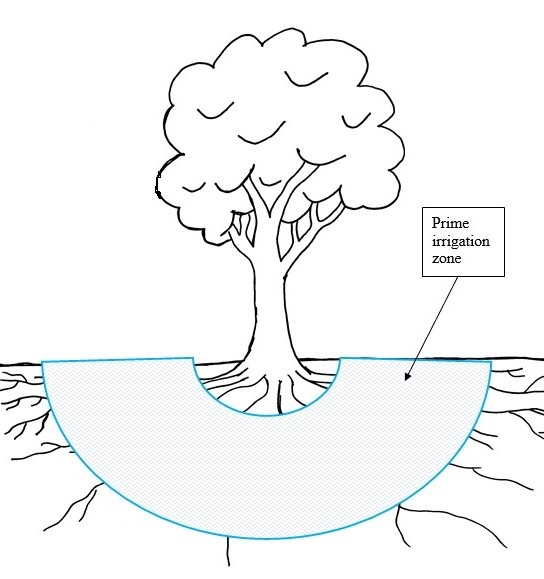
The ideal target area to irrigate is both theoretical and grounded to the reality of the site. Imagine a donut shaped area centered around the tree trunk. The trunk sits in the center of the donut hole. The body of the donut begins halfway between the trunk and the edge of the branch canopy and extends some distance beyond the edge of the canopy. This theoretical donut represents the ideal critical irrigation zone.
Now enters site reality — maybe there is a house or driveway or sidewalk covering part of the donut (or all three, with the tree located in a tiny unpaved space). We don’t want to encourage root growth at the house foundation, so don’t water within a couple of feet of it. Similarly, where concrete or asphalt covers the soil, root growth is moisture-limited and concentrated immediately under the impervious cover and under any planned or accidental cracks that allow rainwater to slip through. Ideally, we don’t want to water next to the pavement. The more of the donut that is unavailable for watering, the more often you may need to water the limited areas of open soil. Even so, it may simply not be enough soil volume to support the tree, which will then decline. In that case, replace it with a nice xeric shrub!
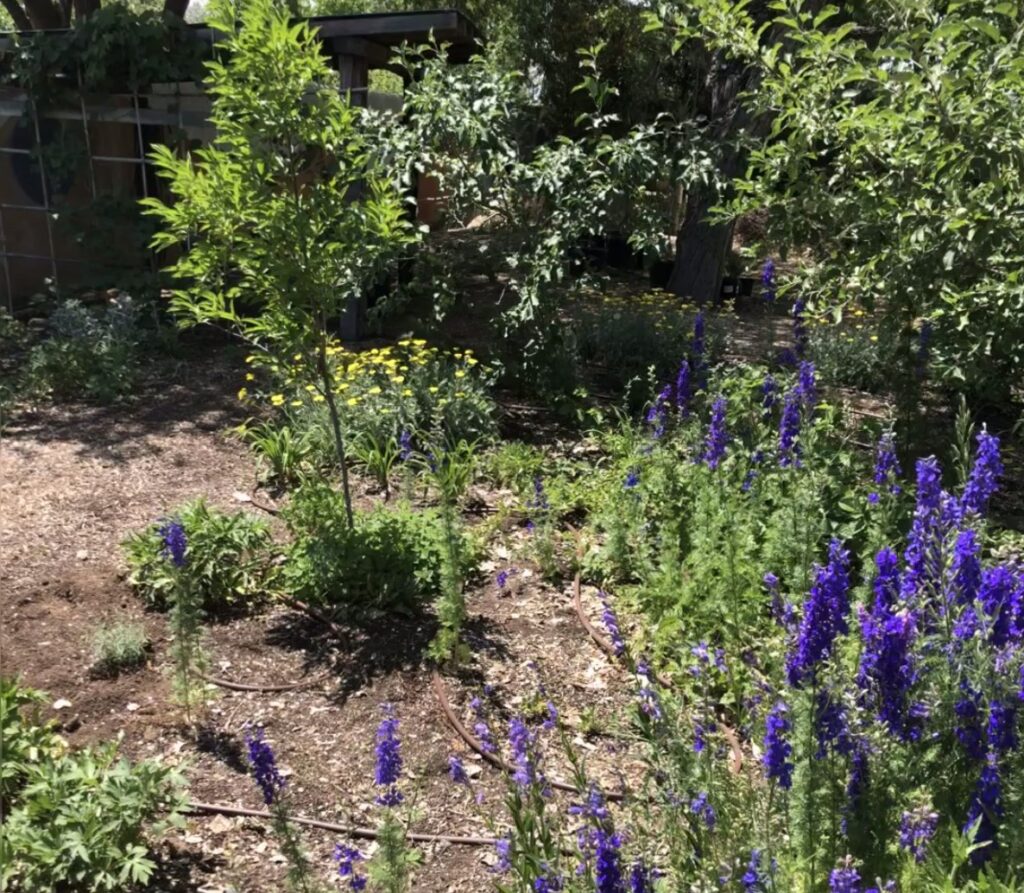
Recently installed drip tubing around a newly planted Mexican elder and some to-be-planted fennel. Both of those plants are excellent pollinator forage. A 4-inch depth of wood chip mulch will be installed over the top.
Author: Joran Viers is an arborist at Legacy Tree Company. Contact him at [email protected]. He’ll be speaking about this topic in greater detail on July 25. Sign up here. Have a question about the article? [email protected]
The ABQ Backyard Refuge Program is working with greater Albuquerque residents to create a mosaic of habitat across the city that will support a wide variety of both year-round and migrating wildlife. The program, which is managed by the Friends of Valle de Oro National Wildlife Refuge, was developed by more than 40 partners, including local government agencies, university departments and conservation organizations. The program provides resources for residents, including an introductory guide that features a list of plants that both thrive here and attract wildlife as well as a workbook for building and documenting your refuge. In addition to recruiting homeowners to build habitats in their yards, we are working with our partners to increase green space in the communities most affected by our changing climate.
Any space can be certified, including a front yard, patio, balcony, community space or, of course, a backyard. As of May 22, the program has certified about 166 acres with 629 individual and business participants. That surpasses the initial goal of certifying as many habitats as there are national wildlife refuges in the nation (572). Next, the program hopes to match Valle de Oro's 570 acres. Every bit of habitat counts!
Whether you have a balcony, a patio (where you can put potted pollinator plants) or acreage at your home, you can make changes that benefit wildlife. Here are some tips:
Leave a few dead branches in your yard, as long as they don’t pose a safety hazard. They can provide great perches for birds and food sources or potential nesting sites for woodpeckers.
Allow some leaves to stay on the ground in the fall so more butterflies are attracted to your property in the spring.
Leave dried sunflowers and grasses in your yard because they provide food for wildlife during the winter.
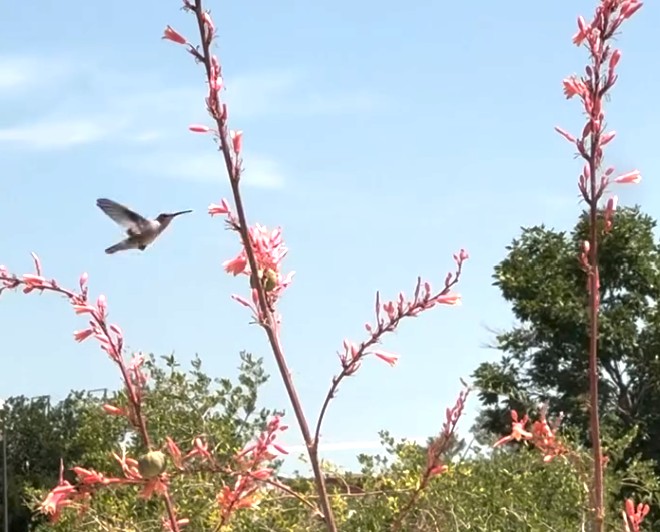
Plant pollinator friendly species such as sunflowers, mistflower, yarrow, beebalm, salvias, penstemon, oregano, fennel, whorled milkweed or native buckwheats.
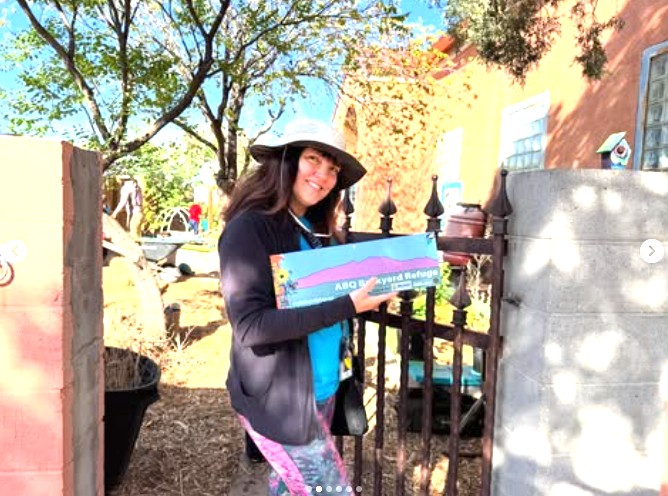
When you certify your space as an ABQ Backyard Refuge, you are helping to encourage neighbors to build wildlife habitats. As a member of the certification program, you will receive a metal sign with stickers that show your certification level.
The sign can be a conversation starter with your neighbors and help the program grow.
With most of Bernalillo County and much of north-central New Mexico in extreme drought, according to the U.S. Drought Monitor, and the Albuquerque stretch of the Rio Grande potentially running dry this summer, it’s time for action.
Albuquerque can use its groundwater resources to make up for the lack of surface water, but the drought reminds us that water is scarce in the arid Southwest. Here’s what the Water Authority is working on to help save water for future generations.
The Water Authority is now at “Stage 0 Drought Advisory,” which triggers several actions and calls for increased public education to encourage voluntary water conservation such as:
Expanding public outreach efforts and customizing promotional and educational materials to raise awareness about the current drought conditions.
Hosting a series of educational drought-focused webinars with a $20 rebate offered to attendees. About 200 ratepayers signed up for the first two webinars.
The water conservation program generally follows a three-pronged approach: education, incentives and enforcement. This includes focusing on how we can help educate ratepayers to efficiently irrigate their existing yard, provide incentives for creating beautiful yard transformations, and better target sites that waste water.
We will be expanding our media outreach on public radio, Spotify, YouTube and social media as well as through traditional methods such as billboards, newspapers and television.
We encourage the public to take advantage of our Desert Friendly Xeriscape Conversion Rebate. At $3 per square foot (the highest in our region), this rebate supports the transformation of water-thirsty lawns into desert friendly landscapes featuring plants, drip irrigation and mulch. This season, we aim to boost participation in this generous program as it remains one of the most effective methods for conserving water outdoors.
We are also prioritizing water waste enforcement. Landscape irrigation is the most common cause of water waste, but waste also can result from air conditioning system leaks, car washing, draining pools and other uses of water. It is also considered water waste to use spray irrigation between 11 a.m. and 7 p.m. from April 1 to Oct. 31. Click here to report water waste or call 842-WATR (9287).
Thank you for working together to support our community in conserving water regularly and during these drought conditions.
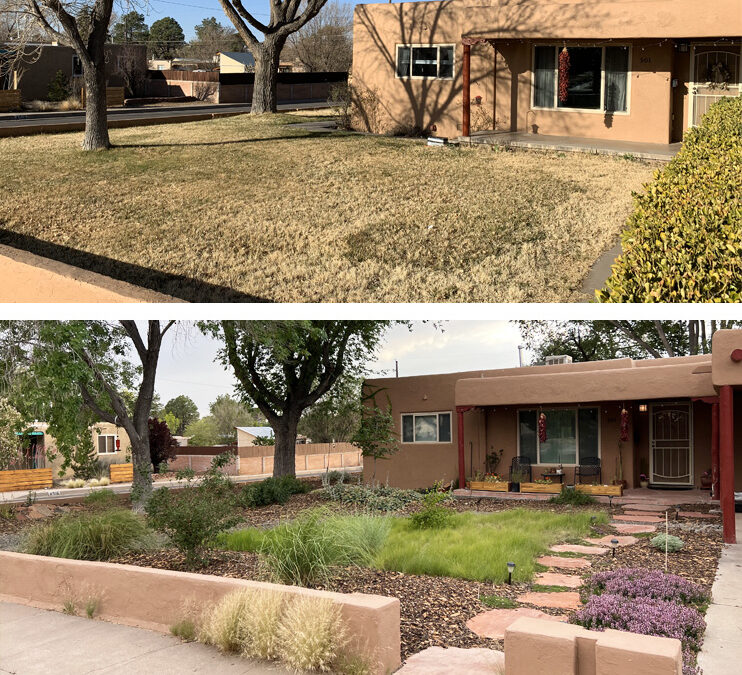
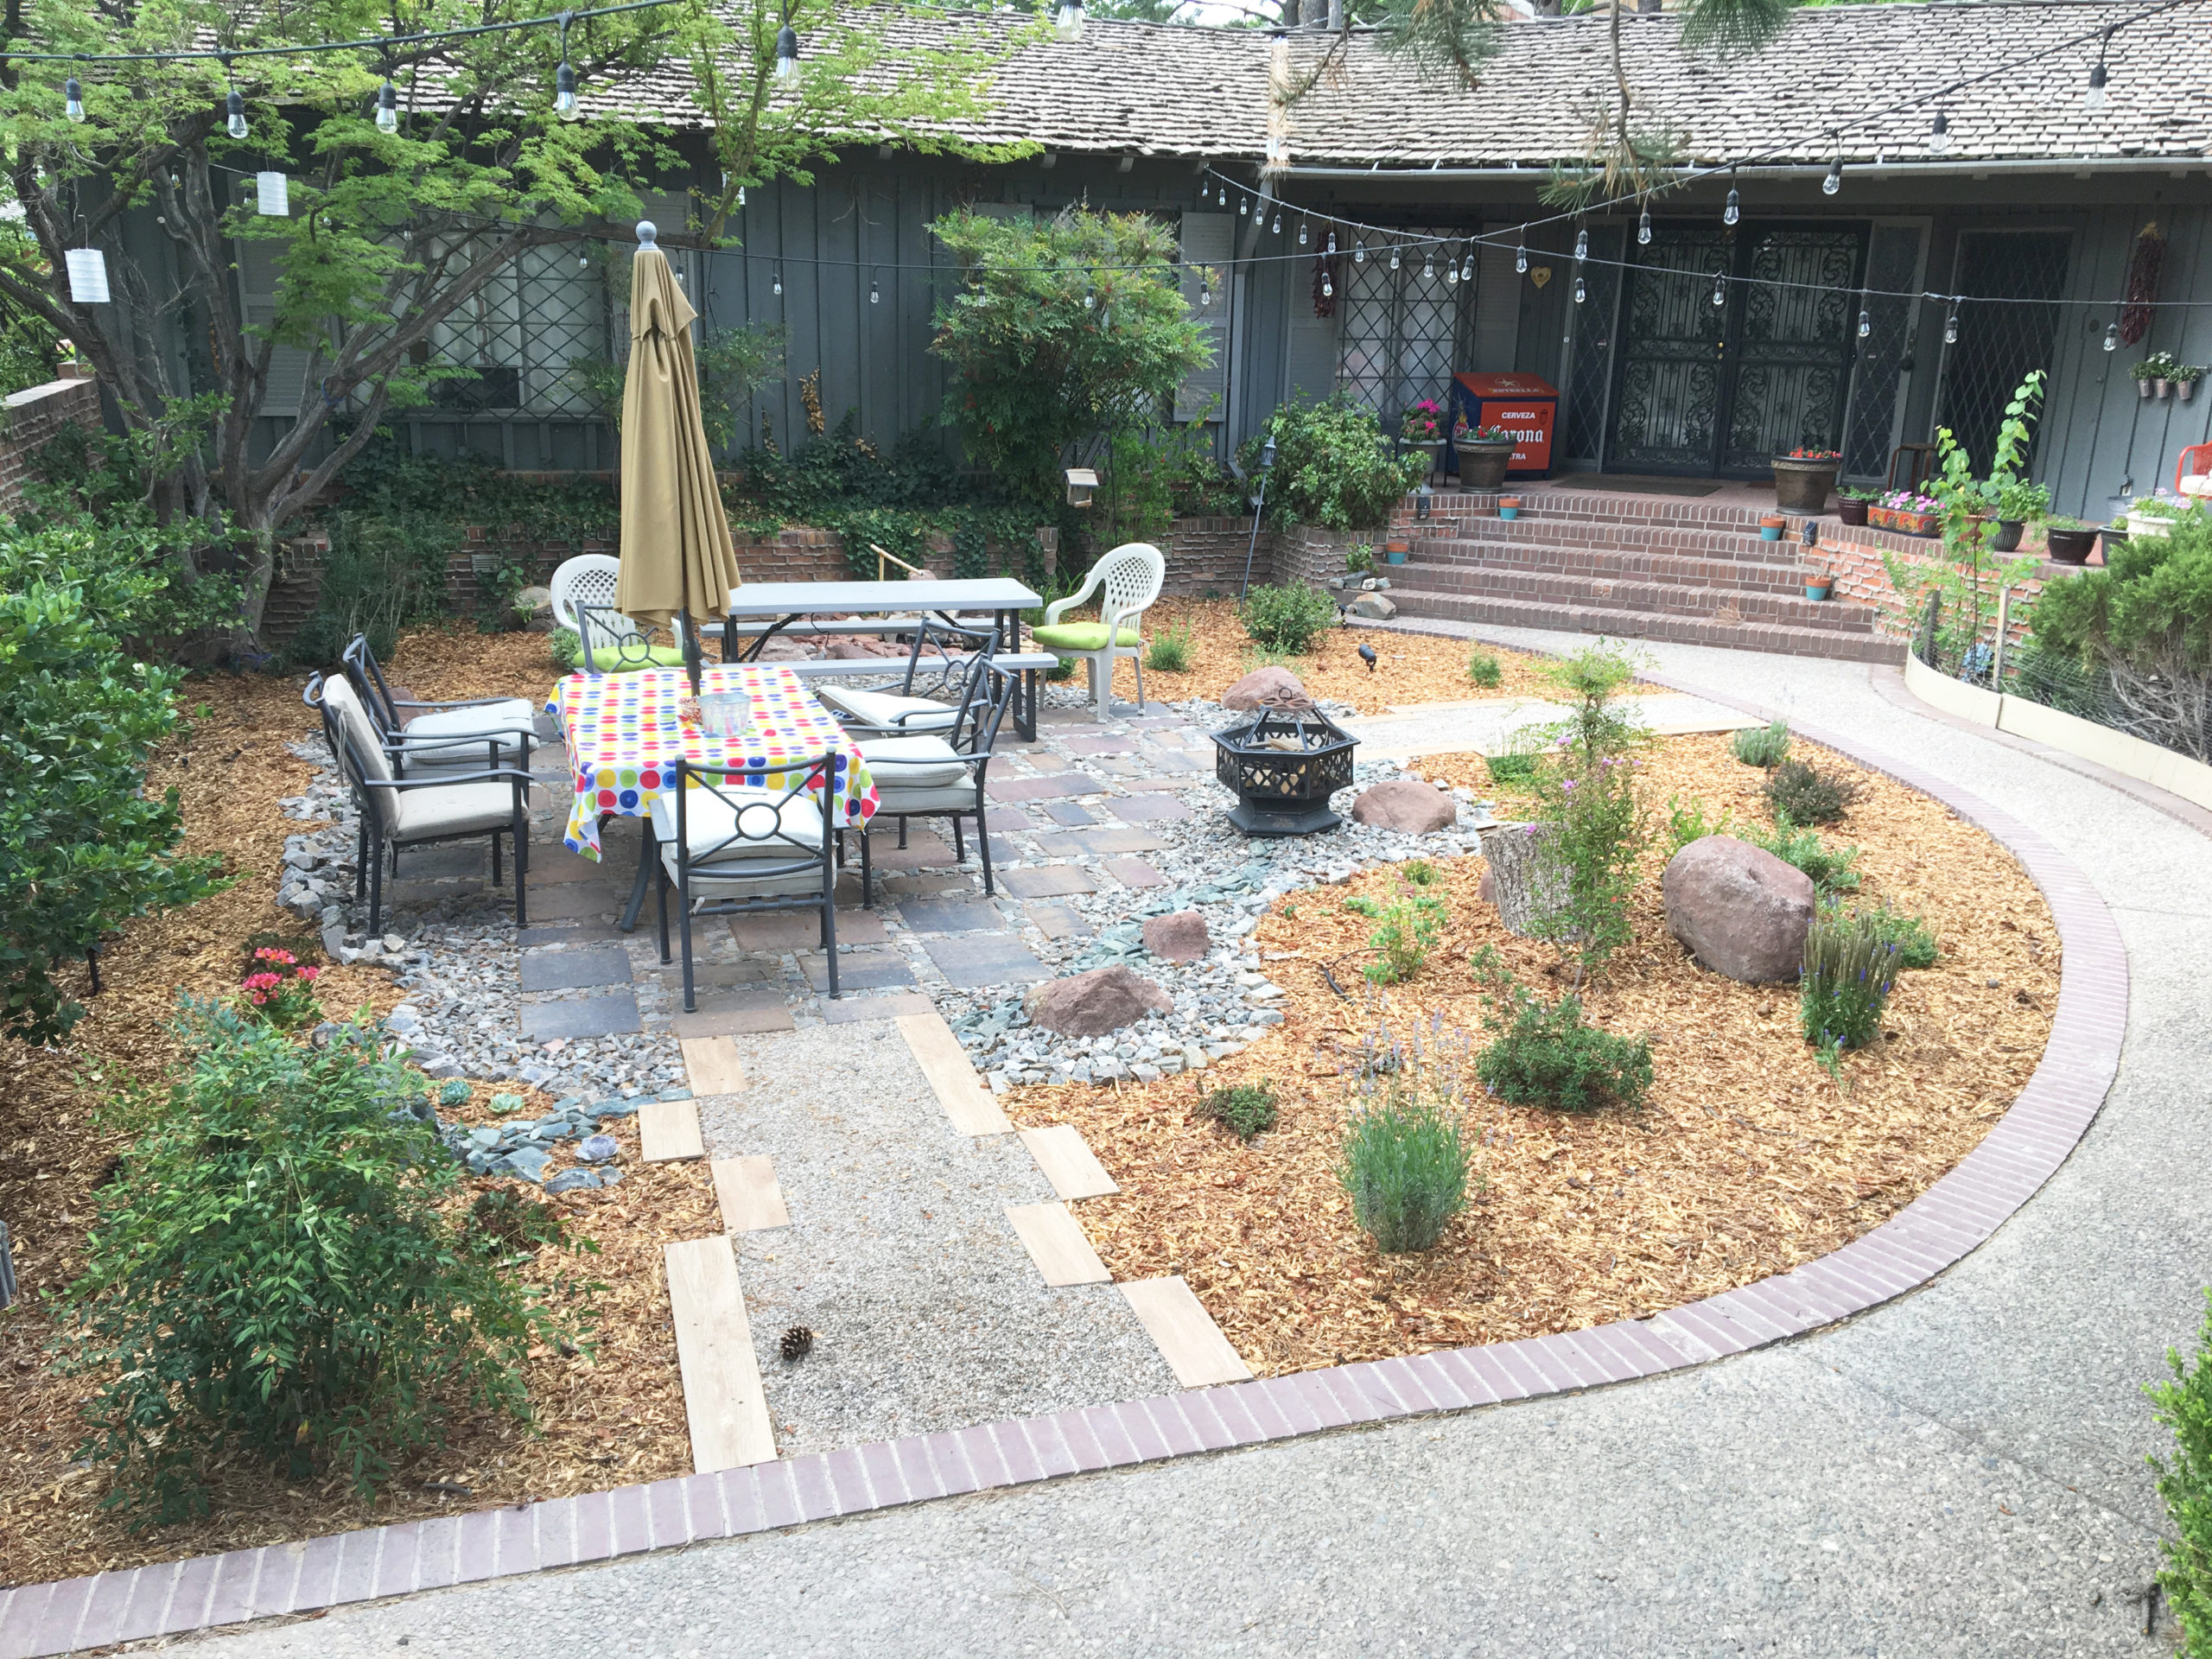
You undoubtedly have seen your neighbors and friends around town removing their grass lawns and replacing them with water efficient desert friendly xeriscapes. You may yourself be interested in doing the same with your yard but perhaps are overwhelmed by the tasks or concerned about how much it would cost. Don’t fret, it’s much simpler than you think. We’re walking you through the six steps to transform your lawn into a beautiful desert friendly xeriscape.
STEP 1
COME UP WITH A DESIGN, then apply for the $3-a-square-foot rebate.
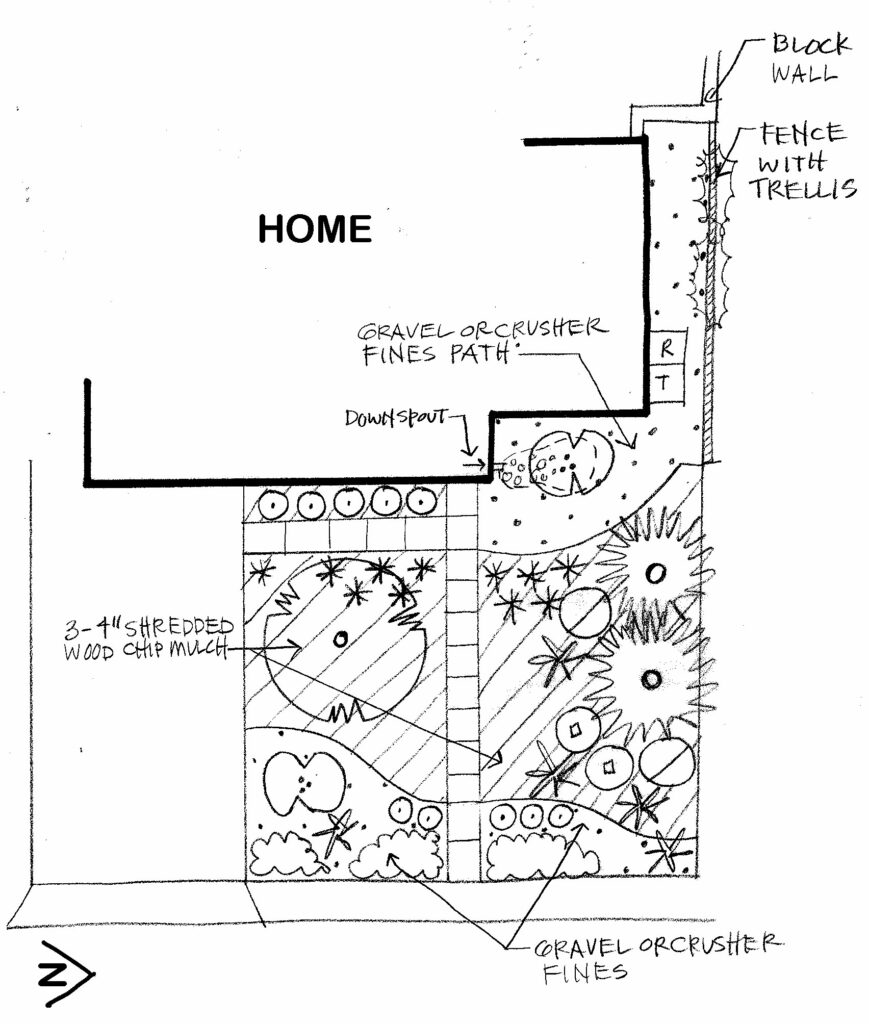
No need to get overwhelmed by this step. You know your yard best, so observe and understand how you want to use your space. Brainstorm elements you want to include. Take into account existing plants and trees, views you want to preserve or hide, shady or very sunny spots, and downspouts/canales or other places where water collects.
Once you have your design, use spray paint or old hoses to lay it out on the ground. Walk around the space and make changes as needed.
Before demolition and removal of the lawn, call 811 to mark underground utilities. Also note existing tree roots that you need to protect during your work.
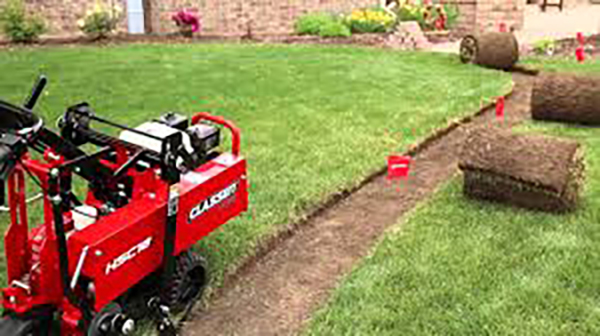
Lawn removal techniques: A sod cutter works best for most lawns unless there are large roots or the grass is Bermuda. Hand dig grass out around large roots so as not to cut any that are more than 2” thick. Use an herbicide to kill Bermuda due to its invasive and prolific roots. Along sidewalks you’ll want to dig down 4” by 12” wide to make room for 3” of mulch and slope the soil back up to the surrounding grade gently. Avoid using a skid steer to remove the grass, this can unnecessarily remove useful existing topsoil.
Drainage Considerations: Always grade water away from your house, masonry walls or walking paths and towards planting areas.
Install any hardscape elements such as walls, pergolas, sidewalks, pavers and boulders.
STEP 4
IRRIGATION
You’ll use a drip system to irrigate your new beautiful desert friendly xeriscape. Check that your existing spray valves are in good working condition. If so, you can reuse these valves. Simply have a licensed irrigator or plumber add a pressure reducer after the valve, then you can add your ½” drip polyline.
Irrigation Components: If your existing valves are damaged or non-functional you’ll need to install new ones. Typically, an irrigation specialist or licensed plumber would install your new manual shut-off valve, automatic valves, box, backflow preventers and pressure reducers. But if you want to do it yourself, do your research and reach out to local landscape irrigation suppliers for advice.
Drip Tubing: The drip tubing is everything downstream of the pressure reducers, and it’s relatively easy for homeowners to install. Uncoil the ½” or ¾” poly tubing in the sun until it’s flexible enough to manage (making sure there are no kinks in the process). Then, dig shallow 6” trenches, lay out the ½” poly in the trench, staking it with 6” weed fabric staples along the way, and snake the poly within a few feet of the plant locations. Wait until the plants are installed to cover the poly unless you have long lengths of it without plants.
Install the plants (link to article). Water your new plants with a hose right after they’re installed. You might need to create temporary basins around each plant to keep the water from running off.
At this point, you’ll want to set up the permanent irrigation. Use your drip tubing punch tool to create a hole for the ¼” coupler and ¼” tubing. Always punch the hole in the side of the ½” poly, not the top, so a footstep doesn’t damage the connection. Carve a small trench in the dirt and run the ¼” tubing to the base of the plant and attach the emitter (use a weed fabric staple to hold it in place if necessary). Avoid running ¼” tubing farther than 3 feet in order to keep things orderly. After the ¼” tubing is installed, cover it with dirt to protect it and keep it from being tripped over.
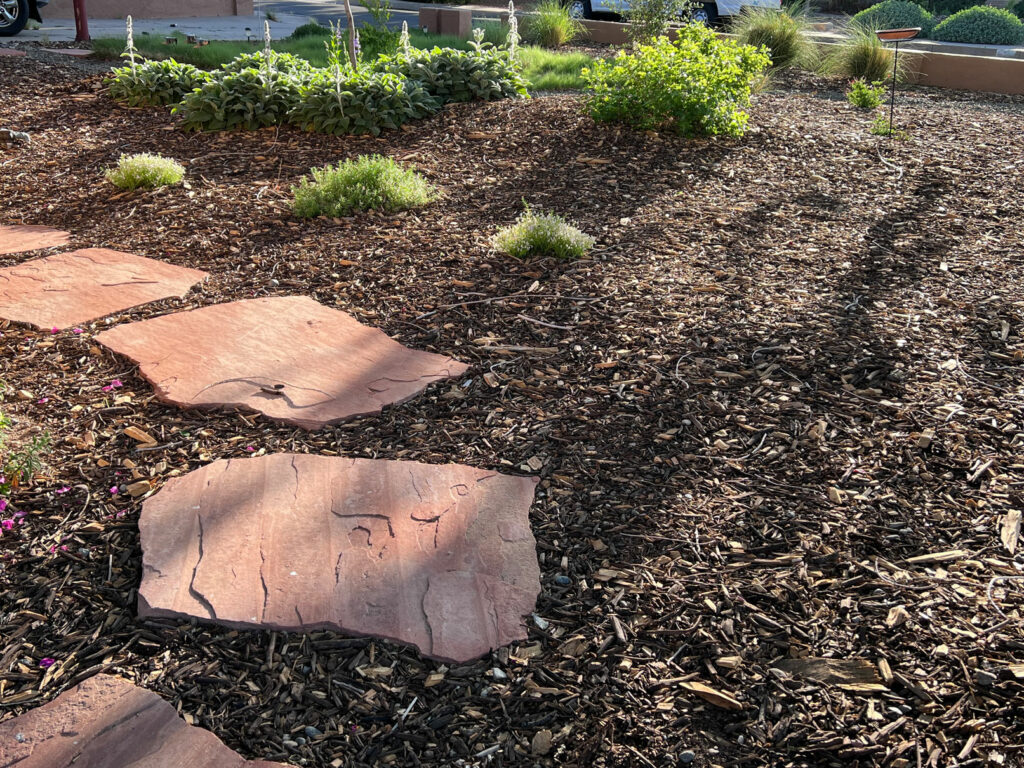
If you’re using gravel, the complexity and layout of your yard will determine whether you install weed barrier fabric before or after planting, but you do want the drip tubing under the weed fabric. For shredded wood chip mulch, lay the irrigation line down over the bare dirt then top with 3-4” of wood mulch.
If the mulch has been delivered in the street or on a concrete driveway, use a square shovel to scoop it up. From there, just load each wheelbarrow full and dump it throughout the yard. Spread it out with a rake and you’re done!