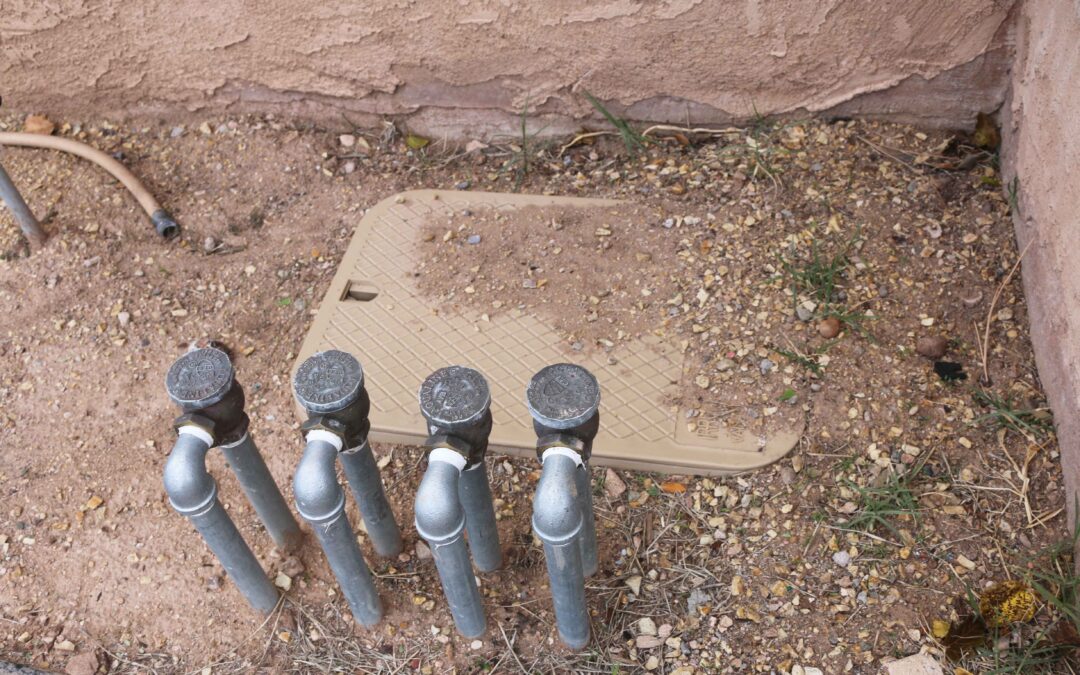
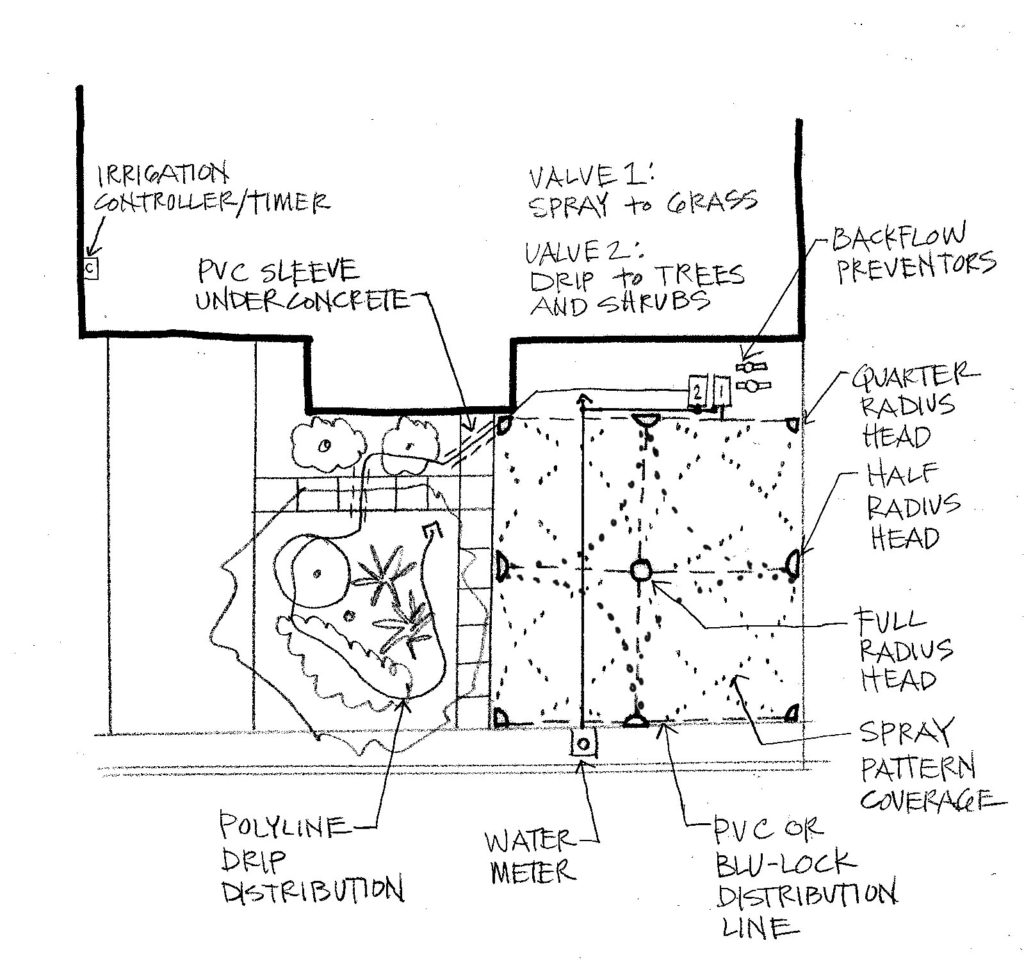
Most irrigation work can be done by the homeowner, except for one component. Tapping into your home's main water line needs to be done by a licensed contractor to ensure it is completed safely. To help homeowners know how to select and work with a contractor, we have provided the Irrigation Association's Irrigation Consumer Bill of Rights in the Appendix.
To make sure you have an efficient system, we highly recommend that you hire a professional irrigation designer to create a custom plan. Having a custom plan minimizes water waste and the chance of problems in the future and also helps ensure an efficient distribution of water, which reduces water usage. We also recommend asking a designer to produce a "call-out" list of all the parts required for the installation or renovation. This helps homeowners decide whether to DIY or hire a contractor.
SEPARATINGIRRIGATIONZONES&HYDROZONING
When you begin to plan a drip system, whether you’re installing a new system or retrofitting an existing system, it is imperative to design it so the drip valves are separate from your lawn valves. If you plan to grow a vegetable garden or water annual beds with a drip system, those areas also need to be on separate valves.
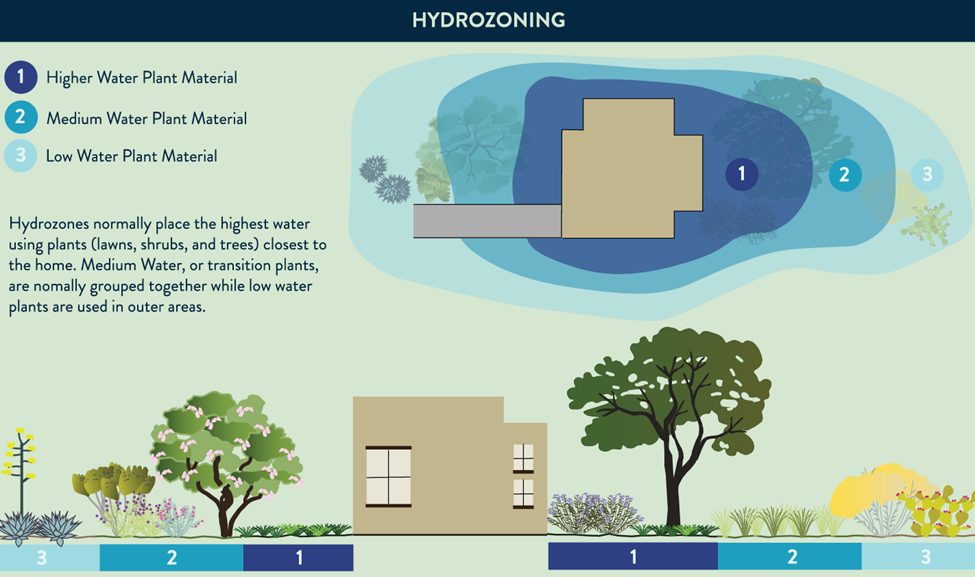
The next thing to do is organize your drip zones by plant watering needs. This means that higher water plants and lower water plants should be on separate valves (hydrozoning) whenever possible, so watering is much more efficient. Hydrozoning is not always possible when retrofitting an established landscape. In that case, you can adjust your water delivery with various sized drip emitters so plants with higher water needs receive more water per hour.
Check out our New Irrigation Efficiency Guide: Beautiful Landscapes with Less Water. Download the guide here.
There are misconceptions about how to prune a tree. Here are seven things you need to know before you begin.
1. Always have a reason for each cut you make on a tree. A beautiful day and hearing you need to prune now are not the right reasons. The main reasons we trim our trees are to support strong tree structure, encourage fruit production, prevent damage, provide clearance to avoid conflicts, shape the tree for aesthetic reasons and repair the tree from previous damage.
2. Chose the right time of the year. There are good times of the year to prune. Pruning at other times can lead to tree distress and disease. Prune during late winter and early spring, just as trees are coming out of dormancy and will be actively growing soon. For fruit trees, wait until they have flowered before pruning to encourage production and direct growth.
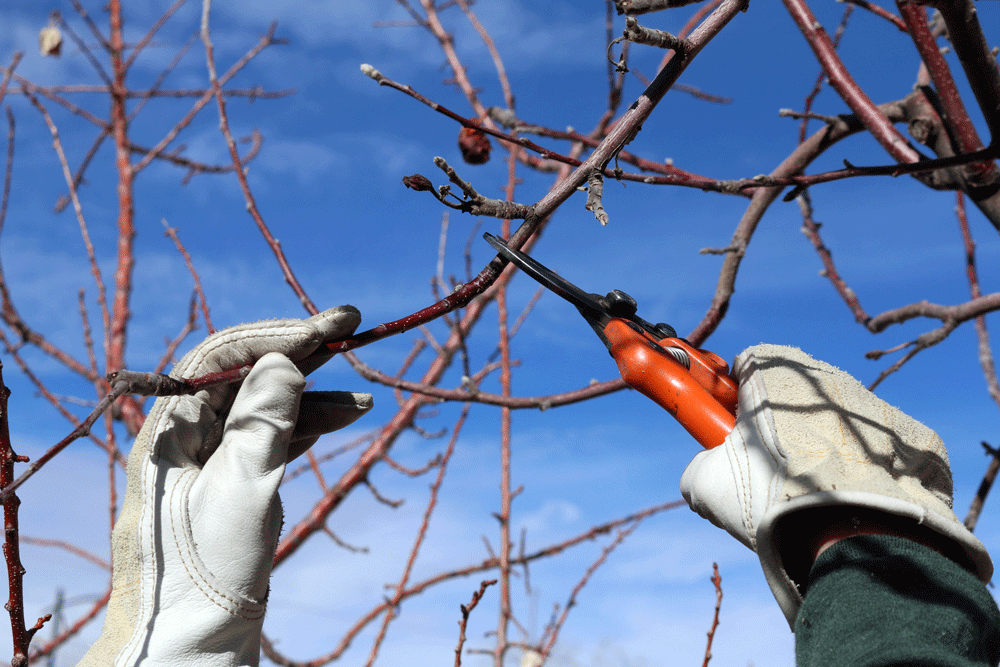
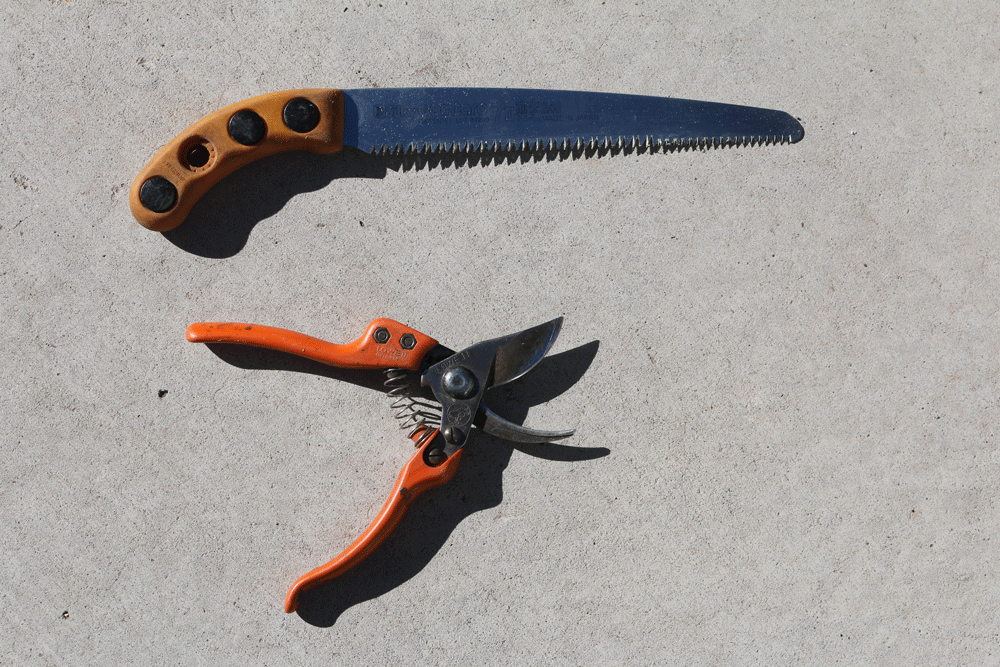
3. Use good hand tools, including a bypass hand pruner and scabbard, 8” folding hand saw, long reach pruner and orchard ladder (step ladders on uneven ground can be dangerous). As fun as they may seem, never use a chainsaw unless operating from the ground below shoulder height. Always wear PPE including safety chaps. Remember to sterilize tools with alcohol or Lysol spray when moving between trees.
Hand Pruner and Bypass Pruning Shears
4. Know your tree type. To figure out your tree type and its particular needs, try some plant identification apps, read the Arbor Day Foundation brochure “what tree is that.” or take photos of the tree and ask an expert. Pictures should include the overall tree form, leaves, bark, flowers or fruit. The most common trees in the Albuquerque landscapes are honey locust, Modesto ash, Siberian elm, London planetree, desert willow, Austrian pine, ashes, ornamental pear, Afghan pine, purple leaf plum, cottonwoods, golden raintree, Chinese pistache, pinon pine, redbuds, crabapples, Navajo willow, Texas red oak and mimosa.
5. Check out your tree’s health. How much water does it need and if/when does it need to be pruned? Highly-stressed trees should not have living branches pruned or removed. A healthy tree’s overall vigor and branch growth from previous years should be around 3”- 4” of growth per year between a bud scar and a new terminal bud. Access the density of the canopy all around and under the tree. For healthy conifers look for four years’ worth of needles on a branch. Less than two years on a branch is considered stressed.
6. Know the three types of pruning cuts: heading, removal and reduction. Avoid heading unless attempting to correct damage. Removal describes cutting branches all the way back to the main trunk. Remove 1” caliper branches and avoid cutting anything bigger than 3”. Some trees, like our local cottonwood, may not be able to heal large wounds. Reduction cut is the ideal cut. It is used to redirect and subordinate growth. Reduction cutting allows the tree to heal properly. Prune back to a branch that is at least 1/3 the size of the branch removed in order to avoid excess sprouting and allow the remaining branch to assert dominance.
7. Know where and how to make the cut. Refer to the diagrams to properly identify the branch collar, which contains the Branch Protection Zone (BPZ) that has specialized tissues which resist the passage of decay organisms into the trunk. Cut about 1/2” outside the branch collar. This allows for proper wound healing. Use the following three-step method when making a cut: First, make a partial upward cut several inches out from the final cut. Next, make a full downward cut a half inch farther out to take the weight off. Lastly, make the final cut without nicking the branch collar.
By reviewing and understanding these seven tree pruning concepts you are well on your way to properly pruning your trees. Remember, tree pruning is only needed every few years. The proper watering of your trees needs to happen monthly. Check out the other tree health articles below to keep yours in tip-top shape.
Author: Amos Arber, Xeriscape Rebate Inspector with the Water Resources Conservation Department for the Water Authority. Have a question about the article? [email protected]
We all love the feeling of cool shade on a hot summer day, whether it comes from a dense tree canopy growing above the yard or from our home as it shades different areas throughout the day. Quite a few plants appreciate that cool space. There are many options for adding useful, attractive greenery to your yard that do well in the shade.
Since there are different levels of shade, watch the progress of the sun across your landscape so you can determine the right plants for each location. The shade cast by trees varies with the size and kind of tree. For example, a large mulberry will cast broad and deep shade, while a honeylocust will provide a more dappled and lighter level of shade. The more upright the tree, the narrower the shade profile. Tree canopies that spread broadly offer a more uniform level of shading. Shade from a building can be a bit problematic in that it is very dense where it falls, but that changes over the course of the day.
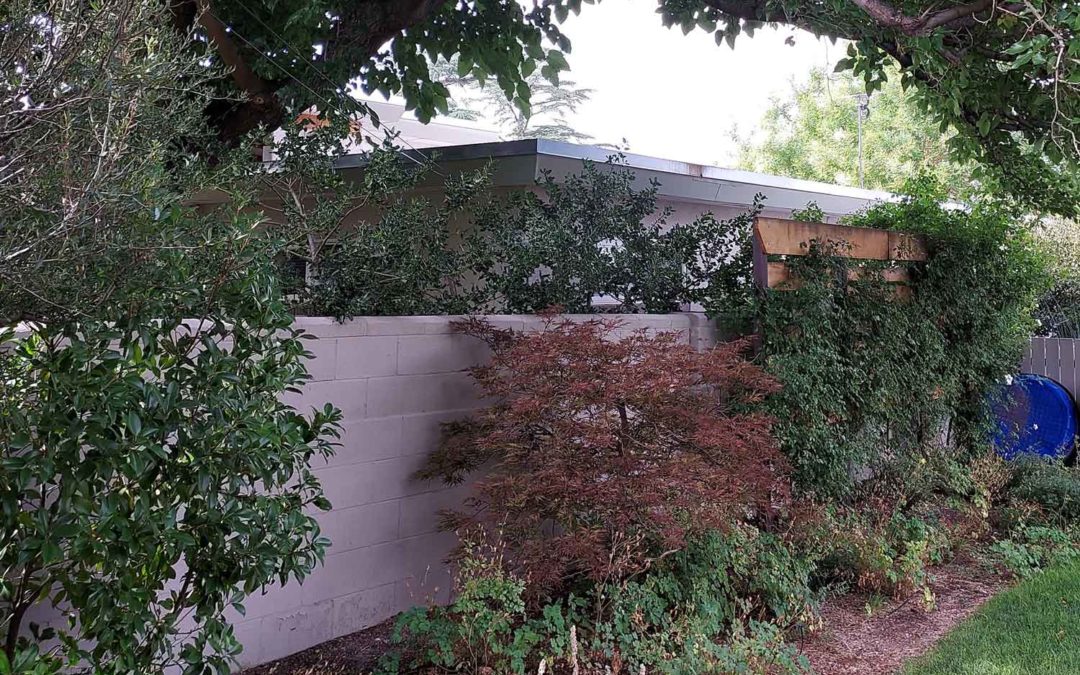
One of my favorite shade plants is something I hardly ever recommend in Albuquerque: Japanese maple trees. These small trees thrive in all-day dappled shade, although they do take a bit of water. Due to their small size, however, they don’t need that much extra water. These lovely little trees deserve a nice setting where you can see and enjoy them all year round. They may be a good choice for the oasis zone of your xeriscaped landscape. The caveat is that these little trees will not do well in strong sun, so pick your spot with care!
There are a couple of shrubs favored by nurseries that do much better with some shade than in the full-sun situations where they are often found. Both nandina (heavenly bamboo) and India hawthorn will look much better with some relief from scorching sun and suffocating heat. Native barberry (Berberis fendleri to the plant nerds) takes deep shade well, while the native three-leaf sumac and gro low sumac will tolerate moderate shade very nicely. The latter tends to get taller and leggier in shade than it does in sun, but it’s happy either way and doesn’t need much water. Other locally-common shrubs/sub-shrubs that do well in dappled shade are autumn sage, cliff fendlerbush, and even blue mist spirea.
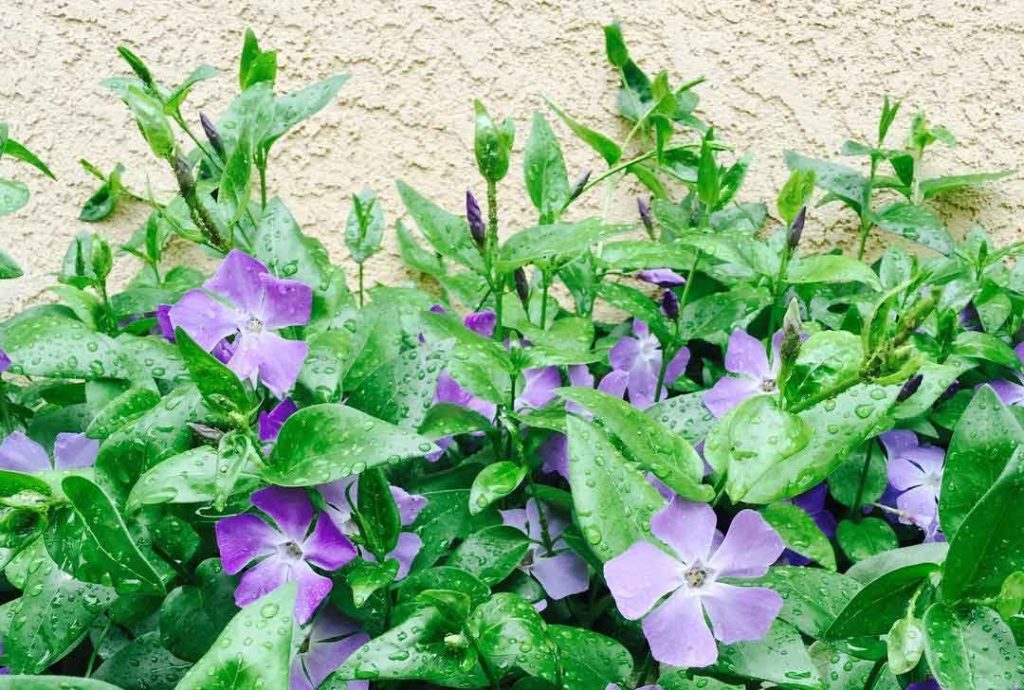
I’m a real fan of ground covers in shady areas, especially under trees and planted into organic mulch like shredded wood chips. Kinnikinnick (a.k.a bear berry) is a Montana native that too often is placed in full sun and doesn’t like it, but in a shadier spot it really shines. The periwinkles, Vinca major and Vinca minor, also do well in a shadier setting, attractively rambling through the mulch. Dwarf plumbago likes similar conditions to the vincas. Yerba mansa and creeping mahonia are native plants that also do well as ground cover.
Vinca Major
Mints are good in light shade. There are many types, from chocolate mint to spearmint to orange mint. I let them grow and bloom. Since bees of all types and sizes love the blossoms, the mint is a great addition to the landscape from the beneficial insect perspective. Many tiny wasps use mint flowers as adult food, while their offspring are busy parasitizing aphids and caterpillars. One thing to remember is to make room for the mint to spread, which it will happily do.
Related to mints, and likely to spread like mints, is dead nettle. Despite it’s name, it’s a great plant that uses little water and has blooms that attract good small insects. Other good flowering plants for light shade areas include the native columbines, lavender, and catmint.
What about turf grass? Most turf grasses like full sun and will get thin under shade, however I’ve had great results with creeping red fescue. This Eurasian native needs regular water to do well but can tolerate deep shade.
By establishing irrigation for shade plants, the trees above them also receive water, which is a great way to make sure those trees get water. Some shade plants are available only as seed (red fescue, for example), but most of them can be found as containerized plants at our local nurseries.
Author: Joran Viers, Senior Partner at Root to Shoot Urban Forestry, Inc. find him at [email protected] Have a question about the article? [email protected]
It’s irrigation season. If you have a grass lawn with spray heads, it’s time to check out your system to make sure it is running smoothly. Run a one-minute test program on the controller and visually examine each zone. Look for broken, leaning, or clogged sprinkler heads. Check and adjust for irrigation spraying on sidewalks, driveways, patios, or streets. Look for uneven coverage and sprays that may be blocked by new landscape growth.
If any of the above issues are happening, you’ll want to go through each spray head and perform the following maintenance tasks:
Flush the sprinkler system by turning on the sprinklers for a few seconds without the nozzle.
Adjust the arc by turning the sprinkler on. While the sprinkler is watering, look at the right side and see if it is aligned. If it isn’t, you will need to align it by turning the entire riser to the correct position (to the right) as this is the fixed side of the arc. While turning the riser you will hear a noise. This is a ratcheting system that allows you to make an adjustment. Turn it clockwise to reduce the arc and counterclockwise to increase the arc.
Adjust the radius by turning the screw in the middle of the nozzle with a flathead screwdriver, turning clockwise position to reduce, and to reach farther turn opposite direction or counterclockwise.
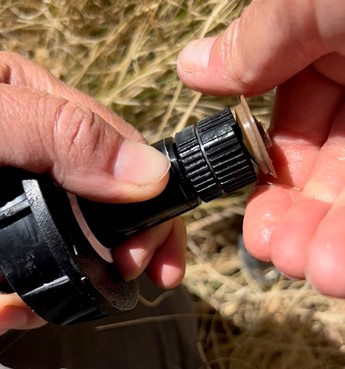
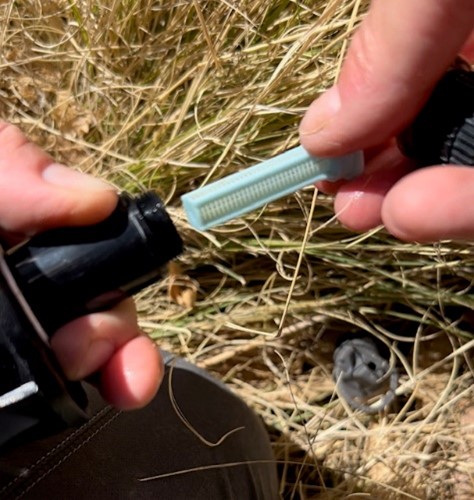
Clean the filter by pulling the riser up and holding it with one hand, while your other hand unthreads the nozzle and pulls the filter out. Clean the filter by dipping it into a bucket of water.
If your spray heads are putting out a very fine mist or fogging, your system may be operating over its design pressure. You’ll need to install a pressure regulator to reduce the water pressure at the irrigation system’s water connection, which is before the backflow and after the meter.
Learn more by checking out these other useful irrigation articles:
Author: Jill Brown, ASLA, is a Landscape Architect and owner of My Landscape Coach in Albuquerque, NM. Contributor: Greg at Sisco Irrigation, Albuquerque, NM. Have A question about the article? [email protected]
The most important part of watering is figuring out how deep you need to water your plants. Once you figure that out, you can easily follow our chart that tells you how often to water.
Here are six simple steps to figuring out your watering depth:
Step 1: Water your landscape for the usual amount of time. If it’s the first time you’re watering, start with the number of minutes found in this Irrigation Advice Chart.
Step 2: Wait 24 hours after watering so the water has a chance to percolate into the soil.
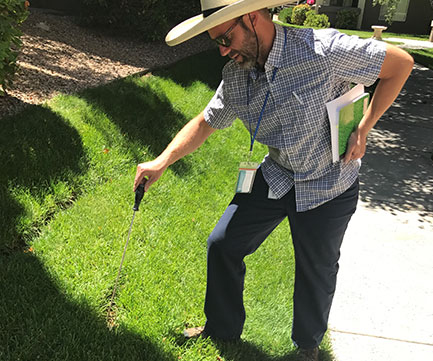
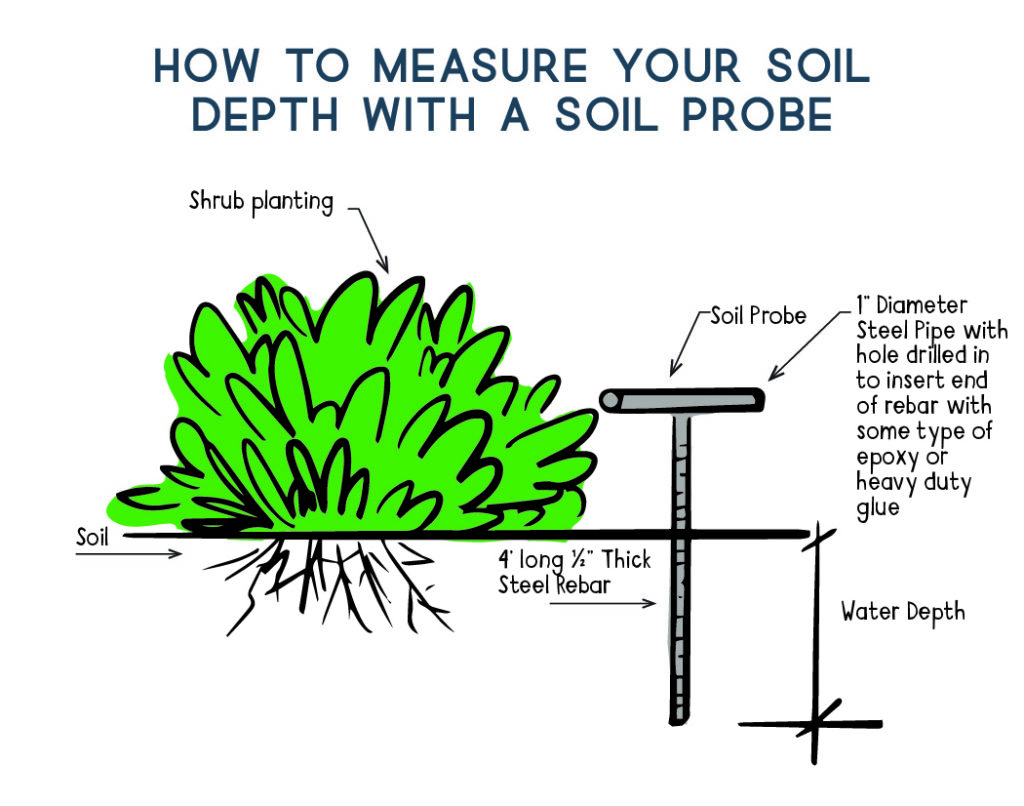
Step 3: Grab a measuring tool, such as an 18” depth screwdriver, soil probe, barbecue skewer or 24” long piece of rebar, and probe your tool into an area you didn’t water to check the soil resistance. Next, go to an area that you watered the day before. Push the probe in until it stops. It should go in fairly easily. Don’t try to push it in further once it stops because you can accidentally break a pipe. Mark the spot it went into with your finger, tape or a permanent marker. Pull out the probe and measure the number of inches. Those inches represent your current watering depth. Using the Seasonal Watering Recommendations chart you can find out the depth you need for your type of plant.
Step 4: Adjust your watering time to correctly determine the watering depth. Did you only water 4” but needed a 12” watering depth? If so, then add more time to your watering schedule and perform the test again. Did you water 24” but only needed 18”? If so, then subtract time from your watering schedule. Water again and wait 24 hours to retest.
Step 5: Once you figure out the amount of time you need to water so the water penetrates to the correct soil depth, you are set.
Step 6: Set your controller for the correct amount of time. Use our handy Seasonal Watering Recommendations chart to see how often you’ll need to water your plants.
Don’t overthink it. Our local, desert-friendly plants (native and adaptive plants typically found in our local nurseries) usually thrive in our native soil.
Learn more by checking out these other useful drip irrigation articles:
Author: Jill Brown, ASLA, is a Landscape Architect and owner of My Landscape Coach in Albuquerque, NM. Have A question about the article? [email protected]
Since the Albuquerque area receives about 9” of rain on average per year and grass lawns can use up to 50” of water per year, the proper design of an irrigation system for a grass lawn is of utmost importance when it comes to water efficiency. Irrigation efficiency can save up to 30% of the water you use by avoiding water waste.
While the Water Authority does not encourage grass lawns, we understand that some homeowners may want to install new lawns or reduce the size of their existing lawns. If you are going to have a turfgrass lawn, we recommend that it’s a lawn you use and not just maintain for curb appeal. Proper irrigation layout and design are key to having a healthy and water-efficient lawn.
When designing your lawn, keep these tips in mind:
1) Lawns smaller than 10’x 10’ are hard to water with a spray irrigation system.
2) To get the most efficient irrigation coverage, design square and rectangular lawns since sprinkler heads spray in fixed patterns-such as a quarter circle, half circle or full circle-but not curves. If curves are necessary, broad curves have the best chance of being irrigated without over spraying, while zigzag narrow curves are the toughest to irrigate effectively.
3) We recommend using WaterSense Pressure Regulating Spray Sprinkler Bodies.
WaterSense labeled spray sprinkler bodies with internal pressure regulation can reduce water waste by providing a consistent flow at the sprinkler nozzle. When the sprinkler body maintains pressure near its optimal operating pressure, the connected nozzle is better able to generate the right amount of water spray and coverage for a more uniform distribution of water across the landscape. Customers can choose from a list of pre-qualified spray sprinkler bodies.
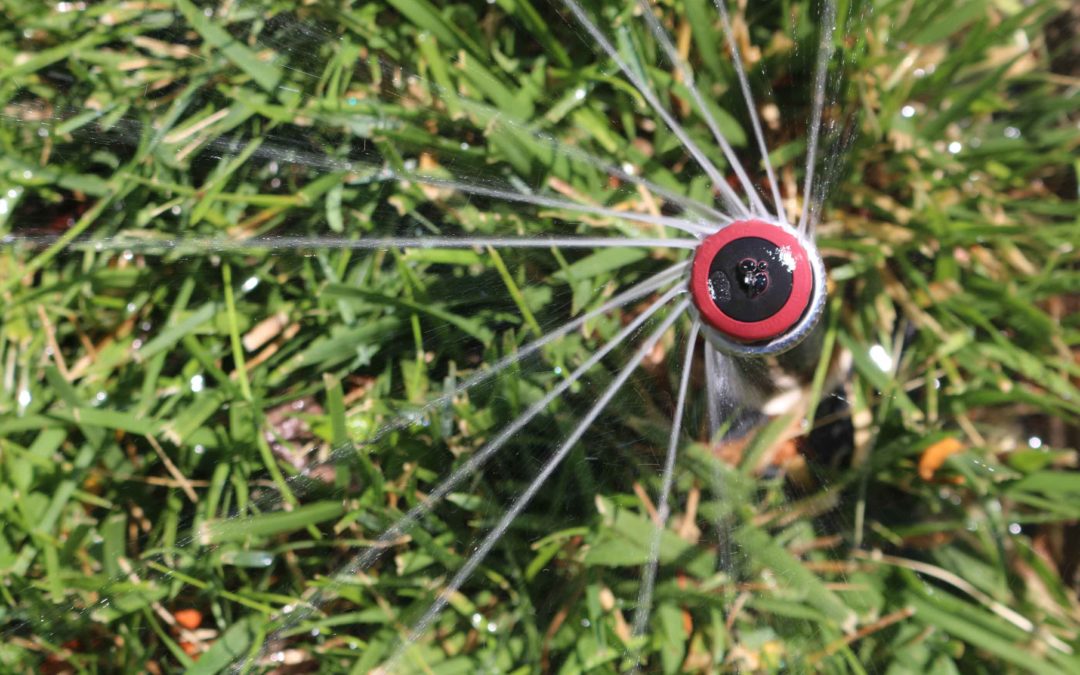
4) We also recommend using High-Efficiency Rotating Sprinkler Nozzles (multi-stream). These nozzles minimize water waste and feature a unique multi-trajectory rotating stream that delivers water at a steady rate. This slower application allows water to gently soak in at rates that soils can absorb. Use these nozzles to replace the sprinkler head on any conventional spray head body or pop up sprinkler. For more information on these nozzles read this post.
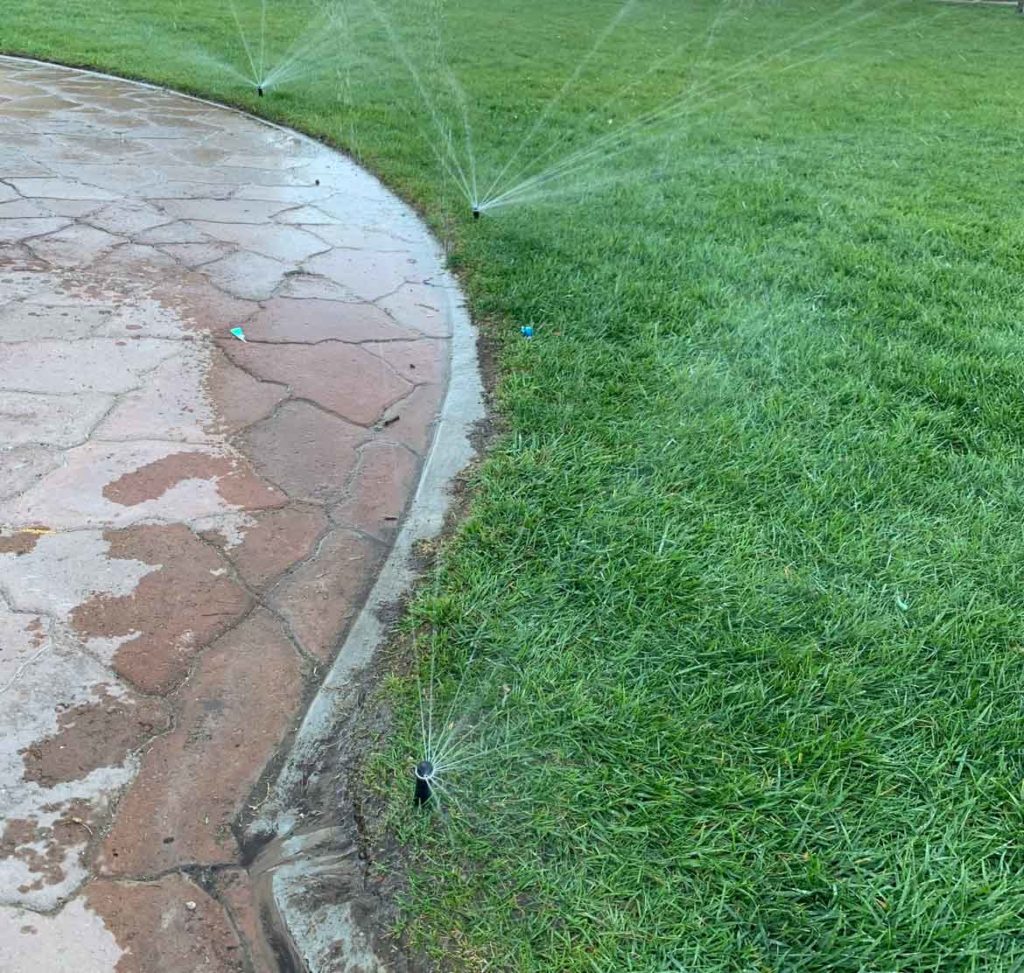
5) Irrigation sprinkler nozzles are designed for 100% overlap of watered areas, which means each sprinkle nozzle throws water to the next sprinkler in all directions. If a system is not built this way, there will be dry spots (see the below image).
Designing, reducing and changing the shape of your lawn doesn’t have to be an expensive project but it can save a lot of water. Visit your favorite local irrigation supply store for professional equipment and expert advice.
Learn more by checking out these other useful irrigation articles:
Author: Jill Brown, ASLA, is a Landscape Architect and owner of My Landscape Coach in Albuquerque, NM. Have a question about the article? [email protected]